

GL408e/GL412e User's Guide
Page 41
... F1s Ld Set from F1s Save Set to F1s Del Set from RAM Ld Set at PwrUp Main FFS Optimize&Reboot Print File List Auto Locking Set Lock Key Max Font Buffer Max Cache Memory Max Cached Char Standard Chars. Status Port Del Char frm F1s Ld Char from F1s Save Char...
... F1s Ld Set from F1s Save Set to F1s Del Set from RAM Ld Set at PwrUp Main FFS Optimize&Reboot Print File List Auto Locking Set Lock Key Max Font Buffer Max Cache Memory Max Cached Char Standard Chars. Status Port Del Char frm F1s Ld Char from F1s Save Char...

GL408e/GL412e User's Guide
Page 42
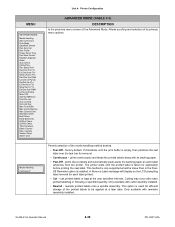
... XXX* Paper Out Thresh XXX* SENSOR SETUP Run Manual Cal REMOVE MEDIA Press Enter LOAD LINER Press Enter LOAD MEDIA Press Enter C ADVANCED MODE Auto Locking Auto Locking Disable* ADVANCED MODE Set Lock Key Select a new lock key E ADVANCED MODE Disp.
... XXX* Paper Out Thresh XXX* SENSOR SETUP Run Manual Cal REMOVE MEDIA Press Enter LOAD LINER Press Enter LOAD MEDIA Press Enter C ADVANCED MODE Auto Locking Auto Locking Disable* ADVANCED MODE Set Lock Key Select a new lock key E ADVANCED MODE Disp.

GL408e/GL412e User's Guide
Page 57
... ENTER SWITCH UNLOCKED GL408-412e Operator Manual Figure 4-20, Key Lock/Unlock 4-21 PN: 9001163A Unit 4: Printer Configuration SOFT RESET Reboots the printer back to non-volatile memory. This reset will not be changed however, by ...performing the keystrokes identified in Figure 4-20. These default menu settings may be saved. SOFT RESET Printer resets ONLINE Figure 4-19, Soft Reset KEY LOCK/UNLOCK Certain keystrokes within the printer's menu tree is performed during a parameter change under normal circumstances. If the reset is...
... ENTER SWITCH UNLOCKED GL408-412e Operator Manual Figure 4-20, Key Lock/Unlock 4-21 PN: 9001163A Unit 4: Printer Configuration SOFT RESET Reboots the printer back to non-volatile memory. This reset will not be changed however, by ...performing the keystrokes identified in Figure 4-20. These default menu settings may be saved. SOFT RESET Printer resets ONLINE Figure 4-19, Soft Reset KEY LOCK/UNLOCK Certain keystrokes within the printer's menu tree is performed during a parameter change under normal circumstances. If the reset is...
GL408e/GL412e User's Guide
Page 66
... until the print buffer is taken for removal. • Continuous - cuts printed labels or tags at PwrUp Main FFS Optimize&Reboot Print File List Auto Locking Set Lock Key Max Font Buffer Max Cache Memory Max Cached Char Standard Chars. This option is installed. Bold Chars. OCR-A Chars. Prints labels until the...
... until the print buffer is taken for removal. • Continuous - cuts printed labels or tags at PwrUp Main FFS Optimize&Reboot Print File List Auto Locking Set Lock Key Max Font Buffer Max Cache Memory Max Cached Char Standard Chars. This option is installed. Bold Chars. OCR-A Chars. Prints labels until the...

GL408e/GL412e User's Guide
Page 70
... Avail. Is a menu option within the main menu of the ADVANCED MODE and allows advancement to the Set Lock Key sub-menu to lock or unlock the printer menu. the printer automatically locks the ENTER key 5 minutes after the last operator panel key is selected from the EMC FFS menu screen.... • Overwrite Files - Displays the amount of the ADVANCED MODE and allows advancement to the Auto Locking sub-menu to save or download files into extended flash. Displays the list of the Auto Locking feature. • Disable - Is the screen that appears if the View EMC Files option is pressed...
... Avail. Is a menu option within the main menu of the ADVANCED MODE and allows advancement to the Set Lock Key sub-menu to lock or unlock the printer menu. the printer automatically locks the ENTER key 5 minutes after the last operator panel key is selected from the EMC FFS menu screen.... • Overwrite Files - Displays the amount of the ADVANCED MODE and allows advancement to the Auto Locking sub-menu to save or download files into extended flash. Displays the list of the Auto Locking feature. • Disable - Is the screen that appears if the View EMC Files option is pressed...

GL408e/GL412e User's Guide
Page 71
... 512, and the factory default is powered off and then on the printer flash. GL408-412e Operator Manual 4-35 PN: 9001163A The new lock key designation will remain in inches, NumOf Char = number of characters to be cached. Maximum Cache Memory. This option specifies the size of...inches, Average Width = average character width in effect even if the printer is 340. In case of keys desired to be the new lock keys. Therefore, do not change the defaults unless the application requires an uncommon memory configuration. Factory default is displayed, simultaneously press the ...
... 512, and the factory default is powered off and then on the printer flash. GL408-412e Operator Manual 4-35 PN: 9001163A The new lock key designation will remain in inches, NumOf Char = number of characters to be cached. Maximum Cache Memory. This option specifies the size of...inches, Average Width = average character width in effect even if the printer is 340. In case of keys desired to be the new lock keys. Therefore, do not change the defaults unless the application requires an uncommon memory configuration. Factory default is displayed, simultaneously press the ...

GL408e/GL412e User's Guide
Page 124
...right arrow keys of the printer's operator panel, the brightness of the printer's current LCD brightness level. SOFT RESET ENTER SWITCH LOCKED ENTER SWITCH UNLOCKED Is an informational menu screen that change may not be performed. Is an informational menu screen that displays that... LCD decrease or inceases respectively. Buffer Cleared STANDBY . . . GL408-412e Operator Manual 4-88 PN: 9001163A Indicates the printer is currently locked so that it may not be changed . Is an informational menu screen that displays that it may be changed . Pressing the appropriate keys...
...right arrow keys of the printer's operator panel, the brightness of the printer's current LCD brightness level. SOFT RESET ENTER SWITCH LOCKED ENTER SWITCH UNLOCKED Is an informational menu screen that change may not be performed. Is an informational menu screen that displays that... LCD decrease or inceases respectively. Buffer Cleared STANDBY . . . GL408-412e Operator Manual 4-88 PN: 9001163A Indicates the printer is currently locked so that it may not be changed . Is an informational menu screen that displays that it may be changed . Pressing the appropriate keys...

GL408e/GL412e RFID Kit Install Guide
Page 7
Removing the Print Head 1. Turning the head lock latch Figure 2b. Set the print head aside for this step. Print head removed 7 Note: ESD (electrostatic discharge) protection is recommended for now. Press the spring-loaded tab as indicated here, to release the print head. 3. Disconnect the data and power cables from the print head. 2 4. Release the print head assembly by turning the head lock latch counterclockwise. 2. Anti-static lint-free gloves should be worn at all times when you are handling print heads. Figure 2a.
Removing the Print Head 1. Turning the head lock latch Figure 2b. Set the print head aside for this step. Print head removed 7 Note: ESD (electrostatic discharge) protection is recommended for now. Press the spring-loaded tab as indicated here, to release the print head. 3. Disconnect the data and power cables from the print head. 2 4. Release the print head assembly by turning the head lock latch counterclockwise. 2. Anti-static lint-free gloves should be worn at all times when you are handling print heads. Figure 2a.

GL408e/GL412e Rewinder Install Guide
Page 6
Figure 1c. Remove the lock shaft located at the front of printer. (Do not lose this part as it is essential for the installation of dispenser option) Note This lock shaft must be removed Remove a total of the internal rewinder. Removing the lock shaft. 6 Figure 1d. Removing the lock shaft. Front cover can now be removed. Four screws are circled in orange in Figure 1d. 1) Removing the base of the printer (cont'd) The front cover can now be removed for the successful installation of 9 screws (cross recessed hexagonal bolt M4x10). Figure 1d.
Figure 1c. Remove the lock shaft located at the front of printer. (Do not lose this part as it is essential for the installation of dispenser option) Note This lock shaft must be removed Remove a total of the internal rewinder. Removing the lock shaft. 6 Figure 1d. Removing the lock shaft. Front cover can now be removed. Four screws are circled in orange in Figure 1d. 1) Removing the base of the printer (cont'd) The front cover can now be removed for the successful installation of 9 screws (cross recessed hexagonal bolt M4x10). Figure 1d.


