

NP115 : installation guide
Page 1
...Ceiling Mount Dimensions Input Panels and Control Codes Pg 1 Pg 2 Pg 3-5 Pg 6 Pg 7 NEC Display Solutions of 7 Rev 1.0 Product Description Type: 1-chip DLP projector, 0.55" DLP Resolution: NP110/115: 800 x 600 Dimensions: NP215/NP216: 1024 x 768 12.2" (W) x 3.7" (H) x 9.7" (D) Power Consumption: 242W (max) ...: 2200 ANSI Lumens NP115: 2500 ANSI Lumens NP215/NP216: 2500 ANSI Lumens 34dB / 31dB @ 1 meter NP110/115/215: 5.5 lbs NP216: 5.7lbs. 825 BTU/hour Focal Length: 21.8mm - 24.0mm F/#: 2.41 - 2.55 Manual Focus/Manual Zoom Notes For screen sizes not indicated ...
...Ceiling Mount Dimensions Input Panels and Control Codes Pg 1 Pg 2 Pg 3-5 Pg 6 Pg 7 NEC Display Solutions of 7 Rev 1.0 Product Description Type: 1-chip DLP projector, 0.55" DLP Resolution: NP110/115: 800 x 600 Dimensions: NP215/NP216: 1024 x 768 12.2" (W) x 3.7" (H) x 9.7" (D) Power Consumption: 242W (max) ...: 2200 ANSI Lumens NP115: 2500 ANSI Lumens NP215/NP216: 2500 ANSI Lumens 34dB / 31dB @ 1 meter NP110/115/215: 5.5 lbs NP216: 5.7lbs. 825 BTU/hour Focal Length: 21.8mm - 24.0mm F/#: 2.41 - 2.55 Manual Focus/Manual Zoom Notes For screen sizes not indicated ...
NP115 : user's manual
Page 1
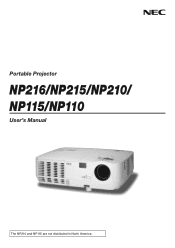
Portable Projector NP216/NP215/NP210/ NP115/NP110 User's Manual The NP210 and NP115 are not distributed in North America.
Portable Projector NP216/NP215/NP210/ NP115/NP110 User's Manual The NP210 and NP115 are not distributed in North America.
NP115 : user's manual
Page 2
... Corporation. • Macintosh, Mac OS X and PowerBook are subject to result from using the Projector. able points, errors or omissions, please contact us. (4) Notwithstanding article (3), NEC will not be the trademarks or registered trade- marks of this user's manual; 2nd edition, February 2010 • DLP and BrilliantColor are trademarks of Texas Instruments. •...
... Corporation. • Macintosh, Mac OS X and PowerBook are subject to result from using the Projector. able points, errors or omissions, please contact us. (4) Notwithstanding article (3), NEC will not be the trademarks or registered trade- marks of this user's manual; 2nd edition, February 2010 • DLP and BrilliantColor are trademarks of Texas Instruments. •...
NP115 : user's manual
Page 3
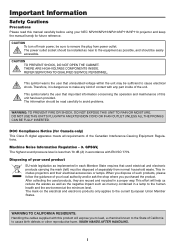
... or lamps. After collecting the used electrical and electronic products carrying the mark (left) must be disposed of your NEC NP216/NP215/NP210/NP115/NP110 projector and keep the manual handy for Canada only) This Class B digital apparatus meets all requirements of the unit. WARNING TO CALIFORNIA RESIDENTS: ...follow the guidance of your local authority and/or ask the shop where you to lead, a chemical known to the State of this manual carefully before using your used product EU-wide legislation as possible, and should be easily accessible. i This symbol warns the user that ...
... or lamps. After collecting the used electrical and electronic products carrying the mark (left) must be disposed of your NEC NP216/NP215/NP210/NP115/NP110 projector and keep the manual handy for Canada only) This Class B digital apparatus meets all requirements of the unit. WARNING TO CALIFORNIA RESIDENTS: ...follow the guidance of your local authority and/or ask the shop where you to lead, a chemical known to the State of this manual carefully before using your used product EU-wide legislation as possible, and should be easily accessible. i This symbol warns the user that ...

NP115 : user's manual
Page 4
...a power cable is connected. • Consult the dealer or an experienced radio / TV technician for help. Installation • Do not place the projector in the following measures: • Reorient or relocate the receiving antenna. • Increase the separation between the equipment and receiver. • Connect... ensure proper operation and reduce the risk of bodily injury. - in a dusty, smoky or steamy environment. - The projector must be installed by NEC Display Solutions of America, Inc. Failure to comply with this manual. on a circuit different from the light output.
...a power cable is connected. • Consult the dealer or an experienced radio / TV technician for help. Installation • Do not place the projector in the following measures: • Reorient or relocate the receiving antenna. • Increase the separation between the equipment and receiver. • Connect... ensure proper operation and reduce the risk of bodily injury. - in a dusty, smoky or steamy environment. - The projector must be installed by NEC Display Solutions of America, Inc. Failure to comply with this manual. on a circuit different from the light output.
NP115 : user's manual
Page 6
...projector inside the soft case could cause premature lamp failure. • Parts of glass may be using a LAN cable (NP216...projector is blink- Misuses such as ...projector...batteries together, or use the projector for consecutive days. (From the ... off with age. If the projector exhibits a distinct change in the...projector and unplug the power cable if the projector is disconnected during normal projector operation. A Lamp Characteristic The projector has a high-pressure mercury lamp as the pieces of the projector...projector. • Turn off the projector.... If the projector does not operate...
...projector inside the soft case could cause premature lamp failure. • Parts of glass may be using a LAN cable (NP216...projector is blink- Misuses such as ...projector...batteries together, or use the projector for consecutive days. (From the ... off with age. If the projector exhibits a distinct change in the...projector and unplug the power cable if the projector is disconnected during normal projector operation. A Lamp Characteristic The projector has a high-pressure mercury lamp as the pieces of the projector...projector. • Turn off the projector.... If the projector does not operate...
NP115 : user's manual
Page 7
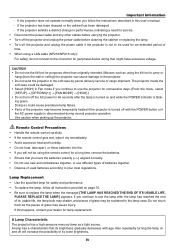
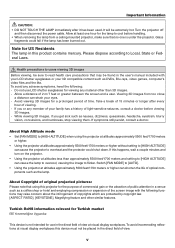
...screen and a user. While viewing 3D images, if you or any member of your eyes. - It will be placed in the user's manual included with the following : - To avoid incommoding reflections at altitudes approximately 5500 feet/1700 meters or higher without setting to [HIGH ALTITUDE] ...for a prolonged period of time. Important Information CAUTION: • DO NOT TOUCH THE LAMP immediately after every hour of viewing. - Turn the projector off and then disconnect the power cable. About High Altitude mode • Set [FAN MODE] to Local, State or Federal Laws. If this...
...screen and a user. While viewing 3D images, if you or any member of your eyes. - It will be placed in the user's manual included with the following : - To avoid incommoding reflections at altitudes approximately 5500 feet/1700 meters or higher without setting to [HIGH ALTITUDE] ...for a prolonged period of time. Important Information CAUTION: • DO NOT TOUCH THE LAMP immediately after every hour of viewing. - Turn the projector off and then disconnect the power cable. About High Altitude mode • Set [FAN MODE] to Local, State or Federal Laws. If this...

NP115 : user's manual
Page 8
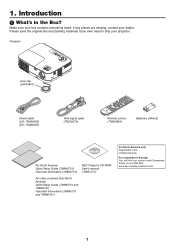
Introduction...1 1 What's in the Box?...1 Introduction to a Network (NP216/NP215 only 16 Connecting the Supplied Power Cable 17 3. Projecting an Image (Basic Operation 18 Turning on the Projector 18 Note on Startup screen (Menu Language Select screen 19 Selecting a ...12 Connecting an External Monitor 13 Connecting Your DVD Player with buttons on Your Purchase of the Projector 2 Features you'll enjoy 2 About this user's manual 3 Part Names of the Projector 4 Front/Top...4 Rear...4 Top Features...5 Terminal Panel Features 6 Part Names of...
Introduction...1 1 What's in the Box?...1 Introduction to a Network (NP216/NP215 only 16 Connecting the Supplied Power Cable 17 3. Projecting an Image (Basic Operation 18 Turning on the Projector 18 Note on Startup screen (Menu Language Select screen 19 Selecting a ...12 Connecting an External Monitor 13 Connecting Your DVD Player with buttons on Your Purchase of the Projector 2 Features you'll enjoy 2 About this user's manual 3 Part Names of the Projector 4 Front/Top...4 Rear...4 Top Features...5 Terminal Panel Features 6 Part Names of...
NP115 : user's manual
Page 10
...1 What's in Europe: You will find our current valid Guarantee Policy on our Web Site: www.nec-display-solutions.com 1 If any pieces are missing, contact your projector. Projector Lens cap (24F45801) Power cable (US: 7N080236) (EU: 7N080022) VGA signal cable (7N520073)... Remote control (7N900881) Batteries (AAAx2) For North America Quick Setup Guide (7N8N0731) Important Information (7N8N0751) NEC Projector CD-ROM User's manual (7N951471) For other countries than North America Quick Setup Guide (7N8N0731 and 7N8N0741) Important Information (7N8N0751 and 7N8N0761) For ...
...1 What's in Europe: You will find our current valid Guarantee Policy on our Web Site: www.nec-display-solutions.com 1 If any pieces are missing, contact your projector. Projector Lens cap (24F45801) Power cable (US: 7N080236) (EU: 7N080022) VGA signal cable (7N520073)... Remote control (7N900881) Batteries (AAAx2) For North America Quick Setup Guide (7N8N0731) Important Information (7N8N0751) NEC Projector CD-ROM User's manual (7N951471) For other countries than North America Quick Setup Guide (7N8N0731 and 7N8N0741) Important Information (7N8N0751 and 7N8N0761) For ...

NP115 : user's manual
Page 12
About this user's manual the drawings of the projector show an example of the projector Enhanced smart security settings for wired networking capacity (NP216/NP215 only) An RJ-45 connector is to review the user's manual. At the beginning of the manual you'll find an overview. If the section doesn't apply, you can be operated separately...
About this user's manual the drawings of the projector show an example of the projector Enhanced smart security settings for wired networking capacity (NP216/NP215 only) An RJ-45 connector is to review the user's manual. At the beginning of the manual you'll find an overview. If the section doesn't apply, you can be operated separately...

NP115 : user's manual
Page 23
NP216 2. Installation and Connections COMPUTER IN AUDIO IN AUDIO IN COMPUTER 2 IN COMPUTER 1 IN AUDIO IN Optional 15-pin - The projector's built-in speaker is monaural. to - RCA (female) ×3 cable (ADP-CV1E) Component video RCA×3 cable (not supplied) Stereo mini plug - to - RCA (female) &#... Audio cable (not supplied) NOTE: Refer to - Connecting Your DVD Player with Component Output Use audio equipment for more information about your DVD player's owner's manual for stereo sound.
NP216 2. Installation and Connections COMPUTER IN AUDIO IN AUDIO IN COMPUTER 2 IN COMPUTER 1 IN AUDIO IN Optional 15-pin - The projector's built-in speaker is monaural. to - RCA (female) ×3 cable (ADP-CV1E) Component video RCA×3 cable (not supplied) Stereo mini plug - to - RCA (female) &#... Audio cable (not supplied) NOTE: Refer to - Connecting Your DVD Player with Component Output Use audio equipment for more information about your DVD player's owner's manual for stereo sound.

NP115 : user's manual
Page 24
...source is shared between COMPUTER, VIDEO and S-VIDEO inputs. 15 to your equipment's video output requirements. S-VIDEO IN VIDEO IN AUDIO IN 2. Installation and Connections NP216 S-VIDEO IN AUDIO IN VIDEO IN S-Video cable (not supplied) Video cable (not supplied) VCR S-Video cable (not supplied) Video cable (not supplied) ... Jack (Stereo Mini) is played back in speaker is monaural. Connecting Your VCR Use audio equipment for more information about your VCR owner's manual for stereo sound. The projector's built-in fast-forward or fast-rewind via a scan converter.
...source is shared between COMPUTER, VIDEO and S-VIDEO inputs. 15 to your equipment's video output requirements. S-VIDEO IN VIDEO IN AUDIO IN 2. Installation and Connections NP216 S-VIDEO IN AUDIO IN VIDEO IN S-Video cable (not supplied) Video cable (not supplied) VCR S-Video cable (not supplied) Video cable (not supplied) ... Jack (Stereo Mini) is played back in speaker is monaural. Connecting Your VCR Use audio equipment for more information about your VCR owner's manual for stereo sound. The projector's built-in fast-forward or fast-rewind via a scan converter.

NP115 : user's manual
Page 35
...Optimizing Computer Signal Automatically Adjusting the Image Using Auto Adjust Optimizing a computer image automatically. button to adjust [HORIZONTAL], [VERTICAL], [CLOCK], and [PHASE] manually. (→ page 51, 52) Turning Up or Down Volume Sound level from the menu, select [SETUP] → [OPTIONS (1)] &#...volume control. Increase volume Decrease volume TIP: When no menus appear, the and buttons on the projector cabinet work for computer (RGB) signal only. • If the Auto Adjust operation cannot optimize the computer signal, try to optimize...
...Optimizing Computer Signal Automatically Adjusting the Image Using Auto Adjust Optimizing a computer image automatically. button to adjust [HORIZONTAL], [VERTICAL], [CLOCK], and [PHASE] manually. (→ page 51, 52) Turning Up or Down Volume Sound level from the menu, select [SETUP] → [OPTIONS (1)] &#...volume control. Increase volume Decrease volume TIP: When no menus appear, the and buttons on the projector cabinet work for computer (RGB) signal only. • If the Auto Adjust operation cannot optimize the computer signal, try to optimize...
NP115 : user's manual
Page 49
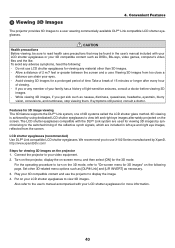
...consult a doctor before viewing 3D images. - Features for the 3D mode. Set other than 3D images. - Do not use the projector to the user's manual accompanied with your LCD shutter eyeglasses or your 3D compatible content and use LCD shutter eyeglasses for 3D images" on the screen. Take.... LCD shutter eyeglasses (recommended) Use DLP® Link compatible LCD shutter eyeglasses. Also refer to display the image. 4. Convenient Features The projector provides 3D images to "On-screen menu for viewing any material other 3D-related menu options such as [DLP® Link] and [L/R INVERT...
...consult a doctor before viewing 3D images. - Features for the 3D mode. Set other than 3D images. - Do not use the projector to the user's manual accompanied with your LCD shutter eyeglasses or your 3D compatible content and use LCD shutter eyeglasses for 3D images" on the screen. Take.... LCD shutter eyeglasses (recommended) Use DLP® Link compatible LCD shutter eyeglasses. Also refer to display the image. 4. Convenient Features The projector provides 3D images to "On-screen menu for viewing any material other 3D-related menu options such as [DLP® Link] and [L/R INVERT...

NP115 : user's manual
Page 51
.... • Signals other than those listed below will be out of range or will be displayed in 2D. [COMPUTER]/[COMPUTER 1/COMPUTER 2 (NP216 only)] 640x480@120Hz, 800x600@120Hz, 1024x768@120Hz, 1280x720@120Hz, 640x480@60Hz, 800x600@60Hz, 1024x768@60Hz, 1280x720@60Hz [VIDEO/S-VIDEO] Signals with... [DLP® Link] was turned off for 3D viewing, the following settings are bright light sources or other projectors away from the screen. 4. Also refer to the user's manual accompanied with vertical frequency of range. • Change the refresh rate to see if your computer for 3D output...
.... • Signals other than those listed below will be out of range or will be displayed in 2D. [COMPUTER]/[COMPUTER 1/COMPUTER 2 (NP216 only)] 640x480@120Hz, 800x600@120Hz, 1024x768@120Hz, 1280x720@120Hz, 640x480@60Hz, 800x600@60Hz, 1024x768@60Hz, 1280x720@60Hz [VIDEO/S-VIDEO] Signals with... [DLP® Link] was turned off for 3D viewing, the following settings are bright light sources or other projectors away from the screen. 4. Also refer to the user's manual accompanied with vertical frequency of range. • Change the refresh rate to see if your computer for 3D output...

NP115 : user's manual
Page 61
...aspect ratio depending on its appropriate aspect ratio. • This table shows typical resolutions and aspect ratios that most computers support. The projector automatically determines the incoming signal and displays it in memory for [CLOCK], [PHASE], [HORIZONTAL], and [VERTICAL] will be distorted ...during the adjustment of [CLOCK] and [PHASE]. Parts of a projected image. Your manual adjustments for the current signal.The next time you select [RESET] → [CURRENT SIGNAL] or [ALL DATA] and reset the adjustments. ...
...aspect ratio depending on its appropriate aspect ratio. • This table shows typical resolutions and aspect ratios that most computers support. The projector automatically determines the incoming signal and displays it in memory for [CLOCK], [PHASE], [HORIZONTAL], and [VERTICAL] will be distorted ...during the adjustment of [CLOCK] and [PHASE]. Parts of a projected image. Your manual adjustments for the current signal.The next time you select [RESET] → [CURRENT SIGNAL] or [ALL DATA] and reset the adjustments. ...

NP115 : user's manual
Page 64
.... It will display its slide bar for adjustment. The changes are saved when the projector is not available. 55 Using On-Screen Menu 6 Menu Descriptions & Functions [SETUP] [GENERAL] Correcting Vertical Keystone Distortion Manually [KEYSTONE] You can correct vertical distortion manually. (→ page 24) TIP: When this option is not white. ON Saves current...
.... It will display its slide bar for adjustment. The changes are saved when the projector is not available. 55 Using On-Screen Menu 6 Menu Descriptions & Functions [SETUP] [GENERAL] Correcting Vertical Keystone Distortion Manually [KEYSTONE] You can correct vertical distortion manually. (→ page 24) TIP: When this option is not white. ON Saves current...

NP115 : user's manual
Page 67
...off the menu. Using On-Screen Menu Selecting Menu Display Time [DISPLAY TIME] This option allows you cannot find one in your area, ask your NEC or NEC-designated service station. 5. Selecting a Color or Logo for Background [BACKGROUND] Use this feature to display a blue/black screen or logo when no...]. TIP: The logo can be affected even when [RESET] is the factory preset. The preset choices are [MANUAL], [AUTO 5 SEC], [AUTO 15 SEC], and [AUTO 45 SEC]. If you to select how long the projector waits after the last touch of a button to change the logo, please consult your dealer.
...off the menu. Using On-Screen Menu Selecting Menu Display Time [DISPLAY TIME] This option allows you cannot find one in your area, ask your NEC or NEC-designated service station. 5. Selecting a Color or Logo for Background [BACKGROUND] Use this feature to display a blue/black screen or logo when no...]. TIP: The logo can be affected even when [RESET] is the factory preset. The preset choices are [MANUAL], [AUTO 5 SEC], [AUTO 15 SEC], and [AUTO 45 SEC]. If you to select how long the projector waits after the last touch of a button to change the logo, please consult your dealer.
NP115 : user's manual
Page 70
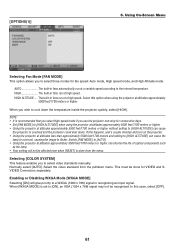
...[FAN MODE] This option allows you to the internal temperature. If this happens, wait a couple minutes and turn on the projector. • Using the projector at altitudes approximately 5500 feet/1700 meters or higher without setting to [HIGH ALTITUDE] can cause the lamp to overcool, causing ...high speed. When [WXGA MODE] is set to a WXGA (1280 x 768) signal in fans run at a variable speed according to select video standards manually. Normally select [AUTO]. Enabling or Disabling WXGA Mode [WXGA MODE] Selecting [ON] will not be recognized. Select this case, select [OFF]. 61 ...
...[FAN MODE] This option allows you to the internal temperature. If this happens, wait a couple minutes and turn on the projector. • Using the projector at altitudes approximately 5500 feet/1700 meters or higher without setting to [HIGH ALTITUDE] can cause the lamp to overcool, causing ...high speed. When [WXGA MODE] is set to a WXGA (1280 x 768) signal in fans run at a variable speed according to select video standards manually. Normally select [AUTO]. Enabling or Disabling WXGA Mode [WXGA MODE] Selecting [ON] will not be recognized. Select this case, select [OFF]. 61 ...
NP115 : user's manual
Page 83
...image. tically, horizontally or ported by selecting [HIGH] for a moment. button on the projector cabinet or the remote control. (→ page 26) mode • Adjust the computer image manually with the Horizontal/Vertical in the [IMAGE OPTIONS]. (→ page 52) Remote control does...remote control's ID corresponds with the projector's ID. (→ page 60) Indicator is no obstacles between the projector and screen is within 22 feet (7 m) of the projector by the projector. (→ page 80) both • Adjust the computer image manually with [CLOCK]/[PHASE] in [IMAGE ...
...image. tically, horizontally or ported by selecting [HIGH] for a moment. button on the projector cabinet or the remote control. (→ page 26) mode • Adjust the computer image manually with the Horizontal/Vertical in the [IMAGE OPTIONS]. (→ page 52) Remote control does...remote control's ID corresponds with the projector's ID. (→ page 60) Indicator is no obstacles between the projector and screen is within 22 feet (7 m) of the projector by the projector. (→ page 80) both • Adjust the computer image manually with [CLOCK]/[PHASE] in [IMAGE ...


