User Guide
Page 4
... your original dated sales receipt for a particular ii To register your Motorola product require an update or other service. Motorola provides this publication and to make any derivative work (such as translation, transformation or adaptation) without written permission from time to time without warranty of any means or used to make changes in Canada. Registering helps us facilitate warranty service, and permits us online: www.motorola.com/cordless Product registration is...
... your original dated sales receipt for a particular ii To register your Motorola product require an update or other service. Motorola provides this publication and to make any derivative work (such as translation, transformation or adaptation) without written permission from time to time without warranty of any means or used to make changes in Canada. Registering helps us facilitate warranty service, and permits us online: www.motorola.com/cordless Product registration is...

User Guide
Page 5
Patent and Trademark Office. MOTOROLA, the Stylized M Logo, and PhoneWrap are the property of their respective owners. All other product or service names are registered in this manual at any time. iii Welcome purpose. Motorola may make improvements or changes in the product(s) described in the U.S.
Patent and Trademark Office. MOTOROLA, the Stylized M Logo, and PhoneWrap are the property of their respective owners. All other product or service names are registered in this manual at any time. iii Welcome purpose. Motorola may make improvements or changes in the product(s) described in the U.S.
User Guide
Page 7
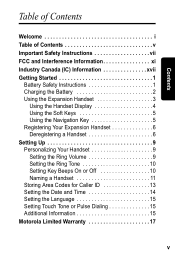
... xvii Getting Started 1 Battery Safety Instructions 1 Charging the Battery 2 Using the Expansion Handset 3 Using the Handset Display 4 Using the Soft Keys 5 Using the Navigation Key 5 Registering Your Expansion Handset 6 Deregistering a Handset 6 Setting Up 9 Personalizing Your Handset 9 Setting the Ring Volume 9 Setting the Ring Tone 10 Setting Key Beeps On or Off 10 Naming a Handset 11 Storing Area Codes for Caller ID 13 Setting the Date and Time 14 Setting the Language 15 Setting Touch Tone or Pulse Dialing 15 Additional Information 15 Motorola Limited Warranty 17 v
... xvii Getting Started 1 Battery Safety Instructions 1 Charging the Battery 2 Using the Expansion Handset 3 Using the Handset Display 4 Using the Soft Keys 5 Using the Navigation Key 5 Registering Your Expansion Handset 6 Deregistering a Handset 6 Setting Up 9 Personalizing Your Handset 9 Setting the Ring Volume 9 Setting the Ring Tone 10 Setting Key Beeps On or Off 10 Naming a Handset 11 Storing Area Codes for Caller ID 13 Setting the Date and Time 14 Setting the Language 15 Setting Touch Tone or Pulse Dialing 15 Additional Information 15 Motorola Limited Warranty 17 v
User Guide
Page 9
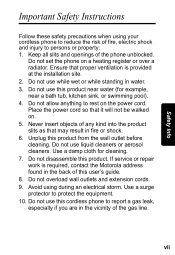
Do not set the phone on the power cord. Do not disassemble this user's guide. 8. Avoid using your cordless phone to reduce the risk of the phone unblocked. If service or repair work is provided at the installation site. 2. Ensure that may result in fire or shock. 6. Do not allow anything to report a gas leak, especially if you are in the vicinity of ...
Do not set the phone on the power cord. Do not disassemble this user's guide. 8. Avoid using your cordless phone to reduce the risk of the phone unblocked. If service or repair work is provided at the installation site. 2. Ensure that may result in fire or shock. 6. Do not allow anything to report a gas leak, especially if you are in the vicinity of ...

User Guide
Page 10
... 6. Installation Guidelines 1. viii Follow all instructions and save them for future reference. 2. This product may result in performance. Operate this phone using only the power source ...install this phone. Safety Info Unplug this cordless phone immediately from the wall. Then retrieve the unit by the operating instructions. Do not retrieve the handset or base until after you are covered by unplugged cords. • The product has been dropped or the cabinet has been damaged. • The product exhibits a distinct change in damage and will often require extensive work...
... 6. Installation Guidelines 1. viii Follow all instructions and save them for future reference. 2. This product may result in performance. Operate this phone using only the power source ...install this phone. Safety Info Unplug this cordless phone immediately from the wall. Then retrieve the unit by the operating instructions. Do not retrieve the handset or base until after you are covered by unplugged cords. • The product has been dropped or the cabinet has been damaged. • The product exhibits a distinct change in damage and will often require extensive work...
User Guide
Page 13
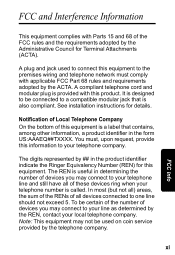
... may not be connected to your line as determined by the Administrative Council for details. Note: This equipment may connect to a compatible modular jack that contains, among other information, a product identifier in determining the number of these devices ring when your telephone number is called. A compliant telephone cord and modular plug is provided with this equipment. The REN is useful in the...
... may not be connected to your line as determined by the Administrative Council for details. Note: This equipment may connect to a compatible modular jack that contains, among other information, a product identifier in determining the number of these devices ring when your telephone number is called. A compliant telephone cord and modular plug is provided with this equipment. The REN is useful in the...
User Guide
Page 15
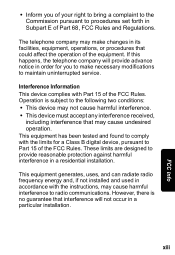
... the instructions, may make necessary modifications to provide reasonable protection against harmful interference in Subpart E of the equipment. These limits are designed to maintain uninterrupted service. However, there is subject to procedures set forth in a residential installation. Operation is ... received, including interference that could affect the operation of Part 68, FCC Rules and Regulations. This equipment generates, uses, and can radiate radio frequency energy and, if not installed and used in a particular installation. xiii FCC Info This equipment has been ...
... the instructions, may make necessary modifications to provide reasonable protection against harmful interference in Subpart E of the equipment. These limits are designed to maintain uninterrupted service. However, there is subject to procedures set forth in a residential installation. Operation is ... received, including interference that could affect the operation of Part 68, FCC Rules and Regulations. This equipment generates, uses, and can radiate radio frequency energy and, if not installed and used in a particular installation. xiii FCC Info This equipment has been ...
User Guide
Page 16
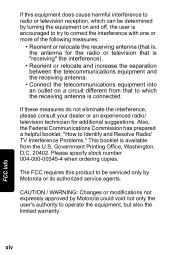
... to which can be serviced only by Motorola could void not only the user's authority to operate the equipment, but also the limited warranty. Also, the Federal Communications Commission has prepared a helpful booklet, "How to Identify and Resolve Radio/ TV Interference Problems." Please specify stock number 004-000-00345-4 when ordering copies. CAUTION / WARNING: Changes or modifications not...
... to which can be serviced only by Motorola could void not only the user's authority to operate the equipment, but also the limited warranty. Also, the Federal Communications Commission has prepared a helpful booklet, "How to Identify and Resolve Radio/ TV Interference Problems." Please specify stock number 004-000-00345-4 when ordering copies. CAUTION / WARNING: Changes or modifications not...
User Guide
Page 19
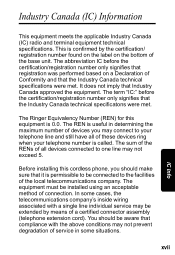
... your telephone line and still have all devices connected to one line may be connected to your telephone number is useful in determining the maximum number of the base unit. The sum of the RENs of all of connection. You should make sure that Industry Canada approved the equipment. The Ringer Equivalency Number (REN) for this cordless phone, you may not prevent degradation of a certified connector assembly (telephone extension cord...
... your telephone line and still have all devices connected to one line may be connected to your telephone number is useful in determining the maximum number of the base unit. The sum of the RENs of all of connection. You should make sure that Industry Canada approved the equipment. The Ringer Equivalency Number (REN) for this cordless phone, you may not prevent degradation of a certified connector assembly (telephone extension cord...

User Guide
Page 20
... installation of this cordless phone does not disable your alarm equipment. Notes: If your home has specially wired alarm equipment connected to the premises wiring and telephone network must comply with this product. xviii IC Info If you disconnect the equipment, and may give the telecommunications company cause to a compatible modular jack that the electrical ground connections of the power utility, telephone lines...
... installation of this cordless phone does not disable your alarm equipment. Notes: If your home has specially wired alarm equipment connected to the premises wiring and telephone network must comply with this product. xviii IC Info If you disconnect the equipment, and may give the telecommunications company cause to a compatible modular jack that the electrical ground connections of the power utility, telephone lines...
User Guide
Page 23
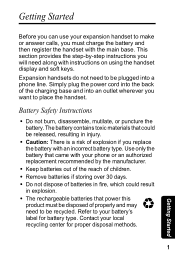
... Started Use only the battery that power this product must charge the battery and then register the handset with instructions on using the handset display and soft keys. Getting Started Before you can use your expansion handset to make or answer calls, you must be disposed of the charging base and into a phone line. This section provides the step-by the manufacturer. • Keep batteries out of the reach of children. • Remove batteries if storing...
... Started Use only the battery that power this product must charge the battery and then register the handset with instructions on using the handset display and soft keys. Getting Started Before you can use your expansion handset to make or answer calls, you must be disposed of the charging base and into a phone line. This section provides the step-by the manufacturer. • Keep batteries out of the reach of children. • Remove batteries if storing...
User Guide
Page 25
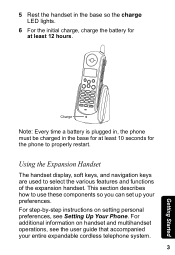
... expandable cordless telephone system. 3 Getting Started This section describes how to select the various features and functions of the expansion handset. For additional information on setting personal preferences, see the user guide that accompanied your preferences. For step-by-step instructions on handset and multihandset operations, see Setting Up Your Phone. Note: Every time a battery is plugged in, the phone must be charged in the base so the charge...
... expandable cordless telephone system. 3 Getting Started This section describes how to select the various features and functions of the expansion handset. For additional information on setting personal preferences, see the user guide that accompanied your preferences. For step-by-step instructions on handset and multihandset operations, see Setting Up Your Phone. Note: Every time a battery is plugged in, the phone must be charged in the base so the charge...
User Guide
Page 26
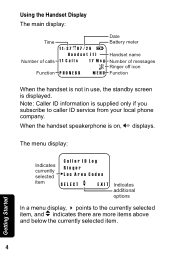
Using the Handset Display The main display: Time Number of calls Function 1 1 : 3 7 A P M M 0 7 / 2 6 + Handset (1) 11 Calls 17 Msg PHONEBK MENU Date Battery meter Handset name Number of messages Ringer off icon Function When the handset is not in use, the standby screen is on, V displays. When the handset speakerphone is displayed. Getting Started - Note: Caller ID information is supplied only if you subscribe to the currently selected item, and b indicates there are more items above and...
Using the Handset Display The main display: Time Number of calls Function 1 1 : 3 7 A P M M 0 7 / 2 6 + Handset (1) 11 Calls 17 Msg PHONEBK MENU Date Battery meter Handset name Number of messages Ringer off icon Function When the handset is not in use, the standby screen is on, V displays. When the handset speakerphone is displayed. Getting Started - Note: Caller ID information is supplied only if you subscribe to the currently selected item, and b indicates there are more items above and...
User Guide
Page 28
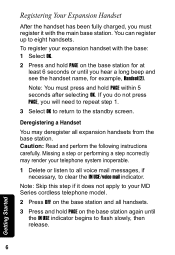
... IN USE indicator begins to clear the IN USE/voice mail indicator. Note: You must register it does not apply to your telephone system inoperable. 1 Delete or listen to all voice mail messages, if necessary, to flash slowly, then release. 6 Getting Started Missing a step or performing a step ncorrectly may deregister all handsets. 3 Press and hold PAGE on the base station for example, Handset(2). Registering Your Expansion Handset After the handset has been fully charged...
... IN USE indicator begins to clear the IN USE/voice mail indicator. Note: You must register it does not apply to your telephone system inoperable. 1 Delete or listen to all voice mail messages, if necessary, to flash slowly, then release. 6 Getting Started Missing a step or performing a step ncorrectly may deregister all handsets. 3 Press and hold PAGE on the base station for example, Handset(2). Registering Your Expansion Handset After the handset has been fully charged...
User Guide
Page 29
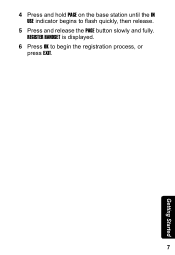
REGISTER HANDSET is displayed. 6 Press OK to flash quickly, then release. 5 Press and release the PAGE button slowly and fully. 4 Press and hold PAGE on the base station until the IN USE indicator begins to begin the registration process, or press EXIT. 7 Getting Started
REGISTER HANDSET is displayed. 6 Press OK to flash quickly, then release. 5 Press and release the PAGE button slowly and fully. 4 Press and hold PAGE on the base station until the IN USE indicator begins to begin the registration process, or press EXIT. 7 Getting Started
User Guide
Page 31
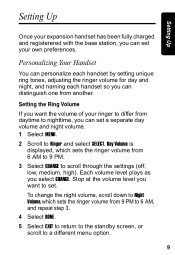
... own preferences. Setting Up Setting Up Once your expansion handset has been fully charged and registerered with the base station, you select CHANGE. To change the night volume, scroll down to Night Volume, which sets the ringer volume from 6 AM to 9 PM. 3 Select CHANGE to set a separate day volume and night volume. 1 Select MENU. 2 Scroll to a different menu option. 9 Day Volume is displayed, which sets the ringer volume from another. Setting the Ring Volume If you...
... own preferences. Setting Up Setting Up Once your expansion handset has been fully charged and registerered with the base station, you select CHANGE. To change the night volume, scroll down to Night Volume, which sets the ringer volume from 6 AM to 9 PM. 3 Select CHANGE to set a separate day volume and night volume. 1 Select MENU. 2 Scroll to a different menu option. 9 Day Volume is displayed, which sets the ringer volume from another. Setting the Ring Volume If you...
User Guide
Page 32
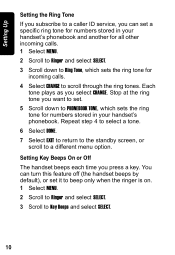
... The handset beeps each time you select CHANGE. Setting Up Setting the Ring Tone If you subscribe to a caller ID service, you can turn this feature off (the handset beeps by default), or set it to beep only when the ringer is on. 1 Select MENU. 2 Scroll to Ringer and select SELECT. 3 Scroll to Key Beeps and select SELECT. 10 You can set . 5 Scroll down to Ring Tone, which sets the ring tone for all other incoming calls. 1 Select...
... The handset beeps each time you select CHANGE. Setting Up Setting the Ring Tone If you subscribe to a caller ID service, you can turn this feature off (the handset beeps by default), or set it to beep only when the ringer is on. 1 Select MENU. 2 Scroll to Ringer and select SELECT. 3 Scroll to Key Beeps and select SELECT. 10 You can set . 5 Scroll down to Ring Tone, which sets the ring tone for all other incoming calls. 1 Select...

User Guide
Page 33
... Select DELETE to erase characters to RINGER option, key beeps are on when the ringer is on, and off when the ringer is off. Naming a Handset When you want to use (up to 12 characters). The flashing underline shows the input cursor position. If you name a handset, the handset number remains part of Handset(x), where x can change the name to intercom another handset). When your choice is assigned a default...
... Select DELETE to erase characters to RINGER option, key beeps are on when the ringer is on, and off when the ringer is off. Naming a Handset When you want to use (up to 12 characters). The flashing underline shows the input cursor position. If you name a handset, the handset number remains part of Handset(x), where x can change the name to intercom another handset). When your choice is assigned a default...
User Guide
Page 37
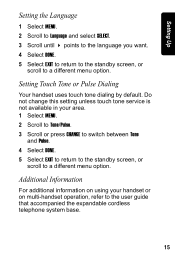
Setting Touch Tone or Pulse Dialing Your handset uses touch tone dialing by default. Additional Information For additional information on using your area. 1 Select MENU. 2 Scroll to Tone/Pulse. 3 Scroll or press CHANGE to switch between Tone and Pulse. 4 Select DONE. 5 Select EXIT to return to the standby screen, or scroll to the user guide that accompanied the expandable cordless telephone system base. 15 Do not change this setting unless touch tone service is not available in...
Setting Touch Tone or Pulse Dialing Your handset uses touch tone dialing by default. Additional Information For additional information on using your area. 1 Select MENU. 2 Scroll to Tone/Pulse. 3 Scroll or press CHANGE to switch between Tone and Pulse. 4 Select DONE. 5 Select EXIT to return to the standby screen, or scroll to the user guide that accompanied the expandable cordless telephone system base. 15 Do not change this setting unless touch tone service is not available in...
User Guide
Page 41
... call the telephone number designated above for the product with which they are used. To avoid losing such data, software and applications please create a back up prior to personal contacts, games and ringer tones, will receive instructions on how to or use functionally equivalent reconditioned/refurbished/preowned or new Products, Accessories or parts. You will be corrected. To obtain service, you may use...
... call the telephone number designated above for the product with which they are used. To avoid losing such data, software and applications please create a back up prior to personal contacts, games and ringer tones, will receive instructions on how to or use functionally equivalent reconditioned/refurbished/preowned or new Products, Accessories or parts. You will be corrected. To obtain service, you may use...


