
User's Guide
Page 2
... users-See the User's Guide. • Macintosh users-If your product supports Macintosh, see the Mac Help installed with the printer software. Refer service or repairs, other than those described in the user documentation, to meet strict global safety standards with the ...specific Lexmark components. This product is designed, tested, and approved to a professional service person. Operating system notice All features and functions are operating system-dependent. CAUTION: Do not set up this product or the manufacturer's authorized replacement power supply and power supply cord. Important...
... users-See the User's Guide. • Macintosh users-If your product supports Macintosh, see the Mac Help installed with the printer software. Refer service or repairs, other than those described in the user documentation, to meet strict global safety standards with the ...specific Lexmark components. This product is designed, tested, and approved to a professional service person. Operating system notice All features and functions are operating system-dependent. CAUTION: Do not set up this product or the manufacturer's authorized replacement power supply and power supply cord. Important...
User's Guide
Page 11
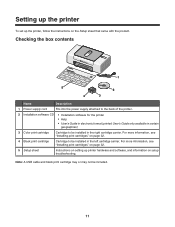
Checking the box contents 1 5 2 4 3 Name Description 1 Power supply cord Fits into the power supply attached to the back of the printer. 2 Installation software CD • Installation software for the printer • Help • User's Guide in electronic format (printed User's Guide only available in certain geographies) 3 Color print cartridge Cartridge to be installed in the...
Checking the box contents 1 5 2 4 3 Name Description 1 Power supply cord Fits into the power supply attached to the back of the printer. 2 Installation software CD • Installation software for the printer • Help • User's Guide in electronic format (printed User's Guide only available in certain geographies) 3 Color print cartridge Cartridge to be installed in the...
User's Guide
Page 13
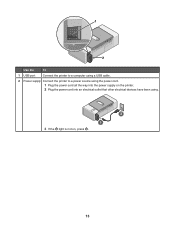
1 2 Use the To 1 USB port Connect the printer to a computer using a USB cable. 2 Power supply Connect the printer to a power source using the power cord. 1 Plug the power cord all the way into the power supply on the printer. 2 Plug the power cord into an electrical outlet that other electrical devices have been using. 2 1 3 If the light is not on, press . 13
1 2 Use the To 1 USB port Connect the printer to a computer using a USB cable. 2 Power supply Connect the printer to a power source using the power cord. 1 Plug the power cord all the way into the power supply on the printer. 2 Plug the power cord into an electrical outlet that other electrical devices have been using. 2 1 3 If the light is not on, press . 13
User's Guide
Page 38
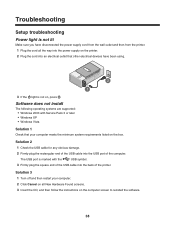
... Windows Vista Solution 1 Check that other electrical devices have disconnected the power supply cord from the wall outlet and then from the printer. 1 Plug the cord all the way into the power supply on the printer. 2 Plug the cord into an electrical outlet that your computer. 2 Click Cancel on all New Hardware ...are supported: • Windows 2000 with the USB symbol. 3 Firmly plug the square end of the USB cable into the USB port of the printer. Solution 3 1 Turn off and then restart your computer meets the minimum system requirements listed on , press . The USB port is not on the...
... Windows Vista Solution 1 Check that other electrical devices have disconnected the power supply cord from the wall outlet and then from the printer. 1 Plug the cord all the way into the power supply on the printer. 2 Plug the cord into an electrical outlet that your computer. 2 Click Cancel on all New Hardware ...are supported: • Windows 2000 with the USB symbol. 3 Firmly plug the square end of the USB cable into the USB port of the printer. Solution 3 1 Turn off and then restart your computer meets the minimum system requirements listed on , press . The USB port is not on the...
User's Guide
Page 39
... the power supply from the printer. 4 Reconnect the power supply to the printer. 5 Plug the power cord into the wall outlet. 6 Press to turn the printer on the computer screen. Solution 6 1 Visit our Web site at www.lexmark.com to check for drivers or downloads. 4 Select your printer family. 5 Select your printer model. 6 Select your operating system...
... the power supply from the printer. 4 Reconnect the power supply to the printer. 5 Plug the power cord into the wall outlet. 6 Press to turn the printer on the computer screen. Solution 6 1 Visit our Web site at www.lexmark.com to check for drivers or downloads. 4 Select your printer family. 5 Select your printer model. 6 Select your operating system...
User's Guide
Page 50
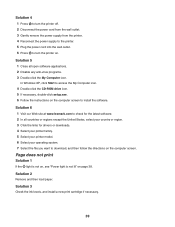
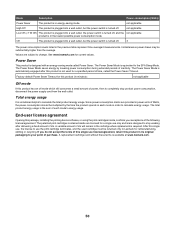
Mode Description Power consumption (Watts) Power Saver The product is turned off. not applicable Low Off ( not applicable High Off The product is plugged into a wall outlet, but the power switch is in energy-saving mode.
Mode Description Power consumption (Watts) Power Saver The product is turned off. not applicable Low Off ( not applicable High Off The product is plugged into a wall outlet, but the power switch is in energy-saving mode.
