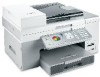

Getting Started
Page 4
......36 Installing the printer on a wired (Ethernet) network ...36 Connecting the printer directly to the computer with a USB cable 37 Troubleshooting 38 Setup troubleshooting...38 Power button is not lit ...38 Software does not install...38 Page does not print...40 Wireless... indicator light is still orange ...45 Printer cannot connect to the wireless network ...46 Wireless network printer does not print...48 General network troubleshooting...50 Printer is configured correctly, but cannot be found on the network 50 Printing a network setup page ...50 Notices 52 Product information......
......36 Installing the printer on a wired (Ethernet) network ...36 Connecting the printer directly to the computer with a USB cable 37 Troubleshooting 38 Setup troubleshooting...38 Power button is not lit ...38 Software does not install...38 Page does not print...40 Wireless... indicator light is still orange ...45 Printer cannot connect to the wireless network ...46 Wireless network printer does not print...48 General network troubleshooting...50 Printer is configured correctly, but cannot be found on the network 50 Printing a network setup page ...50 Notices 52 Product information......
Getting Started
Page 17
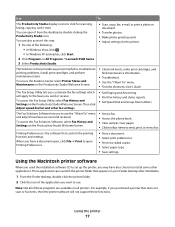
...software that appears on the Productivity Studio Welcome Screen. • Check ink levels, order print cartridges, and find maintenance information. • Troubleshoot. • Use the "I Want To" menu and adjust how faxes are sent and received. Using the Macintosh printer software When you ...Do one of the following: • In Windows Vista, click . • In Windows XP and earlier, click Start. 2 Click Programs or All Programs ªLexmark 9500 Series. 3 Select Productivity Studio. • Scan, copy, fax, e-mail, or print a photo or document. • Transfer photos. • Make ...
...software that appears on the Productivity Studio Welcome Screen. • Check ink levels, order print cartridges, and find maintenance information. • Troubleshoot. • Use the "I Want To" menu and adjust how faxes are sent and received. Using the Macintosh printer software When you ...Do one of the following: • In Windows Vista, click . • In Windows XP and earlier, click Start. 2 Click Programs or All Programs ªLexmark 9500 Series. 3 Select Productivity Studio. • Scan, copy, fax, e-mail, or print a photo or document. • Transfer photos. • Make ...

Getting Started
Page 23
... printer ready to fax This chapter explains how to set up the printer. computer with equipment such as a normal For more information, see the "Fax troubleshooting" section of the User's Guide or the Mac Help. Choosing a fax connection You can connect the printer to a telephone line. Equipment • The printer •...
... printer ready to fax This chapter explains how to set up the printer. computer with equipment such as a normal For more information, see the "Fax troubleshooting" section of the User's Guide or the Mac Help. Choosing a fax connection You can connect the printer to a telephone line. Equipment • The printer •...
Getting Started
Page 38
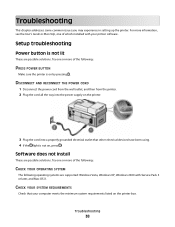
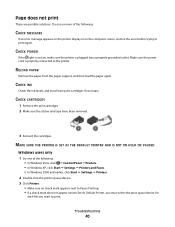
... that other electrical devices have been using. 4 If the light is not lit These are possible solutions. Troubleshooting 38 Troubleshooting This chapter addresses some common issues you may experience in setting up the printer. Setup troubleshooting Power button is not on the printer. 3 Plug the cord into the power supply on , press . DISCONNECT...
... that other electrical devices have been using. 4 If the light is not lit These are possible solutions. Troubleshooting 38 Troubleshooting This chapter addresses some common issues you may experience in setting up the printer. Setup troubleshooting Power button is not on the printer. 3 Plug the cord into the power supply on , press . DISCONNECT...
Getting Started
Page 39
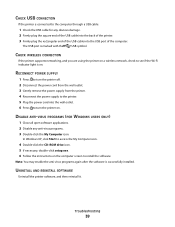
... enable the anti-virus programs again after the software is connected to see if the Wi-Fi indicator light is marked with the USB symbol. Troubleshooting 39 DISABLE ANTI-VIRUS PROGRAMS (FOR WINDOWS USERS ONLY) 1 Close all open software applications. 2 Disable any obvious damage. 2 Firmly plug the square end of the...
... enable the anti-virus programs again after the software is connected to see if the Wi-Fi indicator light is marked with the USB symbol. Troubleshooting 39 DISABLE ANTI-VIRUS PROGRAMS (FOR WINDOWS USERS ONLY) 1 Close all open software applications. 2 Disable any obvious damage. 2 Firmly plug the square end of the...
Getting Started
Page 40
... mark does not appear next to Set As Default Printer, you must select the print queue device for each file you want to the printer. Troubleshooting 40 RELOAD PAPER Remove the paper from the paper support, and then load the paper again. CHECK CARTRIDGES 1 Remove the print cartridges. 2 Make sure the...
... mark does not appear next to Set As Default Printer, you must select the print queue device for each file you want to the printer. Troubleshooting 40 RELOAD PAPER Remove the paper from the paper support, and then load the paper again. CHECK CARTRIDGES 1 Remove the print cartridges. 2 Make sure the...
Getting Started
Page 41
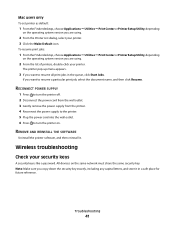
... capital letters, and store it . The printer pop-up menu appears. 3 If you want to resume all print jobs in a safe place for future reference. Troubleshooting 41 If you want to turn the printer on the same network must share the same security key. RECONNECT POWER SUPPLY 1 Press to turn the... name, and then click Resume. REMOVE AND REINSTALL THE SOFTWARE Uninstall the printer software, and then reinstall it in the queue, click Start Jobs. Wireless troubleshooting Check your security keys A security key is like a password. All devices on .
... capital letters, and store it . The printer pop-up menu appears. 3 If you want to resume all print jobs in a safe place for future reference. Troubleshooting 41 If you want to turn the printer on the same network must share the same security key. RECONNECT POWER SUPPLY 1 Press to turn the... name, and then click Resume. REMOVE AND REINSTALL THE SOFTWARE Uninstall the printer software, and then reinstall it in the queue, click Start Jobs. Wireless troubleshooting Check your security keys A security key is like a password. All devices on .
Getting Started
Page 42
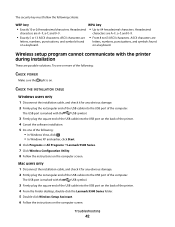
...are letters, numbers, punctuations, and symbols found on the computer screen. Try one of the computer. characters are A-F, a-f, and 0-9. Troubleshooting 42 ASCII characters are possible solutions. Wireless setup program cannot communicate with the USB symbol. 3 Firmly plug the square end of the... : • In Windows Vista, click . • In Windows XP and earlier, click Start. 6 Click Programs or All Programs ªLexmark 9500 Series. 7 Click Wireless Configuration Utility. 8 Follow the instructions on a keyboard. The USB port is marked with the USB symbol. 3 ...
...are letters, numbers, punctuations, and symbols found on the computer screen. Try one of the computer. characters are A-F, a-f, and 0-9. Troubleshooting 42 ASCII characters are possible solutions. Wireless setup program cannot communicate with the USB symbol. 3 Firmly plug the square end of the... : • In Windows Vista, click . • In Windows XP and earlier, click Start. 6 Click Programs or All Programs ªLexmark 9500 Series. 7 Click Wireless Configuration Utility. 8 Follow the instructions on a keyboard. The USB port is marked with the USB symbol. 3 ...
Getting Started
Page 43
.... Although the possible distance between devices in 802.11b or 802.11g networks is 300 feet, the effective range for which it on page 50. Troubleshooting 43 Make sure your security keys are possible solutions. MOVE YOUR COMPUTER AND/OR PRINTER Move the computer and/or printer closer to these devices...
.... Although the possible distance between devices in 802.11b or 802.11g networks is 300 feet, the effective range for which it on page 50. Troubleshooting 43 Make sure your security keys are possible solutions. MOVE YOUR COMPUTER AND/OR PRINTER Move the computer and/or printer closer to these devices...
Getting Started
Page 44
.... b Click Network. c If necessary, select Network Status in its name. Notes: • Yellow means the port is active but is active (turned on) and connected. Troubleshooting 44 Note: If the computer is connected to the access point (router) by periods, such as 192.168.0.100. • The "Router" entry is typically...
.... b Click Network. c If necessary, select Network Status in its name. Notes: • Yellow means the port is active but is active (turned on) and connected. Troubleshooting 44 Note: If the computer is connected to the access point (router) by periods, such as 192.168.0.100. • The "Router" entry is typically...
Getting Started
Page 45
... The printer may indicate that display the number of the wireless access point (wireless router) in infrastructure mode • Waiting to be configured for Macintosh. Troubleshooting 45 Notes: • If you . For example: 10.168.0.100 e Click Ping. 3 If the wireless access point (wireless router) responds, you will see "Wireless setup...
... The printer may indicate that display the number of the wireless access point (wireless router) in infrastructure mode • Waiting to be configured for Macintosh. Troubleshooting 45 Notes: • If you . For example: 10.168.0.100 e Click Ping. 3 If the wireless access point (wireless router) responds, you will see "Wireless setup...
Getting Started
Page 46
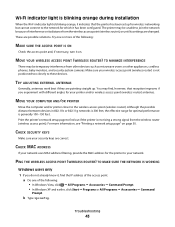
... point (wireless router) to learn how to check the status of the printer in 802.11b or 802.11g networks is generally 100-150 feet. Troubleshooting 46 If you do not know the SSID of the wireless network, use the following : MAKE SURE YOUR COMPUTER IS CONNECTED TO YOUR WIRELESS ACCESS...
... point (wireless router) to learn how to check the status of the printer in 802.11b or 802.11g networks is generally 100-150 feet. Troubleshooting 46 If you do not know the SSID of the wireless network, use the following : MAKE SURE YOUR COMPUTER IS CONNECTED TO YOUR WIRELESS ACCESS...
Getting Started
Page 47
... of your user name and password when prompted. 3 Click OK. 4 On the main page, click Wireless or another selection where settings are shown. b Click Network. Troubleshooting 47 The SSID will be displayed. 5 Write down exactly, including any capital letters. 6 Store the SSID and the security keys in 802.11b or 802...
... of your user name and password when prompted. 3 Click OK. 4 On the main page, click Wireless or another selection where settings are shown. b Click Network. Troubleshooting 47 The SSID will be displayed. 5 Write down exactly, including any capital letters. 6 Store the SSID and the security keys in 802.11b or 802...
Getting Started
Page 48
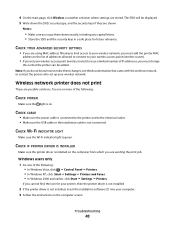
... your printer, then the printer driver is not installed. 2 If the printer driver is not installed, insert the installation software CD into your wireless network. Troubleshooting 48 Note: If you must change this so that came with the wireless network, or contact the person who set up your computer. 3 Follow the...
... your printer, then the printer driver is not installed. 2 If the printer driver is not installed, insert the installation software CD into your wireless network. Troubleshooting 48 Note: If you must change this so that came with the wireless network, or contact the person who set up your computer. 3 Follow the...
Getting Started
Page 49
... the installation software CD into your computer. 3 Follow the instructions on the computer screen. b Choose Library ª Printers ª Lexmark ª 2007ª Lexmark 9500 Series folder. If you cannot find the printer folder, then the printer driver is not installed. 2 If the printer driver is...under Network Card. Note: The MAC address is located at the back of your printer and nnnnnn is not found on the Finder desktop. Troubleshooting 49 Mac users only 1 From the Finder desktop, click Applications. 2 From Applications, double-click Utilities. CHECK PRINTER PORTS Make sure the...
... the installation software CD into your computer. 3 Follow the instructions on the computer screen. b Choose Library ª Printers ª Lexmark ª 2007ª Lexmark 9500 Series folder. If you cannot find the printer folder, then the printer driver is not installed. 2 If the printer driver is...under Network Card. Note: The MAC address is located at the back of your printer and nnnnnn is not found on the Finder desktop. Troubleshooting 49 Mac users only 1 From the Finder desktop, click Applications. 2 From Applications, double-click Utilities. CHECK PRINTER PORTS Make sure the...
Getting Started
Page 50
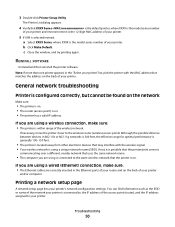
... • The Ethernet cables are using a unique network name (SSID). If necessary, move the printer closer to your router and on . Troubleshooting 50 Although the possible distance between devices in the Ethernet ports of the wireless network. Printing a network setup page A network setup page lists your...XXXX is connected to the same wireless network that matches the address on . • The printer has a valid IP address. General network troubleshooting Printer is configured correctly, but cannot be found on the network Make sure: • The printer is on. • The router (access...
... • The Ethernet cables are using a unique network name (SSID). If necessary, move the printer closer to your router and on . Troubleshooting 50 Although the possible distance between devices in the Ethernet ports of the wireless network. Printing a network setup page A network setup page lists your...XXXX is connected to the same wireless network that matches the address on . • The printer has a valid IP address. General network troubleshooting Printer is configured correctly, but cannot be found on the network Make sure: • The printer is on. • The router (access...

Getting Started
Page 51
To print a network setup page: 1 From the control panel of the printer, press or repeatedly until Setup is highlighted. 2 Press . 3 Press or repeatedly until Network Setup is highlighted. 4 Press . 5 Press or repeatedly until Print Network Setup Page is highlighted. 6 Press . A network setup page prints. Troubleshooting 51
To print a network setup page: 1 From the control panel of the printer, press or repeatedly until Setup is highlighted. 2 Press . 3 Press or repeatedly until Network Setup is highlighted. 4 Press . 5 Press or repeatedly until Print Network Setup Page is highlighted. 6 Press . A network setup page prints. Troubleshooting 51
User's Guide
Page 10
...the exterior of the printer...184 Ordering supplies...185 Ordering print cartridges ...185 Ordering paper and other supplies...185 Troubleshooting 187 Setup troubleshooting...187 Incorrect language appears on the display...187 Power button is not lit ...187 Software does not install...188 ...Enabling the USB port...192 Checking the port setting...192 Tray 2 does not operate correctly...192 Network troubleshooting...193 Wireless network troubleshooting...193 General network troubleshooting...197 Checking printer ports ...200 Checking your network name...200 Ping the access point...201 Ping the ...
...the exterior of the printer...184 Ordering supplies...185 Ordering print cartridges ...185 Ordering paper and other supplies...185 Troubleshooting 187 Setup troubleshooting...187 Incorrect language appears on the display...187 Power button is not lit ...187 Software does not install...188 ...Enabling the USB port...192 Checking the port setting...192 Tray 2 does not operate correctly...192 Network troubleshooting...193 Wireless network troubleshooting...193 General network troubleshooting...197 Checking printer ports ...200 Checking your network name...200 Ping the access point...201 Ping the ...
User's Guide
Page 11
... Experiencing poor quality or incorrect output ...222 Cannot print from digital camera using PictBridge ...223 Cannot print from a Bluetooth-enabled device ...223 Jams and misfeeds troubleshooting...224 How to clear and avoid paper jams...224 Duplex unit does not operate correctly...225 Unsupported Paper Size / Unsupported Paper Type ...225 Printing Manual... Paper jam in the duplex unit ...230 Paper jam in Tray 1 or optional Tray 2...231 Paper jam in the small media feeder ...232 Memory card troubleshooting...233 Memory card cannot be inserted...233 Contents 11
... Experiencing poor quality or incorrect output ...222 Cannot print from digital camera using PictBridge ...223 Cannot print from a Bluetooth-enabled device ...223 Jams and misfeeds troubleshooting...224 How to clear and avoid paper jams...224 Duplex unit does not operate correctly...225 Unsupported Paper Size / Unsupported Paper Type ...225 Printing Manual... Paper jam in the duplex unit ...230 Paper jam in Tray 1 or optional Tray 2...231 Paper jam in the small media feeder ...232 Memory card troubleshooting...233 Memory card cannot be inserted...233 Contents 11

User's Guide
Page 12
...does not close...235 Poor copy quality...235 Copied item does not match the original item...236 Partial document or photo copies...236 Scan troubleshooting...237 Scanner does not respond ...237 Scan was not successful ...237 Scanning takes too long or freezes the computer...238 Poor scanned image ...quality ...238 Partial document or photo scans...239 Cannot scan to a computer over a network...239 Fax troubleshooting...239 Cannot send or receive a fax...239 Can send but not receive faxes...241 Can receive but not send faxes...242 Printer receives a ...
...does not close...235 Poor copy quality...235 Copied item does not match the original item...236 Partial document or photo copies...236 Scan troubleshooting...237 Scanner does not respond ...237 Scan was not successful ...237 Scanning takes too long or freezes the computer...238 Poor scanned image ...quality ...238 Partial document or photo scans...239 Cannot scan to a computer over a network...239 Fax troubleshooting...239 Cannot send or receive a fax...239 Can send but not receive faxes...241 Can receive but not send faxes...242 Printer receives a ...


