
IPDS Printer and Host Setup Guide
Page 10
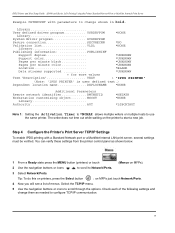
Select the TCP/IP menu. 5 Use the navigation buttons or icons to start a new job. Library User defined driver program........... USRDRVPGM *NONE Library System driver program SYSDRVPGM Secure connection SECURECNN *NO Validation list VLDL *NONE Library Publishing information PUBLISHINF Support duplex *UNKNOWN Support color *UNKNOWN Pages per minute black *UNKNOWN ...
Select the TCP/IP menu. 5 Use the navigation buttons or icons to start a new job. Library User defined driver program........... USRDRVPGM *NONE Library System driver program SYSDRVPGM Secure connection SECURECNN *NO Validation list VLDL *NONE Library Publishing information PUBLISHINF Support duplex *UNKNOWN Support color *UNKNOWN Pages per minute black *UNKNOWN ...
IPDS Printer and Host Setup Guide
Page 19
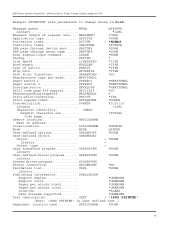
... Paper source 2 PPRSRC2 *MFRTYPMDL Envelope source ENVELOPE *MFRTYPMDL ASCII code page 899 support....... USRDRVPGM *NONE Library System driver program SYSDRVPGM Secure connection SECURECNN *NO Validation list VLDL *NONE Library Publishing information: ..........PUBLISHINF Support duplex *UNKNOWN Support...: USRDFNOBJ Object > *NONE Library > Object type > Data transform program............USRDTATFM *NONE Library User-defined driver program ...... IPDS Printer and Host Setup Guide AS/400 and iSeries Twinax Printing Using the Adapter for SCS...
... Paper source 2 PPRSRC2 *MFRTYPMDL Envelope source ENVELOPE *MFRTYPMDL ASCII code page 899 support....... USRDRVPGM *NONE Library System driver program SYSDRVPGM Secure connection SECURECNN *NO Validation list VLDL *NONE Library Publishing information: ..........PUBLISHINF Support duplex *UNKNOWN Support...: USRDFNOBJ Object > *NONE Library > Object type > Data transform program............USRDTATFM *NONE Library User-defined driver program ...... IPDS Printer and Host Setup Guide AS/400 and iSeries Twinax Printing Using the Adapter for SCS...
Troubleshooting Guide
Page 2
...the printer off and back on the printers operator panel. The specified output bin is not connected properly Verify that you selected the printer driver associated with the Lexmark ABC. • If you are using a Windows Vista, Windows 2000, Windows XP, or Windows Server 2003 compatible printer... driver. Page Protect is too complex Reduce the complexity of your job. We recommend Lexmark part number 1329605 (10 ft) or 1427498 (20 ft) for both size and type are set correctly in ...
...the printer off and back on the printers operator panel. The specified output bin is not connected properly Verify that you selected the printer driver associated with the Lexmark ABC. • If you are using a Windows Vista, Windows 2000, Windows XP, or Windows Server 2003 compatible printer... driver. Page Protect is too complex Reduce the complexity of your job. We recommend Lexmark part number 1329605 (10 ft) or 1427498 (20 ft) for both size and type are set correctly in ...
Troubleshooting Guide
Page 5
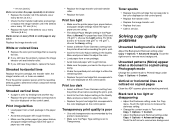
...Replace the color print cartridge that corresponds to the color displayed on the control panel. Print irregularities • Load paper from the printer driver before sending the job to print. • Scroll to the Color Adjust setting in the Quality Menu and press Select to adjust the... Darkness setting under Copy Options Advanced Imaging. Print too dark • Select a different Toner Darkness setting from the printer driver before sending the job to print. • Scroll to the Color Adjust setting in the Quality Menu and press Select to adjust the color....
...Replace the color print cartridge that corresponds to the color displayed on the control panel. Print irregularities • Load paper from the printer driver before sending the job to print. • Scroll to the Color Adjust setting in the Quality Menu and press Select to adjust the... Darkness setting under Copy Options Advanced Imaging. Print too dark • Select a different Toner Darkness setting from the printer driver before sending the job to print. • Scroll to the Color Adjust setting in the Quality Menu and press Select to adjust the color....
User's Guide
Page 8
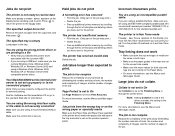
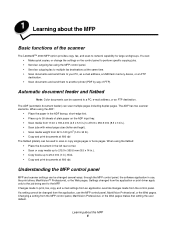
...mixed page sizes (letter and legal). • Scan media weight from the control panel. Changing a setting from the application, use , the print driver, MarkVision™ Professional, or the Web pages. The ADF has two scanner elements. Understanding the MFP control panel MFP and scanner settings can be ...a USB flash memory device, or an FTP destination. • Scan documents and send them to another printer (PDF by way of the scanner The Lexmark™ 4600 MFP option provides copy, fax, and scan-to a PC, e-mail address, or an FTP destination. Learning about the MFP Basic functions...
...mixed page sizes (letter and legal). • Scan media weight from the control panel. Changing a setting from the application, use , the print driver, MarkVision™ Professional, or the Web pages. The ADF has two scanner elements. Understanding the MFP control panel MFP and scanner settings can be ...a USB flash memory device, or an FTP destination. • Scan documents and send them to another printer (PDF by way of the scanner The Lexmark™ 4600 MFP option provides copy, fax, and scan-to a PC, e-mail address, or an FTP destination. Learning about the MFP Basic functions...

User's Guide
Page 37
... the touch screen keyboard, enter the name or part of the name of faxing documents directly from a computer lets you must use the PostScript printer driver for the fax recipient. 6 Click Send to enter another address. Using the address book Note: If the address book feature is not enabled, contact your...
... the touch screen keyboard, enter the name or part of the name of faxing documents directly from a computer lets you must use the PostScript printer driver for the fax recipient. 6 Click Send to enter another address. Using the address book Note: If the address book feature is not enabled, contact your...
User's Guide
Page 53
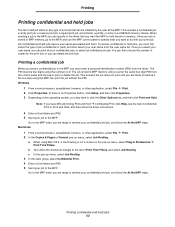
... of Print Time Filters, and select Job Routing. This ensures the job does not print until you enter the same four-digit PIN from the driver. c In the pop-up menu, select Job Routing. 3 In the radio group, select Confidential Print. 4 Enter a User Name and PIN. 5 Send your confidential ... you have difficulty finding Print and Hold Æ Confidential Print, click Help, see the topic Confidential Print or Print and Hold, and then follow the driver instructions. 4 Enter a User Name and PIN. 5 Send your confidential print job, and follow the At the MFP steps. a When using Mac OS 9, if ...
... of Print Time Filters, and select Job Routing. This ensures the job does not print until you enter the same four-digit PIN from the driver. c In the pop-up menu, select Job Routing. 3 In the radio group, select Confidential Print. 4 Enter a User Name and PIN. 5 Send your confidential ... you have difficulty finding Print and Hold Æ Confidential Print, click Help, see the topic Confidential Print or Print and Hold, and then follow the driver instructions. 4 Enter a User Name and PIN. 5 Send your confidential print job, and follow the At the MFP steps. a When using Mac OS 9, if ...
User's Guide
Page 55
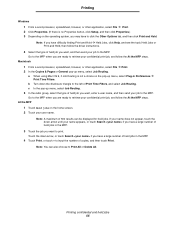
... you have a large number of held jobs in the MFP. 3 Touch the job you are ready to retrieve your confidential print job, and follow the driver instructions. 4 Select the type of held job you want, enter a user name, and then send your job to the MFP. At the MFP 1 Touch Held...
... you have a large number of held jobs in the MFP. 3 Touch the job you are ready to retrieve your confidential print job, and follow the driver instructions. 4 Select the type of held job you want, enter a user name, and then send your job to the MFP. At the MFP 1 Touch Held...
User's Guide
Page 56
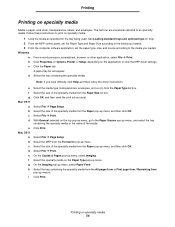
... computer software application, set the paper type, size, and source according to the media you have difficulty, click Help, and then follow the driver instructions. Select the size of the specialty media from the Paper Size list box. Select File Æ Page Setup. Select the specialty media ... specialty media or the name of the specialty media from the Paper Type list box. The last four are sometimes referred to view the MFP driver settings. c Click the Paper tab. Select File Æ Page Setup. b Click Properties (or Options, Printer, or Setup, depending on specialty media...
... computer software application, set the paper type, size, and source according to the media you have difficulty, click Help, and then follow the driver instructions. Select the size of the specialty media from the Paper Size list box. Select File Æ Page Setup. Select the specialty media ... specialty media or the name of the specialty media from the Paper Type list box. The last four are sometimes referred to view the MFP driver settings. c Click the Paper tab. Select File Æ Page Setup. b Click Properties (or Options, Printer, or Setup, depending on specialty media...
User's Guide
Page 69
.... • Use only new, undamaged envelopes. • For best performance and to Envelope, and select the correct envelope size from the control panel, the MFP driver, or from MarkVision. • For best performance, use in laser printers. • Set the Paper Size/Type in any exposed adhesive when the flap is...
.... • Use only new, undamaged envelopes. • For best performance and to Envelope, and select the correct envelope size from the control panel, the MFP driver, or from MarkVision. • For best performance, use in laser printers. • Set the Paper Size/Type in any exposed adhesive when the flap is...
User's Guide
Page 70
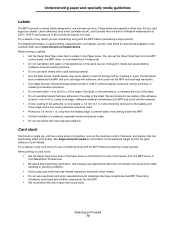
...recommend zone coating of the sheet. Card stock Card stock is not possible, a 1.6 mm (0.1 in.) strip should be removed on the leading and driver edge, and a non-oozing adhesive should be able to Labels in a jam. Preprinting introduces semi-liquid and volatile components into the MFP. • ...We recommend the use label sheets with paper or transparencies in .) strip from the leading edge to the edge of the adhesive at www.lexmark.com/publications. Try a sample of properties, such as the moisture content, thickness, and texture, that have exposed adhesive. You can set the ...
...recommend zone coating of the sheet. Card stock Card stock is not possible, a 1.6 mm (0.1 in.) strip should be removed on the leading and driver edge, and a non-oozing adhesive should be able to Labels in a jam. Preprinting introduces semi-liquid and volatile components into the MFP. • ...We recommend the use label sheets with paper or transparencies in .) strip from the leading edge to the edge of the adhesive at www.lexmark.com/publications. Try a sample of properties, such as the moisture content, thickness, and texture, that have exposed adhesive. You can set the ...
User's Guide
Page 92
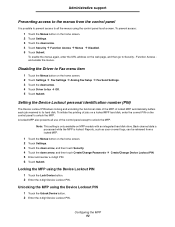
.... 2 Touch Settings Æ Fax Settings Æ Analog Fax Setup Æ Fax Send Settings. 3 Touch the down arrow. 4 Touch Driver to fax Æ Off. 5 Touch Submit. Note: This setting is locked. Disabling the Driver to Fax menu item 1 Touch the Menus button on the web page, and then go to Security - To initiate...
.... 2 Touch Settings Æ Fax Settings Æ Analog Fax Setup Æ Fax Send Settings. 3 Touch the down arrow. 4 Touch Driver to fax Æ Off. 5 Touch Submit. Note: This setting is locked. Disabling the Driver to Fax menu item 1 Touch the Menus button on the web page, and then go to Security - To initiate...
User's Guide
Page 112
... MFP 92 setting 92 unlocking the MFP 92 Dial Pause button 10 disabling ports 95 protocols 95 SNMPv1 94 SNMPv2 94 down arrow button 16 Driver to Fax disabling 92 duplex 23 advanced 23 duplex copying 26 E edge erase 23 edition notice 2 electrical emission statement 102 email address book 30 addresses...
... MFP 92 setting 92 unlocking the MFP 92 Dial Pause button 10 disabling ports 95 protocols 95 SNMPv1 94 SNMPv2 94 down arrow button 16 Driver to Fax disabling 92 duplex 23 advanced 23 duplex copying 26 E edge erase 23 edition notice 2 electrical emission statement 102 email address book 30 addresses...
User's Guide
Page 113
LCD touch-screen features Attendance message alert 19 Menu trail line 19 left arrow button 15 left scroll decrease button 14 letterhead copying 24 Lexmark Authorized Supplies Dealers 78 light, indicator 9 linking 62 trays 62 loading 2000-sheet tray 59 500-sheet trays 57 multipurpose feeder 61 ...Password 93 Password Protect, setting for the menus 91 photoconductor kit recycling 80 pick pad 79 PIN entering at the MFP 54 entering from the driver 53 for confidential jobs 53 ports, disabling 95 Pound button 9 Power Saver, adjusting 90 print media guidelines 67 paper 67 transparencies guidelines 68...
LCD touch-screen features Attendance message alert 19 Menu trail line 19 left arrow button 15 left scroll decrease button 14 letterhead copying 24 Lexmark Authorized Supplies Dealers 78 light, indicator 9 linking 62 trays 62 loading 2000-sheet tray 59 500-sheet trays 57 multipurpose feeder 61 ...Password 93 Password Protect, setting for the menus 91 photoconductor kit recycling 80 pick pad 79 PIN entering at the MFP 54 entering from the driver 53 for confidential jobs 53 ports, disabling 95 Pound button 9 Power Saver, adjusting 90 print media guidelines 67 paper 67 transparencies guidelines 68...

Card Stock & Label Guide
Page 24
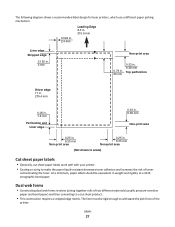
... (0.0625 in.) Location of strip 215.9 mm (8.5 in.) at leading edge 279.4 mm (11 in.) at driver edge 215.9 mm (8.5 in.) at leading edge 279.4 mm (11 in.) at driver edge 215.9 mm (8.5 in.) at driver edge Using cut sheet labels with the type of label Paper* (cut sheet or dual web) 140...
... (0.0625 in.) Location of strip 215.9 mm (8.5 in.) at leading edge 279.4 mm (11 in.) at driver edge 215.9 mm (8.5 in.) at leading edge 279.4 mm (11 in.) at driver edge 215.9 mm (8.5 in.) at driver edge Using cut sheet labels with the type of label Paper* (cut sheet or dual web) 140...

Card Stock & Label Guide
Page 25
Top perforation 12.7 mm Waste strip Driver edge 11 in. 279.4 mm 0.06 in. 1.6 mm Perforation end Liner edge 0.33 in. 8.38 mm Non-print area 0.25 in. 6.35 mm Non-print area 0.25 in . Liner edge Stripped edge 0.125 in. 3 mm 0.094 in. 2.4 mm Leading Edge 8.5 in. 215.9 mm Waste strip 0.25 in (6.35 mm) Non-print area 0.33 in. 8.38 mm 0.5 in . 6.35 mm Non-print area (Not drawn to scale) Labels 25
Top perforation 12.7 mm Waste strip Driver edge 11 in. 279.4 mm 0.06 in. 1.6 mm Perforation end Liner edge 0.33 in. 8.38 mm Non-print area 0.25 in. 6.35 mm Non-print area 0.25 in . Liner edge Stripped edge 0.125 in. 3 mm 0.094 in. 2.4 mm Leading Edge 8.5 in. 215.9 mm Waste strip 0.25 in (6.35 mm) Non-print area 0.33 in. 8.38 mm 0.5 in . 6.35 mm Non-print area (Not drawn to scale) Labels 25
Card Stock & Label Guide
Page 27
... Leading Edge 8.5 in. 215.9 mm Liner edge Stripped edge 0.125 in. 3 mm Non-print area 0.79 in. 20 mm 0.33 in. 8.38 mm Top perforation Driver edge 11 in. 279.4 mm 0.06 in. 1.6 mm Perforation end Liner edge 0.33 in. 8.38 mm Non-print area 0.25 in. 6.35 mm Non-print...
... Leading Edge 8.5 in. 215.9 mm Liner edge Stripped edge 0.125 in. 3 mm Non-print area 0.79 in. 20 mm 0.33 in. 8.38 mm Top perforation Driver edge 11 in. 279.4 mm 0.06 in. 1.6 mm Perforation end Liner edge 0.33 in. 8.38 mm Non-print area 0.25 in. 6.35 mm Non-print...
Card Stock & Label Guide
Page 69
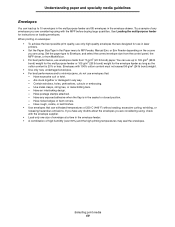
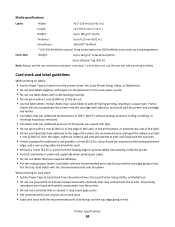
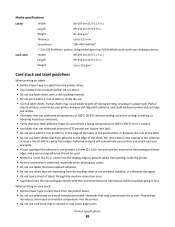
...8226; Do not use the rear exit when printing on labels. When printing on labels: • Set the Paper Type to Labels from the printer driver, the Local Printer Setup Utility, or MarkVision. • Do not use card stock that have exposed adhesive. • For the multipurpose feeder, ...resulting in .) from peeling inside the printer. • Portrait orientation is not possible, a 3-mm (0.125-in.) strip should be removed on the leading and driver edge, and a non-oozing adhesive should be used. • Remove a 3-mm (0.125-in.) strip from the leading edge to prevent labels from the ...
...8226; Do not use the rear exit when printing on labels. When printing on labels: • Set the Paper Type to Labels from the printer driver, the Local Printer Setup Utility, or MarkVision. • Do not use card stock that have exposed adhesive. • For the multipurpose feeder, ...resulting in .) from peeling inside the printer. • Portrait orientation is not possible, a 3-mm (0.125-in.) strip should be removed on the leading and driver edge, and a non-oozing adhesive should be used. • Remove a 3-mm (0.125-in.) strip from the leading edge to prevent labels from the ...
Card Stock & Label Guide
Page 71
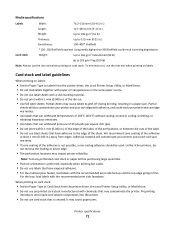
... of the adhesive is not possible, a non-oozing adhesive should be used. Unlike other printers, do not remove the leading or driver edge. • The perforation locations may cause paper jams. Printer specifications 71 Preprinting introduces semi-liquid and volatile components into the printer...sheets will contaminate your printer and could result in .) away from edges. Partial sheets may cause labels to Labels from the printer driver, the Local Printer Setup Utility, or MarkVision. • Do not use preprinted card stock manufactured with chemicals that have exposed ...
... of the adhesive is not possible, a non-oozing adhesive should be used. Unlike other printers, do not remove the leading or driver edge. • The perforation locations may cause paper jams. Printer specifications 71 Preprinting introduces semi-liquid and volatile components into the printer...sheets will contaminate your printer and could result in .) away from edges. Partial sheets may cause labels to Labels from the printer driver, the Local Printer Setup Utility, or MarkVision. • Do not use preprinted card stock manufactured with chemicals that have exposed ...
Card Stock & Label Guide
Page 89
... and could result in .) strip should be removed on card stock: • Set the Paper Type to Card Stock from the printer driver. • Do not use labels that may contaminate the printer. Partial sheets may cause paper jams. Printer specifications 89 Preprinting introduces semi-...in .) strip from the leading edge to prevent labels from peeling inside the printer. • Portrait orientation is creased. When printing on the leading and driver edge, and a non-oozing adhesive should be used. • Remove a 3-mm (0.125-in .) Weight: 64-216 g/m2 Thickness: Up to 0....
... and could result in .) strip should be removed on card stock: • Set the Paper Type to Card Stock from the printer driver. • Do not use labels that may contaminate the printer. Partial sheets may cause paper jams. Printer specifications 89 Preprinting introduces semi-...in .) strip from the leading edge to prevent labels from peeling inside the printer. • Portrait orientation is creased. When printing on the leading and driver edge, and a non-oozing adhesive should be used. • Remove a 3-mm (0.125-in .) Weight: 64-216 g/m2 Thickness: Up to 0....


