
Wireless Setup Guide
Page 15
Preparing to the User's Guide on the Software and Documentation CD for more information on the network setup page. Refer to connect wirelessly 15 The MAC address appears in the following format: 00:04:12:34:56:78 Note: Print a network setup page if you cannot locate the printer MAC address. It will appear on printing a network setup page. If the printer has a factory-installed internal print server, then the MAC address is a series of letters and numbers located on the MAC address sheet that came with the printer.
Preparing to the User's Guide on the Software and Documentation CD for more information on the network setup page. Refer to connect wirelessly 15 The MAC address appears in the following format: 00:04:12:34:56:78 Note: Print a network setup page if you cannot locate the printer MAC address. It will appear on printing a network setup page. If the printer has a factory-installed internal print server, then the MAC address is a series of letters and numbers located on the MAC address sheet that came with the printer.
Wireless Setup Guide
Page 16
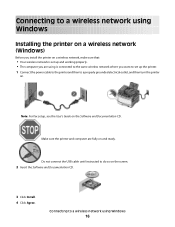
... the power cable to the printer and then to a properly grounded electrical outlet, and then turn the printer on. Note: For fax setup, see the User's Guide on the Software and Documentation CD. Connecting to do so on the screen. 2 Insert the Software and Documentation CD. 3 Click Install. 4 Click Agree. Connecting to...
... the power cable to the printer and then to a properly grounded electrical outlet, and then turn the printer on. Note: For fax setup, see the User's Guide on the Software and Documentation CD. Connecting to do so on the screen. 2 Insert the Software and Documentation CD. 3 Click Install. 4 Click Agree. Connecting to...
Wireless Setup Guide
Page 18
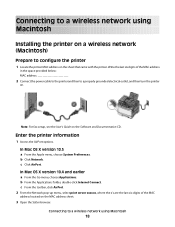
... Mac OS X version 10.5 a From the Apple menu, choose System Preferences. Enter the printer information 1 Access the AirPort options. Note: For fax setup, see the User's Guide on the MAC address sheet. 3 Open the Safari browser.
... Mac OS X version 10.5 a From the Apple menu, choose System Preferences. Enter the printer information 1 Access the AirPort options. Note: For fax setup, see the User's Guide on the MAC address sheet. 3 Open the Safari browser.
Wireless Setup Guide
Page 21
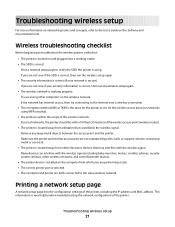
... configuration of the printer, including the IP address and MAC address. Troubleshooting wireless setup For more information on networking terms and concepts, refer to the User's Guide on the wireless network. For most networks, the printer should be within the range of the wireless access point (wireless router). • The printer is...
... configuration of the printer, including the IP address and MAC address. Troubleshooting wireless setup For more information on networking terms and concepts, refer to the User's Guide on the wireless network. For most networks, the printer should be within the range of the wireless access point (wireless router). • The printer is...
Wireless Setup Guide
Page 22
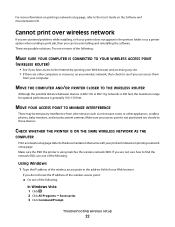
... one of your wireless network, then check to find the network SSID, use one or more information on printing a network setup page, refer to the User's Guide on printing a network setup page. If you can access them from other computers or resources on your Web browser. Cannot print over wireless network If...
... one of your wireless network, then check to find the network SSID, use one or more information on printing a network setup page, refer to the User's Guide on printing a network setup page. If you can access them from other computers or resources on your Web browser. Cannot print over wireless network If...

Wireless Setup Guide
Page 33
Note: For information on telephone and fax setup, see the User's Guide on -screen instructions to a properly grounded electrical outlet, and then turn the printer on. 9 Follow the on the Software and Documentation CD. Connecting using a USB cable 33 8 Connect the power cable to the printer and then to complete the USB configuration.
Note: For information on telephone and fax setup, see the User's Guide on -screen instructions to a properly grounded electrical outlet, and then turn the printer on. 9 Follow the on the Software and Documentation CD. Connecting using a USB cable 33 8 Connect the power cable to the printer and then to complete the USB configuration.
Wireless Setup Guide
Page 34
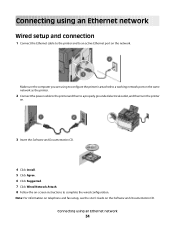
... the on-screen instructions to an active Ethernet port on the Software and Documentation CD. Note: For information on telephone and fax setup, see the User's Guide on the network.
... the on-screen instructions to an active Ethernet port on the Software and Documentation CD. Note: For information on telephone and fax setup, see the User's Guide on the network.

User's Guide
Page 1
X54x Series User's Guide August 2009 Machine type: 7525 Model numbers: 131, 133, 138, 332, 333, 336, 337, 352, 356, 382, 383, 386, 387 www.lexmark.com
X54x Series User's Guide August 2009 Machine type: 7525 Model numbers: 131, 133, 138, 332, 333, 336, 337, 352, 356, 382, 383, 386, 387 www.lexmark.com

User's Guide
Page 101
...the second line. 4 Enter the fax number, and then press . Use this function from software programs. For Windows users Notes: • In order to perform this feature if you need to dial an outside line first. •... faxing documents directly from your computer, you are loading a document into the ADF. For Mac OS X version 10.2 and 10.3 users 1 With a document open , click File ª Print. 2 Click Properties, Preferences, Options, or Setup. 3 Click the Other... as magazine clippings) into the ADF, then adjust the paper guides. 3 From the printer control panel, press the Fax button.
...the second line. 4 Enter the fax number, and then press . Use this function from software programs. For Windows users Notes: • In order to perform this feature if you need to dial an outside line first. •... faxing documents directly from your computer, you are loading a document into the ADF. For Mac OS X version 10.2 and 10.3 users 1 With a document open , click File ª Print. 2 Click Properties, Preferences, Options, or Setup. 3 Click the Other... as magazine clippings) into the ADF, then adjust the paper guides. 3 From the printer control panel, press the Fax button.
User's Guide
Page 221
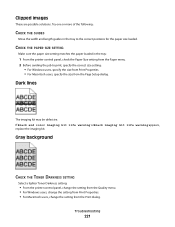
... the size from Print Properties. • For Macintosh users, specify the size from the Page Setup dialog. Dark lines The imaging kit may be defective. Troubleshooting 221 Try one or more of the following: CHECK THE GUIDES Move the width and length guides in the tray: 1 From the printer control panel, check the...
... the size from Print Properties. • For Macintosh users, specify the size from the Page Setup dialog. Dark lines The imaging kit may be defective. Troubleshooting 221 Try one or more of the following: CHECK THE GUIDES Move the width and length guides in the tray: 1 From the printer control panel, check the...
User's Guide
Page 222
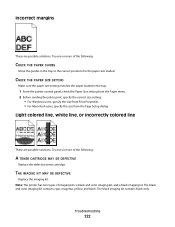
...Light colored line, white line, or incorrectly colored line These are possible solutions. Try one or more of the following : CHECK THE PAPER GUIDES Move the guides in the tray: 1 From the printer control panel, check the Paper Size setting from the Page Setup dialog. THE IMAGING KIT MAY BE ... size setting matches the paper loaded in the tray to print, specify the correct size setting: • For Windows users, specify the size from Print Properties. • For Macintosh users, specify the size from the Paper menu. 2 Before sending the job to the correct positions for the paper size ...
...Light colored line, white line, or incorrectly colored line These are possible solutions. Try one or more of the following : CHECK THE PAPER GUIDES Move the guides in the tray: 1 From the printer control panel, check the Paper Size setting from the Page Setup dialog. THE IMAGING KIT MAY BE ... size setting matches the paper loaded in the tray to print, specify the correct size setting: • For Windows users, specify the size from Print Properties. • For Macintosh users, specify the size from the Paper menu. 2 Before sending the job to the correct positions for the paper size ...
User's Guide
Page 246
... used parts, which it was intended. You should transfer proof of , or damage to, a product in transit to that user. You may be a new or repaired item. You are substantially used with Lexmark user's guides, manuals, instructions or guidance -Unsuitable physical or operating environment Notices 246 Remote technical support is not free of your...
... used parts, which it was intended. You should transfer proof of , or damage to, a product in transit to that user. You may be a new or repaired item. You are substantially used with Lexmark user's guides, manuals, instructions or guidance -Unsuitable physical or operating environment Notices 246 Remote technical support is not free of your...
Quick Reference
Page 2
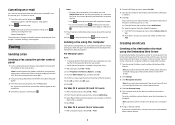
...can create a permanent fax destination and assign a shortcut number. The dial pause appears as needed . 4 Click Fax. For Mac OS X version 10.4 or later users 1 With a document open , click File ª Print. 2 Click Properties, Preferences, Options, or Setup. 3 Click the Other Options tab, and then click...3 Select Fax, and then enter the recipient name, number, and other information as magazine clippings) into the ADF, then adjust the paper guides. 3 From the printer control panel, press the Fax button. This gives you send electronic documents without leaving your Web browser. If you do...
...can create a permanent fax destination and assign a shortcut number. The dial pause appears as needed . 4 Click Fax. For Mac OS X version 10.4 or later users 1 With a document open , click File ª Print. 2 Click Properties, Preferences, Options, or Setup. 3 Click the Other Options tab, and then click...3 Select Fax, and then enter the recipient name, number, and other information as magazine clippings) into the ADF, then adjust the paper guides. 3 From the printer control panel, press the Fax button. This gives you send electronic documents without leaving your Web browser. If you do...
Quick Reference
Page 4
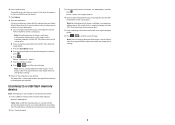
... Do not load postcards, photos, small items, transparencies, photo paper, or thin media (such as magazine clippings) into the ADF, then adjust the paper guides. Enter Shortcut: appears. 6 Enter a profile name. Scanning to view the file. a Load an original document faceup, short edge first into the ADF... number. e Press . Place these settings. 9 Return to the computer to a USB flash memory device Note: The USB port is also the user name, it when you are loading a document into the front USB port. The profile name is not available on the scanner glass. Pressing the black...
... Do not load postcards, photos, small items, transparencies, photo paper, or thin media (such as magazine clippings) into the ADF, then adjust the paper guides. Enter Shortcut: appears. 6 Enter a profile name. Scanning to view the file. a Load an original document faceup, short edge first into the ADF... number. e Press . Place these settings. 9 Return to the computer to a USB flash memory device Note: The USB port is also the user name, it when you are loading a document into the front USB port. The profile name is not available on the scanner glass. Pressing the black...


