
User's Guide
Page 3
......32 Connecting to a telephone ...33 Setting up to fax while behind a PBX ...34 Using a digital phone service ...35 Understanding the control panel...35 Using the control panel ...35 Saving settings...39 Installing another language control panel...40 Installing the printer software...41 Understanding the printer software...41 Turning printing voice notification on or off...44...
......32 Connecting to a telephone ...33 Setting up to fax while behind a PBX ...34 Using a digital phone service ...35 Understanding the control panel...35 Using the control panel ...35 Saving settings...39 Installing another language control panel...40 Installing the printer software...41 Understanding the printer software...41 Turning printing voice notification on or off...44...
User's Guide
Page 6
...Scanning a document using the computer...87 Scanning text for editing...88 Scanning images for editing...88 Scanning a photo to the Library...88 Scanning multiple photos at one time using the computer 89 Creating a PDF from a scanned item...89 Canceling a scan job...90 ... 94 Faxing 96 Sending a fax...96 Entering a fax number ...96 Sending a fax using the software...96 Sending a fax using the control panel ...97 Sending a fax while listening to a call (On Hook Dial)...97 Sending a broadcast fax at a scheduled time...98 Receiving a fax...98 Receiving a fax manually...98 Setting a fax manual ...
...Scanning a document using the computer...87 Scanning text for editing...88 Scanning images for editing...88 Scanning a photo to the Library...88 Scanning multiple photos at one time using the computer 89 Creating a PDF from a scanned item...89 Canceling a scan job...90 ... 94 Faxing 96 Sending a fax...96 Entering a fax number ...96 Sending a fax using the software...96 Sending a fax using the control panel ...97 Sending a fax while listening to a call (On Hook Dial)...97 Sending a broadcast fax at a scheduled time...98 Receiving a fax...98 Receiving a fax manually...98 Setting a fax manual ...

User's Guide
Page 7
... a fax header...106 Setting up a fax footer ...107 Blocking junk faxes...108 Blocking unwanted changes to fax settings...108 Using the Fax Solutions Software ...109 Setting up a dialing prefix ...110 Setting the distinctive ring...110 Setting the number of rings before receiving a fax automatically 111 Setting up Speed Dial...111 Printing fax activity reports...112 Maintaining the printer 113...
... a fax header...106 Setting up a fax footer ...107 Blocking junk faxes...108 Blocking unwanted changes to fax settings...108 Using the Fax Solutions Software ...109 Setting up a dialing prefix ...110 Setting the distinctive ring...110 Setting the number of rings before receiving a fax automatically 111 Setting up Speed Dial...111 Printing fax activity reports...112 Maintaining the printer 113...
User's Guide
Page 9
..., scanning, or faxing ...144 Wrong printer is attached...144 Updating the printer software ...144 Bidirectional communication is not established...145 Experiencing poor quality or incorrect output ...145 Cannot print from digital camera using PictBridge ...146 Partial 4 x 6 in. (10 x 15 cm) photo prints when using ...when memory card is inserted ...150 Copy troubleshooting...151 Copier does not respond ...151 Scanner unit does not close...151 Poor copy quality...151 Partial document or photo copies...152 Scan troubleshooting...153 Scanner does not respond ...153 Scan was not successful ...153...
..., scanning, or faxing ...144 Wrong printer is attached...144 Updating the printer software ...144 Bidirectional communication is not established...145 Experiencing poor quality or incorrect output ...145 Cannot print from digital camera using PictBridge ...146 Partial 4 x 6 in. (10 x 15 cm) photo prints when using ...when memory card is inserted ...150 Copy troubleshooting...151 Copier does not respond ...151 Scanner unit does not close...151 Poor copy quality...151 Partial document or photo copies...152 Scan troubleshooting...153 Scanner does not respond ...153 Scan was not successful ...153...
User's Guide
Page 14
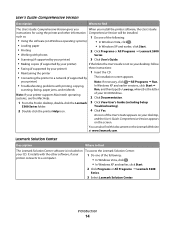
... gives you When you install the printer software, the User's Guide: instructions for using the printer and other software, if your CD-ROM drive. 2 Click Documentation. 1 From the Finder desktop, double-click the Lexmark 3 Click View User's Guide (including Setup 5300 Series folder. To access the Lexmark Solution Center: 1 Do one of the User's Guide appears on...
... gives you When you install the printer software, the User's Guide: instructions for using the printer and other software, if your CD-ROM drive. 2 Click Documentation. 1 From the Finder desktop, double-click the Lexmark 3 Click View User's Guide (including Setup 5300 Series folder. To access the Lexmark Solution Center: 1 Do one of the User's Guide appears on...

User's Guide
Page 17
...printer Your printer may need to purchase a USB cable separately. Note: You may not support: • Memory Cards • PictBridge-enabled digital camera • Photo Card mode Checking the box contents 12 3 4 1 2 3 7 5 6 Name Description 1 Black print cartridge Cartridges to the power supply port located at the back of the printer...be installed into the printer 2 Color print cartridge Note: Cartridge combinations vary depending on the installation software CD. Setting up the printer 17 For more information about connecting this cord, see "Choosing a fax connection" on page ...
...printer Your printer may need to purchase a USB cable separately. Note: You may not support: • Memory Cards • PictBridge-enabled digital camera • Photo Card mode Checking the box contents 12 3 4 1 2 3 7 5 6 Name Description 1 Black print cartridge Cartridges to the power supply port located at the back of the printer...be installed into the printer 2 Color print cartridge Note: Cartridge combinations vary depending on the installation software CD. Setting up the printer 17 For more information about connecting this cord, see "Choosing a fax connection" on page ...
User's Guide
Page 32
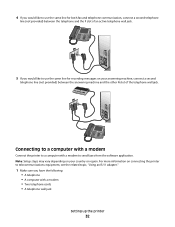
... between the telephone and the F slot of the telephone wall jack. 4 If you would like to use the same line for both fax and telephone communication, connect a second telephone line (not provided) between the answering machine and the other N slot of an active telephone ...wall jack. 5 If you have the following: • A telephone • A computer with a modem to send faxes from the software application. Connecting to a computer with a modem Connect the printer to a computer with a modem • Two telephone cords • A telephone wall jack Setting up the...
... between the telephone and the F slot of the telephone wall jack. 4 If you would like to use the same line for both fax and telephone communication, connect a second telephone line (not provided) between the answering machine and the other N slot of an active telephone ...wall jack. 5 If you have the following: • A telephone • A computer with a modem to send faxes from the software application. Connecting to a computer with a modem Connect the printer to a computer with a modem • Two telephone cords • A telephone wall jack Setting up the...
User's Guide
Page 41
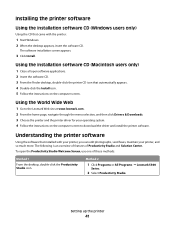
... the Productivity Studio Welcome Screen, use one of Productivity Studio and Solution Center. Method 2 1 Click Programs or All Programs ΠLexmark 5300 Series. 2 Select Productivity Studio. Installing the printer software Using the installation software CD (Windows users only) Using the CD that came with your printer, you can edit photographs, send faxes, maintain your operating system. 4 Follow...
... the Productivity Studio Welcome Screen, use one of Productivity Studio and Solution Center. Method 2 1 Click Programs or All Programs ΠLexmark 5300 Series. 2 Select Productivity Studio. Installing the printer software Using the installation software CD (Windows users only) Using the CD that came with your printer, you can edit photographs, send faxes, maintain your operating system. 4 Follow...
User's Guide
Page 42
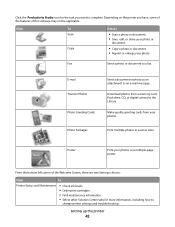
...a photo or document. • Save, edit, or share your photo or document. • Copy a photo or document. • Reprint or enlarge your photos. Setting up the printer 42 E-mail Transfer Photos Photo Greeting Cards Photo Packages Send a document or photo as a multiple-page poster. Print multiple photos in... you have, some of the features of this software may not be applicable. Click the Productivity Studio icon for more information, including how to change printer settings and troubleshooting. Download photos from your photo. Make quality greeting cards from a memory card,...
...a photo or document. • Save, edit, or share your photo or document. • Copy a photo or document. • Reprint or enlarge your photos. Setting up the printer 42 E-mail Transfer Photos Photo Greeting Cards Photo Packages Send a document or photo as a multiple-page poster. Print multiple photos in... you have, some of the features of this software may not be applicable. Click the Productivity Studio icon for more information, including how to change printer settings and troubleshooting. Download photos from your photo. Make quality greeting cards from a memory card,...

User's Guide
Page 43
... How To • Learn how to such printing features as photos, envelopes, cards, banners, iron-on the Solution Center icon. 2 Click Setup and diagnose printer. 1 Click Programs or All Programs Œ Lexmark 5300 Series. 2 Select Solution Center. Advanced • Change ...printer. • Obtain software version information. • View ink levels and order new print cartridges. Troubleshooting • Learn tips about the current status. • Solve printer problems. • View ink levels and order new print cartridges. Click Fax History and Settings To Set printer fax...
... How To • Learn how to such printing features as photos, envelopes, cards, banners, iron-on the Solution Center icon. 2 Click Setup and diagnose printer. 1 Click Programs or All Programs Œ Lexmark 5300 Series. 2 Select Solution Center. Advanced • Change ...printer. • Obtain software version information. • View ink levels and order new print cartridges. Troubleshooting • Learn tips about the current status. • Solve printer problems. • View ink levels and order new print cartridges. Click Fax History and Settings To Set printer fax...

User's Guide
Page 46
... ΠPrinters or Printers and Faxes. b Right-click the Lexmark 5300 Series icon. Sharing a printer in the form \\server \printer. e Click OK. 3 Locate the printer from the remote computer. Note: The remote computer is the one that is listed with the printer name. b Install the printer software on all computers printing to the printer: a Click Start ΠSettings ΠPrinters or Printers and Faxes. j Click...
... ΠPrinters or Printers and Faxes. b Right-click the Lexmark 5300 Series icon. Sharing a printer in the form \\server \printer. e Click OK. 3 Locate the printer from the remote computer. Note: The remote computer is the one that is listed with the printer name. b Install the printer software on all computers printing to the printer: a Click Start ΠSettings ΠPrinters or Printers and Faxes. j Click...
User's Guide
Page 47
... Printers or Printers and Faxes. 2 Right-click the Lexmark 5300 Series icon. 3 From the sidebar menu, select Properties. 4 Click the Ports tab. 5 Make sure: • The port is set as the port. Click Configure to find and configure newly added printers. If the software detects a direct network attached printer,... feature, create and enter a name for your computer. When you must first highlight the printer in the window. Add printers Specify remote subnets that is not set to a USB port. • File is already installed on your computer. Contact your system support person ...
... Printers or Printers and Faxes. 2 Right-click the Lexmark 5300 Series icon. 3 From the sidebar menu, select Properties. 4 Click the Ports tab. 5 Make sure: • The port is set as the port. Click Configure to find and configure newly added printers. If the software detects a direct network attached printer,... feature, create and enter a name for your computer. When you must first highlight the printer in the window. Add printers Specify remote subnets that is not set to a USB port. • File is already installed on your computer. Contact your system support person ...
User's Guide
Page 61
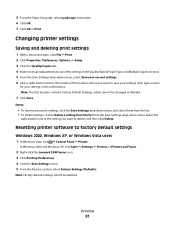
Changing printer settings Saving and deleting print settings 1 With a document open, click File ΠPrint. 2 Click Properties, Preferences, Options, or Setup. 3 Click the Quality/Copies tab. 4 Make ... printer software to factory default settings Windows 2000, Windows XP, or Windows Vista users 1 In Windows Vista, click ΠControl Panel ΠPrinter. Printing 61 Note: The first location contains Factory Default Settings, which cannot be deleted. In Windows 2000 and Windows XP, click Start ΠSettings ΠPrinters or Printers and Faxes. 2 Right-click the Lexmark...
Changing printer settings Saving and deleting print settings 1 With a document open, click File ΠPrint. 2 Click Properties, Preferences, Options, or Setup. 3 Click the Quality/Copies tab. 4 Make ... printer software to factory default settings Windows 2000, Windows XP, or Windows Vista users 1 In Windows Vista, click ΠControl Panel ΠPrinter. Printing 61 Note: The first location contains Factory Default Settings, which cannot be deleted. In Windows 2000 and Windows XP, click Start ΠSettings ΠPrinters or Printers and Faxes. 2 Right-click the Lexmark...
User's Guide
Page 96
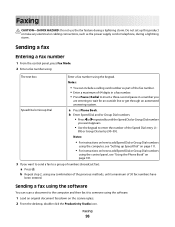
... computer, see "Using the Phone Book" on the scanner glass. 2 From the desktop, double-click the Productivity Studio icon. Faxing 96 Notes: • You can scan a document to the computer and then fax it to enter the number of 30 fax numbers have been entered. Do not set up Speed ... Redial to insert a three-second pause in a number you are entering to add Speed Dial or Group Dial numbers using the keypad. Sending a fax using the software You can include a calling card number as the power supply cord or telephone, during a lightning storm. Notes: • For instructions on how...
... computer, see "Using the Phone Book" on the scanner glass. 2 From the desktop, double-click the Productivity Studio icon. Faxing 96 Notes: • You can scan a document to the computer and then fax it to enter the number of 30 fax numbers have been entered. Do not set up Speed ... Redial to insert a three-second pause in a number you are entering to add Speed Dial or Group Dial numbers using the keypad. Sending a fax using the software You can include a calling card number as the power supply cord or telephone, during a lightning storm. Notes: • For instructions on how...

User's Guide
Page 99
Using Caller ID from the software Caller ID is a service provided by some telephone companies that identifies the telephone number or the name of the person who is calling. If you subscribe to this service, it works with the printer. Using Caller ID from the control ...and Pattern 2 (DTMF). Note: For information on the display. The printer receives the fax. If you subscribe to this service, it works with the printer. Depending on the telephone after you answer it and hear fax tones. 3 To receive a fax if you have set up a manual answer code, see the related topic...
Using Caller ID from the software Caller ID is a service provided by some telephone companies that identifies the telephone number or the name of the person who is calling. If you subscribe to this service, it works with the printer. Using Caller ID from the control ...and Pattern 2 (DTMF). Note: For information on the display. The printer receives the fax. If you subscribe to this service, it works with the printer. Depending on the telephone after you answer it and hear fax tones. 3 To receive a fax if you have set up a manual answer code, see the related topic...

User's Guide
Page 103
Faxing 103 Customizing fax settings Customizing settings using the Fax Setup Utility You can adjust the fax settings in the Fax Setup Utility. These settings apply to the faxes you send or receive. 1 From the desktop, double-click the Productivity Studio icon. 2 Click Fax History and Settings. The following screen appears. The Fax Solutions Software screen appears. 3 Click Adjust speed dial list and other fax settings.
Faxing 103 Customizing fax settings Customizing settings using the Fax Setup Utility You can adjust the fax settings in the Fax Setup Utility. These settings apply to the faxes you send or receive. 1 From the desktop, double-click the Productivity Studio icon. 2 Click Fax History and Settings. The following screen appears. The Fax Solutions Software screen appears. 3 Click Adjust speed dial list and other fax settings.
User's Guide
Page 108
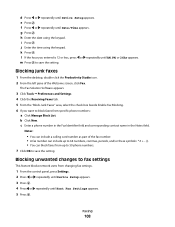
... time using the keypad. l If the hour you want to save the setting. The Fax Solution Software appears. 3 Click Tools ΠPreferences and Settings. 4 Click the Receiving Faxes tab. 5 From the "Block Junk Faxes" area, select the check box beside Enable Fax Blocking. 6 If you entered is 12 or less, press or repeatedly until Device...
... time using the keypad. l If the hour you want to save the setting. The Fax Solution Software appears. 3 Click Tools ΠPreferences and Settings. 4 Click the Receiving Faxes tab. 5 From the "Block Junk Faxes" area, select the check box beside Enable Fax Blocking. 6 If you entered is 12 or less, press or repeatedly until Device...

User's Guide
Page 109
.... b Click Programs or All Programs Œ Lexmark 5300 Series. The Productivity Studio screen appears. a Do one of the following : • In Windows Vista, click . • In Windows XP and earlier, click Start. Faxing 109 6 Press or until Block appears. 7 Press . d Click the Fax icon. 2 When the Fax Solutions Software appears, as shown, use the Phonebook, so...
.... b Click Programs or All Programs Œ Lexmark 5300 Series. The Productivity Studio screen appears. a Do one of the following : • In Windows Vista, click . • In Windows XP and earlier, click Start. Faxing 109 6 Press or until Block appears. 7 Press . d Click the Fax icon. 2 When the Fax Solutions Software appears, as shown, use the Phonebook, so...

User's Guide
Page 110
... the Ringing and Answering tab. Help Locate information on faxing, fax settings, and so on page 103 5 After changing settings, click OK. 6 Close the Fax Solutions Software. The prefix can program your printer to have a distinctive ring pattern and phone number for fax lists. • Adjust fax settings. If you subscribe to this service, you can add...
... the Ringing and Answering tab. Help Locate information on faxing, fax settings, and so on page 103 5 After changing settings, click OK. 6 Close the Fax Solutions Software. The prefix can program your printer to have a distinctive ring pattern and phone number for fax lists. • Adjust fax settings. If you subscribe to this service, you can add...

User's Guide
Page 112
Faxing 112 Notes: • You can include a calling card number as part of the fax number. • A fax number can include up to 64 numbers, commas, periods, spaces, and/or these symbols Printing fax activity reports 1 From the desktop, double-click the Productivity Studio icon. 2 From the left pane of the Welcome screen, click Fax. The Fax Solution Software appears. 3 Click Tools Œ Create Report. 4 From the Display drop-down list, select Sent and Outgoing Faxes, Received, or Incoming Faxes. 5 Choose a date range. 6 Click Print.
Faxing 112 Notes: • You can include a calling card number as part of the fax number. • A fax number can include up to 64 numbers, commas, periods, spaces, and/or these symbols Printing fax activity reports 1 From the desktop, double-click the Productivity Studio icon. 2 From the left pane of the Welcome screen, click Fax. The Fax Solution Software appears. 3 Click Tools Œ Create Report. 4 From the Display drop-down list, select Sent and Outgoing Faxes, Received, or Incoming Faxes. 5 Choose a date range. 6 Click Print.


