
Getting Started
Page 3
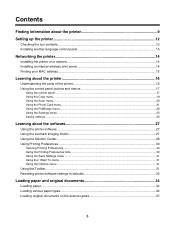
... Using the Photo Card menu ...31 Using the PictBridge menu ...32 Using the Settings menu ...33 Saving settings ...35 Learning about the software 37 Using the printer software...37 Using the Lexmark Imaging Studio...37 Using the Solution Center...38 Using Printing Preferences...40 Opening Printing Preferences ...40 Using the Save Settings menu ...40...
... Using the Photo Card menu ...31 Using the PictBridge menu ...32 Using the Settings menu ...33 Saving settings ...35 Learning about the software 37 Using the printer software...37 Using the Lexmark Imaging Studio...37 Using the Solution Center...38 Using Printing Preferences...40 Opening Printing Preferences ...40 Using the Save Settings menu ...40...
Getting Started
Page 4
......64 Resetting to factory default settings 65 Resetting an internal wireless print server to factory default settings 65 Uninstalling and reinstalling the software 66 Advanced wireless setup 68 Adding a printer to an existing ad hoc wireless network 68 Creating an ad hoc wireless network 69 Notices...72 Edition notice...72 Networking glossary...
......64 Resetting to factory default settings 65 Resetting an internal wireless print server to factory default settings 65 Uninstalling and reinstalling the software 66 Advanced wireless setup 68 Adding a printer to an existing ad hoc wireless network 68 Creating an ad hoc wireless network 69 Notices...72 Edition notice...72 Networking glossary...
Getting Started
Page 6
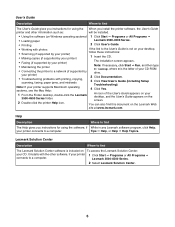
... Where to find The User's Guide gives you install the printer software, the User's Guide printer and other software, if your printer supports Macintosh operating systems, see the Mac Help: 4 Click Yes. 1 From the Finder desktop, double-click the Lexmark 3500-4500 Series folder. Note: If your printer 1 Click Start ΠPrograms or All Programs Πconnects...
... Where to find The User's Guide gives you install the printer software, the User's Guide printer and other software, if your printer supports Macintosh operating systems, see the Mac Help: 4 Click Yes. 1 From the Finder desktop, double-click the Lexmark 3500-4500 Series folder. Note: If your printer 1 Click Start ΠPrograms or All Programs Πconnects...
Getting Started
Page 37
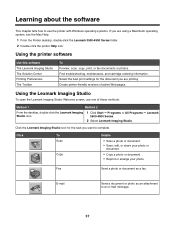
... Studio icon. 1 Click Start ΠPrograms or All Programs ΠLexmark 3500-4500 Series. 2 Select Lexmark Imaging Studio. Learning about the software This chapter tells how to use one of active Web pages. Using the printer software Use this software The Lexmark Imaging Studio The Solution Center Printing Preferences The Toolbar To Preview, scan, copy, print, or...
... Studio icon. 1 Click Start ΠPrograms or All Programs ΠLexmark 3500-4500 Series. 2 Select Lexmark Imaging Studio. Learning about the software This chapter tells how to use one of active Web pages. Using the printer software Use this software The Lexmark Imaging Studio The Solution Center Printing Preferences The Toolbar To Preview, scan, copy, print, or...
Getting Started
Page 42
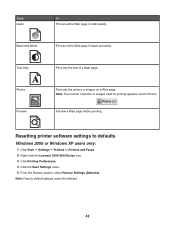
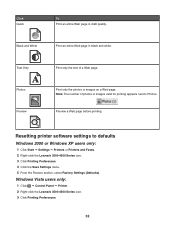
...Web page. Note: The number of a Web page. Click Quick To Print an entire Web page in black and white. Resetting printer software settings to Photos. Text Only A Photos Preview Print only the text of photos or images valid for printing appears next to defaults Windows... 2000 or Windows XP users only: 1 Click Start ΠSettings ΠPrinters or Printers and Faxes. 2 Right-click the Lexmark 3500-4500 Series icon. 3 Click Printing Preferences. 4 Click the Save Settings menu. 5 From the Restore section, select Factory ...
...Web page. Note: The number of a Web page. Click Quick To Print an entire Web page in black and white. Resetting printer software settings to Photos. Text Only A Photos Preview Print only the text of photos or images valid for printing appears next to defaults Windows... 2000 or Windows XP users only: 1 Click Start ΠSettings ΠPrinters or Printers and Faxes. 2 Right-click the Lexmark 3500-4500 Series icon. 3 Click Printing Preferences. 4 Click the Save Settings menu. 5 From the Restore section, select Factory ...
Getting Started
Page 49
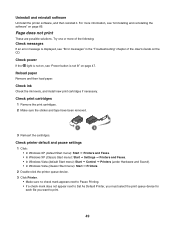
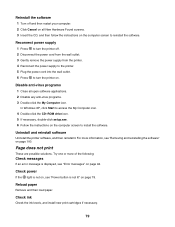
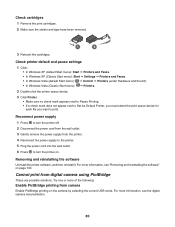
...appears next to Pause Printing. • If a check mark does not appear next to Set As Default Printer, you must select the print queue device for each file you want to print. 49 Check print cartridges...the cartridges. Check power If the light is not on, see "Power button is displayed, see "Uninstalling and reinstalling the software" on page 47. Reload paper Remove and then load paper. Try one or more information, see "Error messages" in..., and install new print cartridges if necessary. Uninstall and reinstall software Uninstall the printer software, and then reinstall it.
...appears next to Pause Printing. • If a check mark does not appear next to Set As Default Printer, you must select the print queue device for each file you want to print. 49 Check print cartridges...the cartridges. Check power If the light is not on, see "Power button is displayed, see "Uninstalling and reinstalling the software" on page 47. Reload paper Remove and then load paper. Try one or more information, see "Error messages" in..., and install new print cartridges if necessary. Uninstall and reinstall software Uninstall the printer software, and then reinstall it.
Getting Started
Page 50
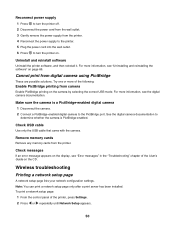
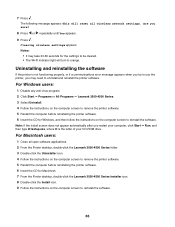
...PictBridge printing from camera Enable PictBridge printing on . For more of the printer, press Settings. 2 Press or repeatedly until Network Setup appears. 50 Uninstall and reinstall software Uninstall the printer software, and then reinstall it. Try one or more information, see the digital... camera documentation. Reconnect power supply 1 Press to turn the printer off. 2 Disconnect the power cord from the wall ...
...PictBridge printing from camera Enable PictBridge printing on . For more of the printer, press Settings. 2 Press or repeatedly until Network Setup appears. 50 Uninstall and reinstall software Uninstall the printer software, and then reinstall it. Try one or more information, see the digital... camera documentation. Reconnect power supply 1 Press to turn the printer off. 2 Disconnect the power cord from the wall ...
Getting Started
Page 58
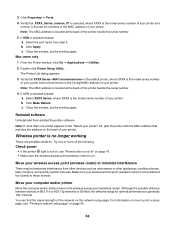
... and then reinstall the printer software. Wireless printer is selected instead: a Select the port name from other devices such as microwaves or other appliances, cordless phones, baby monitors, and security system cameras. Move your computer and/or printer Move the computer and/or printer closer to print a setup page, see "...Power button is not lit" on page 47. • Make sure the wireless access point (wireless router) is on the back of your printer. You can find the signal strength of the network on how to the wireless access point (wireless router). Mac users only 1 From the Finder...
... and then reinstall the printer software. Wireless printer is selected instead: a Select the port name from other devices such as microwaves or other appliances, cordless phones, baby monitors, and security system cameras. Move your computer and/or printer Move the computer and/or printer closer to print a setup page, see "...Power button is not lit" on page 47. • Make sure the wireless access point (wireless router) is on the back of your printer. You can find the signal strength of the network on how to the wireless access point (wireless router). Mac users only 1 From the Finder...
Getting Started
Page 66
... 2 Click Start ΠPrograms or All Programs ΠLexmark 3500-4500 Series. 3 Select Uninstall. 4 Follow the instructions on the computer screen to remove the printer software. 5 Restart the computer before reinstalling the printer software. 6 Insert the CD for Windows, and then follow the ...icon. 4 Follow the instructions on the computer screen to remove the printer software. 5 Restart the computer before reinstalling the printer software. 6 Insert the CD for Macintosh. 7 From the Finder desktop, double-click the Lexmark 3500-4500 Series Installer icon. 8 Double-click the Install icon. ...
... 2 Click Start ΠPrograms or All Programs ΠLexmark 3500-4500 Series. 3 Select Uninstall. 4 Follow the instructions on the computer screen to remove the printer software. 5 Restart the computer before reinstalling the printer software. 6 Insert the CD for Windows, and then follow the ...icon. 4 Follow the instructions on the computer screen to remove the printer software. 5 Restart the computer before reinstalling the printer software. 6 Insert the CD for Macintosh. 7 From the Finder desktop, double-click the Lexmark 3500-4500 Series Installer icon. 8 Double-click the Install icon. ...

User's Guide
Page 2
...other than those described in the user documentation, to a professional service person. The safety features of specific Lexmark components. SAVE THESE INSTRUCTIONS. Connect the power supply cord to meet strict global safety standards with the printer software. This product is designed, tested, and approved to a properly grounded electrical outlet that is not responsible... supply cord provided with this product or make any electrical or cabling connections, such as the power supply cord or telephone, during a lightning storm. Lexmark is near the product and easily accessible.
...other than those described in the user documentation, to a professional service person. The safety features of specific Lexmark components. SAVE THESE INSTRUCTIONS. Connect the power supply cord to meet strict global safety standards with the printer software. This product is designed, tested, and approved to a properly grounded electrical outlet that is not responsible... supply cord provided with this product or make any electrical or cabling connections, such as the power supply cord or telephone, during a lightning storm. Lexmark is near the product and easily accessible.
User's Guide
Page 3
... Using the Photo Card menu ...21 Using the PictBridge menu ...22 Using the Settings menu ...23 Saving settings ...25 Learning about the software 27 Using the printer software...27 Using the Lexmark Imaging Studio...27 Using the Solution Center...28 Using Printing Preferences...30 Opening Printing Preferences ...30 Using the Printing Preferences tabs ...30...
... Using the Photo Card menu ...21 Using the PictBridge menu ...22 Using the Settings menu ...23 Saving settings ...25 Learning about the software 27 Using the printer software...27 Using the Lexmark Imaging Studio...27 Using the Solution Center...28 Using Printing Preferences...30 Opening Printing Preferences ...30 Using the Printing Preferences tabs ...30...

User's Guide
Page 9
... The Quick Setup sheet gives you instructions for setting up the printer and some basic instructions for Lexmark Web site at www.lexmark.com. using the When you install the printer software, the User's Guide printer and other information such as: will be installed. • Using the software (on the 1 From the Finder desktop, double-click the...
... The Quick Setup sheet gives you instructions for setting up the printer and some basic instructions for Lexmark Web site at www.lexmark.com. using the When you install the printer software, the User's Guide printer and other information such as: will be installed. • Using the software (on the 1 From the Finder desktop, double-click the...

User's Guide
Page 27
... these methods: Method 1 Method 2 From the desktop, double-click the Lexmark Imaging Studio icon. 1 Click Start ΠPrograms or All Programs ΠLexmark 3500-4500 Series. 2 Select Lexmark Imaging Studio. E-mail Send a document or photo as a fax. Using the printer software Use this software The Lexmark Imaging Studio The Solution Center Printing Preferences The Toolbar To Preview...
... these methods: Method 1 Method 2 From the desktop, double-click the Lexmark Imaging Studio icon. 1 Click Start ΠPrograms or All Programs ΠLexmark 3500-4500 Series. 2 Select Lexmark Imaging Studio. E-mail Send a document or photo as a fax. Using the printer software Use this software The Lexmark Imaging Studio The Solution Center Printing Preferences The Toolbar To Preview...
User's Guide
Page 32
Resetting printer software settings to Photos. Windows Vista users only: 1 Click ΠControl Panel ΠPrinter. 2 Right-click the Lexmark 3500-4500 Series icon. 3 Click Printing Preferences. 32 Click Quick To Print an entire Web page in black and white. Note...or images valid for printing appears next to defaults Windows 2000 or Windows XP users only: 1 Click Start ΠSettings ΠPrinters or Printers and Faxes. 2 Right-click the Lexmark 3500-4500 Series icon. 3 Click Printing Preferences. 4 Click the Save Settings menu. 5 From the Restore section, select Factory Settings...
Resetting printer software settings to Photos. Windows Vista users only: 1 Click ΠControl Panel ΠPrinter. 2 Right-click the Lexmark 3500-4500 Series icon. 3 Click Printing Preferences. 32 Click Quick To Print an entire Web page in black and white. Note...or images valid for printing appears next to defaults Windows 2000 or Windows XP users only: 1 Click Start ΠSettings ΠPrinters or Printers and Faxes. 2 Right-click the Lexmark 3500-4500 Series icon. 3 Click Printing Preferences. 4 Click the Save Settings menu. 5 From the Restore section, select Factory Settings...
User's Guide
Page 79
... and then restart your computer. 2 Click Cancel on all open software applications. 2 Disable any anti-virus programs. 3 Double-click the My Computer icon. Uninstall and reinstall software Uninstall the printer software, and then reinstall it. Try one or more information, see "Error messages" on page... 94. Check power If the light is not on, see "Power button is displayed, see "Removing and reinstalling the software" on the computer...
... and then restart your computer. 2 Click Cancel on all open software applications. 2 Disable any anti-virus programs. 3 Double-click the My Computer icon. Uninstall and reinstall software Uninstall the printer software, and then reinstall it. Try one or more information, see "Error messages" on page... 94. Check power If the light is not on, see "Power button is displayed, see "Removing and reinstalling the software" on the computer...
User's Guide
Page 80
... Start menu): Start Œ Settings Œ Printers and Faxes. • In Windows Vista (default Start menu): Œ Control Œ Printers (under Hardware and Sound). • In Windows Vista (Classic Start menu): Œ Printers. 2 Double-click the printer queue device. 3 Click Printer. • Make sure no check mark appears.... 1 2 3 Reinsert the cartridges. Cannot print from camera Enable PictBridge printing on page 100. Removing and reinstalling the software Uninstall the printer software, and then reinstall it. Try one or more information, see "Removing and reinstalling the...
... Start menu): Start Œ Settings Œ Printers and Faxes. • In Windows Vista (default Start menu): Œ Control Œ Printers (under Hardware and Sound). • In Windows Vista (Classic Start menu): Œ Printers. 2 Double-click the printer queue device. 3 Click Printer. • Make sure no check mark appears.... 1 2 3 Reinsert the cartridges. Cannot print from camera Enable PictBridge printing on page 100. Removing and reinstalling the software Uninstall the printer software, and then reinstall it. Try one or more information, see "Removing and reinstalling the...
User's Guide
Page 86
...; "Partial document or photo copies" on page 100. Are you printing photos or documents with the Best Quality/Speed setting? Removing and reinstalling software For more of graphics? To reduce ink usage, select Best only when you are possible solutions. Copy troubleshooting • "Copier does not respond... photos or graphics. they represent the ink level at a lower Quality/Speed setting. The ink levels may seem inconsistent in the printer software are not updated during a print job; The ink levels displayed in the Printing Status window when you are possible solutions.
...; "Partial document or photo copies" on page 100. Are you printing photos or documents with the Best Quality/Speed setting? Removing and reinstalling software For more of graphics? To reduce ink usage, select Best only when you are possible solutions. Copy troubleshooting • "Copier does not respond... photos or graphics. they represent the ink level at a lower Quality/Speed setting. The ink levels may seem inconsistent in the printer software are not updated during a print job; The ink levels displayed in the Printing Status window when you are possible solutions.
User's Guide
Page 100
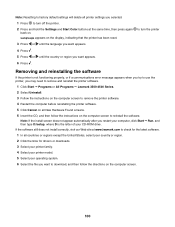
... country or region you may need to remove and reinstall the printer software. 1 Click Start ΠPrograms or All Programs ΠLexmark 3500-4500 Series. 2 Select Uninstall. 3 Follow the instructions on the computer screen to remove the printer software. 4 Restart the computer before reinstalling the printer software. 5 Click Cancel on all countries or regions except the United...
... country or region you may need to remove and reinstall the printer software. 1 Click Start ΠPrograms or All Programs ΠLexmark 3500-4500 Series. 2 Select Uninstall. 3 Follow the instructions on the computer screen to remove the printer software. 4 Restart the computer before reinstalling the printer software. 5 Click Cancel on all countries or regions except the United...

User's Guide
Page 106
...levels, checking 28 ink, ordering 28 inserting flash drives 45 memory cards 44 PictBridge-enabled digital camera 52 installing print cartridges 70 printer on a network 14 printer software 100 internal wireless print server installing 14 iron-on transfers, loading 36 J jams and misfeeds troubleshooting banner paper jams 92 paper ...Fax 27 Photo Greeting Cards 27 Photo Packages 27 Scan 27 Slideshow 27 Transfer Photos 27 using 27 View / Print Photo Library 27 Lexmark Imaging Studio, using 27 loading banner paper 37 custom-size paper 36 documents on the scanner glass 37 envelopes 35 glossy paper 34 ...
...levels, checking 28 ink, ordering 28 inserting flash drives 45 memory cards 44 PictBridge-enabled digital camera 52 installing print cartridges 70 printer on a network 14 printer software 100 internal wireless print server installing 14 iron-on transfers, loading 36 J jams and misfeeds troubleshooting banner paper jams 92 paper ...Fax 27 Photo Greeting Cards 27 Photo Packages 27 Scan 27 Slideshow 27 Transfer Photos 27 using 27 View / Print Photo Library 27 Lexmark Imaging Studio, using 27 loading banner paper 37 custom-size paper 36 documents on the scanner glass 37 envelopes 35 glossy paper 34 ...
User's Guide
Page 108
... 84 poor text and graphic quality 83 print speed is slow 85 printer does not feed paper, envelopes, or specialty media 91 printer software reinstalling 100 removing 100 using 27 printer software settings resetting to defaults 32 Printer Status dialog 29 printing all photos 50 cards 42 collated copies 41 ... PictBridge 80 incorrect language appears on display 77 page does not print 79 power button is not lit 78 software does not install 78 smudging, preventing in photos 85 software Lexmark Imaging Studio 27 Printing Preferences 30 removing and reinstalling 100 Solution Center 28 Toolbar 31 108
... 84 poor text and graphic quality 83 print speed is slow 85 printer does not feed paper, envelopes, or specialty media 91 printer software reinstalling 100 removing 100 using 27 printer software settings resetting to defaults 32 Printer Status dialog 29 printing all photos 50 cards 42 collated copies 41 ... PictBridge 80 incorrect language appears on display 77 page does not print 79 power button is not lit 78 software does not install 78 smudging, preventing in photos 85 software Lexmark Imaging Studio 27 Printing Preferences 30 removing and reinstalling 100 Solution Center 28 Toolbar 31 108


