Sending a fax using the computer
Page 1
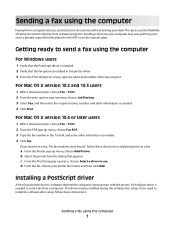
... the computer For Windows users 1 Verify that the PostScript driver is installed. 2 Verify that the fax option is installed in the ADF or on the scanner glass. For Mac OS X version 10.4 or later users 1 With a document open , choose File > Print. 2 From the print options pop-up ... computer Faxing from the dialog that appears. b Select the printer from a computer lets you the flexibility of the fax recipient. A PostScript driver is software that lets the computer communicate with the printer. Getting ready to use. c From the Print Using pop-up menu, choose Add Printer. Installing a...
... the computer For Windows users 1 Verify that the PostScript driver is installed. 2 Verify that the fax option is installed in the ADF or on the scanner glass. For Mac OS X version 10.4 or later users 1 With a document open , choose File > Print. 2 From the print options pop-up ... computer Faxing from the dialog that appears. b Select the printer from a computer lets you the flexibility of the fax recipient. A PostScript driver is software that lets the computer communicate with the printer. Getting ready to use. c From the Print Using pop-up menu, choose Add Printer. Installing a...

Troubleshooting Guide
Page 4
Scan troubleshooting Scanner does not respond • Check the display. For more information, see "Removing and reinstalling the drivers software" on page 1. Partial document scans • Make sure the document is loaded correctly into the ADF or on hold or paused. 1 Click ...are secure, if applicable: - or Click Start Control Panel Printers and Other Hardware Printers and Faxes. 2 Double-click the Lexmark X340/X340n/ X342n icon. 3 Click Printer, and make sure that the paper size settings match the paper in the printer. • Check to the telephone ...
Scan troubleshooting Scanner does not respond • Check the display. For more information, see "Removing and reinstalling the drivers software" on page 1. Partial document scans • Make sure the document is loaded correctly into the ADF or on hold or paused. 1 Click ...are secure, if applicable: - or Click Start Control Panel Printers and Other Hardware Printers and Faxes. 2 Double-click the Lexmark X340/X340n/ X342n icon. 3 Click Printer, and make sure that the paper size settings match the paper in the printer. • Check to the telephone ...

User's Guide
Page 5
... photoconductor 65 Cleaning the MFP ...67 Cleaning the scanner glass 67 Cleaning the outside of the MFP 67 Cleaning the inside of the MFP 68 Ordering supplies ...70 Recycling Lexmark products 70 Chapter 10: Troubleshooting 71 Setup troubleshooting ...72 Removing and reinstalling the drivers software 74 Jams and misfeeds troubleshooting 75 Clearing a paper...
... photoconductor 65 Cleaning the MFP ...67 Cleaning the scanner glass 67 Cleaning the outside of the MFP 67 Cleaning the inside of the MFP 68 Ordering supplies ...70 Recycling Lexmark products 70 Chapter 10: Troubleshooting 71 Setup troubleshooting ...72 Removing and reinstalling the drivers software 74 Jams and misfeeds troubleshooting 75 Clearing a paper...
User's Guide
Page 55
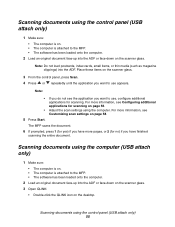
..., see the application you have finished scanning the entire document. Scanning documents using the control panel (USB attach only) 55 Place these items on the scanner glass. 3 From the control panel, press Scan. 4 Press or repeatedly until the application you do not see Customizing scan settings on page 58. ...attached to use appears. Note: • If you want to the MFP. • The software has been loaded onto the computer. 2 Load an original document face-up into the ADF or face-down on the scanner glass. Note: Do not load postcards, index cards, small items, or thin media (such...
..., see the application you have finished scanning the entire document. Scanning documents using the control panel (USB attach only) 55 Place these items on the scanner glass. 3 From the control panel, press Scan. 4 Press or repeatedly until the application you do not see Customizing scan settings on page 58. ...attached to use appears. Note: • If you want to the MFP. • The software has been loaded onto the computer. 2 Load an original document face-up into the ADF or face-down on the scanner glass. Note: Do not load postcards, index cards, small items, or thin media (such...
User's Guide
Page 57
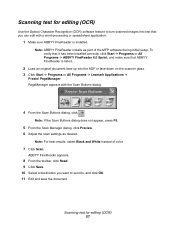
.... 1 Make sure ABBYY FineReader is listed. 2 Load an original document face-up into the ADF or face-down on the scanner glass. 3 Click Start Æ Programs or All Programs Æ Lexmark Applications Æ Presto! ABBYY FineReader appears. 8 From the toolbar, click Read. 9 Click Save. 10 Select a destination you...images into text that ABBYY FineReader is installed. PageManager. Note: For best results, select Black and White instead of the MFP software during initial setup. Scanning text for editing (OCR) 57 Scanning text for editing (OCR) Use the Optical Character Recognition (OCR...
.... 1 Make sure ABBYY FineReader is listed. 2 Load an original document face-up into the ADF or face-down on the scanner glass. 3 Click Start Æ Programs or All Programs Æ Lexmark Applications Æ Presto! ABBYY FineReader appears. 8 From the toolbar, click Read. 9 Click Save. 10 Select a destination you...images into text that ABBYY FineReader is installed. PageManager. Note: For best results, select Black and White instead of the MFP software during initial setup. Scanning text for editing (OCR) 57 Scanning text for editing (OCR) Use the Optical Character Recognition (OCR...

User's Guide
Page 88
Make sure the MFP is set as the default printer and is not on the scanner glass. or Click Start Æ Control Panel Æ Printers and Other Hardware Æ Printers and Faxes. 2 Double-click the Lexmark X340/X340n/X342n icon. 3 Click Printer, and make sure no check mark appears next to Pause ... and size on page 74. If you are printing a document, wait until printing is an error message, see Removing and reinstalling the drivers software on page 35. For more information, see Scanning on page 91. If there is done before sending the scan job. Partial document scans Solution...
Make sure the MFP is set as the default printer and is not on the scanner glass. or Click Start Æ Control Panel Æ Printers and Other Hardware Æ Printers and Faxes. 2 Double-click the Lexmark X340/X340n/X342n icon. 3 Click Printer, and make sure no check mark appears next to Pause ... and size on page 74. If you are printing a document, wait until printing is an error message, see Removing and reinstalling the drivers software on page 35. For more information, see Scanning on page 91. If there is done before sending the scan job. Partial document scans Solution...
User's Guide
Page 91
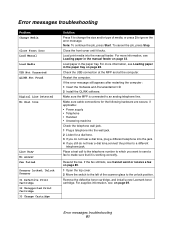
...software. Resend the fax. Error messages troubleshooting 91 Note: To continue the job, press Start. Restart the computer. For more information, see Cannot send or receive a fax on page 69. Make sure the MFP is connected to make sure that it locks. Remove the defective toner cartridge, and install a new Lexmark...Load Media USB Not Connected QLINK Not Found Digital Line Detected No dial tone Line Busy No answer Fax failed Scanner Locked, Unlock Scanner 31 Defective Print Cartridge 32 Unsupported Print Cartridge 33 Change Cartridge Solution Press 1 to change the size and/or type...
...software. Resend the fax. Error messages troubleshooting 91 Note: To continue the job, press Start. Restart the computer. For more information, see Cannot send or receive a fax on page 69. Make sure the MFP is connected to make sure that it locks. Remove the defective toner cartridge, and install a new Lexmark...Load Media USB Not Connected QLINK Not Found Digital Line Detected No dial tone Line Busy No answer Fax failed Scanner Locked, Unlock Scanner 31 Defective Print Cartridge 32 Unsupported Print Cartridge 33 Change Cartridge Solution Press 1 to change the size and/or type...
User's Guide
Page 103
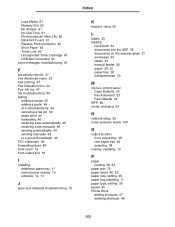
...group (broadcast) 44 FCC statement 94 forwarding faxes 46 front cover 18 front output slot 18 I installing additional paper tray 11 control panel overlay 10 software 12, 13 J jams and misfeeds troubleshooting 75 K keypad, using 50 L labels 33 loading card stock 33 documents into the ADF 36 documents on the... scanner glass 37 envelopes 33 labels 33 manual feeder 32 paper 28, 32 paper tray 28 transparencies 33 M menus, control panel Copy Defaults 23 Fax ...
...group (broadcast) 44 FCC statement 94 forwarding faxes 46 front cover 18 front output slot 18 I installing additional paper tray 11 control panel overlay 10 software 12, 13 J jams and misfeeds troubleshooting 75 K keypad, using 50 L labels 33 loading card stock 33 documents into the ADF 36 documents on the... scanner glass 37 envelopes 33 labels 33 manual feeder 32 paper 28, 32 paper tray 28 transparencies 33 M menus, control panel Copy Defaults 23 Fax ...
User's Guide
Page 104
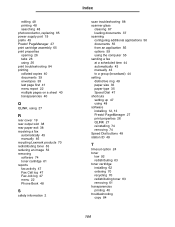
...R rear cover 19 rear output slot 38 rear paper exit 38 receiving a fax automatically 45 manually 46 recycling Lexmark products 70 redistributing toner 63 reducing an image 53 removing software 74 toner cartridge 61 reports fax activity 47 Fax Call log 47 Fax Job log 47 menu 22 Phone Book... 48 S safety information 2 Index scan troubleshooting 88 scanner glass cleaning 67 loading documents 37 scanning configuring additional applications ...
...R rear cover 19 rear output slot 38 rear paper exit 38 receiving a fax automatically 45 manually 46 recycling Lexmark products 70 redistributing toner 63 reducing an image 53 removing software 74 toner cartridge 61 reports fax activity 47 Fax Call log 47 Fax Job log 47 menu 22 Phone Book... 48 S safety information 2 Index scan troubleshooting 88 scanner glass cleaning 67 loading documents 37 scanning configuring additional applications ...


