User's Guide
Page 18
...information about the All-In-One or its software. Click the Index button, and use the Find function to locate more information, see "Using the Lexmark All-In-One Center" on page 15. 2 Click the Saved Images tab. 3 Click Show Folders to browse to the folder where the saved ...images are stored. 4 Click Hide Folders to close the folder window. 5 Click to select the photos you with instant access to the Lexmark Solution Center. Clicking Maintain/Troubleshoot lets you choose from these topics: • Maintain or fix quality problems •...
...information about the All-In-One or its software. Click the Index button, and use the Find function to locate more information, see "Using the Lexmark All-In-One Center" on page 15. 2 Click the Saved Images tab. 3 Click Show Folders to browse to the folder where the saved ...images are stored. 4 Click Hide Folders to close the folder window. 5 Click to select the photos you with instant access to the Lexmark Solution Center. Clicking Maintain/Troubleshoot lets you choose from these topics: • Maintain or fix quality problems •...
User's Guide
Page 20
... Editor To open the Lexmark Photo Editor from the All-In-One Center: 1 Select the Saved Images tab. 2 Click Show Folders to browse to the folder where the saved images are stored. 3 Click Hide Folders to close the folder window. 4 Select the photo(s) you want to print the photos. drop-...down menu, select Lexmark Photo Editor. 6 Click Open Now. 20 9 Select a Paper size in printer. 10 Select the Number of copies....
... Editor To open the Lexmark Photo Editor from the All-In-One Center: 1 Select the Saved Images tab. 2 Click Show Folders to browse to the folder where the saved images are stored. 3 Click Hide Folders to close the folder window. 4 Select the photo(s) you want to print the photos. drop-...down menu, select Lexmark Photo Editor. 6 Click Open Now. 20 9 Select a Paper size in printer. 10 Select the Number of copies....
User's Guide
Page 26
... Change the appearance of the All-In-One. Lexmark Solution Center tabs From this tab Printer Status (Main dialog) How To Troubleshooting Maintenance Contact Information Advanced You can • View the status of the Printing Status window, or turn printing voice notification on or off.... • Change the network printing settings. • Participate in Lexmark Connect. • Obtain software version information. Note: For more information, click...
... Change the appearance of the All-In-One. Lexmark Solution Center tabs From this tab Printer Status (Main dialog) How To Troubleshooting Maintenance Contact Information Advanced You can • View the status of the Printing Status window, or turn printing voice notification on or off.... • Change the network printing settings. • Participate in Lexmark Connect. • Obtain software version information. Note: For more information, click...
User's Guide
Page 41
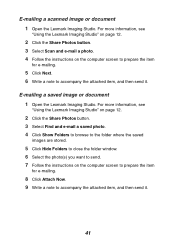
For more information, see "Using the Lexmark Imaging Studio" on page 12. 2 Click the Share Photos button. 3 Select Find and e-mail a saved photo. 4 Click Show Folders to browse to the folder where the saved images are stored. 5 Click Hide Folders to close the folder window. 6 Select the photo(s) you want to send. 7 Follow...
For more information, see "Using the Lexmark Imaging Studio" on page 12. 2 Click the Share Photos button. 3 Select Find and e-mail a saved photo. 4 Click Show Folders to browse to the folder where the saved images are stored. 5 Click Hide Folders to close the folder window. 6 Select the photo(s) you want to send. 7 Follow...
User's Guide
Page 48
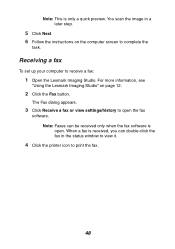
You scan the image in the status window to view it. 4 Click the printer icon to open . Note: This is open the fax software. The Fax dialog appears. 3 Click Receive a fax or view ... step. 5 Click Next. 6 Follow the instructions on page 12. 2 Click the Fax button. For more information, see "Using the Lexmark Imaging Studio" on the computer screen to receive a fax: 1 Open the Lexmark Imaging Studio. Receiving a fax To set up your computer to complete the task. When a fax is received, you can be...
You scan the image in the status window to view it. 4 Click the printer icon to open . Note: This is open the fax software. The Fax dialog appears. 3 Click Receive a fax or view ... step. 5 Click Next. 6 Follow the instructions on page 12. 2 Click the Fax button. For more information, see "Using the Lexmark Imaging Studio" on the computer screen to receive a fax: 1 Open the Lexmark Imaging Studio. Receiving a fax To set up your computer to complete the task. When a fax is received, you can be...
User's Guide
Page 62
The following operating systems are supported: • Windows 98/Me • Windows 2000 • Windows XP 1 Remove the software CD. 2 Turn off the computer. 3 Restart the computer. 4 When the desktop appears, reinsert the software CD. 5 Follow the instructions on , press ... from the All-In-One. 2 Plug the cord all open software applications. 2 Temporarily disable any anti-virus programs. 3 Double-click the My Computer icon. For Windows XP, click Start to access the My Computer icon. 4 Double-click the CD-ROM drive icon. 5 If necessary, double-click setup.exe. 6 Follow the instructions...
The following operating systems are supported: • Windows 98/Me • Windows 2000 • Windows XP 1 Remove the software CD. 2 Turn off the computer. 3 Restart the computer. 4 When the desktop appears, reinsert the software CD. 5 Follow the instructions on , press ... from the All-In-One. 2 Plug the cord all open software applications. 2 Temporarily disable any anti-virus programs. 3 Double-click the My Computer icon. For Windows XP, click Start to access the My Computer icon. 4 Double-click the CD-ROM drive icon. 5 If necessary, double-click setup.exe. 6 Follow the instructions...
User's Guide
Page 64
...: a From the desktop, double-click My Computer. c When the All-In-One software installation screen appears, click Install or Install Now. For Windows XP, click Start to complete the installation. 64 d Follow the instructions on the computer screen to access the My Computer icon. Removing and reinstalling .... 5 Eject and reinsert the software CD. If the problems persist, follow these steps: 1 From the desktop, click Start Æ Programs Æ Lexmark 2300 Series Æ Uninstall. 2 Follow the instructions on the computer screen to remove and then reinstall the All-In-One software.
...: a From the desktop, double-click My Computer. c When the All-In-One software installation screen appears, click Install or Install Now. For Windows XP, click Start to complete the installation. 64 d Follow the instructions on the computer screen to access the My Computer icon. Removing and reinstalling .... 5 Eject and reinsert the software CD. If the problems persist, follow these steps: 1 From the desktop, click Start Æ Programs Æ Lexmark 2300 Series Æ Uninstall. 2 Follow the instructions on the computer screen to remove and then reinstall the All-In-One software.


