Quick Reference
Page 5
... ink. You can be used to : Applications > select your printer folder 2 Double‑click User's Guide. Use the preview features found in a minimum‑power standby mode after the printer is left idle for ? The latest supplemental information, updates, Support Web site-http://support.lexmark.com online customer support, and telephone support 1 Available on the...
... ink. You can be used to : Applications > select your printer folder 2 Double‑click User's Guide. Use the preview features found in a minimum‑power standby mode after the printer is left idle for ? The latest supplemental information, updates, Support Web site-http://support.lexmark.com online customer support, and telephone support 1 Available on the...
Quick Reference
Page 20
... dialog Use the Print dialog to PDF. • Adjust settings for the printer. • Order supplies. • Maintain ink cartridges. • Register the printer. • Contact technical support. • Access the User's Guide. Speed up usual tasks with the printer software if the printer has wireless capability. Learn more about the printing problems encountered. • Check...
... dialog Use the Print dialog to PDF. • Adjust settings for the printer. • Order supplies. • Maintain ink cartridges. • Register the printer. • Contact technical support. • Access the User's Guide. Speed up usual tasks with the printer software if the printer has wireless capability. Learn more about the printing problems encountered. • Check...

Quick Reference
Page 27
... make a selection. 4 Press . Note: The printer reads only one memory device at a time. 4 Press the up your flash drive or memory card is in place with the settings you want , press to a flash drive or memory card Notes: • Some features are available only in the User's Guide. Scanning Scanning ADF Scanner glass...
... make a selection. 4 Press . Note: The printer reads only one memory device at a time. 4 Press the up your flash drive or memory card is in place with the settings you want , press to a flash drive or memory card Notes: • Some features are available only in the User's Guide. Scanning Scanning ADF Scanner glass...
Quick Reference
Page 29
...to be e-mailed is connected to avoid dark edges on the computer screen. For Macintosh users 1 From the Finder, navigate to start scanning. Setting up the SMTP server before sending an e‑mail. The printer supports only one or more of the original document. • To easily retrieve a ...document after copying or scanning through the ADF, lift the ADF input tray. • When using the ADF, adjust the paper guide on the computer screen, and then ...
...to be e-mailed is connected to avoid dark edges on the computer screen. For Macintosh users 1 From the Finder, navigate to start scanning. Setting up the SMTP server before sending an e‑mail. The printer supports only one or more of the original document. • To easily retrieve a ...document after copying or scanning through the ADF, lift the ADF input tray. • When using the ADF, adjust the paper guide on the computer screen, and then ...
Quick Reference
Page 39
...on the scanner glass. • When the document to be faxed is in the "Fax number(s)" field. For Macintosh users 1 With a document open , click File > Print. 2 Make sure the appropriate printer is selected, and then click Properties, Preferences, Options, or Setup. 3 Click the Fax tab, and then make ... pages. • To easily retrieve a document after copying or scanning, lift the ADF input tray. • When using the ADF, adjust the paper guide on the scanned image. • Do not load postcards, photos, small items, transparencies, photo paper, or thin media (such as the fax feature, ...
...on the scanner glass. • When the document to be faxed is in the "Fax number(s)" field. For Macintosh users 1 With a document open , click File > Print. 2 Make sure the appropriate printer is selected, and then click Properties, Preferences, Options, or Setup. 3 Click the Fax tab, and then make ... pages. • To easily retrieve a document after copying or scanning, lift the ADF input tray. • When using the ADF, adjust the paper guide on the scanned image. • Do not load postcards, photos, small items, transparencies, photo paper, or thin media (such as the fax feature, ...
Quick Reference
Page 42
... the wireless settings and determining the WPS capability of your access point. For more information on the printer display. If nothing happens after 30 seconds, then do one of your access point, see the User's Guide. For more information, see the documentation that came with the access point or contact your access point...
... the wireless settings and determining the WPS capability of your access point. For more information on the printer display. If nothing happens after 30 seconds, then do one of your access point, see the User's Guide. For more information, see the documentation that came with the access point or contact your access point...
Quick Reference
Page 47
... increase the security, you have only one or more information on the location of the network indicator lights, see"Using the printer control panel" on installing these drivers, see the User's Guide available on . • The wireless network is available for your telephone line (through a standard wall jack, a DSL filter, a VoIP adapter, or...
... increase the security, you have only one or more information on the location of the network indicator lights, see"Using the printer control panel" on installing these drivers, see the User's Guide available on . • The wireless network is available for your telephone line (through a standard wall jack, a DSL filter, a VoIP adapter, or...
Quick Reference
Page 48
... you are connected to another network through a VPN connection, you are performing a task. • The correct printer port is selected. • The computer and printer are not available when Demo Mode is like a password. See the User's Guide on printing a network setup page. If you encountered problems while installing, or if your network is...
... you are connected to another network through a VPN connection, you are performing a task. • The correct printer port is selected. • The computer and printer are not available when Demo Mode is like a password. See the User's Guide on printing a network setup page. If you encountered problems while installing, or if your network is...

User's Guide
Page 7
...16 page images on both sides of the paper. About your printer 7 About your printer Thank you are continually improving our printers to reduce their environmental impact. If you get the most out of your printer, read the User's Guide carefully, and make sure you print on both sides of paper.... can scan documents or photographs and save . To start using your printer model). • Preview print jobs before printing. We're committed to delivering performance and value with the printer, and then skim the User's Guide to learn how to print multiple pages on one side of a ...
...16 page images on both sides of the paper. About your printer 7 About your printer Thank you are continually improving our printers to reduce their environmental impact. If you get the most out of your printer, read the User's Guide carefully, and make sure you print on both sides of paper.... can scan documents or photographs and save . To start using your printer model). • Preview print jobs before printing. We're committed to delivering performance and value with the printer, and then skim the User's Guide to learn how to print multiple pages on one side of a ...
User's Guide
Page 9
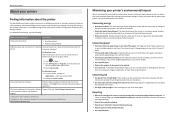
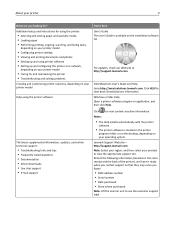
...back of the printer), and have it here User's Guide The User's Guide is located in the printer program folder or on the desktop, depending on your product to view the appropriate support site. For updates, check our Web site at http://support.lexmark.com. The ... • Live chat support • E‑mail support Click to http://smartsolutions.lexmark.com. Notes: • The Help installs automatically with the printer software. • The printer software is available on the installation software CD. Click HELP to see the customer support label...
...back of the printer), and have it here User's Guide The User's Guide is located in the printer program folder or on the desktop, depending on your product to view the appropriate support site. For updates, check our Web site at http://support.lexmark.com. The ... • Live chat support • E‑mail support Click to http://smartsolutions.lexmark.com. Notes: • The Help installs automatically with the printer software. • The printer software is available on the installation software CD. Click HELP to see the customer support label...

User's Guide
Page 26
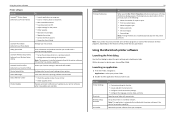
...Options > Install Additional Software. Printer software Use the LexmarkTM Printer Home (referred to as Printer Home) Lexmark Phone Book (referred to as Phone Book) Abbyy Sprint OCR Lexmark Wireless Setup Utility (referred to as Wireless Setup Utility) Lexmark Tools for Office (referred ...Adjust settings for the printer. • Order supplies. • Maintain ink cartridges. • Register the printer. • Contact technical support. • Access the User's Guide. Using the printer software 26 If you can edit with the printer software if the printer has wireless capability. ...
...Options > Install Additional Software. Printer software Use the LexmarkTM Printer Home (referred to as Printer Home) Lexmark Phone Book (referred to as Phone Book) Abbyy Sprint OCR Lexmark Wireless Setup Utility (referred to as Wireless Setup Utility) Lexmark Tools for Office (referred ...Adjust settings for the printer. • Order supplies. • Maintain ink cartridges. • Register the printer. • Contact technical support. • Access the User's Guide. Using the printer software 26 If you can edit with the printer software if the printer has wireless capability. ...
User's Guide
Page 45
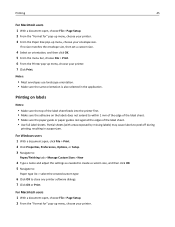
...size. 4 Select an orientation, and then click OK. 5 From the menu bar, choose File > Print. 6 From the Printer pop‑up menu, choose your printer. 7 Click Print. For Windows users 1 With a document open , choose File > Page Setup. 2 From the "Format for " pop‑up menu, choose ... Make sure the paper guide or paper guides rest against the edges of the label sheet. • Use full label sheets. Notes: • Most envelopes use landscape orientation. • Make sure the same orientation is also selected in a paper jam. Printing 45 For Macintosh users 1 With a document ...
...size. 4 Select an orientation, and then click OK. 5 From the menu bar, choose File > Print. 6 From the Printer pop‑up menu, choose your printer. 7 Click Print. For Windows users 1 With a document open , choose File > Page Setup. 2 From the "Format for " pop‑up menu, choose ... Make sure the paper guide or paper guides rest against the edges of the label sheet. • Use full label sheets. Notes: • Most envelopes use landscape orientation. • Make sure the same orientation is also selected in a paper jam. Printing 45 For Macintosh users 1 With a document ...
User's Guide
Page 67
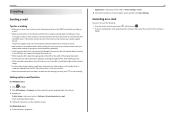
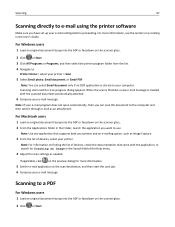
... the ADF or facedown on the scanner glass. 2 From the Applications folder in the User's Guide. Note: For information on e‑mailing in the Finder, launch the application you have set up your printer and an e‑mailing option, such as an attachment. Note: If your e-mail ... stored on the scanner glass. 2 Click or Start. 3 Click All Programs or Programs, and then select the printer program folder from the list. 4 Navigate to: Printer Home > select your printer. Scanning starts and the scan progress dialog appears. If applicable, click on the scanner glass. 2 Click or Start...
... the ADF or facedown on the scanner glass. 2 From the Applications folder in the User's Guide. Note: For information on e‑mailing in the Finder, launch the application you have set up your printer and an e‑mailing option, such as an attachment. Note: If your e-mail ... stored on the scanner glass. 2 Click or Start. 3 Click All Programs or Programs, and then select the printer program folder from the list. 4 Navigate to: Printer Home > select your printer. Scanning starts and the scan progress dialog appears. If applicable, click on the scanner glass. 2 Click or Start...

User's Guide
Page 88
..., photo paper, or thin media (such as magazine clippings) into the ADF. Sending faxes using the computer For Windows users 1 With a document open, click File > Print. 2 Make sure the appropriate printer is selected, and then click Properties, Preferences, Options, or Setup. 3 Click the Fax tab, and then make sure...pages. • To easily retrieve a document after copying or scanning, lift the ADF input tray. • When using the ADF, adjust the paper guide on and connected to a working if you want to send a fax to send the fax. Warning-Potential Damage: Do not touch the cables or ...
..., photo paper, or thin media (such as magazine clippings) into the ADF. Sending faxes using the computer For Windows users 1 With a document open, click File > Print. 2 Make sure the appropriate printer is selected, and then click Properties, Preferences, Options, or Setup. 3 Click the Fax tab, and then make sure...pages. • To easily retrieve a document after copying or scanning, lift the ADF input tray. • When using the ADF, adjust the paper guide on and connected to a working if you want to send a fax to send the fax. Warning-Potential Damage: Do not touch the cables or ...
User's Guide
Page 101
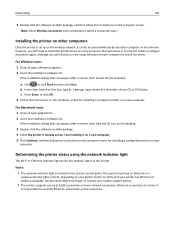
...capability, see the Quick Reference Guide, or contact your CD or DVD drive. You do not need to configure the printer again, although you will need to run the setup software on each computer to use both , depending on a new computer. For Windows users 1 Close all open software ...programs. 2 Insert the installation software CD. It is the letter of the printer. The printer may have an Ethernet or a wireless indicator light, or both Ethernet and wireless at ...
...capability, see the Quick Reference Guide, or contact your CD or DVD drive. You do not need to configure the printer again, although you will need to run the setup software on each computer to use both , depending on a new computer. For Windows users 1 Close all open software ...programs. 2 Insert the installation software CD. It is the letter of the printer. The printer may have an Ethernet or a wireless indicator light, or both Ethernet and wireless at ...
User's Guide
Page 105
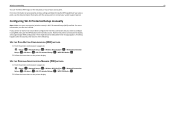
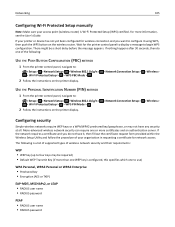
... wireless router. There might be required) • Default WEP Transmit Key (if more than one or more information, see the User's Guide. The following : USE THE PUSH BUTTON CONFIGURATION (PBC) METHOD 1 From the printer control panel, navigate to: > Setup > > Network Setup > > Wireless 802.11b/g/n > > Wi‑Fi Protected Setup > > WPS PBC...
... wireless router. There might be required) • Default WEP Transmit Key (if more than one or more information, see the User's Guide. The following : USE THE PUSH BUTTON CONFIGURATION (PBC) METHOD 1 From the printer control panel, navigate to: > Setup > > Network Setup > > Wireless 802.11b/g/n > > Wi‑Fi Protected Setup > > WPS PBC...
User's Guide
Page 120
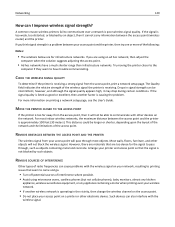
...CHECK THE WIRELESS SIGNAL QUALITY To determine if the printer is too weak, too distorted, or blocked by such objects. Drops in the vicinity, then change the wireless channel on printing a network setup page, see the User's Guide. Networking 120 How can be intermittent, however, and... although the signal quality appears high, it cannot carry information between the access point (wireless router) and the printer. For most objects. This distance could be longer or...
...CHECK THE WIRELESS SIGNAL QUALITY To determine if the printer is too weak, too distorted, or blocked by such objects. Drops in the vicinity, then change the wireless channel on printing a network setup page, see the User's Guide. Networking 120 How can be intermittent, however, and... although the signal quality appears high, it cannot carry information between the access point (wireless router) and the printer. For most objects. This distance could be longer or...

User's Guide
Page 137
...the current job. • Use only genuine Lexmark ink cartridges. • Install the specified ink cartridges properly. • Turn the printer off the printer. • See the User's Guide or visit the Lexmark Support Web site at http://support.lexmark.com for a list of supported ink cartridges.... Ink Cartridge Missing Try one that is supported by your printer settings, you may need to clear the message. • See the User's Guide or visit the Lexmark Support Web site at http://support.lexmark.com for a list of the installed ink cartridges. Try...
...the current job. • Use only genuine Lexmark ink cartridges. • Install the specified ink cartridges properly. • Turn the printer off the printer. • See the User's Guide or visit the Lexmark Support Web site at http://support.lexmark.com for a list of supported ink cartridges.... Ink Cartridge Missing Try one that is supported by your printer settings, you may need to clear the message. • See the User's Guide or visit the Lexmark Support Web site at http://support.lexmark.com for a list of the installed ink cartridges. Try...
User's Guide
Page 140
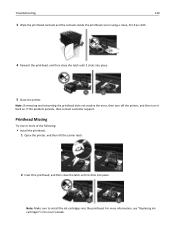
...Install the printhead. 1 Open the printer, and then lift the carrier latch. 2 Insert the printhead, and then close the latch until it clicks into the printhead. Printhead Missing Try one or more information, see "Replacing ink cartridges" in the User's Guide. Note: If removing and reinserting ...the printhead does not resolve the error, then turn off the printer, and then turn it back on. If the problem persists, then contact customer support...
...Install the printhead. 1 Open the printer, and then lift the carrier latch. 2 Insert the printhead, and then close the latch until it clicks into the printhead. Printhead Missing Try one or more information, see "Replacing ink cartridges" in the User's Guide. Note: If removing and reinserting ...the printhead does not resolve the error, then turn off the printer, and then turn it back on. If the problem persists, then contact customer support...

User's Guide
Page 162
... cause connection issues. Note: USB hubs, extension cables, port replicators, and docking stations may be within the same series. For more information, see the printer User's Guide. If unsure, look for three seconds to a USB port: 1 Click , or click Start and then click Run. 2 In the Start Search or...USB devices. MAKE SURE YOU ARE USING THE CORRECT CD FOR YOUR PRINTER MODEL Compare the printer model on the CD to your other USB ports on the Lexmark Web site. RECONNECT THE PRINTER POWER SUPPLY 1 Turn off the printer. 2 Unplug the power cord from the wall outlet, and then ...
... cause connection issues. Note: USB hubs, extension cables, port replicators, and docking stations may be within the same series. For more information, see the printer User's Guide. If unsure, look for three seconds to a USB port: 1 Click , or click Start and then click Run. 2 In the Start Search or...USB devices. MAKE SURE YOU ARE USING THE CORRECT CD FOR YOUR PRINTER MODEL Compare the printer model on the CD to your other USB ports on the Lexmark Web site. RECONNECT THE PRINTER POWER SUPPLY 1 Turn off the printer. 2 Unplug the power cord from the wall outlet, and then ...


