Quick Reference
Page 3
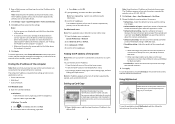
... then click Go or press Enter. For Macintosh users Note: This is applicable only in the Network/Ports menu. • By printing a network setup page or menu settings page, and then finding the TCP/IP section. When scanning multiple cards, make sure the location settings of the bookmark are...type the correct IP address of the scanned card when printed. The default setting is connected to a network or to the network (Ethernet or wireless). To use the application, touch Card Copy on the printer home screen, and then follow the instructions on a form number, name, or description.
... then click Go or press Enter. For Macintosh users Note: This is applicable only in the Network/Ports menu. • By printing a network setup page or menu settings page, and then finding the TCP/IP section. When scanning multiple cards, make sure the location settings of the bookmark are...type the correct IP address of the scanned card when printed. The default setting is connected to a network or to the network (Ethernet or wireless). To use the application, touch Card Copy on the printer home screen, and then follow the instructions on a form number, name, or description.
User's Guide
Page 18
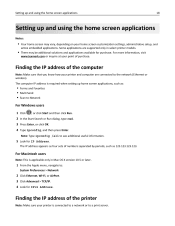
...Click Advanced > TCP/IP. 4 Look for IPv4 Address. The computer IP address is connected to a network or to the network (Ethernet or wireless). Finding the IP address of the computer Note: Make sure that you know how your printer is required when setting up and using the home... 18 Setting up home screen applications, such as 123.123.123.123. For more information, visit www.lexmark.com or inquire at your home screen customization settings, administrative setup, and active embedded applications. Finding the IP address of the printer Note: Make sure your printer and ...
...Click Advanced > TCP/IP. 4 Look for IPv4 Address. The computer IP address is connected to a network or to the network (Ethernet or wireless). Finding the IP address of the computer Note: Make sure that you know how your printer is required when setting up and using the home... 18 Setting up home screen applications, such as 123.123.123.123. For more information, visit www.lexmark.com or inquire at your home screen customization settings, administrative setup, and active embedded applications. Finding the IP address of the printer Note: Make sure your printer and ...

User's Guide
Page 26
...in MX410de printer model. Printcryption • Printer hard disk1 • LexmarkTM Internal Solutions Ports (ISP) - MarkNetTM N8350 802.11 b/g/n wireless printer server1 - RS‑232‑C serial interface 1 2 This internal option is available only in MX510de, MX511de, and MX511dhe printer...Flash memory • Fonts • Firmware cards - Prescribe - IPDS - Parallel 1284‑B interface - Additional printer setup 26 Additional printer setup Installing internal options CAUTION-SHOCK HAZARD: If you have any cables going into the printer. If you are accessing the ...
...in MX410de printer model. Printcryption • Printer hard disk1 • LexmarkTM Internal Solutions Ports (ISP) - MarkNetTM N8350 802.11 b/g/n wireless printer server1 - RS‑232‑C serial interface 1 2 This internal option is available only in MX510de, MX511de, and MX511dhe printer...Flash memory • Fonts • Firmware cards - Prescribe - IPDS - Parallel 1284‑B interface - Additional printer setup 26 Additional printer setup Installing internal options CAUTION-SHOCK HAZARD: If you have any cables going into the printer. If you are accessing the ...

User's Guide
Page 49
...Search or Run dialog, type D:\setup.exe, where D is a name assigned to installing the printer. Additional printer setup 49 Networking Notes: • Purchase a MarkNet N8350 wireless network adapter for MX510de, MX511de, and MX511dhe printer models or MarkNet N8352 wireless network adapter for MX410de printer model... printer does not appear in the list, then click Modify Search. 6 Follow the instructions on installing the wireless network adapter, see the setup sheet that is easier for you to an Ethernet network, organize the following information before setting up the printer...
...Search or Run dialog, type D:\setup.exe, where D is a name assigned to installing the printer. Additional printer setup 49 Networking Notes: • Purchase a MarkNet N8350 wireless network adapter for MX510de, MX511de, and MX511dhe printer models or MarkNet N8352 wireless network adapter for MX410de printer model... printer does not appear in the list, then click Modify Search. 6 Follow the instructions on installing the wireless network adapter, see the setup sheet that is easier for you to an Ethernet network, organize the following information before setting up the printer...

User's Guide
Page 50
... AppleTalk > select your printer > Add Preparing to set up the printer on a wireless network Notes: • Make sure your wireless network adapter is activated on the computer screen. Additional printer setup 50 For Macintosh users 1 Allow the network DHCP server to assign an IP address to...subnet than the printer. 3 Install the printer driver on and is turned on the computer. b Follow the instructions on your access point (wireless router) is working properly. f Click Close when installation is supported only in the address field, and then click Add. • For AppleTalk...
... AppleTalk > select your printer > Add Preparing to set up the printer on a wireless network Notes: • Make sure your wireless network adapter is activated on the computer screen. Additional printer setup 50 For Macintosh users 1 Allow the network DHCP server to assign an IP address to...subnet than the printer. 3 Install the printer driver on and is turned on the computer. b Follow the instructions on your access point (wireless router) is working properly. f Click Close when installation is supported only in the address field, and then click Add. • For AppleTalk...

User's Guide
Page 51
...type on the router and on the printer, or the printer will also require the automatic setting. Connecting the printer using an unsecured wireless network. Check with the wireless network adapter. • An Ethernet cable is disconnected from the printer. • Active NIC is working properly. WPA or WPA2 ...one WEP key, then enter up the printer on . If you do not recommend using the Wireless Setup Wizard Before you begin, make sure that came with the access point, or contact your wireless network does not use on an 802.1X network, then you may need the following information ...
...type on the router and on the printer, or the printer will also require the automatic setting. Connecting the printer using an unsecured wireless network. Check with the wireless network adapter. • An Ethernet cable is disconnected from the printer. • Active NIC is working properly. WPA or WPA2 ...one WEP key, then enter up the printer on . If you do not recommend using the Wireless Setup Wizard Before you begin, make sure that came with the access point, or contact your wireless network does not use on an 802.1X network, then you may need the following information ...

User's Guide
Page 52
... Enter a network name Manually type the SSID. Note: Make sure to : > Network/Ports > Network [x] > Network [x] Setup > Wireless > Wi‑Fi Protected Setup > Start Push Button Method 2 Follow the instructions on the printer display. Connecting the printer to load the Web page correctly. ... From the printer control panel, navigate to type the correct SSID. Additional printer setup 52 1 From the printer control panel, navigate to : > Network/Ports > Network [x] > Network [x] Setup > Wireless > Wi‑Fi Protected Setup > Start PIN Method 2 Copy the eight‑digit WPS PIN. 3 Open...
... Enter a network name Manually type the SSID. Note: Make sure to : > Network/Ports > Network [x] > Network [x] Setup > Wireless > Wi‑Fi Protected Setup > Start Push Button Method 2 Follow the instructions on the printer display. Connecting the printer to load the Web page correctly. ... From the printer control panel, navigate to type the correct SSID. Additional printer setup 52 1 From the printer control panel, navigate to : > Network/Ports > Network [x] > Network [x] Setup > Wireless > Wi‑Fi Protected Setup > Start PIN Method 2 Copy the eight‑digit WPS PIN. 3 Open...

User's Guide
Page 53
Additional printer setup 53 Connecting the printer to a wireless network using a proxy server, then temporarily disable it back on . For more information, see if the status is inactive. Changing port settings after installing a new network Internal Solutions Port When a new Lexmark Internal Solutions ...Port (ISP) is installed in your printer is connected to an Ethernet network. • A wireless network adapter is installed in the address field. To activate the wireless ISP, disconnect the printer from the ...
Additional printer setup 53 Connecting the printer to a wireless network using a proxy server, then temporarily disable it back on . For more information, see if the status is inactive. Changing port settings after installing a new network Internal Solutions Port When a new Lexmark Internal Solutions ...Port (ISP) is installed in your printer is connected to an Ethernet network. • A wireless network adapter is installed in the address field. To activate the wireless ISP, disconnect the printer from the ...

User's Guide
Page 146
...setting from the printer control panel, and then exiting the menus causes the printer to restart. Standard Network Setup or Network [x] Setup Reports Network Card TCP/IP IPv6 Wireless AppleTalk Understanding the printer menus 146 Use PS SmartSwitch On Off To Set the printer to automatically switch ...Changing this setting from the printer control panel and then exiting the menus causes the printer to a wireless network. Notes: • Auto is connected to restart. Note: The Wireless menu appears only when the printer is the factory default setting. • Off filters print jobs ...
...setting from the printer control panel, and then exiting the menus causes the printer to restart. Standard Network Setup or Network [x] Setup Reports Network Card TCP/IP IPv6 Wireless AppleTalk Understanding the printer menus 146 Use PS SmartSwitch On Off To Set the printer to automatically switch ...Changing this setting from the printer control panel and then exiting the menus causes the printer to a wireless network. Notes: • Auto is connected to restart. Note: The Wireless menu appears only when the printer is the factory default setting. • Off filters print jobs ...

User's Guide
Page 149
... the menu, navigate to either of the following : • Network/Ports > Standard Network > Standard Network Setup > Wireless • Network/Ports > Network [x] > Network [x] Setup > Wireless Use Wi‑Fi Protected Setup (WPS) Start Push Button Method Start PIN Method To Establish a wireless network connection and enable network security. Set the host name. Notes: • Start Push Button...
... the menu, navigate to either of the following : • Network/Ports > Standard Network > Standard Network Setup > Wireless • Network/Ports > Network [x] > Network [x] Setup > Wireless Use Wi‑Fi Protected Setup (WPS) Start Push Button Method Start PIN Method To Establish a wireless network connection and enable network security. Set the host name. Notes: • Start Push Button...

User's Guide
Page 150
... to use. Show the assigned AppleTalk name. This lets the printer access a network using an access point. • Ad hoc configures a wireless connection directly between the printer and a computer. Note: The address can be changed only from the Embedded Web Server. View the quality of ... • Network/Ports > Network Setup [x] > AppleTalk Use Activate Yes No View Name View Address To Enable or disable AppleTalk support. Show the assigned AppleTalk address. View the encryption method for the wireless network. If no default zone exists, then the zone marked with an asterisk (*) is ...
... to use. Show the assigned AppleTalk name. This lets the printer access a network using an access point. • Ad hoc configures a wireless connection directly between the printer and a computer. Note: The address can be changed only from the Embedded Web Server. View the quality of ... • Network/Ports > Network Setup [x] > AppleTalk Use Activate Yes No View Name View Address To Enable or disable AppleTalk support. Show the assigned AppleTalk address. View the encryption method for the wireless network. If no default zone exists, then the zone marked with an asterisk (*) is ...

User's Guide
Page 320
... using PIN (Personal Identification Number) method 52 using Push Button Configuration method 52 using the Embedded Web Server 53 using wireless setup wizard 51 conservation settings brightness, adjusting 206 Eco‑Mode 204 Hibernate Mode 206 Quiet Mode 204 Sleep Mode 205 conserving supplies 203 ... pages on one sheet 90 copying on both sides of the paper (duplexing) 88 copying on letterhead 86 copying on transparencies 85 cover page setup copy options 94 create booklet copy options 95 creating a fax destination shortcut using the Embedded Web Server 120 creating an FTP shortcut using the...
... using PIN (Personal Identification Number) method 52 using Push Button Configuration method 52 using the Embedded Web Server 53 using wireless setup wizard 51 conservation settings brightness, adjusting 206 Eco‑Mode 204 Hibernate Mode 206 Quiet Mode 204 Sleep Mode 205 conserving supplies 203 ... pages on one sheet 90 copying on both sides of the paper (duplexing) 88 copying on letterhead 86 copying on transparencies 85 cover page setup copy options 94 create booklet copy options 95 creating a fax destination shortcut using the Embedded Web Server 120 creating an FTP shortcut using the...
User's Guide
Page 323
... 166 Custom Names 142 Custom Scan Sizes 143 Custom Types 142 Default Source 135 Disk Wiping 155 E‑mail Settings 177 Fax Mode (Analog Fax Setup) 169 Finishing 191 Flash Drive 185 K keypad printer control panel 14 L labels, paper tips 70 letterhead copying on 86 loading, multipurpose feeder 62... 193 Reports 144 Security Audit Log 156 Set Date and Time 156 Settings 190 SMTP Setup menu 152 Standard Network 145 Standard USB 151 Substitute Size 138 TCP/IP 147 Universal Setup 143 Utilities 195 Wireless 149 XPS 196 menus list 134 message e‑mail options 100 Miscellaneous menu 154 moving...
... 166 Custom Names 142 Custom Scan Sizes 143 Custom Types 142 Default Source 135 Disk Wiping 155 E‑mail Settings 177 Fax Mode (Analog Fax Setup) 169 Finishing 191 Flash Drive 185 K keypad printer control panel 14 L labels, paper tips 70 letterhead copying on 86 loading, multipurpose feeder 62... 193 Reports 144 Security Audit Log 156 Set Date and Time 156 Settings 190 SMTP Setup menu 152 Standard Network 145 Standard USB 151 Substitute Size 138 TCP/IP 147 Universal Setup 143 Utilities 195 Wireless 149 XPS 196 menus list 134 message e‑mail options 100 Miscellaneous menu 154 moving...
User's Guide
Page 329
...screen 15 uneven print density 287 Unformatted flash detected [53] 254 Universal Paper Size setting 57 Universal paper size setting 57 Universal Setup menu 143 unlinking trays 66, 67 Unsupported USB hub, please remove 242 updating options in printer driver 46 USB port 47 ... 110 volatile memory 209 erasing 209 volatility statement of 209 W wiping the printer hard disk 210 Wireless menu 149 wireless network configuration information 50 wireless network setup using the Embedded Web Server 53 wireless setup wizard using 51 X XPS menu 196 V verify print jobs 80 printing from a Macintosh computer ...
...screen 15 uneven print density 287 Unformatted flash detected [53] 254 Universal Paper Size setting 57 Universal paper size setting 57 Universal Setup menu 143 unlinking trays 66, 67 Unsupported USB hub, please remove 242 updating options in printer driver 46 USB port 47 ... 110 volatile memory 209 erasing 209 volatility statement of 209 W wiping the printer hard disk 210 Wireless menu 149 wireless network configuration information 50 wireless network setup using the Embedded Web Server 53 wireless setup wizard using 51 X XPS menu 196 V verify print jobs 80 printing from a Macintosh computer ...

