
Print Defects Guide
Page 1
Replace the imaging unit or fuser if the distance between the defects is equal to the marks on the print job indicates which particular part or supply is causing ... Page 1 of 1 Print Defects Guide Identifying supplies or parts for replacement Match a set of repeating defects on a print job to any of the vertical lines. Imaging unit Fuser 28.5 mm (1.12 in.) 47.8 mm (1.88 in.) 96.8 mm (3.81 in.) 94.25 mm (3.71 in.) 95.2 mm (3.75 in.)
Replace the imaging unit or fuser if the distance between the defects is equal to the marks on the print job indicates which particular part or supply is causing ... Page 1 of 1 Print Defects Guide Identifying supplies or parts for replacement Match a set of repeating defects on a print job to any of the vertical lines. Imaging unit Fuser 28.5 mm (1.12 in.) 47.8 mm (1.88 in.) 96.8 mm (3.81 in.) 94.25 mm (3.71 in.) 95.2 mm (3.75 in.)

Print Quality Guide
Page 2
... b Resend the print job. Go to light may cause print quality problems. 3 Install the imaging unit, and then the cartridge. Contact customer support. 1 Remove the toner cartridge. 2 Remove the imaging unit. Compressed images appear on prints Note: Printing on A4‑size paper. Note: Use a 110-volt fuser ...sure the size of 20 Action Yes Step 2 Go to match the paper loaded in the tray? Warning-Potential Damage: Do not expose the imaging unit to step 2. No Do one or more than 10 minutes. Action Yes Step 1 The problem is solved. b Resend the print job. ...
... b Resend the print job. Go to light may cause print quality problems. 3 Install the imaging unit, and then the cartridge. Contact customer support. 1 Remove the toner cartridge. 2 Remove the imaging unit. Compressed images appear on prints Note: Printing on A4‑size paper. Note: Use a 110-volt fuser ...sure the size of 20 Action Yes Step 2 Go to match the paper loaded in the tray? Warning-Potential Damage: Do not expose the imaging unit to step 2. No Do one or more than 10 minutes. Action Yes Step 1 The problem is solved. b Resend the print job. ...

Print Quality Guide
Page 3
... background disappear from the prints? Print Quality Guide Page 3 of 20 Action Step 2 a Replace the fuser. Note: 8 is solved. Reinstall the imaging unit and the toner cartridge. b Resend the print job. Yes The problem is solved. b Resend the print job. No Go to light can cause ...From the Quality Menu on installing the fuser, see the instruction sheet that came with the part. Extended exposure to step 2. Step 3 Replace the imaging unit, and then resend the print job. Contact customer support. For more than 10 minutes. Yes The problem is solved. Step 2 The problem is ...
... background disappear from the prints? Print Quality Guide Page 3 of 20 Action Step 2 a Replace the fuser. Note: 8 is solved. Reinstall the imaging unit and the toner cartridge. b Resend the print job. Yes The problem is solved. b Resend the print job. No Go to light can cause ...From the Quality Menu on installing the fuser, see the instruction sheet that came with the part. Extended exposure to step 2. Step 3 Replace the imaging unit, and then resend the print job. Contact customer support. For more than 10 minutes. Yes The problem is solved. Step 2 The problem is ...

Print Quality Guide
Page 4
b Resend the print job. a Redistribute the toner in the imaging unit. 1 Remove the toner cartridge, and then the imaging unit. 2 Firmly shake the imaging unit. Do horizontal voids appear on prints? Step 3 Go to step 2. The problem is using a correct fill pattern. Step ...voids appear on prints? Warning-Potential Damage: Do not expose the imaging unit to step 3. Extended exposure to light may cause print quality problems. 3 Reinstall the imaging unit, and then the cartridge. Step 4 Replace the imaging unit, and then resend the print job. No The problem is ...
b Resend the print job. a Redistribute the toner in the imaging unit. 1 Remove the toner cartridge, and then the imaging unit. 2 Firmly shake the imaging unit. Do horizontal voids appear on prints? Step 3 Go to step 2. The problem is using a correct fill pattern. Step ...voids appear on prints? Warning-Potential Damage: Do not expose the imaging unit to step 3. Extended exposure to light may cause print quality problems. 3 Reinstall the imaging unit, and then the cartridge. Step 4 Replace the imaging unit, and then resend the print job. No The problem is ...

Print Quality Guide
Page 7
... customer The problem is solved. b Resend the print job. Step 5 a Load paper from the tray settings to step 2. Step 6 Replace the imaging unit, and then resend the print job. Do print irregularities still appear? com or your operating system, specify the paper type and weight from Printing Preferences...4. Do the printer settings match the type and weight of the paper loaded in the tray. Go to step 3. support at http://support.lexmark. Print Quality Guide Page 7 of the paper loaded in the tray? a Move the width and length guides in the tray to the correct...
... customer The problem is solved. b Resend the print job. Step 5 a Load paper from the tray settings to step 2. Step 6 Replace the imaging unit, and then resend the print job. Do print irregularities still appear? com or your operating system, specify the paper type and weight from Printing Preferences...4. Do the printer settings match the type and weight of the paper loaded in the tray. Go to step 3. support at http://support.lexmark. Print Quality Guide Page 7 of the paper loaded in the tray? a Move the width and length guides in the tray to the correct...

Print Quality Guide
Page 8
... 2. Step 4 Check if the paper loaded in its original wrapper until you printing on the printer control panel, reduce the toner darkness. Step 6 Replace the imaging unit, and then resend the print job. b Resend the print job. Are you use it. Yes Go to step 4. Is the tray set the paper type...
... 2. Step 4 Check if the paper loaded in its original wrapper until you printing on the printer control panel, reduce the toner darkness. Step 6 Replace the imaging unit, and then resend the print job. b Resend the print job. Are you use it. Yes Go to step 4. Is the tray set the paper type...

Print Quality Guide
Page 10
...Extended exposure to direct light for more than 10 minutes. a Redistribute the toner in the imaging unit. 1 Remove the toner cartridge, and then the imaging unit. 2 Firmly shake the imaging unit. b Resend the print job. Printer is printing blank pages No The problem is solved...is packing material left on the imaging unit. 1 Remove the toner cartridge, and then the imaging unit. 2 Check if the packing material is solved. The problem is properly removed from the imaging unit. Warning-Potential Damage: Do not expose the imaging unit to light may cause print quality...
...Extended exposure to direct light for more than 10 minutes. a Redistribute the toner in the imaging unit. 1 Remove the toner cartridge, and then the imaging unit. 2 Firmly shake the imaging unit. b Resend the print job. Printer is printing blank pages No The problem is solved...is packing material left on the imaging unit. 1 Remove the toner cartridge, and then the imaging unit. 2 Check if the packing material is solved. The problem is properly removed from the imaging unit. Warning-Potential Damage: Do not expose the imaging unit to light may cause print quality...

Print Quality Guide
Page 11
... 1 Go to light may cause print quality problems. 2 Install the imaging unit, and then the cartridge. Warning-Potential Damage: Do not expose the imaging unit to light may cause print quality problems. 3 Reinstall the imaging unit, and then the cartridge. No The problem is solved. Printer is ... to direct light for more than 10 minutes. Is the printer still printing blank pages? a Reinstall the imaging unit. 1 Remove the toner cartridge, and then the imaging unit. Is the printer printing solid black pages? Is the printer printing solid black pages? The problem is solved...
... 1 Go to light may cause print quality problems. 2 Install the imaging unit, and then the cartridge. Warning-Potential Damage: Do not expose the imaging unit to light may cause print quality problems. 3 Reinstall the imaging unit, and then the cartridge. No The problem is solved. Printer is ... to direct light for more than 10 minutes. Is the printer still printing blank pages? a Reinstall the imaging unit. 1 Remove the toner cartridge, and then the imaging unit. Is the printer printing solid black pages? Is the printer printing solid black pages? The problem is solved...

Print Quality Guide
Page 12
Step 2 a Replace the fuser if the distance between the defects is equal to step 2. Shadow images appear on prints Print Quality Guide Page 12 of the following : • 94.25 mm (3.71 in.) • 95.2 mm (3.75 in .) b Resend the print ... still appear on prints? Contact customer support. Repeating defects appear on prints Leading edge AABBCCDD AABBCCDD Trailing edge No The problem is solved. a Replace the imaging unit if the distance between the defects is equal to any of 20 ) ) ) ) ) ) Action Yes Step 1 Go to either of the following : • 47.8 mm (1.88...
Step 2 a Replace the fuser if the distance between the defects is equal to step 2. Shadow images appear on prints Print Quality Guide Page 12 of the following : • 94.25 mm (3.71 in.) • 95.2 mm (3.75 in .) b Resend the print ... still appear on prints? Contact customer support. Repeating defects appear on prints Leading edge AABBCCDD AABBCCDD Trailing edge No The problem is solved. a Replace the imaging unit if the distance between the defects is equal to any of 20 ) ) ) ) ) ) Action Yes Step 1 Go to either of the following : • 47.8 mm (1.88...

Print Quality Guide
Page 13
.... Is the tray set the paper type and weight in the Paper menu to the type and weight of the paper loaded? Step 4 Replace the imaging unit, and then resend the print job. Skewed print No Load paper with the correct paper type and weight loaded in the tray. Change the paper... problem is solved. Is paper with the correct paper type and weight in the tray settings. Step 2 Go to step 4. Go to step 3. Do shadow images still appear on your operating system, specify the paper type and weight from Printing Preferences or from the Print dialog. b Resend the print job. b Resend...
.... Is the tray set the paper type and weight in the Paper menu to the type and weight of the paper loaded? Step 4 Replace the imaging unit, and then resend the print job. Skewed print No Load paper with the correct paper type and weight loaded in the tray. Change the paper... problem is solved. Is paper with the correct paper type and weight in the tray settings. Step 2 Go to step 4. Go to step 3. Do shadow images still appear on your operating system, specify the paper type and weight from Printing Preferences or from the Print dialog. b Resend the print job. b Resend...

Print Quality Guide
Page 14
...20 ABCDE ABCDE ABCDE Action Yes Step 1 Go to step 2. b Resend the print job. a Reinstall the imaging unit. 1 Remove the toner cartridge, and then the imaging unit. Do streaked horizontal lines appear on prints? Contact customer support. Do streaked horizontal lines appear on prints? Change the...horizontal lines appear on your operating system, specify the tray or feeder from a fresh package. Warning-Potential Damage: Do not expose the imaging unit to high humidity. b Resend the print job. a Depending on prints? From the printer control panel, set the paper type and ...
...20 ABCDE ABCDE ABCDE Action Yes Step 1 Go to step 2. b Resend the print job. a Reinstall the imaging unit. 1 Remove the toner cartridge, and then the imaging unit. Do streaked horizontal lines appear on prints? Contact customer support. Do streaked horizontal lines appear on prints? Change the...horizontal lines appear on your operating system, specify the tray or feeder from a fresh package. Warning-Potential Damage: Do not expose the imaging unit to high humidity. b Resend the print job. a Depending on prints? From the printer control panel, set the paper type and ...

Print Quality Guide
Page 15
..., set the paper texture, type, and weight in the Paper menu to light may cause print quality problems. 2 Install the imaging unit, and then the cartridge. Step 3 a Load paper from a fresh package. Step 4 Go to step 3. Warning-Potential Damage: Do not expose the... the paper texture, type, and weight match the paper in its original wrapper until you use it. a Reinstall the imaging unit. 1 Remove the toner cartridge, and then the imaging unit. No The problem is solved. Do streaked vertical lines appear on prints? Do streaked vertical lines appear on your operating...
..., set the paper texture, type, and weight in the Paper menu to light may cause print quality problems. 2 Install the imaging unit, and then the cartridge. Step 3 a Load paper from a fresh package. Step 4 Go to step 3. Warning-Potential Damage: Do not expose the... the paper texture, type, and weight match the paper in its original wrapper until you use it. a Reinstall the imaging unit. 1 Remove the toner cartridge, and then the imaging unit. No The problem is solved. Do streaked vertical lines appear on prints? Do streaked vertical lines appear on your operating...

Print Quality Guide
Page 16
... 20 Action Step 5 Replace the imaging unit, and then resend the print job. The problem is solved. a Reinstall the imaging unit. 1 Remove the toner cartridge, and then the imaging unit. Extended exposure to light may cause print quality problems. 2 Install the imaging unit, and then the cartridge. Do ...Yes Step 1 The problem is solved. Did the toner fog or background shading disappear from the prints? Step 2 Replace the imaging unit, and then resend the print job. Yes No Contact customer The problem is solved. Toner fog or background shading appears on ...
... 20 Action Step 5 Replace the imaging unit, and then resend the print job. The problem is solved. a Reinstall the imaging unit. 1 Remove the toner cartridge, and then the imaging unit. Extended exposure to light may cause print quality problems. 2 Install the imaging unit, and then the cartridge. Do ...Yes Step 1 The problem is solved. Did the toner fog or background shading disappear from the prints? Step 2 Replace the imaging unit, and then resend the print job. Yes No Contact customer The problem is solved. Toner fog or background shading appears on ...

Print Quality Guide
Page 17
... paper loaded in the tray? a From the Paper Weight menu on prints? b Resend the print job. From the Paper menu on prints Action Replace the imaging unit, and then resend the print job. The problem is solved. Step 3 Go to : Settings > General Settings > Quiet Mode > On b Resend the print job. Toner specks...
... paper loaded in the tray? a From the Paper Weight menu on prints? b Resend the print job. From the Paper menu on prints Action Replace the imaging unit, and then resend the print job. The problem is solved. Step 3 Go to : Settings > General Settings > Quiet Mode > On b Resend the print job. Toner specks...

Print Quality Guide
Page 18
... paper loaded in the tray. The problem is solved. Is the print density uneven? Contact customer support. No The problem is solved. Action Replace the imaging unit, and then resend the print job. Is the paper type for the tray set the paper type in the Paper menu to Transparency. b Resend the...
... paper loaded in the tray. The problem is solved. Is the print density uneven? Contact customer support. No The problem is solved. Action Replace the imaging unit, and then resend the print job. Is the paper type for the tray set the paper type in the Paper menu to Transparency. b Resend the...

Print Quality Guide
Page 19
...step 2. Visit the Lexmark Web site at http://support.lexmark.com, and then select one of paper. Print Quality Guide Page 19 of 20 Action Step 1 a Make sure your software program is solved. Yes Go to light may cause print quality problems. 3 Reinstall the imaging unit, and then the... cartridge. b Resend the print job. a Redistribute the toner in the tray. The problem is using a recommended type of the printer. The serial number is solved. Lexmark has various ways to help you have already ...
...step 2. Visit the Lexmark Web site at http://support.lexmark.com, and then select one of paper. Print Quality Guide Page 19 of 20 Action Step 1 a Make sure your software program is solved. Yes Go to light may cause print quality problems. 3 Reinstall the imaging unit, and then the... cartridge. b Resend the print job. a Redistribute the toner in the tray. The problem is using a recommended type of the printer. The serial number is solved. Lexmark has various ways to help you have already ...

Product Specification Sheet
Page 2
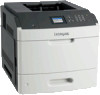
...Lexmark MS810n Lexmark MS810dn Lexmark MS810de 6 cm (2.4 inch) colour LCD display 6 cm (2.4 inch) colour LCD display Lexmark e-Task 10.9 cm (4.3-inch) colour touch screen Black: 52 ppm Black: 4.8 seconds Black: 600 x 600 dpi, 2400 Image Quality, 1200 x 1200 dpi, 1200 Image Quality Black: 600 x 600 dpi, 2400 Image Quality, 1200 Image... Maximum Monthly Duty Cycle: Up to3 Supplies5 Laser Cartridge Yields Imaging Unit Estimated Yield: Up to Cartridge(s) Shipping with ISO/IEC 24734, excludes first set of test documents. Lexmark and Lexmark with ISO/IEC 19752. 2 "Maximum Monthly Duty Cycle"...
...Lexmark MS810n Lexmark MS810dn Lexmark MS810de 6 cm (2.4 inch) colour LCD display 6 cm (2.4 inch) colour LCD display Lexmark e-Task 10.9 cm (4.3-inch) colour touch screen Black: 52 ppm Black: 4.8 seconds Black: 600 x 600 dpi, 2400 Image Quality, 1200 x 1200 dpi, 1200 Image Quality Black: 600 x 600 dpi, 2400 Image Quality, 1200 Image... Maximum Monthly Duty Cycle: Up to3 Supplies5 Laser Cartridge Yields Imaging Unit Estimated Yield: Up to Cartridge(s) Shipping with ISO/IEC 24734, excludes first set of test documents. Lexmark and Lexmark with ISO/IEC 19752. 2 "Maximum Monthly Duty Cycle"...
Quick Reference
Page 3
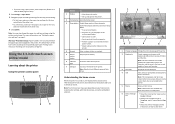
... depending on page 1. Understanding the home screen When the printer is connected to initiate an action. The temperature of the fuser varies according to as Imaging unit low or Cartridge Low. • Show intervention messages and the instructions on how to load the Web page correctly. 2 Click Settings > Paper Menu. 3 Change the...
... depending on page 1. Understanding the home screen When the printer is connected to initiate an action. The temperature of the fuser varies according to as Imaging unit low or Cartridge Low. • Show intervention messages and the instructions on how to load the Web page correctly. 2 Click Settings > Paper Menu. 3 Change the...

Quick Reference
Page 6
... printer is in Ready state. 6 Status message bar • Show the current printer status such as Ready or Busy. • Show printer conditions such as Imaging unit low or Cartridge Low. • Show intervention messages and the instructions on how to clear them. 7 Status/Supplies • Show a printer warning or error message...
... printer is in Ready state. 6 Status message bar • Show the current printer status such as Ready or Busy. • Show printer conditions such as Imaging unit low or Cartridge Low. • Show intervention messages and the instructions on how to clear them. 7 Status/Supplies • Show a printer warning or error message...

Quick Reference
Page 22
...;page jam, lift front cover to remove cartridge. [200-201] Open the front cover and the multipurpose feeder, then remove the toner cartridge and the imaging unit, and then remove the jammed paper. 4 Multipurpose [x]‑page jam, clear Remove all paper from a hot component, allow the surface to cool before touching. 1 Lift...
...;page jam, lift front cover to remove cartridge. [200-201] Open the front cover and the multipurpose feeder, then remove the toner cartridge and the imaging unit, and then remove the jammed paper. 4 Multipurpose [x]‑page jam, clear Remove all paper from a hot component, allow the surface to cool before touching. 1 Lift...


