
Clearing Jams Guide
Page 1
...or folding bars - Have an interlocking design - Identifying jams in the same stack. • Do not feed envelopes that paper travels through the printer. The path varies depending on the input source (tray or feeder) and depending on page 2 for a list of jammed sheets. When a..., weights, or types in the paper path The following illustration to access jam locations. For more information, see the setup documentation. Lexmark™ E360 Clearing Jams Guide Clearing jams Avoiding jams The following illustration and table indicate these locations. Have windows, holes, perforations, ...
...or folding bars - Have an interlocking design - Identifying jams in the same stack. • Do not feed envelopes that paper travels through the printer. The path varies depending on the input source (tray or feeder) and depending on page 2 for a list of jammed sheets. When a..., weights, or types in the paper path The following illustration to access jam locations. For more information, see the setup documentation. Lexmark™ E360 Clearing Jams Guide Clearing jams Avoiding jams The following illustration and table indicate these locations. Have windows, holes, perforations, ...
Clearing Jams Guide
Page 2
Remove the jam from the printer. 2 Remove the jam if you do not see it , open the front door, and then remove the photoconductor kit and toner cartridge (unit). 5 Align and ... to access each jam Jam number 200 201 202 231 233 234 235 242 251 To access the jam Try one or more of the printer, and remove any jammed sheets. 3 If you see it here.
Remove the jam from the printer. 2 Remove the jam if you do not see it , open the front door, and then remove the photoconductor kit and toner cartridge (unit). 5 Align and ... to access each jam Jam number 200 201 202 231 233 234 235 242 251 To access the jam Try one or more of the printer, and remove any jammed sheets. 3 If you see it here.
Clearing Jams Guide
Page 3
... the front door, and then remove the unit. 3 Open the rear door. 2 Lift the flap in front of the printer, and then remove any jammed sheets. 2 Lift the flap in front of the printer, and then remove any jammed sheets. 4 Remove the jam. 3 Align and insert the unit. 4 Close the front door.... 5 Press . 5 Close the rear door. 6 Close the front door. 7 Press . 3 201 paper jam CAUTION-HOT SURFACE: The fuser and the inside of the printer near the fuser may be hot. To reduce the risk of injury from a hot component, allow the surface to cool before removing paper from this...
... the front door, and then remove the unit. 3 Open the rear door. 2 Lift the flap in front of the printer, and then remove any jammed sheets. 2 Lift the flap in front of the printer, and then remove any jammed sheets. 4 Remove the jam. 3 Align and insert the unit. 4 Close the front door.... 5 Press . 5 Close the rear door. 6 Close the front door. 7 Press . 3 201 paper jam CAUTION-HOT SURFACE: The fuser and the inside of the printer near the fuser may be hot. To reduce the risk of injury from a hot component, allow the surface to cool before removing paper from this...
Clearing Jams Guide
Page 4
... door. 2 Open the rear door. 3 Remove the jam. 4 Close the rear door. 5 Close the front door. 6 Press . 233 paper jam 1 Remove the tray from the printer. 3 Pull the jammed sheets from this does not clear the jam, complete the steps in the duplex area of the... printer near the fuser may be hot. Pull the level down to cool before removing paper from the duplex area. 4 Insert the tray. 5 Press . To reduce ...
... door. 2 Open the rear door. 3 Remove the jam. 4 Close the rear door. 5 Close the front door. 6 Press . 233 paper jam 1 Remove the tray from the printer. 3 Pull the jammed sheets from this does not clear the jam, complete the steps in the duplex area of the... printer near the fuser may be hot. Pull the level down to cool before removing paper from the duplex area. 4 Insert the tray. 5 Press . To reduce ...
Clearing Jams Guide
Page 5
...visible, complete the following steps: 1 Open the front door, and then remove the unit. 2 Press . 242 paper jam 1 Remove the optional tray from the printer. 3 Insert the optional tray. 4 Press . 251 paper jam A sheet of paper not supported for duplex printing. 235 paper jam A duplex print job was sent... to the printer using a size of paper or specialty media failed to feed completely from the multipurpose feeder. If it may be still visible. A sheet is visible, ...
...visible, complete the following steps: 1 Open the front door, and then remove the unit. 2 Press . 242 paper jam 1 Remove the optional tray from the printer. 3 Insert the optional tray. 4 Press . 251 paper jam A sheet of paper not supported for duplex printing. 235 paper jam A duplex print job was sent... to the printer using a size of paper or specialty media failed to feed completely from the multipurpose feeder. If it may be still visible. A sheet is visible, ...
Troubleshooting Guide
Page 1
...number of the following : MAKE SURE THE PRINTER IS READY TO PRINT Make sure Ready or Power Saver appears on . Lexmark™ E360 Troubleshooting Guide Troubleshooting Solving basic printer problems If there are basic printer problems, or the printer is unresponsive, make sure: • The... power cord is plugged into the printer and a properly grounded electrical outlet. •...
...number of the following : MAKE SURE THE PRINTER IS READY TO PRINT Make sure Ready or Power Saver appears on . Lexmark™ E360 Troubleshooting Guide Troubleshooting Solving basic printer problems If there are basic printer problems, or the printer is unresponsive, make sure: • The... power cord is plugged into the printer and a properly grounded electrical outlet. •...

Troubleshooting Guide
Page 2
...: Setting Collate to Off in the software overrides the setting in Hex Trace mode. Unexpected page breaks occur Increase the Print Timeout value: 1 From the printer control panel, press . 2 Press the arrow buttons until Settings appears, and then press . 3 Press the arrow buttons until General Settings appears, and then ... if the option is not in the Finishing menu. Note: None of pages in each tray. 2 Move the paper guides to the printer system board. REDUCE THE COMPLEXITY OF THE PRINT JOB Reduce the complexity of the print job by reducing the number and size of fonts,...
...: Setting Collate to Off in the software overrides the setting in Hex Trace mode. Unexpected page breaks occur Increase the Print Timeout value: 1 From the printer control panel, press . 2 Press the arrow buttons until Settings appears, and then press . 3 Press the arrow buttons until General Settings appears, and then ... if the option is not in the Finishing menu. Note: None of pages in each tray. 2 Move the paper guides to the printer system board. REDUCE THE COMPLEXITY OF THE PRINT JOB Reduce the complexity of the print job by reducing the number and size of fonts,...

Troubleshooting Guide
Page 3
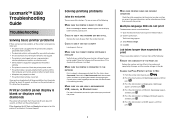
...8226; Store paper in the following : CHECK THE PAPER Use recommended paper. Load the paper stack toward the back of the following topics may have a printer part that jammed does not reprint after jam is cleared The paper path is set to guide you load does not exceed the maximum stack... height indicated in the tray or on the side of paper you . Print the print quality test pages: 1 Turn the printer off . 2 Load letter- For more of the tray as shown with the recommended print side facedown. You may help isolate print quality problems, print...
...8226; Store paper in the following : CHECK THE PAPER Use recommended paper. Load the paper stack toward the back of the following topics may have a printer part that jammed does not reprint after jam is cleared The paper path is set to guide you load does not exceed the maximum stack... height indicated in the tray or on the side of paper you . Print the print quality test pages: 1 Turn the printer off . 2 Load letter- For more of the tray as shown with the recommended print side facedown. You may help isolate print quality problems, print...
Troubleshooting Guide
Page 4
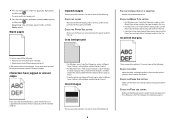
...the job to print. CHECK THE PAGE SIZE SETTING Before sending the job to the correct positions for the paper size loaded. Resetting the Printer appears briefly, and then Ready appears. Characters have jagged or uneven edges If you are using downloaded fonts, verify that the fonts are ...8226; For Macintosh users: From the Print dialog, make sure the Paper Type setting matches the paper loaded in the tray. • From the printer control panel Paper menu, make sure the Paper Type setting matches the paper loaded in the tray. Try one or more information, contact Customer Support....
...the job to print. CHECK THE PAGE SIZE SETTING Before sending the job to the correct positions for the paper size loaded. Resetting the Printer appears briefly, and then Ready appears. Characters have jagged or uneven edges If you are using downloaded fonts, verify that the fonts are ...8226; For Macintosh users: From the Print dialog, make sure the Paper Type setting matches the paper loaded in the tray. • From the printer control panel Paper menu, make sure the Paper Type setting matches the paper loaded in the tray. Try one or more information, contact Customer Support....
Troubleshooting Guide
Page 5
...tray. • For Macintosh users: From the Print dialog, make sure the Paper Type setting matches the paper loaded in the tray. • From the printer control panel Paper menu, make sure the Paper Type setting matches the paper loaded in its original wrapper until you use it . THE PAPER HAS...tray. • For Macintosh users: From the Print dialog, make sure the Paper Type setting matches the paper loaded in the tray. • From the printer control panel Paper menu, make sure the Paper Type setting matches the paper loaded in its original wrapper until you use it . CHECK THE PAPER...
...tray. • For Macintosh users: From the Print dialog, make sure the Paper Type setting matches the paper loaded in the tray. • From the printer control panel Paper menu, make sure the Paper Type setting matches the paper loaded in its original wrapper until you use it . THE PAPER HAS...tray. • For Macintosh users: From the Print dialog, make sure the Paper Type setting matches the paper loaded in the tray. • From the printer control panel Paper menu, make sure the Paper Type setting matches the paper loaded in its original wrapper until you use it . CHECK THE PAPER...

Troubleshooting Guide
Page 6
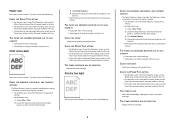
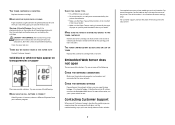
... the toner cartridge. Toner fog or background shading appears on the page These are possible solutions. Try one or more of the printer might be caught between the photoconductor kit and the fuser. Toner rubs off These are possible solutions. Streaked horizontal lines These are ... PAPER TYPE SETTING Load transparencies, and make sure the Paper Type setting is poor CHECK THE TRANSPARENCIES Use only transparencies recommended by the printer manufacturer. Try one or more of injury from a hot component, allow the surface to the correct positions for the job. Toner specks...
... the toner cartridge. Toner fog or background shading appears on the page These are possible solutions. Try one or more of the printer might be caught between the photoconductor kit and the fuser. Toner rubs off These are possible solutions. Streaked horizontal lines These are ... PAPER TYPE SETTING Load transparencies, and make sure the Paper Type setting is poor CHECK THE TRANSPARENCIES Use only transparencies recommended by the printer manufacturer. Try one or more of injury from a hot component, allow the surface to the correct positions for the job. Toner specks...
Troubleshooting Guide
Page 7
... one . CAUTION-HOT SURFACE: The inside top front cover of injury from a hot component, allow the surface to cool before the printer IP address to know your system administrator. THERE MAY BE EXCESS TONER IN THE PAPER PATH Contact Customer Support. Contacting Customer Support When you...LOW ON TONER Replace the used toner cartridge with a new one or more of the following : CHECK THE NETWORK CONNECTIONS Make sure the printer and computer are turned on the underside of http:// before touching. For more information, see . For customer support, contact the place ...
... one . CAUTION-HOT SURFACE: The inside top front cover of injury from a hot component, allow the surface to cool before the printer IP address to know your system administrator. THERE MAY BE EXCESS TONER IN THE PAPER PATH Contact Customer Support. Contacting Customer Support When you...LOW ON TONER Replace the used toner cartridge with a new one or more of the following : CHECK THE NETWORK CONNECTIONS Make sure the printer and computer are turned on the underside of http:// before touching. For more information, see . For customer support, contact the place ...

Quick Reference
Page 1
... tray. the position for the length of paper like A4 or legal, squeeze the length guide tab and slide the length guide backwards to the printer at one time. b Raise the A6 backstop. If you are loading a longer size of paper you move just the right width guide. 3 Squeeze the length...: the standard tray (Tray 1), also known as the 250-sheet tray, and either the optional 250-sheet tray or the optional 550-sheet tray (Tray 2). Lexmark™ E360 Quick Reference Loading paper Loading the standard 250-sheet tray The printer has two trays to overload the tray. 1
... tray. the position for the length of paper like A4 or legal, squeeze the length guide tab and slide the length guide backwards to the printer at one time. b Raise the A6 backstop. If you are loading a longer size of paper you move just the right width guide. 3 Squeeze the length...: the standard tray (Tray 1), also known as the 250-sheet tray, and either the optional 250-sheet tray or the optional 550-sheet tray (Tray 2). Lexmark™ E360 Quick Reference Loading paper Loading the standard 250-sheet tray The printer has two trays to overload the tray. 1

Quick Reference
Page 2
... the standard tray accommodates A6-size paper, so the width guides slide farther to adjust the length guide specifically created for the tray from the printer control panel. You also need to the center of the tray. Do not try to the maximum fill line; Note: The difference between the standard...
... the standard tray accommodates A6-size paper, so the width guides slide farther to adjust the length guide specifically created for the tray from the printer control panel. You also need to the center of the tray. Do not try to the maximum fill line; Note: The difference between the standard...

Quick Reference
Page 3
..., and envelopes. or 550-sheet tray, may be attached to complete the steps for single-page print jobs on letterhead or on page 1 to the printer at a time. or 550-sheet tray Only one optional drawer, which includes either a 250- the multipurpose feeder for loading a tray. Loading the optional 250- Opening...
..., and envelopes. or 550-sheet tray, may be attached to complete the steps for single-page print jobs on letterhead or on page 1 to the printer at a time. or 550-sheet tray Only one optional drawer, which includes either a 250- the multipurpose feeder for loading a tray. Loading the optional 250- Opening...

Quick Reference
Page 5
...is on loading transparencies, see the packaging the transparencies came in. • Load letterhead with the logo faceup and the top edge entering the printer first. • Load envelopes with stamps, clasps, snaps, windows, coated linings, or self-stick adhesives. The stamp and address are Warning-Potential... side down and the stamp location in the trays, then any trays containing the same size and type are automatically linked by the printer. shown to illustrate the proper orientation for the size and type used in the position shown. Select Source appears. 5 Press the ...
...is on loading transparencies, see the packaging the transparencies came in. • Load letterhead with the logo faceup and the top edge entering the printer first. • Load envelopes with stamps, clasps, snaps, windows, coated linings, or self-stick adhesives. The stamp and address are Warning-Potential... side down and the stamp location in the trays, then any trays containing the same size and type are automatically linked by the printer. shown to illustrate the proper orientation for the size and type used in the position shown. Select Source appears. 5 Press the ...

Quick Reference
Page 6
... button on the paper that is one of the photoconductor kit by pulling on the display. f Click OK, and then click Print. A list of the printer as needed in the Print dialog: 1 With a document open , choose File > Page Setup. 2 From the Paper Size pop-up menu, choose a paper size or... by Size. 8 Press the arrow buttons until Type appears, and then press . 9 Press the arrow buttons until Cancel appears. Canceling a print job from the printer control panel If the job is sent, to match the loaded paper. 3 Click OK. c From the Form Source list box, select the source containing the...
... button on the paper that is one of the photoconductor kit by pulling on the display. f Click OK, and then click Print. A list of the printer as needed in the Print dialog: 1 With a document open , choose File > Page Setup. 2 From the Paper Size pop-up menu, choose a paper size or... by Size. 8 Press the arrow buttons until Type appears, and then press . 9 Press the arrow buttons until Cancel appears. Canceling a print job from the printer control panel If the job is sent, to match the loaded paper. 3 Click OK. c From the Form Source list box, select the source containing the...

Quick Reference
Page 7
... the unit as far as it and continue printing. Warning-Potential Damage: Resetting the photoconductor counter without replacing the photoconductor may damage your printer and void your cartridge by aligning the arrows on the base of the unit with the arrows in your warranty. 8 Close the front... door. 4 Unpack the new photoconductor kit. Push the toner cartridge until it clicks into the printer by printing a menu settings page. 7 Note: You can check to touch the photoconductor drum. 6 Install the unit into place. 7 After you...
... the unit as far as it and continue printing. Warning-Potential Damage: Resetting the photoconductor counter without replacing the photoconductor may damage your printer and void your cartridge by aligning the arrows on the base of the unit with the arrows in your warranty. 8 Close the front... door. 4 Unpack the new photoconductor kit. Push the toner cartridge until it clicks into the printer by printing a menu settings page. 7 Note: You can check to touch the photoconductor drum. 6 Install the unit into place. 7 After you...

Quick Reference
Page 8
...power cord from the wall outlet. Warning-Potential Damage: Do not use household cleaners or detergents, as it will go. Cleaning the exterior of the printer. Warning-Potential Damage: When replacing a toner cartridge, do not leave the new cartridge exposed to distribute the toner. 5 Install the new toner ...cartridge by pressing the button on the left side of the printer and lowering the door. 2 Press the button on the base of the photoconductor kit, and then pull the toner cartridge out using the handle...
...power cord from the wall outlet. Warning-Potential Damage: Do not use household cleaners or detergents, as it will go. Cleaning the exterior of the printer. Warning-Potential Damage: When replacing a toner cartridge, do not leave the new cartridge exposed to distribute the toner. 5 Install the new toner ...cartridge by pressing the button on the left side of the printer and lowering the door. 2 Press the button on the base of the photoconductor kit, and then pull the toner cartridge out using the handle...

Service Manual
Page 3
...1-7 Tools 1-8 Acronyms 1-9 Diagnostics information 2-1 Start 2-1 Overview of the operator panel and menus 2-2 Indicator light 2-2 Buttons 2-3 Diagram of the printer menus 2-5 Messages and error codes 2-6 User attendance messages 2-6 Cartridge error messages 2-9 Paper jam error codes (200-series 2-9 Service error codes ...2-15 Symptom tables 2-20 POST symptom table 2-20 Printer symptom table 2-21 Service checks 2-22 Controller board service check 2-22 Cooling fan service check 2-23 Cover interlock switch service...
...1-7 Tools 1-8 Acronyms 1-9 Diagnostics information 2-1 Start 2-1 Overview of the operator panel and menus 2-2 Indicator light 2-2 Buttons 2-3 Diagram of the printer menus 2-5 Messages and error codes 2-6 User attendance messages 2-6 Cartridge error messages 2-9 Paper jam error codes (200-series 2-9 Service error codes ...2-15 Symptom tables 2-20 POST symptom table 2-20 Printer symptom table 2-21 Service checks 2-22 Controller board service check 2-22 Cooling fan service check 2-23 Cover interlock switch service...


