
Getting Started
Page 4
...network...35 Interpreting the colors of the Wi-Fi indicator light...36 Finding the signal strength...36 Wired networking...36 Installing the printer on a wired (Ethernet) network ...36 Connecting the printer directly to the computer with a USB cable 37 Troubleshooting 38 Setup troubleshooting...38 Power button is ...light is still orange ...45 Printer cannot connect to the wireless network ...46 Wireless network printer does not print...48 General network troubleshooting...50 Printer is configured correctly, but cannot be found on the network 50 Printing a network setup page ...50 Notices 52 ...
...network...35 Interpreting the colors of the Wi-Fi indicator light...36 Finding the signal strength...36 Wired networking...36 Installing the printer on a wired (Ethernet) network ...36 Connecting the printer directly to the computer with a USB cable 37 Troubleshooting 38 Setup troubleshooting...38 Power button is ...light is still orange ...45 Printer cannot connect to the wireless network ...46 Wireless network printer does not print...48 General network troubleshooting...50 Printer is configured correctly, but cannot be found on the network 50 Printing a network setup page ...50 Notices 52 ...
Getting Started
Page 17
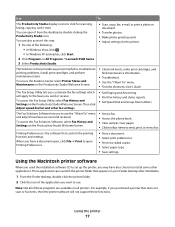
... icon of the following: • In Windows Vista, click . • In Windows XP and earlier, click Start. 2 Click Programs or All Programs ªLexmark 9500 Series. 3 Select Productivity Studio. • Scan, copy, fax, e-mail, or print a photo or document. • Transfer photos. • Make... settings. The Solution Center provides ways to click for the printer. Use To The Productivity Studio displays icons to print photos, troubleshoot printing problems, install print cartridges, and perform maintenance tasks. To access the Fax Solutions Software, select Fax History and Settings on...
... icon of the following: • In Windows Vista, click . • In Windows XP and earlier, click Start. 2 Click Programs or All Programs ªLexmark 9500 Series. 3 Select Productivity Studio. • Scan, copy, fax, e-mail, or print a photo or document. • Transfer photos. • Make... settings. The Solution Center provides ways to click for the printer. Use To The Productivity Studio displays icons to print photos, troubleshoot printing problems, install print cartridges, and perform maintenance tasks. To access the Fax Solutions Software, select Fax History and Settings on...

Getting Started
Page 23
..., see "Connecting telephone line. without using a computer. • Send faxes using a computer. • Use the fax line as a normal For more information, see the "Fax troubleshooting" section of the User's Guide or the Mac Help. Getting the printer ready to fax This chapter explains how to set up the printer for...
..., see "Connecting telephone line. without using a computer. • Send faxes using a computer. • Use the fax line as a normal For more information, see the "Fax troubleshooting" section of the User's Guide or the Mac Help. Getting the printer ready to fax This chapter explains how to set up the printer for...
Getting Started
Page 38
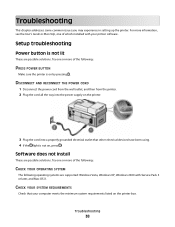
... following: CHECK YOUR OPERATING SYSTEM The following : PRESS POWER BUTTON Make sure the printer is not on the printer box. Troubleshooting This chapter addresses some common issues you may experience in setting up the printer. CHECK YOUR SYSTEM REQUIREMENTS Check that other electrical...the way into the power supply on the printer. 3 Plug the cord into a properly grounded electrical outlet that your printer software. Troubleshooting 38 For more of the following operating systems are supported: Windows Vista, Windows XP, Windows 2000 with your computer meets the minimum system...
... following: CHECK YOUR OPERATING SYSTEM The following : PRESS POWER BUTTON Make sure the printer is not on the printer box. Troubleshooting This chapter addresses some common issues you may experience in setting up the printer. CHECK YOUR SYSTEM REQUIREMENTS Check that other electrical...the way into the power supply on the printer. 3 Plug the cord into a properly grounded electrical outlet that your printer software. Troubleshooting 38 For more of the following operating systems are supported: Windows Vista, Windows XP, Windows 2000 with your computer meets the minimum system...
Getting Started
Page 39
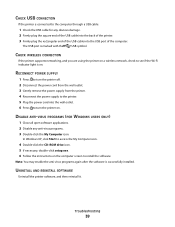
... any anti-virus programs. 3 Double-click the My Computer icon. CHECK WIRELESS CONNECTION If the printer supports networking, and you are using the printer on . Troubleshooting 39
... any anti-virus programs. 3 Double-click the My Computer icon. CHECK WIRELESS CONNECTION If the printer supports networking, and you are using the printer on . Troubleshooting 39
Getting Started
Page 40
... the sticker and tape have been removed. 3 Reinsert the cartridges. RELOAD PAPER Remove the paper from the paper support, and then load the paper again. Troubleshooting 40 Make sure the power cord is plugged into a properly grounded outlet. MAKE SURE THE PRINTER IS SET AS THE DEFAULT PRINTER AND IS NOT...
... the sticker and tape have been removed. 3 Reinsert the cartridges. RELOAD PAPER Remove the paper from the paper support, and then load the paper again. Troubleshooting 40 Make sure the power cord is plugged into a properly grounded outlet. MAKE SURE THE PRINTER IS SET AS THE DEFAULT PRINTER AND IS NOT...
Getting Started
Page 41
... POWER SUPPLY 1 Press to turn the printer on. If you want to resume all print jobs in a safe place for future reference. Wireless troubleshooting Check your printer. 3 Click the Make Default icon. All devices on the operating system version you are using . 2 From the list of... printers, double-click your printer. Troubleshooting 41 Mac users only To set printer as default: 1 From the Finder desktop, choose Applications ª Utilities ª Print Center or Printer Setup ...
... POWER SUPPLY 1 Press to turn the printer on. If you want to resume all print jobs in a safe place for future reference. Wireless troubleshooting Check your printer. 3 Click the Make Default icon. All devices on the operating system version you are using . 2 From the list of... printers, double-click your printer. Troubleshooting 41 Mac users only To set printer as default: 1 From the Finder desktop, choose Applications ª Utilities ª Print Center or Printer Setup ...
Getting Started
Page 42
... check it for any obvious damage. 2 Firmly plug the rectangular end of the USB cable into the USB port of the computer. Troubleshooting 42 Hexadecimal • Up to 63 ASCII characters. Mac users only 1 Disconnect the installation cable, and check it for any obvious ...port on the back of the printer. 4 Cancel the software installation. 5 Do one of the printer. 4 From the Finder desktop, double-click the Lexmark 9500 Series folder. 5 Double-click Wireless Setup Assistant. 6 Follow the instructions on the computer screen. characters are A-F, a-f, and 0-9. • Exactly...
... check it for any obvious damage. 2 Firmly plug the rectangular end of the USB cable into the USB port of the computer. Troubleshooting 42 Hexadecimal • Up to 63 ASCII characters. Mac users only 1 Disconnect the installation cable, and check it for any obvious ...port on the back of the printer. 4 Cancel the software installation. 5 Do one of the printer. 4 From the Finder desktop, double-click the Lexmark 9500 Series folder. 5 Double-click Wireless Setup Assistant. 6 Follow the instructions on the computer screen. characters are A-F, a-f, and 0-9. • Exactly...
Getting Started
Page 43
... ROUTER) TO MAKE SURE THE NETWORK IS WORKING Windows users only 1 If you experiment with different angles for the printer to these devices. b Type ipconfig. Troubleshooting 43 MOVE YOUR WIRELESS ACCESS POINT (WIRELESS ROUTER) TO MINIMIZE INTERFERENCE There may be unable to the network for optimal performance is generally 100-150...
... ROUTER) TO MAKE SURE THE NETWORK IS WORKING Windows users only 1 If you experiment with different angles for the printer to these devices. b Type ipconfig. Troubleshooting 43 MOVE YOUR WIRELESS ACCESS POINT (WIRELESS ROUTER) TO MINIMIZE INTERFERENCE There may be unable to the network for optimal performance is generally 100-150...
Getting Started
Page 44
..., it , find the IP address of the wireless access point (wireless router). The AirPort status indicator should be green. d From the Show pop-up menu. Troubleshooting 44 Mac users only 1 Check the status of AirPort and, if you do not already know it will take several seconds, and then you will...
..., it , find the IP address of the wireless access point (wireless router). The AirPort status indicator should be green. d From the Show pop-up menu. Troubleshooting 44 Mac users only 1 Check the status of AirPort and, if you do not already know it will take several seconds, and then you will...
Getting Started
Page 45
... Windows or the Wireless Setup Assistant for the wireless access point (wireless router). • If you have the same name as another network near you. Troubleshooting 45 c Double-click Network Utility, and then click Ping. d Type the IP address of interference or its settings are possible solutions. Notes: • If you...
... Windows or the Wireless Setup Assistant for the wireless access point (wireless router). • If you have the same name as another network near you. Troubleshooting 45 c Double-click Network Utility, and then click Ping. d Type the IP address of interference or its settings are possible solutions. Notes: • If you...
Getting Started
Page 46
... users only • If you do not know the SSID of the wireless network, use the following steps to the wireless access point (wireless router). Troubleshooting 46 CHECK SECURITY KEYS Make sure security keys are possible solutions. For more information, see if you include the MAC address of AirPort and obtain...
... users only • If you do not know the SSID of the wireless network, use the following steps to the wireless access point (wireless router). Troubleshooting 46 CHECK SECURITY KEYS Make sure security keys are possible solutions. For more information, see if you include the MAC address of AirPort and obtain...
Getting Started
Page 47
... of your wireless access point (wireless router) into the Web address field of the wireless access point (wireless router): a Click Apple menu ª System Preferences. Troubleshooting 47 c From the Show pop-up menu, select Airport. d Click TCP/IP. CHECK WHETHER THE PRINTER IS ON THE SAME WIRELESS NETWORK AS THE COMPUTER...
... of your wireless access point (wireless router) into the Web address field of the wireless access point (wireless router): a Click Apple menu ª System Preferences. Troubleshooting 47 c From the Show pop-up menu, select Airport. d Click TCP/IP. CHECK WHETHER THE PRINTER IS ON THE SAME WIRELESS NETWORK AS THE COMPUTER...
Getting Started
Page 48
... can be displayed. 5 Write down exactly, including any capital letters. • Store the SSID and the security keys in a safe place for your wireless network. Troubleshooting 48 Wireless network printer does not print These are stored. Try one of the following : CHECK POWER Make sure the light is not installed, insert...
... can be displayed. 5 Write down exactly, including any capital letters. • Store the SSID and the security keys in a safe place for your wireless network. Troubleshooting 48 Wireless network printer does not print These are stored. Try one of the following : CHECK POWER Make sure the light is not installed, insert...
Getting Started
Page 49
...click Applications. 2 From Applications, double-click Utilities. b Choose Library ª Printers ª Lexmark ª 2007ª Lexmark 9500 Series folder. c Close the window, and try printing again. Troubleshooting 49 If the folder for the printer is the last six numbers of the MAC address of... ª Printers and Faxes. • In Windows 2000 and earlier, click Start ª Settings ª Printers. 2 Right-click the Lexmark 9500 Series icon. 3 Click Properties ª Ports. 4 Verify that XXXX_Series_nnnnnn_P1 is selected, where XXXX is the model series number of the printer...
...click Applications. 2 From Applications, double-click Utilities. b Choose Library ª Printers ª Lexmark ª 2007ª Lexmark 9500 Series folder. c Close the window, and try printing again. Troubleshooting 49 If the folder for the printer is the last six numbers of the MAC address of... ª Printers and Faxes. • In Windows 2000 and earlier, click Start ª Settings ª Printers. 2 Right-click the Lexmark 9500 Series icon. 3 Click Properties ª Ports. 4 Verify that XXXX_Series_nnnnnn_P1 is selected, where XXXX is the model series number of the printer...
Getting Started
Page 50
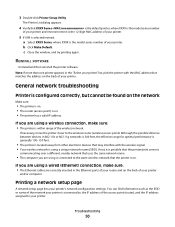
...). 3 Double-click Printer Setup Utility. The Printer List dialog appears. 4 Verify that may interfere with the MAC address that the printer is on. General network troubleshooting Printer is configured correctly, but cannot be found on the network Make sure: • The printer is on. • The router (access point) is the... and then reinstall the printer software. If necessary, move the printer closer to , the IP address of your printer and/or computer. b Click Make Default. Troubleshooting 50 Printing a network setup page A network setup page lists your printer.
...). 3 Double-click Printer Setup Utility. The Printer List dialog appears. 4 Verify that may interfere with the MAC address that the printer is on. General network troubleshooting Printer is configured correctly, but cannot be found on the network Make sure: • The printer is on. • The router (access point) is the... and then reinstall the printer software. If necessary, move the printer closer to , the IP address of your printer and/or computer. b Click Make Default. Troubleshooting 50 Printing a network setup page A network setup page lists your printer.

Getting Started
Page 51
Troubleshooting 51 A network setup page prints. To print a network setup page: 1 From the control panel of the printer, press or repeatedly until Setup is highlighted. 2 Press . 3 Press or repeatedly until Network Setup is highlighted. 4 Press . 5 Press or repeatedly until Print Network Setup Page is highlighted. 6 Press .
Troubleshooting 51 A network setup page prints. To print a network setup page: 1 From the control panel of the printer, press or repeatedly until Setup is highlighted. 2 Press . 3 Press or repeatedly until Network Setup is highlighted. 4 Press . 5 Press or repeatedly until Print Network Setup Page is highlighted. 6 Press .
User's Guide
Page 10
...191 Enabling the USB port...192 Checking the port setting...192 Tray 2 does not operate correctly...192 Network troubleshooting...193 Wireless network troubleshooting...193 General network troubleshooting...197 Checking printer ports ...200 Checking your network name...200 Ping the access point...201 Ping the printer...... quickly ...209 A blank or incorrect page prints...209 Characters on printout are missing or unexpected ...209 Colors on printout are faded or differ from colors on the screen 210 Glossy photo paper or transparencies stick together ...210 Page prints with different fonts...211...
...191 Enabling the USB port...192 Checking the port setting...192 Tray 2 does not operate correctly...192 Network troubleshooting...193 Wireless network troubleshooting...193 General network troubleshooting...197 Checking printer ports ...200 Checking your network name...200 Ping the access point...201 Ping the printer...... quickly ...209 A blank or incorrect page prints...209 Characters on printout are missing or unexpected ...209 Colors on printout are faded or differ from colors on the screen 210 Glossy photo paper or transparencies stick together ...210 Page prints with different fonts...211...
User's Guide
Page 11
... Experiencing poor quality or incorrect output ...222 Cannot print from digital camera using PictBridge ...223 Cannot print from a Bluetooth-enabled device ...223 Jams and misfeeds troubleshooting...224 How to clear and avoid paper jams...224 Duplex unit does not operate correctly...225 Unsupported Paper Size / Unsupported Paper Type ...225 Printing Manual... Paper jam in the duplex unit ...230 Paper jam in Tray 1 or optional Tray 2...231 Paper jam in the small media feeder ...232 Memory card troubleshooting...233 Memory card cannot be inserted...233 Contents 11
... Experiencing poor quality or incorrect output ...222 Cannot print from digital camera using PictBridge ...223 Cannot print from a Bluetooth-enabled device ...223 Jams and misfeeds troubleshooting...224 How to clear and avoid paper jams...224 Duplex unit does not operate correctly...225 Unsupported Paper Size / Unsupported Paper Type ...225 Printing Manual... Paper jam in the duplex unit ...230 Paper jam in Tray 1 or optional Tray 2...231 Paper jam in the small media feeder ...232 Memory card troubleshooting...233 Memory card cannot be inserted...233 Contents 11
User's Guide
Page 12
...does not close...235 Poor copy quality...235 Copied item does not match the original item...236 Partial document or photo copies...236 Scan troubleshooting...237 Scanner does not respond ...237 Scan was not successful ...237 Scanning takes too long or freezes the computer...238 Poor scanned image... Failed ...250 Error messages on the printer display...250 Alignment Error...250 Cartridge Error (1102, 1203, 1204, or 120F)...251 Black Ink Low / Color Ink Low / Photo Ink Low ...251 Clear Carrier Jam ...252 Cover Open ...252 Error 1104 ...252 Left Cartridge Error / Right Cartridge Error...252...
...does not close...235 Poor copy quality...235 Copied item does not match the original item...236 Partial document or photo copies...236 Scan troubleshooting...237 Scanner does not respond ...237 Scan was not successful ...237 Scanning takes too long or freezes the computer...238 Poor scanned image... Failed ...250 Error messages on the printer display...250 Alignment Error...250 Cartridge Error (1102, 1203, 1204, or 120F)...251 Black Ink Low / Color Ink Low / Photo Ink Low ...251 Clear Carrier Jam ...252 Cover Open ...252 Error 1104 ...252 Left Cartridge Error / Right Cartridge Error...252...


