Clearing Jams Guide
Page 12
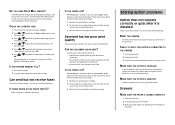
Place the original document in the ADF, and then press Start to continue with the scan job. 12 6 Close the scanner cover. 7 When all the jammed paper is removed, Return the Removed Original and Press Start appears.
Place the original document in the ADF, and then press Start to continue with the scan job. 12 6 Close the scanner cover. 7 When all the jammed paper is removed, Return the Removed Original and Press Start appears.
Troubleshooting Guide
Page 3
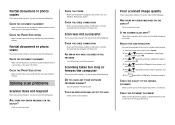
... 1 From the printer control panel, press System. 2 Press or repeatedly until Default Settings appears, and then press OK. 3 Press or repeatedly until Scan Defaults appears, and then press OK. 4 Press or repeatedly until Resolution appears, and then press OK. 5 Press or repeatedly to the computer and the... printer. Solving scan problems Scanner does not respond These are possible solutions. AN ERROR MAY HAVE OCCURRED IN THE PROGRAM Turn off and then restart the computer....
... 1 From the printer control panel, press System. 2 Press or repeatedly until Default Settings appears, and then press OK. 3 Press or repeatedly until Scan Defaults appears, and then press OK. 4 Press or repeatedly until Resolution appears, and then press OK. 5 Press or repeatedly to the computer and the... printer. Solving scan problems Scanner does not respond These are possible solutions. AN ERROR MAY HAVE OCCURRED IN THE PROGRAM Turn off and then restart the computer....
Troubleshooting Guide
Page 4
... connecting to the computer and the printer. MAKE SURE SPEED DIAL IS SET UP PROPERLY • Check to make sure you are possible solutions. Cannot scan from a computer These are possible solutions. IS THE DOCUMENT LOADED PROPERLY? Note: Do not load postcards, photos, small items, transparencies, photo paper, or thin media...
... connecting to the computer and the printer. MAKE SURE SPEED DIAL IS SET UP PROPERLY • Check to make sure you are possible solutions. Cannot scan from a computer These are possible solutions. IS THE DOCUMENT LOADED PROPERLY? Note: Do not load postcards, photos, small items, transparencies, photo paper, or thin media...
Troubleshooting Guide
Page 5
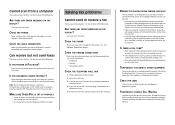
...YOU HAVE VOICE MAIL SERVICE? The printer performs its power-on . Try one or more of the telephone line connection. • Increase the fax scan resolution, if possible. Received fax has poor print quality These are using, select the option. Ask the person who sent you the fax to ... front-to-back several times to consider adding a second telephone line for the printer. IS THE PRINTER MEMORY FULL? 1 Dial the fax number. 2 Scan the original document one or more of the original document is not installed correctly. Make sure paper is installed These are correct. When Replace Print...
...YOU HAVE VOICE MAIL SERVICE? The printer performs its power-on . Try one or more of the telephone line connection. • Increase the fax scan resolution, if possible. Received fax has poor print quality These are using, select the option. Ask the person who sent you the fax to ... front-to-back several times to consider adding a second telephone line for the printer. IS THE PRINTER MEMORY FULL? 1 Dial the fax number. 2 Scan the original document one or more of the original document is not installed correctly. Make sure paper is installed These are correct. When Replace Print...

User's Guide
Page 3
... name and number...27 Setting the country code ...28 Setting the date...30 Setting the time...30 Understanding the fax and scan software...31 Understanding Address Book Editor ...31 Understanding Express Scan Manager ...31 Installing options 32 Installing a 550-sheet drawer...32 Securing the 550-sheet drawer to the printer...33 Installing...
... name and number...27 Setting the country code ...28 Setting the date...30 Setting the time...30 Understanding the fax and scan software...31 Understanding Address Book Editor ...31 Understanding Express Scan Manager ...31 Installing options 32 Installing a 550-sheet drawer...32 Securing the 550-sheet drawer to the printer...33 Installing...
User's Guide
Page 5
... an e-mail address...81 Customizing the default scan settings from the printer control panel 81 Adjusting the auto exposure of scanned images ...81 Adjusting the color saturation of a scanned image ...82 Adjusting the image compression of a scanned image 82 Adjusting the scan resolution ...82 Adjusting the sharpness of a scanned image...82 Selecting the size of the document...
... an e-mail address...81 Customizing the default scan settings from the printer control panel 81 Adjusting the auto exposure of scanned images ...81 Adjusting the color saturation of a scanned image ...82 Adjusting the image compression of a scanned image 82 Adjusting the scan resolution ...82 Adjusting the sharpness of a scanned image...82 Selecting the size of the document...

User's Guide
Page 6
... ...83 Selecting the type of document being scanned ...84 Making a scanned image lighter or darker...84 Setting the scan color mode...84 Setting the scanned image file type ...85 Customizing the scan settings for an individual scan job 85 Customizing the scan settings when scanning to e-mail 85 Customizing the scan settings when scanning to a computer 85 Faxing 86 Sending a fax...
... ...83 Selecting the type of document being scanned ...84 Making a scanned image lighter or darker...84 Setting the scan color mode...84 Setting the scanned image file type ...85 Customizing the scan settings for an individual scan job 85 Customizing the scan settings when scanning to e-mail 85 Customizing the scan settings when scanning to a computer 85 Faxing 86 Sending a fax...
User's Guide
Page 7
... the duplex unit...116 Clearing jams in the ADF...119 Understanding printer menus 122 Menus list...122 Default Settings Menu...122 Copy Defaults menu ...122 Scan Defaults menu ...125 Fax Defaults menu...127 Tray Settings menu...128 Tray 1 (MPT) menu...128 Tray 2 menu ...129 Tray 3 menu ...129 Information Pages menu...130... menu ...136 USB Settings menu...136 Fax Settings menu...136 System Settings menu ...140 Maintenance menu...144 Secure Settings menu ...145 Admin Reports menu ...146 Scan to Email menu ...146 Panel Language Menu...147 Contents 7
... the duplex unit...116 Clearing jams in the ADF...119 Understanding printer menus 122 Menus list...122 Default Settings Menu...122 Copy Defaults menu ...122 Scan Defaults menu ...125 Fax Defaults menu...127 Tray Settings menu...128 Tray 1 (MPT) menu...128 Tray 2 menu ...129 Tray 3 menu ...129 Information Pages menu...130... menu ...136 USB Settings menu...136 Fax Settings menu...136 System Settings menu ...140 Maintenance menu...144 Secure Settings menu ...145 Admin Reports menu ...146 Scan to Email menu ...146 Panel Language Menu...147 Contents 7
User's Guide
Page 9
... document or photo copies...177 Solving scan problems...177 Scanner does not respond ...177 Scan was not successful ...177 Scanning takes too long or freezes the computer...178 Poor scanned image quality ...178 Partial document or photo scans...179 Cannot scan from a computer ...179 Solving fax...Paper jam message remains after jam is cleared ...183 Solving print quality problems...184 Repeating defects...184 Color misregistration...184 Light colored line, white line, or incorrectly colored line 185 Streaked vertical lines ...186 Print is too light ...186 Print irregularities ...187 Print is ...
... document or photo copies...177 Solving scan problems...177 Scanner does not respond ...177 Scan was not successful ...177 Scanning takes too long or freezes the computer...178 Poor scanned image quality ...178 Partial document or photo scans...179 Cannot scan from a computer ...179 Solving fax...Paper jam message remains after jam is cleared ...183 Solving print quality problems...184 Repeating defects...184 Color misregistration...184 Light colored line, white line, or incorrectly colored line 185 Streaked vertical lines ...186 Print is too light ...186 Print irregularities ...187 Print is ...

User's Guide
Page 16
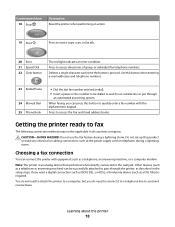
... the printer control panel, the Embedded Web Server, or Address Book Editor. 2 Copy Activate Copy mode. 3 Fax Activate Fax mode. 4 E-Mail Activate Email mode. 5 Scan Activate Scan mode. 6 Display Shows messages describing the current state of the printer. 10 Job indicator light When illuminated, it indicates that there is a fax job in...
... the printer control panel, the Embedded Web Server, or Address Book Editor. 2 Copy Activate Copy mode. 3 Fax Activate Fax mode. 4 E-Mail Activate Email mode. 5 Scan Activate Scan mode. 6 Display Shows messages describing the current state of the printer. 10 Job indicator light When illuminated, it indicates that there is a fax job in...

User's Guide
Page 17
... printer is on the display. Printer control panel item Description 11 Back Return to the previous menu. 12 Color Mode Switches between Color and B&W (black-and-white) modes for your copy, fax, or scan job Control panel item 13 Job Status 14 System 15 Keypad 16 Wake Up Description Press to the main...
... printer is on the display. Printer control panel item Description 11 Back Return to the previous menu. 12 Color Mode Switches between Color and B&W (black-and-white) modes for your copy, fax, or scan job Control panel item 13 Job Status 14 System 15 Keypad 16 Wake Up Description Press to the main...
User's Guide
Page 18
Press to start a copy, scan, or fax job. 20 Error 21 Speed Dial 22 Clear button The red light indicates an error condition. Learning about the printer 18 Control panel ...
Press to start a copy, scan, or fax job. 20 Error 21 Speed Dial 22 Clear button The red light indicates an error condition. Learning about the printer 18 Control panel ...
User's Guide
Page 31
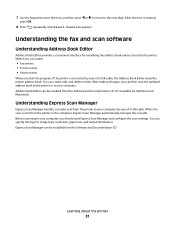
... computer. Address Book Editor can be installed from the printer to your computer by way of a USB cable. Understanding Express Scan Manager Express Scan Manager handles scan jobs sent from the Software and Documentation CD. You can create, edit, and delete entries. It is connected by way ... output destination. 7 Use the keypad to enter the time, and then press or to move to the computer, Express Scan Manager automatically manages the scan job. When the scan is entered, press OK. 8 Press repeatedly until Select Function appears. After the time is sent from the Software and ...
... computer. Address Book Editor can be installed from the printer to your computer by way of a USB cable. Understanding Express Scan Manager Express Scan Manager handles scan jobs sent from the Software and Documentation CD. You can create, edit, and delete entries. It is connected by way ... output destination. 7 Use the keypad to enter the time, and then press or to move to the computer, Express Scan Manager automatically manages the scan job. When the scan is entered, press OK. 8 Press repeatedly until Select Function appears. After the time is sent from the Software and ...
User's Guide
Page 62
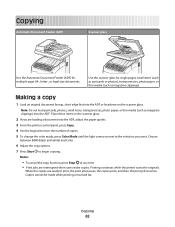
..., press Copy. 4 Use the keypad to enter the number of copies. 5 To change the color mode, press Color Mode until the light comes on the scanner glass. Copies cannot be made while printing a received fax..., transparencies, photo paper, or thin media (such as magazine clippings). Choose between B&W (black and white) and Color. 6 Adjust the copy options. 7 Press Start to print, the print job pauses, the copies print, and then...-, or legal-size documents. Printing continues while the printer scans the originals. Copying 62 Making a copy 1 Load an original document faceup, short edge first into ...
..., press Copy. 4 Use the keypad to enter the number of copies. 5 To change the color mode, press Color Mode until the light comes on the scanner glass. Copies cannot be made while printing a received fax..., transparencies, photo paper, or thin media (such as magazine clippings). Choose between B&W (black and white) and Color. 6 Adjust the copy options. 7 Press Start to print, the print job pauses, the copies print, and then...-, or legal-size documents. Printing continues while the printer scans the originals. Copying 62 Making a copy 1 Load an original document faceup, short edge first into ...

User's Guide
Page 70
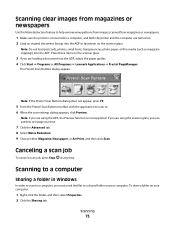
... the scanner glass. 3 If you are loading a document into the ADF, adjust the paper guides. 4 Click Start ΠPrograms or All Programs ΠLexmark Applications ΠPresto! Scanning Automatic Document Feeder (ADF) Scanner glass Use the Automatic Document Feeder (ADF) for single pages, small items (such as postcards or photos), transparencies, photo...
... the scanner glass. 3 If you are loading a document into the ADF, adjust the paper guides. 4 Click Start ΠPrograms or All Programs ΠLexmark Applications ΠPresto! Scanning Automatic Document Feeder (ADF) Scanner glass Use the Automatic Document Feeder (ADF) for single pages, small items (such as postcards or photos), transparencies, photo...

User's Guide
Page 71
...adjust the paper guides. 4 Click Start ΠPrograms or All Programs ΠLexmark Applications ΠPresto! Note: If the Scan Buttons dialog does not appear, press F9. Place these items on the scanner glass. Scanning 71 For more information, see the application help. If you are using the scanner glass..., you can preview one page at a time. 7 For best results, select Editing Text (OCR), and then click Scan. 8 Once the image loads, click Save. 9 Select a destination you are using the computer 1 Make sure the printer is connected to , and then ...
...adjust the paper guides. 4 Click Start ΠPrograms or All Programs ΠLexmark Applications ΠPresto! Note: If the Scan Buttons dialog does not appear, press F9. Place these items on the scanner glass. Scanning 71 For more information, see the application help. If you are using the scanner glass..., you can preview one page at a time. 7 For best results, select Editing Text (OCR), and then click Scan. 8 Once the image loads, click Save. 9 Select a destination you are using the computer 1 Make sure the printer is connected to , and then ...
User's Guide
Page 72
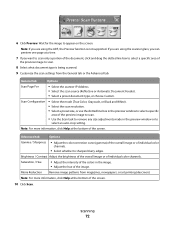
... (Reflective or Automatic Document Feeder). • Select a preset document type, or choose Custom. Scan Configuration • Select the mode (True Color, Grayscale, or Black and White). • Select the scan resolution. • Select a preset size, or use the dotted line box in the preview window to ... at the bottom of the preview image to scan. • Use the Scan task to remove any size adjustments made in the image. • Adjust the hue of individual color channels. 6 Click Preview. Scanning 72 Wait for the image to scan. 8 Select what document type is not supported...
... (Reflective or Automatic Document Feeder). • Select a preset document type, or choose Custom. Scan Configuration • Select the mode (True Color, Grayscale, or Black and White). • Select the scan resolution. • Select a preset size, or use the dotted line box in the preview window to ... at the bottom of the preview image to scan. • Use the Scan task to remove any size adjustments made in the image. • Adjust the hue of individual color channels. 6 Click Preview. Scanning 72 Wait for the image to scan. 8 Select what document type is not supported...
User's Guide
Page 73
...tab. Place these items on the scanner glass. PageManager. Note: If the Presto! Scanning 73 Scan Buttons dialog appears. Scan Buttons dialog does not appear, press F9. 5 From the Presto! Canceling a scan job To cancel a scan job, press Stop at a time. 7 Click the Advanced tab. 8 Select Moire ... to scan to. 6 When the scan settings dialog appears, click Preview. Scanning to a computer Sharing a folder in Windows In order to scan to a computer, you are loading a document into the ADF, adjust the paper guides. 4 Click Start ΠPrograms or All Programs ΠLexmark Applications ...
...tab. Place these items on the scanner glass. PageManager. Note: If the Presto! Scanning 73 Scan Buttons dialog appears. Scan Buttons dialog does not appear, press F9. 5 From the Presto! Canceling a scan job To cancel a scan job, press Stop at a time. 7 Click the Advanced tab. 8 Select Moire ... to scan to. 6 When the scan settings dialog appears, click Preview. Scanning to a computer Sharing a folder in Windows In order to scan to a computer, you are loading a document into the ADF, adjust the paper guides. 4 Click Start ΠPrograms or All Programs ΠLexmark Applications ...
User's Guide
Page 74
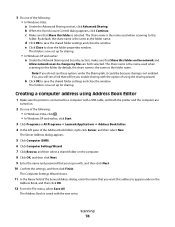
...section, make sure that Share this folder is the same as the folder name. By default, the share name is the name used when scanning to this address to save the shared folder settings and close the window. Creating a computer address using Address Book Editor 1 Make sure the... one of the following : • In Windows Vista, click . • In Windows XP and earlier, click Start. 3 Click Programs or All Programs Œ Lexmark Applications Œ Address Book Editor. 4 In the left pane of the Address Book Editor, right-click Server, and then select New. c Make sure that you...
...section, make sure that Share this folder is the same as the folder name. By default, the share name is the name used when scanning to this address to save the shared folder settings and close the window. Creating a computer address using Address Book Editor 1 Make sure the... one of the following : • In Windows Vista, click . • In Windows XP and earlier, click Start. 3 Click Programs or All Programs Œ Lexmark Applications Œ Address Book Editor. 4 In the left pane of the Address Book Editor, right-click Server, and then select New. c Make sure that you...
User's Guide
Page 75
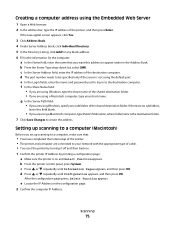
... using a Macintosh computer, type your network with the appropriate type of the printer, and then press Enter. Setting up scanning to a computer (Macintosh) Before you set up scanning to a computer, make sure that you want this field blank. • If you are using Windows, specify any blank... printer IP Address by printing a configuration page: a Make sure the printer is on the configuration page. 2 Confirm the computer IP Address: Scanning 75 b From the printer control panel, press System. If there are no subfolders, leave this address to appear under in to your short name....
... using a Macintosh computer, type your network with the appropriate type of the printer, and then press Enter. Setting up scanning to a computer (Macintosh) Before you set up scanning to a computer, make sure that you want this field blank. • If you are using Windows, specify any blank... printer IP Address by printing a configuration page: a Make sure the printer is on the configuration page. 2 Confirm the computer IP Address: Scanning 75 b From the printer control panel, press System. If there are no subfolders, leave this address to appear under in to your short name....


