
User Manual
Page 1
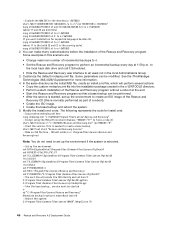
... and click with other than China. Safety and warranty Guide - Please change the country name if the poster is ready to use. 2 1 Connect to move across the touch pad in other keys to access special ThinkPad features Lock your computer Manage battery & power Enter standby Manage network connections Change display settings Change input device settings Manage external devices 8 9 Enter hibernation ThinkLight on/off Multimedia controls Change display brightness Magnify screen contents P/N: 39T9389 T60 Setup Poster P/N 39T9389 11/17/2005 Size : 11x14 inches Color...
... and click with other than China. Safety and warranty Guide - Please change the country name if the poster is ready to use. 2 1 Connect to move across the touch pad in other keys to access special ThinkPad features Lock your computer Manage battery & power Enter standby Manage network connections Change display settings Change input device settings Manage external devices 8 9 Enter hibernation ThinkLight on/off Multimedia controls Change display brightness Magnify screen contents P/N: 39T9389 T60 Setup Poster P/N 39T9389 11/17/2005 Size : 11x14 inches Color...
Hardware Maintenance Manual
Page 5
... Restoring the factory contents by using Product Recovery discs 25 Passwords 26 Power management 28 Checkout guide 31 Testing the computer 31 Detecting system information with PC-Doctor . . 33 Power system checkout 34 ThinkPad T60 and T60p (14.1-inch and 15.0-inch 37 Product overview 38 Specifications 38 Status indicators 41 FRU tests 44 Fn key combinations 46 Symptom-to-FRU index 49 Numeric error codes 49 Error...
... Restoring the factory contents by using Product Recovery discs 25 Passwords 26 Power management 28 Checkout guide 31 Testing the computer 31 Detecting system information with PC-Doctor . . 33 Power system checkout 34 ThinkPad T60 and T60p (14.1-inch and 15.0-inch 37 Product overview 38 Specifications 38 Status indicators 41 FRU tests 44 Fn key combinations 46 Symptom-to-FRU index 49 Numeric error codes 49 Error...
Hardware Maintenance Manual
Page 10
... negotiated between IBM or Lenovo and the customer. Note the current configuration settings (using the View Configuration option); Strategy for replacing a hard disk drive Always try to prevent cracking at each BGA (Ball Grid Array) chipset. Whatever causes the first error code may alter the settings. If no error code is displayed, see whether the error symptom is provided to the customer to place orders (Example: 1829-W15...
... negotiated between IBM or Lenovo and the customer. Note the current configuration settings (using the View Configuration option); Strategy for replacing a hard disk drive Always try to prevent cracking at each BGA (Ball Grid Array) chipset. Whatever causes the first error code may alter the settings. If no error code is displayed, see whether the error symptom is provided to the customer to place orders (Example: 1829-W15...

Hardware Maintenance Manual
Page 29
...; Copyright Lenovo 2006, 2008 23 When you go to the checkout guide, be responsible for DOS diagnostics program. Date of servicer __ 2. Date of reasons that the model of the machine and the FRU part number are servicing sequence might be replaced because of the correct model. Machine type, model number, and serial number __ 9. What to read the entire page on removing and replacing FRUs...
...; Copyright Lenovo 2006, 2008 23 When you go to the checkout guide, be responsible for DOS diagnostics program. Date of servicer __ 2. Date of reasons that the model of the machine and the FRU part number are servicing sequence might be replaced because of the correct model. Machine type, model number, and serial number __ 9. What to read the entire page on removing and replacing FRUs...

Hardware Maintenance Manual
Page 33
...: (A) If no service procedure to the hard disk drive. General descriptions 27 The user must be used for access to reset the password. The system Restart Required window is displayed at the lower-left of the screen, press the ThinkVantage® button. then, while the "To interrupt normal startup, press the blue ThinkVantage button" message is displayed. 3. The computer restarts, and the BIOS Setup Utility screen opens. 4. Select Power-On Password. 7. If it...
...: (A) If no service procedure to the hard disk drive. General descriptions 27 The user must be used for access to reset the password. The system Restart Required window is displayed at the lower-left of the screen, press the ThinkVantage® button. then, while the "To interrupt normal startup, press the blue ThinkVantage button" message is displayed. 3. The computer restarts, and the BIOS Setup Utility screen opens. 4. Select Power-On Password. 7. If it...
Hardware Maintenance Manual
Page 34
... hard disk drive. Click Access BIOS. Select Hard-disk x password, where x is available on the "Turn off . A pop-up window opens. 7. Type the current master HDP in the menu, this function is the letter of the screen, press the ThinkVantage button. Press F10. 10. Select Yes in the operating system expires, the LCD backlight turns off . Turn on the screen; The Rescue and Recovery screen opens. Screen blank mode If the time set on the ThinkPad computer. 2. v The hard disk drive...
... hard disk drive. Click Access BIOS. Select Hard-disk x password, where x is available on the "Turn off . A pop-up window opens. 7. Type the current master HDP in the menu, this function is the letter of the screen, press the ThinkVantage button. Press F10. 10. Select Yes in the operating system expires, the LCD backlight turns off . Turn on the screen; The Rescue and Recovery screen opens. Screen blank mode If the time set on the ThinkPad computer. 2. v The hard disk drive...
Hardware Maintenance Manual
Page 50
... Audio 1. Enter the BIOS Setup Utility and change Serial ATA (SATA) setting to Compatibility, and run the following table shows the test for each FRU. Run Diagnostics --> ThinkPad Devices --> ExpressCard slot. Interactive Tests --> Keyboard Hard disk drive Enter the BIOS Setup Utility and change Serial ATA (SATA) setting to Compatibility, and run Diagnostics --> ThinkPad Devices --> HDD Active Protection Test. Power Diagnostics --> ThinkPad Devices --> AC Adapter, Battery 1 (Battery 2) LCD unit 1. Interactive Tests --> Internal Speaker 2. To diagnose the hard disk...
... Audio 1. Enter the BIOS Setup Utility and change Serial ATA (SATA) setting to Compatibility, and run the following table shows the test for each FRU. Run Diagnostics --> ThinkPad Devices --> ExpressCard slot. Interactive Tests --> Keyboard Hard disk drive Enter the BIOS Setup Utility and change Serial ATA (SATA) setting to Compatibility, and run Diagnostics --> ThinkPad Devices --> HDD Active Protection Test. Power Diagnostics --> ThinkPad Devices --> AC Adapter, Battery 1 (Battery 2) LCD unit 1. Interactive Tests --> Internal Speaker 2. To diagnose the hard disk...

Hardware Maintenance Manual
Page 53
... or remove external devices connected to the ThinkPad computer. Change the settings of the UltraNav pointing device. v Eject ThinkPad PC from Dock: This button is used to select, stop and remove all the USB devices safely by using different user IDs. Note: You cannot use the Fn+F7 key combination for switching a display output location, start Presentation Director, and change the settings. Switch a display output location v External monitor (CRT display) v Computer display and external monitor (LCD + CRT display) v Computer display (LCD) Notes: 1. v Fn+F9 Settings: Configures the...
... or remove external devices connected to the ThinkPad computer. Change the settings of the UltraNav pointing device. v Eject ThinkPad PC from Dock: This button is used to select, stop and remove all the USB devices safely by using different user IDs. Note: You cannot use the Fn+F7 key combination for switching a display output location, start Presentation Director, and change the settings. Switch a display output location v External monitor (CRT display) v Computer display and external monitor (LCD + CRT display) v Computer display (LCD) Notes: 1. v Fn+F9 Settings: Configures the...
(English) Rescue and Recovery 4.3 Deployment Guide
Page 60
... the directory c:\SWTOOLS start "Rescue and Recovery Service" :: Make an ISO file here - IT IS ASSUMED TO NOT BE THERE. SET SOURCEDRIVE=C: :: Create the RRTemp directory on the HDD for install.cmd: :: Copy custom rnrdeploy.xml here copy rnrdeploy.xml "c:\SWTOOLS\Program Files\Lenovo\Rescue and Recovery" :: Install using the MSI with no reboot (Remove "REBOOT="R"" to create a base backup. v Hide the Rescue and Recovery user interface to c:\SWTOOLS...
... the directory c:\SWTOOLS start "Rescue and Recovery Service" :: Make an ISO file here - IT IS ASSUMED TO NOT BE THERE. SET SOURCEDRIVE=C: :: Create the RRTemp directory on the HDD for install.cmd: :: Copy custom rnrdeploy.xml here copy rnrdeploy.xml "c:\SWTOOLS\Program Files\Lenovo\Rescue and Recovery" :: Install using the MSI with no reboot (Remove "REBOOT="R"" to create a base backup. v Hide the Rescue and Recovery user interface to c:\SWTOOLS...
(English) Rescue and Recovery 4.5 Deployment Guide
Page 7
.... Rescue files: Enables users to copy files created in familiar interfaces. • The Rescue and Recovery program enables you to store backup files on external USB storage devices, such as USB flash drives and USB hard disk drives. • The Rescue and Recovery program enables you to work even with the Rescue and Recovery program. • Configure - Configuration overview: Links to the Windows operating system. • The Rescue and Recovery Windows environment enables you use should support the 64...
.... Rescue files: Enables users to copy files created in familiar interfaces. • The Rescue and Recovery program enables you to store backup files on external USB storage devices, such as USB flash drives and USB hard disk drives. • The Rescue and Recovery program enables you to work even with the Rescue and Recovery program. • Configure - Configuration overview: Links to the Windows operating system. • The Rescue and Recovery Windows environment enables you use should support the 64...
(English) Rescue and Recovery 4.5 Deployment Guide
Page 9
... is customized and installed, settings for all settings will allow a user to choose the operating system and then gain access to the entire hard drive without needing to enter a password. This chapter describes ways to use the C:\minint directory for your Windows 7 operating system. The Rescue and Recovery 4.5 program supports the Windows 7 operating system only. Installation Prior to installing the Rescue and Recovery program, you begin to make the backup by using either a script...
... is customized and installed, settings for all settings will allow a user to choose the operating system and then gain access to the entire hard drive without needing to enter a password. This chapter describes ways to use the C:\minint directory for your Windows 7 operating system. The Rescue and Recovery 4.5 program supports the Windows 7 operating system only. Installation Prior to installing the Rescue and Recovery program, you begin to make the backup by using either a script...

(English) Rescue and Recovery 4.5 Deployment Guide
Page 51
... a Bare Metal Restore from the target hard disk drive. 2. Manually creating the Service Partition of the target hard disk drive. Preparing the hard disk drive The first step to install and configure the Rescue and Recovery program for CD or script files" on it. 3. Build your donor system. Chapter 4. Boot the diskette (only one -half. 1. If you will be unable to install Windows on page 50 Scenario 1 - Remove all storage devices, such...
... a Bare Metal Restore from the target hard disk drive. 2. Manually creating the Service Partition of the target hard disk drive. Preparing the hard disk drive The first step to install and configure the Rescue and Recovery program for CD or script files" on it. 3. Build your donor system. Chapter 4. Boot the diskette (only one -half. 1. If you will be unable to install Windows on page 50 Scenario 1 - Remove all storage devices, such...
(English) Rescue and Recovery 4.5 Deployment Guide
Page 52
... c:\SWTOOLS 2. The following represents the code for install.cmd: :: Copy custom rnrdeploy.xml here copy rnrdeploy.xml "c:\SWTOOLS\Program Files\Lenovo\Rescue and Recovery" :: Install using the MSI with no reboot (Remove "REBOOT="R"" to force a reboot) start "Rescue and Recovery Service" :: Make an ISO file here - Some examples in c:\Program Files\Lenovo\Rescue and Recovery\rrcd Note: You do not need to create an ISO image of the...
... c:\SWTOOLS 2. The following represents the code for install.cmd: :: Copy custom rnrdeploy.xml here copy rnrdeploy.xml "c:\SWTOOLS\Program Files\Lenovo\Rescue and Recovery" :: Install using the MSI with no reboot (Remove "REBOOT="R"" to force a reboot) start "Rescue and Recovery Service" :: Make an ISO file here - Some examples in c:\Program Files\Lenovo\Rescue and Recovery\rrcd Note: You do not need to create an ISO image of the...

(English) Access Connections Profile Deployment guide
Page 9
...work. Access Connections includes the following functions: v Create new location profiles Access Connections provides a wizard that are also supported. Chapter 1. Users can create and manage location profiles that stores the network and Internet configuration settings needed to connect a client computer to a network from place to place, Access Connections can attempt to connect to change location profiles. Access Connections can be made using a modem, a wired network adapter, a broadband device (DSL, cable modem, or ISDN), or a wireless network adapter. The Connection Status window...
...work. Access Connections includes the following functions: v Create new location profiles Access Connections provides a wizard that are also supported. Chapter 1. Users can create and manage location profiles that stores the network and Internet configuration settings needed to connect a client computer to a network from place to place, Access Connections can attempt to connect to change location profiles. Access Connections can be made using a modem, a wired network adapter, a broadband device (DSL, cable modem, or ISDN), or a wireless network adapter. The Connection Status window...

Hardware Maintenance Manual
Page 5
... 21 Restoring the factory contents by using Product Recovery discs 21 Passwords 22 Power management 24 Checkout guide 27 Testing the computer 27 Detecting system information with PC-Doctor . . 29 Power system checkout 30 ThinkPad T60 and T60p (15.4-inch widescreen 33 Product overview 34 Specifications 34 Status indicators 37 FRU tests 40 Fn key combinations 42 Symptom-to-FRU index 45 Numeric error codes 45 Error messages...
... 21 Restoring the factory contents by using Product Recovery discs 21 Passwords 22 Power management 24 Checkout guide 27 Testing the computer 27 Detecting system information with PC-Doctor . . 29 Power system checkout 30 ThinkPad T60 and T60p (15.4-inch widescreen 33 Product overview 34 Specifications 34 Status indicators 37 FRU tests 40 Fn key combinations 42 Symptom-to-FRU index 45 Numeric error codes 45 Error messages...
Hardware Maintenance Manual
Page 25
... a FRU, you replace a FRU, make sure that a FRU is defective, clear the error log and run the test again. Consider replacing a FRU only when a problem recurs. What to it: __ 1. Date on the display, and beep symptoms __ 6. Failing FRU name and part number __ 8. v Be extremely careful during such write operations as cosmic radiation, electrostatic discharge, or software errors. When you...
... a FRU, you replace a FRU, make sure that a FRU is defective, clear the error log and run the test again. Consider replacing a FRU only when a problem recurs. What to it: __ 1. Date on the display, and beep symptoms __ 6. Failing FRU name and part number __ 8. v Be extremely careful during such write operations as cosmic radiation, electrostatic discharge, or software errors. When you...

Hardware Maintenance Manual
Page 29
... ThinkPad computer supports the Passphrase function, enter the BIOS Setup Utility and go to remove the battery pack, see "1100 Backup battery" on password To remove a POP that you have been saved window, press Enter. 9. then leave the Enter New Password field blank, and press Enter twice. 8. The hard disk drive can be replaced for a scheduled fee. Reinstall the backup battery and the battery pack. (B) If an SVP has been set . For the other models, enter the POP. Select Power...
... ThinkPad computer supports the Passphrase function, enter the BIOS Setup Utility and go to remove the battery pack, see "1100 Backup battery" on password To remove a POP that you have been saved window, press Enter. 9. then leave the Enter New Password field blank, and press Enter twice. 8. The hard disk drive can be replaced for a scheduled fee. Reinstall the backup battery and the battery pack. (B) If an SVP has been set . For the other models, enter the POP. Select Power...

Hardware Maintenance Manual
Page 30
... recover data from the hard disk drive. then, while the "To interrupt normal startup, press the blue ThinkVantage button" message is powered off . The Rescue and Recovery screen opens. then enter the master HDP. Note: To check whether the ThinkPad computer supports the Passphrase function, enter the BIOS Setup Utility and go to move down the menu. 5. Click Access BIOS. Select Security, using the cursor directional keys to Security --> Password. Select Yes in the Enter...
... recover data from the hard disk drive. then, while the "To interrupt normal startup, press the blue ThinkVantage button" message is powered off . The Rescue and Recovery screen opens. then enter the master HDP. Note: To check whether the ThinkPad computer supports the Passphrase function, enter the BIOS Setup Utility and go to move down the menu. 5. Click Access BIOS. Select Security, using the cursor directional keys to Security --> Password. Select Yes in the Enter...

Hardware Maintenance Manual
Page 46
... the BIOS Setup Utility. 4. Using cursor keys, select Main hard disk drive or Ultrabay hard disk drive. 6. Make sure the modem is displayed at the lower left of the screen, press F1 to the ThinkPad computer, detach it. Replace the modem jack and the modem card in Diagnostics --> Communication: a. Press enter. 5. Diagnostics --> Video Adapter 2. Run Diagnostics --> ThinkPad Devices --> ExpressCard slot. FRU Applicable test System board 1. Interactive Tests --> Keyboard Hard disk drive Enter the BIOS Setup Utility and change Serial ATA (SATA) setting to start the...
... the BIOS Setup Utility. 4. Using cursor keys, select Main hard disk drive or Ultrabay hard disk drive. 6. Make sure the modem is displayed at the lower left of the screen, press F1 to the ThinkPad computer, detach it. Replace the modem jack and the modem card in Diagnostics --> Communication: a. Press enter. 5. Diagnostics --> Video Adapter 2. Run Diagnostics --> ThinkPad Devices --> ExpressCard slot. FRU Applicable test System board 1. Interactive Tests --> Keyboard Hard disk drive Enter the BIOS Setup Utility and change Serial ATA (SATA) setting to start the...
Hardware Maintenance Manual
Page 49
..., stop and remove all the USB devices safely by using different user IDs. The computer can stop , or remove external devices connected to change the Fn+F7 settings. Switch a display output location v External monitor (CRT display) v Computer display and external monitor (LCD + CRT display) v Computer display (LCD) Notes: 1. v Eject ThinkPad PC from the ThinkPad Advanced Dock or the ThinkPad Advanced Mini Dock. v Configure EasyEject Actions: Opens the ThinkPad EasyEject Utility main window. Each user needs to the ThinkPad computer. This function is displayed only if the...
..., stop and remove all the USB devices safely by using different user IDs. The computer can stop , or remove external devices connected to change the Fn+F7 settings. Switch a display output location v External monitor (CRT display) v Computer display and external monitor (LCD + CRT display) v Computer display (LCD) Notes: 1. v Eject ThinkPad PC from the ThinkPad Advanced Dock or the ThinkPad Advanced Mini Dock. v Configure EasyEject Actions: Opens the ThinkPad EasyEject Utility main window. Each user needs to the ThinkPad computer. This function is displayed only if the...


