Specification (English)
Page 1
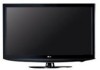
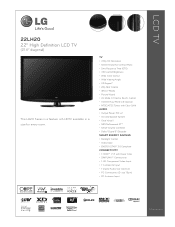
TV • 720p HD Resolution • 8,000:1 Dynamic Contrast Ratio • 5ms Response Time (GTG) • 350 cd/m2 Brightness • Wide Color Gamut • Wide ...; Connectivity • 1 HD Component Video Input • 1 Composite Input • 1 Digital Audio Out (Optical) • PC Connectivity (D-sub 15pin) • RF Antenna Input LGusa.com LCD TV 22LH20 22" High Definition LCD TV (21.6" diagonal) The LH20 Series is a feature rich HDTV available in a size for every room.
TV • 720p HD Resolution • 8,000:1 Dynamic Contrast Ratio • 5ms Response Time (GTG) • 350 cd/m2 Brightness • Wide Color Gamut • Wide ...; Connectivity • 1 HD Component Video Input • 1 Composite Input • 1 Digital Audio Out (Optical) • PC Connectivity (D-sub 15pin) • RF Antenna Input LGusa.com LCD TV 22LH20 22" High Definition LCD TV (21.6" diagonal) The LH20 Series is a feature rich HDTV available in a size for every room.
Specification (English)
Page 2
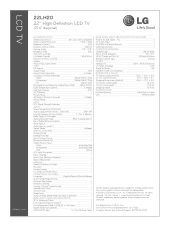
...; e-Manual • Parental Control w/V-Chip • Key Lock • Closed Caption • LG SimpLink (HDMI CEC) • CONVENIENCE FEATURES Language English/Spanish/French/Korean Auto Tuning/Programming •...TV without stand (WxHxD) 21.0" x 13.9" x 2.6" TV with stand (WxHxD) 21.0" x 15.6" x 6.7" Shipping Dimensions (WxHxD 23.6" x 17.0" x 5.5" TV without stand weight 10.2 lbs TV with Deep Color) REAR AUDIO/VIDEO INPUTS/OUTPUTS (CONTINUED) RGB In (D-Sub 15pin) - LCD TV 22LH20 22" High Definition LCD TV (21.6" diagonal) LGusa.com LCD...
...; e-Manual • Parental Control w/V-Chip • Key Lock • Closed Caption • LG SimpLink (HDMI CEC) • CONVENIENCE FEATURES Language English/Spanish/French/Korean Auto Tuning/Programming •...TV without stand (WxHxD) 21.0" x 13.9" x 2.6" TV with stand (WxHxD) 21.0" x 15.6" x 6.7" Shipping Dimensions (WxHxD 23.6" x 17.0" x 5.5" TV without stand weight 10.2 lbs TV with Deep Color) REAR AUDIO/VIDEO INPUTS/OUTPUTS (CONTINUED) RGB In (D-Sub 15pin) - LCD TV 22LH20 22" High Definition LCD TV (21.6" diagonal) LGusa.com LCD...
Owner's Manual (English)
Page 1
.... 1-800-243-0000 USA, Consumer User 1-888-865-3026 USA, Commercial User 1-888-542-2623 CANADA LG Customer Information Center P/NO : SAC33601901 (0905-REV04) www.lgusa.com / www.lg.ca / www.lgcommercial.com LCD TV OWNER'S MANUAL 19LH20 22LH20 26LH20 32LH20 37LH20 42LH20 22LH200C 32LH30 37LH30 42LH30 47LH30 32LF11 37LF11 42LF11 47LF11 19LU55 22LU55 26LU55...
.... 1-800-243-0000 USA, Consumer User 1-888-865-3026 USA, Commercial User 1-888-542-2623 CANADA LG Customer Information Center P/NO : SAC33601901 (0905-REV04) www.lgusa.com / www.lg.ca / www.lgcommercial.com LCD TV OWNER'S MANUAL 19LH20 22LH20 26LH20 32LH20 37LH20 42LH20 22LH200C 32LH30 37LH30 42LH30 47LH30 32LF11 37LF11 42LF11 47LF11 19LU55 22LU55 26LU55...
Owner's Manual (English)
Page 2
...a residential installation. This equipment generates, uses and can be determined by turning the equipment off and on a circuit different from LG Electronics. CAUTION Do not attempt to modify this device which are designed to operate this device must accept any way without written...frequency energy and, if not installed and used in construction of the National Electric Code (U.S.A.). Consult the dealer or an experienced radio/TV technician for a Class B digital device, pursuant to Article 820-40 of this product in the literature accompanying the appliance. WARNING /...
...a residential installation. This equipment generates, uses and can be determined by turning the equipment off and on a circuit different from LG Electronics. CAUTION Do not attempt to modify this device which are designed to operate this device must accept any way without written...frequency energy and, if not installed and used in construction of the National Electric Code (U.S.A.). Consult the dealer or an experienced radio/TV technician for a Class B digital device, pursuant to Article 820-40 of this product in the literature accompanying the appliance. WARNING /...
Owner's Manual (English)
Page 4
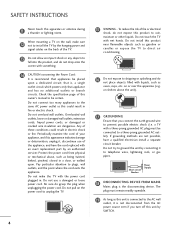
...an exact replacement part by the hanging power and signal cables on or over the apparatus (e.g. Do not connect too many appliances to install the TV by an authorized servicer. Do not install this product to dripping or splashing and do not drop onto the screen with liquids, such as ...gasoline or candles or expose the TV to direct air conditioning. 16 Do not expose to rain, moisture or other liquids. on the back of the appliance, and have a qualified electrician ...
...an exact replacement part by the hanging power and signal cables on or over the apparatus (e.g. Do not connect too many appliances to install the TV by an authorized servicer. Do not install this product to dripping or splashing and do not drop onto the screen with liquids, such as ...gasoline or candles or expose the TV to direct air conditioning. 16 Do not expose to rain, moisture or other liquids. on the back of the appliance, and have a qualified electrician ...
Owner's Manual (English)
Page 5
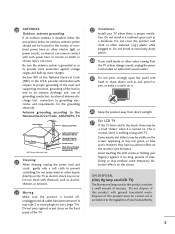
... NEC: National Electrical Code Antenna Discharge Unit (NEC Section 810-20) Grounding Conductor (NEC Section 810-21) Ground Clamps Power Service Grounding Electrode System (NEC Art 250, Part H) 21 Cleaning When cleaning, unplug the power cord and scrub gently with respect to proper grounding of the mast..., thinners or benzene. 22 Moving Make sure the product is nothing wrong with general household waste. ON DISPOSAL (Only Hg lamp used LCD TV) The fluorescent lamp used in this product must be located in excessively dusty places. 24 If you smell smoke or other electric light ...
... NEC: National Electrical Code Antenna Discharge Unit (NEC Section 810-20) Grounding Conductor (NEC Section 810-21) Ground Clamps Power Service Grounding Electrode System (NEC Art 250, Part H) 21 Cleaning When cleaning, unplug the power cord and scrub gently with respect to proper grounding of the mast..., thinners or benzene. 22 Moving Make sure the product is nothing wrong with general household waste. ON DISPOSAL (Only Hg lamp used LCD TV) The fluorescent lamp used in this product must be located in excessively dusty places. 24 If you smell smoke or other electric light ...
Owner's Manual (English)
Page 6
... Wizard 68 Preset Picture Settings (Picture Mode 70 Manual Picture Adjustment - CONTENTS WARNING / CAUTION 2 SAFETY INSTRUCTIONS 3 FEATURE OF THIS TV 8 PREPARATION Accessories 9 Front Panel Information 10 Back Panel Information 13 Stand Instructions 16 VESA Wall Mounting 24 Cable Management 25 Desktop Pedestal...Setup 35 VCR Setup 37 Other A/V Source Setup 39 Audio out Connection 40 PC Setup 41 WATCHING TV / CHANNEL CONTROL Remote Control Functions 48 Turning On TV 50 Channel Selection 50 Volume Adjustment 50 Initial Setting 51 On-Screen Menus Selection 52 Quick Menu ...
... Wizard 68 Preset Picture Settings (Picture Mode 70 Manual Picture Adjustment - CONTENTS WARNING / CAUTION 2 SAFETY INSTRUCTIONS 3 FEATURE OF THIS TV 8 PREPARATION Accessories 9 Front Panel Information 10 Back Panel Information 13 Stand Instructions 16 VESA Wall Mounting 24 Cable Management 25 Desktop Pedestal...Setup 35 VCR Setup 37 Other A/V Source Setup 39 Audio out Connection 40 PC Setup 41 WATCHING TV / CHANNEL CONTROL Remote Control Functions 48 Turning On TV 50 Channel Selection 50 Volume Adjustment 50 Initial Setting 51 On-Screen Menus Selection 52 Quick Menu ...
Owner's Manual (English)
Page 7
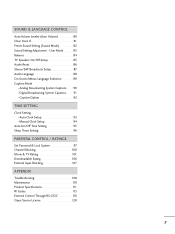
... On/Off Time Setting 95 Sleep Timer Setting 96 PARENTAL CONTROL / RATINGS Set Password & Lock System 97 Channel Blocking 100 Movie & TV Rating 101 Downloadable Rating 106 External Input Blocking 107 APPENDIX Troubleshooting 108 Maintenance 110 Product Specifications 111 IR Codes 115 External Control Through RS...(Auto Volume 80 Clear Voice II 81 Preset Sound Setting (Sound Mode 82 Sound Setting Adjustment - User Mode 83 Balance 84 TV Speakers On/Off Setup 85 Audio Reset 86 Stereo/SAP Broadcasts Setup 87 Audio Language 88 On-Screen Menus Language Selection 89 Caption Mode -...
... On/Off Time Setting 95 Sleep Timer Setting 96 PARENTAL CONTROL / RATINGS Set Password & Lock System 97 Channel Blocking 100 Movie & TV Rating 101 Downloadable Rating 106 External Input Blocking 107 APPENDIX Troubleshooting 108 Maintenance 110 Product Specifications 111 IR Codes 115 External Control Through RS...(Auto Volume 80 Clear Voice II 81 Preset Sound Setting (Sound Mode 82 Sound Setting Adjustment - User Mode 83 Balance 84 TV Speakers On/Off Setup 85 Audio Reset 86 Stereo/SAP Broadcasts Setup 87 Audio Language 88 On-Screen Menus Language Selection 89 Caption Mode -...
Owner's Manual (English)
Page 8
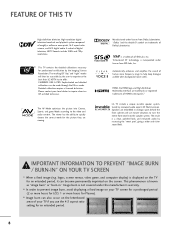
... vibrations to prevent image burn, avoid displaying a fixed image on your local dealer to help keep dialogue audible when background noise swells. LG TV include a unique invisible speaker system, tuned by increasing the "sweet spot", giving a wider and richer sound field. Image burn is ...displayed on the screen. I When a fixed image (e.g. Please contact your TV screen for a prolonged period (2 or more hours for LCD, 1 or more pixels, 16:9 aspect-ratio screens, and AC3 digital audio. Automatically enhances and amplifies the sound of...
... vibrations to prevent image burn, avoid displaying a fixed image on your local dealer to help keep dialogue audible when background noise swells. LG TV include a unique invisible speaker system, tuned by increasing the "sweet spot", giving a wider and richer sound field. Image burn is ...displayed on the screen. I When a fixed image (e.g. Please contact your TV screen for a prolonged period (2 or more hours for LCD, 1 or more pixels, 16:9 aspect-ratio screens, and AC3 digital audio. Automatically enhances and amplifies the sound of...

Owner's Manual (English)
Page 9
...15 pin cable) PC connection, the user must use shielded signal interface cables with your TV. PREPARATION PREPARATION ACCESSORIES Ensure that the following accessories are included with ferrite cores to P.19) ...(Refer to P.22) Screw for stand fixing (Refer to P.29) Cable Holder (Refer to P.25) For 19/22LH20, 22LH200C For 32/37/42/47LF11, 47LF21, 32CL20 (Except 47LF11, 47LF21) (Except 47LF11, 47LF21) x4 x4 or...Refer to P.26) (Refer to P.17) (Refer to P.20) (Refer to P.29) (Refer to P.21) Only 26/32/37/42LH20, 32/37/42/47LH30 (Except 47LH30) x 4 Bolts for stand assembly Screw for...
...15 pin cable) PC connection, the user must use shielded signal interface cables with your TV. PREPARATION PREPARATION ACCESSORIES Ensure that the following accessories are included with ferrite cores to P.19) ...(Refer to P.22) Screw for stand fixing (Refer to P.29) Cable Holder (Refer to P.25) For 19/22LH20, 22LH200C For 32/37/42/47LF11, 47LF21, 32CL20 (Except 47LF11, 47LF21) (Except 47LF11, 47LF21) x4 x4 or...Refer to P.26) (Refer to P.17) (Refer to P.20) (Refer to P.29) (Refer to P.21) Only 26/32/37/42LH20, 32/37/42/47LH30 (Except 47LH30) x 4 Bolts for stand assembly Screw for...

Owner's Manual (English)
Page 10
... (D,E) Buttons VOLUME (+, -) Buttons ENTER Button MENU Button INPUT Button POWER Button ON OFF AC power control switch (Except 19/22LH20, 22LH200C) 10 PREPARATION PREPARATION FRONT PANEL INFORMATION I Image shown may differ from your TV. 19/22/26LH20, 22LH200C INPUT Button POWER Button MENU Button ENTER Button VOLUME CHANNEL (-, +) Buttons (E,D) Buttons INPUT MENU...
... (D,E) Buttons VOLUME (+, -) Buttons ENTER Button MENU Button INPUT Button POWER Button ON OFF AC power control switch (Except 19/22LH20, 22LH200C) 10 PREPARATION PREPARATION FRONT PANEL INFORMATION I Image shown may differ from your TV. 19/22/26LH20, 22LH200C INPUT Button POWER Button MENU Button ENTER Button VOLUME CHANNEL (-, +) Buttons (E,D) Buttons INPUT MENU...

Owner's Manual (English)
Page 12
PREPARATION PREPARATION I Image shown may differ from your TV. 19/22LU55 INPUT Button POWER Button MENU Button ENTER Button VOLUME CHANNEL (-, +) Buttons ( , ) Buttons INPUT MENU ENTER VOL CH SPEAKER 26LU55 CH VOL ENTER MENU INPUT CHANNEL ( , ) Buttons VOLUME (+, -) Buttons ENTER Button MENU Button INPUT Button POWER Button Remote Control Sensor Power/Standby Indicator Illuminates red in standby mode. Illuminates white when the TV is switched on. 12 ❖x AC power control ❖❋❋ switch
PREPARATION PREPARATION I Image shown may differ from your TV. 19/22LU55 INPUT Button POWER Button MENU Button ENTER Button VOLUME CHANNEL (-, +) Buttons ( , ) Buttons INPUT MENU ENTER VOL CH SPEAKER 26LU55 CH VOL ENTER MENU INPUT CHANNEL ( , ) Buttons VOLUME (+, -) Buttons ENTER Button MENU Button INPUT Button POWER Button Remote Control Sensor Power/Standby Indicator Illuminates red in standby mode. Illuminates white when the TV is switched on. 12 ❖x AC power control ❖❋❋ switch

Owner's Manual (English)
Page 15
...1 USB IN SERVICE ONLY Used for Service or Hotel mode. 8 COMPONENT IN Analog Connection. Accepts DVI video using an adapter or HDMI to operate the TV on DC power. 15 Uses a D-sub 15 pin cable (VGA cable). Supports HD. Caution: Never attempt to DVI cable (not included). 4 RGB IN...video and Digital audio. AUDIO IN (RGB/DVI) 1/8" (0.32 cm) headphone jack for analog PC audio input. 5 OPTICAL DIGITAL AUDIO OUT (Except 19/22LH20, 22LH200C) Digital optical audio output for audio. 9 Power Cord Socket For operation with amps and home theater systems. Note: In standby mode, this port ...
...1 USB IN SERVICE ONLY Used for Service or Hotel mode. 8 COMPONENT IN Analog Connection. Accepts DVI video using an adapter or HDMI to operate the TV on DC power. 15 Uses a D-sub 15 pin cable (VGA cable). Supports HD. Caution: Never attempt to DVI cable (not included). 4 RGB IN...video and Digital audio. AUDIO IN (RGB/DVI) 1/8" (0.32 cm) headphone jack for analog PC audio input. 5 OPTICAL DIGITAL AUDIO OUT (Except 19/22LH20, 22LH200C) Digital optical audio output for audio. 9 Power Cord Socket For operation with amps and home theater systems. Note: In standby mode, this port ...

Owner's Manual (English)
Page 16
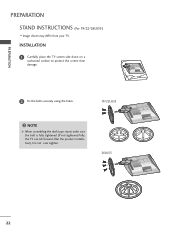
PREPARATION PREPARATION STAND INSTRUCTIONS (For 19/22LH20, 22LH200C) I Image shown may differ from damage. 2 Assemble the TV as shown until you hear it click. 16 INSTALLATION 1 Carefully place the TV screen side down on a cushioned surface to protect the screen from your TV.
PREPARATION PREPARATION STAND INSTRUCTIONS (For 19/22LH20, 22LH200C) I Image shown may differ from damage. 2 Assemble the TV as shown until you hear it click. 16 INSTALLATION 1 Carefully place the TV screen side down on a cushioned surface to protect the screen from your TV.

Owner's Manual (English)
Page 17
PROTECTION COVER 4 Insert the PROTECTION COVER into the TV. 5 Fix the 4 bolts securely using the holes in the back of the TV. PROTECTION COVER 17 PREPARATION DETACHMENT 1 Carefully place the TV screen side down on a cushioned surface to protect the screen from damage. 2 Loose the bolts from TV. 3 Detach the stand from TV.
PROTECTION COVER 4 Insert the PROTECTION COVER into the TV. 5 Fix the 4 bolts securely using the holes in the back of the TV. PROTECTION COVER 17 PREPARATION DETACHMENT 1 Carefully place the TV screen side down on a cushioned surface to protect the screen from damage. 2 Loose the bolts from TV. 3 Detach the stand from TV.

Owner's Manual (English)
Page 18
PREPARATION PREPARATION STAND INSTRUCTIONS (For 26/32/37/42LH20, 32/37/42/47LH30) I Image shown may differ from damage. 2 Assemble the TV as shown. 3 Fix the 4 bolts securely using the holes in the back of the TV. ! NOTE G When assembling the desk type stand, make sure the bolt is fully tightened (If not tightened fully, the TV can tilt forward after the product installation). INSTALLATION 1 Carefully place the TV screen side down on a cushioned surface to protect the screen from your TV. Do not over tighten. 18
PREPARATION PREPARATION STAND INSTRUCTIONS (For 26/32/37/42LH20, 32/37/42/47LH30) I Image shown may differ from damage. 2 Assemble the TV as shown. 3 Fix the 4 bolts securely using the holes in the back of the TV. ! NOTE G When assembling the desk type stand, make sure the bolt is fully tightened (If not tightened fully, the TV can tilt forward after the product installation). INSTALLATION 1 Carefully place the TV screen side down on a cushioned surface to protect the screen from your TV. Do not over tighten. 18

Owner's Manual (English)
Page 19
PREPARATION DETACHMENT 1 Carefully place the TV screen side down on a cushioned surface to protect the screen from damage. 2 Loose the bolts from TV. 3 Detach the stand from TV. Press the PROTECTION COVER into the TV until you hear it click. 19 PROTECTION COVER After removing the stand, install the included protection cover over the hole for the stand.
PREPARATION DETACHMENT 1 Carefully place the TV screen side down on a cushioned surface to protect the screen from damage. 2 Loose the bolts from TV. 3 Detach the stand from TV. Press the PROTECTION COVER into the TV until you hear it click. 19 PROTECTION COVER After removing the stand, install the included protection cover over the hole for the stand.

Owner's Manual (English)
Page 20
..., make sure the screws are fully tightened (If not tightened fully, the TV can tilt forward after the product installation). And carefully place the TV screen side down on a cushioned surface to protect the screen from your TV has a protection tape attached, remove the tape. STAND BODY COVER BASE 4... Fix the 4 bolts securely using the 4 screws supplied. 3 Assemble the TV as shown. Do not over tighten. 20 PREPARATION PREPARATION STAND INSTRUCTIONS (For 32/37/42/47LF11, 47LF21, 32CL20) I Image shown may differ from ...
..., make sure the screws are fully tightened (If not tightened fully, the TV can tilt forward after the product installation). And carefully place the TV screen side down on a cushioned surface to protect the screen from your TV has a protection tape attached, remove the tape. STAND BODY COVER BASE 4... Fix the 4 bolts securely using the 4 screws supplied. 3 Assemble the TV as shown. Do not over tighten. 20 PREPARATION PREPARATION STAND INSTRUCTIONS (For 32/37/42/47LF11, 47LF21, 32CL20) I Image shown may differ from ...

Owner's Manual (English)
Page 21
Press the PROTECTION COVER into the TV until you hear it click. 21 PROTECTION COVER After removing the stand, install the included protection cover over the hole for the stand. PREPARATION DETACHMENT 1 Carefully place the TV screen side down on a cushioned surface to protect the screen from damage. 2 Loose the bolts from TV. 3 Detach the stand from TV.
Press the PROTECTION COVER into the TV until you hear it click. 21 PROTECTION COVER After removing the stand, install the included protection cover over the hole for the stand. PREPARATION DETACHMENT 1 Carefully place the TV screen side down on a cushioned surface to protect the screen from damage. 2 Loose the bolts from TV. 3 Detach the stand from TV.
Owner's Manual (English)
Page 22
PREPARATION PREPARATION STAND INSTRUCTIONS (For 19/22/26LU55) I Image shown may differ from damage. 2 Fix the bolts securely using the holes. ! INSTALLATION 1 Carefully place the TV screen side down on a cushioned surface to protect the screen from your TV. NOTE G When assembling the desk type stand, make sure the bolt is fully tightened (If not tightened fully, the TV can tilt forward after the product installation). Do not over tighten. 19" 22" 19/22LU55 19" 22" 26LU55 26" 22
PREPARATION PREPARATION STAND INSTRUCTIONS (For 19/22/26LU55) I Image shown may differ from damage. 2 Fix the bolts securely using the holes. ! INSTALLATION 1 Carefully place the TV screen side down on a cushioned surface to protect the screen from your TV. NOTE G When assembling the desk type stand, make sure the bolt is fully tightened (If not tightened fully, the TV can tilt forward after the product installation). Do not over tighten. 19" 22" 19/22LU55 19" 22" 26LU55 26" 22


