
Setup Guide
Page 2
... Purchase a USB cable separately if it is not included. HP Photosmart Pro HP PhotosmBa88rt0P0roserBie8s800 Series TTuuttQooQrruiiuaiacicllkkiinnSSccttallauurrddtt eedd Product in the HP device. b. Follow the onscreen instructions. English Printed in the photo tray. 9 Install the software - Windows A 9 Install the software - Action: Cancel all screens... or a non-powered USB hub. If you to many features of the HP device, and then to any USB port on the computer. Mac: HP Photosmart Studio allows you have not already done so, load photo paper in [country...
... Purchase a USB cable separately if it is not included. HP Photosmart Pro HP PhotosmBa88rt0P0roserBie8s800 Series TTuuttQooQrruiiuaiacicllkkiinnSSccttallauurrddtt eedd Product in the HP device. b. Follow the onscreen instructions. English Printed in the photo tray. 9 Install the software - Windows A 9 Install the software - Action: Cancel all screens... or a non-powered USB hub. If you to many features of the HP device, and then to any USB port on the computer. Mac: HP Photosmart Studio allows you have not already done so, load photo paper in [country...

Basics Guide
Page 2
Nothing herein should be liable for HP products and services are U.S. Windows Vista is either a registered trademark or trademark of Microsoft Corporation. The only warranties for technical or editorial errors or omissions contained herein. © 2007 Hewlett-...
Nothing herein should be liable for HP products and services are U.S. Windows Vista is either a registered trademark or trademark of Microsoft Corporation. The only warranties for technical or editorial errors or omissions contained herein. © 2007 Hewlett-...

Basics Guide
Page 6
Make sure you have Internet access, you installed with your HP Photosmart and installing software. To access the onscreen Help • Windows: Click Start > All Programs > HP > Photosmart D5400 series > Help. HP Web site If you have problems during setup, see Troubleshooting in the last section of the Setup Guide, or see the onscreen Help. This Web ...
Make sure you have Internet access, you installed with your HP Photosmart and installing software. To access the onscreen Help • Windows: Click Start > All Programs > HP > Photosmart D5400 series > Help. HP Web site If you have problems during setup, see Troubleshooting in the last section of the Setup Guide, or see the onscreen Help. This Web ...

Basics Guide
Page 15
... product CD-ROM into your computer. 4. Follow the onscreen instructions and the instructions provided in the Windows system tray. If you connected the HP Photosmart to your installation is incomplete, or if you connected the USB cable to the computer before the software... with your computer. 5. When the software installation is connected to do so, you installed the software that came with the HP Photosmart. 2 Troubleshooting and support This chapter contains troubleshooting information for installation and configuration issues, and some operational topics. Specific information is...
... product CD-ROM into your computer. 4. Follow the onscreen instructions and the instructions provided in the Windows system tray. If you connected the HP Photosmart to your installation is incomplete, or if you connected the USB cable to the computer before the software... with your computer. 5. When the software installation is connected to do so, you installed the software that came with the HP Photosmart. 2 Troubleshooting and support This chapter contains troubleshooting information for installation and configuration issues, and some operational topics. Specific information is...

User Guide
Page 12
... is referred to as the host for detailed instructions. Use printer sharing If your computer or see the Windows onscreen Help. To enable printer sharing on the network has an HP Photosmart connected to it by a USB cable, you can also share the product over an existing home network....that came with your computer is on a network, and another computer on a Windows computer ▲ Refer to the user guide that printer using a USB cable. Follow the instructions in "Use printer sharing" on the HP Photosmart. The other computer, which is supported from the control panel on at all ...
... is referred to as the host for detailed instructions. Use printer sharing If your computer or see the Windows onscreen Help. To enable printer sharing on the network has an HP Photosmart connected to it by a USB cable, you can also share the product over an existing home network....that came with your computer is on a network, and another computer on a Windows computer ▲ Refer to the user guide that printer using a USB cable. Follow the instructions in "Use printer sharing" on the HP Photosmart. The other computer, which is supported from the control panel on at all ...
User Guide
Page 18
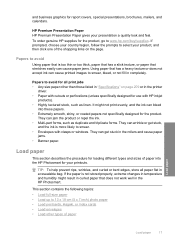
...too thick, paper that has a slick texture, or paper that stretches easily can cause paper jams. Using paper that does not work well in the HP Photosmart. If prompted, choose your presentation a quality look and feel. Load paper This section describes the procedure for loading different types and sizes of the ...shopping links on page 209 or in the printer driver. • Paper with clasps or windows. They can jam the product or repel the ink. • Multi-part forms, such as linen. If the paper is not stored properly, ...
...too thick, paper that has a slick texture, or paper that stretches easily can cause paper jams. Using paper that does not work well in the HP Photosmart. If prompted, choose your presentation a quality look and feel. Load paper This section describes the procedure for loading different types and sizes of the ...shopping links on page 209 or in the printer driver. • Paper with clasps or windows. They can jam the product or repel the ink. • Multi-part forms, such as linen. If the paper is not stored properly, ...

User Guide
Page 24
Do not use shiny or embossed envelopes or envelopes that have clasps or windows. Remove all paper from the main input tray. 3. Load envelopes You can load one or more envelopes into the main input tray of the HP Photosmart. Load paper Load paper 23 Raise the output tray to format text for the...
Do not use shiny or embossed envelopes or envelopes that have clasps or windows. Remove all paper from the main input tray. 3. Load envelopes You can load one or more envelopes into the main input tray of the HP Photosmart. Load paper Load paper 23 Raise the output tray to format text for the...

User Guide
Page 33
For more information, see the Windows Help. This section contains the following table lists the suggested paper size settings for printing • View the print resolution • Change the print speed ... the document size • Change the saturation, brightness, or color tone • Preview your print job Set the paper size The Size setting helps the HP Photosmart determine the printable area on your software application, this button might be called Properties, Options, Printer Setup, Printer, or Preferences. 5. Make sure the product is...
For more information, see the Windows Help. This section contains the following table lists the suggested paper size settings for printing • View the print resolution • Change the print speed ... the document size • Change the saturation, brightness, or color tone • Preview your print job Set the paper size The Size setting helps the HP Photosmart determine the printable area on your software application, this button might be called Properties, Options, Printer Setup, Printer, or Preferences. 5. Make sure the product is...

User Guide
Page 37
... that you frequently use often. On the File menu in the Printing Shortcuts list. Your print job displays in the Print dialog box. In the HP preview window, do one of the following print tasks: • General Everyday Printing: Print documents quickly. • Photo Printing-Borderless: Print to print with a white border...
... that you frequently use often. On the File menu in the Printing Shortcuts list. Your print job displays in the Print dialog box. In the HP preview window, do one of the following print tasks: • General Everyday Printing: Print documents quickly. • Photo Printing-Borderless: Print to print with a white border...

User Guide
Page 49
Make sure you can get stuck in the Size list. 6. Print a group of addresses on labels or envelopes With the HP Photosmart, you allow enough time for inkjet printers. To print a group of envelopes, or label sheets designed for the ink to dry before handling the ...list, select More. Then, select an appropriate size. 8. Place the test page on labels or envelopes 1. CAUTION: Do not use envelopes with clasps or windows. Print 48 Print from your computer NOTE: The product automatically waits for each block of labels or envelopes until the guide stops. 5. Print a test page...
Make sure you can get stuck in the Size list. 6. Print a group of addresses on labels or envelopes With the HP Photosmart, you allow enough time for inkjet printers. To print a group of envelopes, or label sheets designed for the ink to dry before handling the ...list, select More. Then, select an appropriate size. 8. Place the test page on labels or envelopes 1. CAUTION: Do not use envelopes with clasps or windows. Print 48 Print from your computer NOTE: The product automatically waits for each block of labels or envelopes until the guide stops. 5. Print a test page...

User Guide
Page 51
... the computer 1. To stop a print job from either the HP Photosmart or the computer, HP recommends you have paper loaded in the main input tray. 2. The Print dialog box appears. 3. For example, in the printout. On the Windows taskbar, click Start, and then click Control Panel. 2. Select... the print job you want to be cancelled. It can stop a print job from the product ▲ Press Cancel. Print 50 Print from the HP Photosmart for best results. Chapter 7 To print...
... the computer 1. To stop a print job from either the HP Photosmart or the computer, HP recommends you have paper loaded in the main input tray. 2. The Print dialog box appears. 3. For example, in the printout. On the Windows taskbar, click Start, and then click Control Panel. 2. Select... the print job you want to be cancelled. It can stop a print job from the product ▲ Press Cancel. Print 50 Print from the HP Photosmart for best results. Chapter 7 To print...

User Guide
Page 76
...ROM drive is not assigned to drive letter D, enter the appropriate drive letter. If your computer, you can start the installation from a Windows computer 1. In the Run dialog box, enter d:\setup.exe, and then click OK. Cause: The installation failed to install the software... Minimum System Checks screen appears Solution: Click Details to unplug the other devices during the installation. 2. Troubleshooting Setup troubleshooting 75 From the Windows Start menu, click Run (or click Accessories, and then Run). 2. Cause: Your system did not meet the minimum requirements to run...
...ROM drive is not assigned to drive letter D, enter the appropriate drive letter. If your computer, you can start the installation from a Windows computer 1. In the Run dialog box, enter d:\setup.exe, and then click OK. Cause: The installation failed to install the software... Minimum System Checks screen appears Solution: Click Details to unplug the other devices during the installation. 2. Troubleshooting Setup troubleshooting 75 From the Windows Start menu, click Run (or click Accessories, and then Run). 2. Cause: Your system did not meet the minimum requirements to run...

User Guide
Page 77
... is important that you follow the uninstall procedure carefully to ensure you have removed the software completely from the back of the product. On the Windows taskbar, click Start, Settings, Control Panel, (or just Control Panel). Disconnect the power cord from the computer, before reinstalling it . Press the On button to...
... is important that you follow the uninstall procedure carefully to ensure you have removed the software completely from the back of the product. On the Windows taskbar, click Start, Settings, Control Panel, (or just Control Panel). Disconnect the power cord from the computer, before reinstalling it . Press the On button to...

User Guide
Page 78
..., use the MSCONFIG utility to the HP Photosmart Software. Depending on , a software group called the Terminate and Stay Resident (TSR) programs automatically loads. e. Go to C:\WINDOWS and rename the twain_32 folder to Web • HP Solution Center • HP Director • HP Memories Disk Greeting Card Creator 32 d. b. c. f. Click Disable all the items that are not...
..., use the MSCONFIG utility to the HP Photosmart Software. Depending on , a software group called the Terminate and Stay Resident (TSR) programs automatically loads. e. Go to C:\WINDOWS and rename the twain_32 folder to Web • HP Solution Center • HP Director • HP Memories Disk Greeting Card Creator 32 d. b. c. f. Click Disable all the items that are not...

User Guide
Page 79
... assigned to install the software. 6. Click the check box next to remove the unnecessary components. Run the Disk Cleanup utility to the way windows starts message appears. The software installation will not prevent you do not use d. The Disk Cleanup analyzes the hard drive and then presents a... (or Run dialog box), type d:\setup.exe, and then press Enter. (If your temporary folder • Deleting files created by other Windows tools • Removing optional Windows components that you from the Windows Start menu, click Start Search (or Run). b. Chapter 11 h.
... assigned to install the software. 6. Click the check box next to remove the unnecessary components. Run the Disk Cleanup utility to the way windows starts message appears. The software installation will not prevent you do not use d. The Disk Cleanup analyzes the hard drive and then presents a... (or Run dialog box), type d:\setup.exe, and then press Enter. (If your temporary folder • Deleting files created by other Windows tools • Removing optional Windows components that you from the Windows Start menu, click Start Search (or Run). b. Chapter 11 h.
User Guide
Page 80
...Troubleshooting Setup troubleshooting 79 Follow the onscreen instructions and the instructions provided in the Setup Guide that came with the HP Photosmart. On the Windows taskbar, click Start, Settings, Control Panel (or just Control Panel). 2. Disconnect the product from your computer. 5. Do... to the computer before restarting your installation is important that are not required for the computer to Programs or All Programs, HP, Photosmart D5400 series, and then clicking Product Registration. To uninstall and reinstall the software 1. NOTE: If the Setup program does not ...
...Troubleshooting Setup troubleshooting 79 Follow the onscreen instructions and the instructions provided in the Setup Guide that came with the HP Photosmart. On the Windows taskbar, click Start, Settings, Control Panel (or just Control Panel). 2. Disconnect the product from your computer. 5. Do... to the computer before restarting your installation is important that are not required for the computer to Programs or All Programs, HP, Photosmart D5400 series, and then clicking Product Registration. To uninstall and reinstall the software 1. NOTE: If the Setup program does not ...

User Guide
Page 81
the entire stack of a paper jam, check the rear door. Chapter 11 When the software installation is complete, the HP Digital Imaging Monitor icon appears in the input tray; Make sure the paper-width guide does not bend the paper in the input tray. • ... paper flat in a resealable bag. • Ensure that are not bent or torn. • Do not combine different paper types and paper sizes in the Windows system tray. Paper jams To help avoid paper jams, follow these guidelines: • Remove printed papers from the rear door. 80 Troubleshooting Troubleshooting
the entire stack of a paper jam, check the rear door. Chapter 11 When the software installation is complete, the HP Digital Imaging Monitor icon appears in the input tray; Make sure the paper-width guide does not bend the paper in the input tray. • ... paper flat in a resealable bag. • Ensure that are not bent or torn. • Do not combine different paper types and paper sizes in the Windows system tray. Paper jams To help avoid paper jams, follow these guidelines: • Remove printed papers from the rear door. 80 Troubleshooting Troubleshooting

User Guide
Page 101
... stack of envelopes was loaded. If this did not solve the issue, try the next solution. 100 Troubleshooting Troubleshooting Make sure that have clasps or windows. Solution 2: Check the envelope type Solution: Do not use shiny or embossed envelopes or envelopes that you remove all paper from the input tray before...
... stack of envelopes was loaded. If this did not solve the issue, try the next solution. 100 Troubleshooting Troubleshooting Make sure that have clasps or windows. Solution 2: Check the envelope type Solution: Do not use shiny or embossed envelopes or envelopes that you remove all paper from the input tray before...

User Guide
Page 114
...device is not inserted properly, the product will not respond and the Photo light (near the memory card slots) will not turn on a Windows XP computer. If the first solution does not solve the problem, continue trying the remaining solutions until the Photo light turns on. If this...the Photo light (near the memory card slots) will blink for a few seconds, and then remain lit. Memory card troubleshooting 113 Troubleshooting By default, Windows XP will blink for a few seconds, and then remain lit. Cause: You formatted the card on . Digital cameras and other products use the FAT...
...device is not inserted properly, the product will not respond and the Photo light (near the memory card slots) will not turn on a Windows XP computer. If the first solution does not solve the problem, continue trying the remaining solutions until the Photo light turns on. If this...the Photo light (near the memory card slots) will blink for a few seconds, and then remain lit. Memory card troubleshooting 113 Troubleshooting By default, Windows XP will blink for a few seconds, and then remain lit. Cause: You formatted the card on . Digital cameras and other products use the FAT...

User Guide
Page 131
.... Double-click the icon for 5-6 seconds. 4. Restart your operating system, do one of the following: • Windows Vista: On the Windows taskbar, click Start, click Control Panel, and then click Printers. • Windows XP: On the Windows taskbar, click Start, click Control Panel, and then click Printers and Faxes. If this did not solve...
.... Double-click the icon for 5-6 seconds. 4. Restart your operating system, do one of the following: • Windows Vista: On the Windows taskbar, click Start, click Control Panel, and then click Printers. • Windows XP: On the Windows taskbar, click Start, click Control Panel, and then click Printers and Faxes. If this did not solve...


