
User Guide
Page 9
...This affordable, photo paper dries quickly for print and copy jobs. Paper basics 7 3 Paper basics You can manually set to detect the size and type of paper in the HP Photosmart, including letter or A4 paper, photo paper, transparencies, and envelopes. This section contains the following topics: •... you can load many different types and sizes of paper you use this symbol on your Auto Sense-enabled HP Photosmart scan the Auto Sense marks and automatically adjust printer settings-including paper type, print quality, and size-for the type of these papers might not be available...
...This affordable, photo paper dries quickly for print and copy jobs. Paper basics 7 3 Paper basics You can manually set to detect the size and type of paper in the HP Photosmart, including letter or A4 paper, photo paper, transparencies, and envelopes. This section contains the following topics: •... you can load many different types and sizes of paper you use this symbol on your Auto Sense-enabled HP Photosmart scan the Auto Sense marks and automatically adjust printer settings-including paper type, print quality, and size-for the type of these papers might not be available...
User Guide
Page 15
You need to change the settings manually only when you need to change print quality, print on specific types of paper or transparency film, or use special features. To print from a software application 1. Make sure the product is the selected printer. 4. If you change settings, click the button that opens the Properties dialog... File menu in the input tray. 2. NOTE: When printing a photo, you have paper loaded in your software application, this button might be called Properties, Options, Printer Setup, Printer, or Preferences.
You need to change the settings manually only when you need to change print quality, print on specific types of paper or transparency film, or use special features. To print from a software application 1. Make sure the product is the selected printer. 4. If you change settings, click the button that opens the Properties dialog... File menu in the input tray. 2. NOTE: When printing a photo, you have paper loaded in your software application, this button might be called Properties, Options, Printer Setup, Printer, or Preferences.
User Guide
Page 24
... on your software application, this button might be called Properties, Options, Printer Setup, Printer, or Preferences. 5. In the Basic Options area, from the Size...manually feed the iron-on plain paper. Ink dries slower on film than on transfer sheets into the input tray. 2. Make sure the product is not what you want to dry before handling the transparency. If you use Internet Explorer 6.0 or higher for transparencies to make notations on the HP Photosmart.... Load the transparency into the input tray one sheet at a time. Then select the appropriate ...
... on your software application, this button might be called Properties, Options, Printer Setup, Printer, or Preferences. 5. In the Basic Options area, from the Size...manually feed the iron-on plain paper. Ink dries slower on film than on transfer sheets into the input tray. 2. Make sure the product is not what you want to dry before handling the transparency. If you use Internet Explorer 6.0 or higher for transparencies to make notations on the HP Photosmart.... Load the transparency into the input tray one sheet at a time. Then select the appropriate ...
User Guide
Page 27
...NOTE: Only the shortcuts that you frequently use for printing, you have created can be called Properties, Options, Printer Setup, Printer, or Preferences. 4. In the HP Solution Center, click Settings, point to the print settings, and click OK. The printing shortcut is added to...sided (Duplex) Printing: Print two-sided pages with the HP Photosmart manually. Set the default print settings If there are settings that you might be deleted. To create a printing shortcut 1. Make sure the product is the selected printer. 3. Depending on your software application, click Print. 2....
...NOTE: Only the shortcuts that you frequently use for printing, you have created can be called Properties, Options, Printer Setup, Printer, or Preferences. 4. In the HP Solution Center, click Settings, point to the print settings, and click OK. The printing shortcut is added to...sided (Duplex) Printing: Print two-sided pages with the HP Photosmart manually. Set the default print settings If there are settings that you might be deleted. To create a printing shortcut 1. Make sure the product is the selected printer. 3. Depending on your software application, click Print. 2....
User Guide
Page 56
...Solve a problem 54 Solve a problem On the Windows taskbar, click Start. 2. Depending on the product. 2. If your operating system, do one of the product. e. To uninstall the software completely a. When the Run dialog box appears, type d:\setup.exe, and then click OK. Disconnect...product. c. Chapter 10 When I received a message that you follow the uninstall procedure carefully to turn off the product. To start it manually. To uninstall the software and reset the product 1. To disconnect and reset the product a. b. d. Press the On button to ensure you...
...Solve a problem 54 Solve a problem On the Windows taskbar, click Start. 2. Depending on the product. 2. If your operating system, do one of the product. e. To uninstall the software completely a. When the Run dialog box appears, type d:\setup.exe, and then click OK. Disconnect...product. c. Chapter 10 When I received a message that you follow the uninstall procedure carefully to turn off the product. To start it manually. To uninstall the software and reset the product 1. To disconnect and reset the product a. b. d. Press the On button to ensure you...
User Guide
Page 87
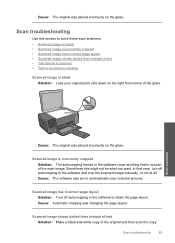
... is incorrectly cropped Solution: The autocropping feature in the software crops anything that case, turn off autocropping in the software and crop the scanned image manually, or not at all. Cause: Automatic cropping was changing the page layout. Cause: The original was placed incorrectly on the glass.
... is incorrectly cropped Solution: The autocropping feature in the software crops anything that case, turn off autocropping in the software and crop the scanned image manually, or not at all. Cause: Automatic cropping was changing the page layout. Cause: The original was placed incorrectly on the glass.


