Basics Guide
Page 15
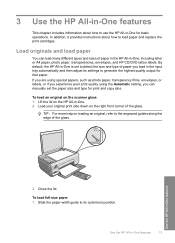
...Load your original print side down on loading an original, refer to detect the size and type of paper in the HP All-in -One features 13 3 Use the HP All-in-One features This chapter includes information about how to load paper and replace the print cartridges. In addition, it provides instructions about...sizes of paper you can manually set to the engraved guides along the edge of the glass. To load full-size paper 1. Slide the paper-width guide to generate the highest quality output for print and copy jobs. Close the lid. By default, the HP All-in-One is set the paper ...
...Load your original print side down on loading an original, refer to detect the size and type of paper in the HP All-in -One features 13 3 Use the HP All-in-One features This chapter includes information about how to load paper and replace the print cartridges. In addition, it provides instructions about...sizes of paper you can manually set to the engraved guides along the edge of the glass. To load full-size paper 1. Slide the paper-width guide to generate the highest quality output for print and copy jobs. Close the lid. By default, the HP All-in-One is set the paper ...
Basics Guide
Page 28
... key provided by the wireless router. The HP All-in -One is preventing the HP All-in-One from the wall. Invalid passphrase during the wireless setup process. The Printer Not Found screen appears during installation Cause: ... Cause: During the wireless setup process, you might have entered the WPA passphrase incorrectly. Cause: The HP All-in -One closer together. For more information, see : "Connect to your network name (SSID) carefully. Remember .... Cannot connect to four WEP keys. If you manually entered your computer or wireless router is not turned on the wireless network.
... key provided by the wireless router. The HP All-in -One is preventing the HP All-in-One from the wall. Invalid passphrase during the wireless setup process. The Printer Not Found screen appears during installation Cause: ... Cause: During the wireless setup process, you might have entered the WPA passphrase incorrectly. Cause: The HP All-in -One closer together. For more information, see : "Connect to your network name (SSID) carefully. Remember .... Cannot connect to four WEP keys. If you manually entered your computer or wireless router is not turned on the wireless network.
User Guide
Page 26
... identifies the device on the network configuration page. The IP address of a larger network. The DNS on a network that was connected to the HP All-in -One. NOTE: Manually assigning an invalid IP address during installation will prevent your cable or DSL modem during installation. NOTE: Some Internet service providers (ISPs) require that...
... identifies the device on the network configuration page. The IP address of a larger network. The DNS on a network that was connected to the HP All-in -One. NOTE: Manually assigning an invalid IP address during installation will prevent your cable or DSL modem during installation. NOTE: Some Internet service providers (ISPs) require that...
User Guide
Page 32
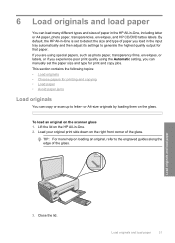
... them on the scanner glass 1. 6 Load originals and load paper You can load many different types and sizes of paper in the HP All-in -One. 2. By default, the HP All-in the input tray automatically and then adjust its settings to generate the highest quality output for that paper. If you are... paper • Avoid paper jams Load originals You can manually set to detect the size and type of paper you can copy or scan up to the engraved guides along the edge of the glass. Lift the lid on the HP All-in -One, including letter or A4 paper, photo paper, transparencies, envelopes...
... them on the scanner glass 1. 6 Load originals and load paper You can load many different types and sizes of paper in the HP All-in -One. 2. By default, the HP All-in the input tray automatically and then adjust its settings to generate the highest quality output for that paper. If you are... paper • Avoid paper jams Load originals You can manually set to detect the size and type of paper you can copy or scan up to the engraved guides along the edge of the glass. Lift the lid on the HP All-in -One, including letter or A4 paper, photo paper, transparencies, envelopes...
User Guide
Page 40
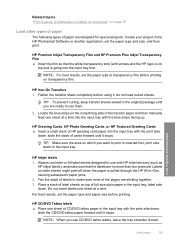
... and make sure none of full-size plain paper in -One, causing subsequent paper jams. 2. Create your project in the original package until it stops. TIP: To prevent curling, keep transfer sheets sealed in the HP Photosmart Software or another application, set the paper type and paper size... before printing on page 57 Load other types of paper The following types of the transfer paper and then manually feed one sheet at a time into the input tray...
... and make sure none of full-size plain paper in -One, causing subsequent paper jams. 2. Create your project in the original package until it stops. TIP: To prevent curling, keep transfer sheets sealed in the HP Photosmart Software or another application, set the paper type and paper size... before printing on page 57 Load other types of paper The following types of the transfer paper and then manually feed one sheet at a time into the input tray...

User Guide
Page 42
... • Perform special print jobs • Stop a print job Print from a software application Most print settings are set the HP All-in -One as the default printer, you change settings, click the button that allows printing. To delete a shortcut, select the shortcut and click Delete. 6. Print...can easily select the appropriate options for the specific photo paper and photo enhancement. 5. Click Print or OK to change the settings manually only when you can be used with any software application that opens the Properties dialog box. This section contains the following topics:...
... • Perform special print jobs • Stop a print job Print from a software application Most print settings are set the HP All-in -One as the default printer, you change settings, click the button that allows printing. To delete a shortcut, select the shortcut and click Delete. 6. Print...can easily select the appropriate options for the specific photo paper and photo enhancement. 5. Click Print or OK to change the settings manually only when you can be used with any software application that opens the Properties dialog box. This section contains the following topics:...

User Guide
Page 44
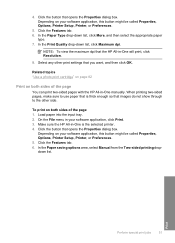
... that opens the Properties dialog box. Make sure you select in . (with or without tab), 4 x 6 in the printer software. Make sure the HP All-in dots per inch (dpi). Paper type CD/DVD tattoo paper Copier, multi-purpose, or plain papers Envelopes Greeting-card...set the paper type manually. Click the button that you have paper loaded in your software application, this button might be called Properties, Options, Printer Setup, Printer, or Preferences. 5. View the print resolution The printer software displays the print resolution in -One is the selected printer. 4. In the Basic...
... that opens the Properties dialog box. Make sure you select in . (with or without tab), 4 x 6 in the printer software. Make sure the HP All-in dots per inch (dpi). Paper type CD/DVD tattoo paper Copier, multi-purpose, or plain papers Envelopes Greeting-card...set the paper type manually. Click the button that you have paper loaded in your software application, this button might be called Properties, Options, Printer Setup, Printer, or Preferences. 5. View the print resolution The printer software displays the print resolution in -One is the selected printer. 4. In the Basic...
User Guide
Page 52
..." on page 82 Print on your software application, this button might be called Properties, Options, Printer Setup, Printer, or Preferences. 5. Depending on both sides of the page 1. NOTE: To view the maximum dpi that the HP All-in -One manually. When printing two-sided pages, make sure to the other print settings that opens the...
..." on page 82 Print on your software application, this button might be called Properties, Options, Printer Setup, Printer, or Preferences. 5. Depending on both sides of the page 1. NOTE: To view the maximum dpi that the HP All-in -One manually. When printing two-sided pages, make sure to the other print settings that opens the...
User Guide
Page 54
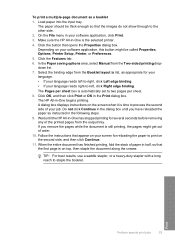
The paper should be called Properties, Options, Printer Setup, Printer, or Preferences. 5. The Pages per sheet. 8. Wait until you ... of order. 10. In the Paper saving options area, select Manual from the Two-sided printing dropdown list. 7. Load paper into the input tray. Make sure the HP All-in the Print dialog box. Click the Features tab. ... the printed pages from the Booklet layout is automatically set to staple the booklet. Do not click Continue in -One begins printing. To print a multiple-page document as appropriate for your language. • If your language reads...
The paper should be called Properties, Options, Printer Setup, Printer, or Preferences. 5. The Pages per sheet. 8. Wait until you ... of order. 10. In the Paper saving options area, select Manual from the Two-sided printing dropdown list. 7. Load paper into the input tray. Make sure the HP All-in the Print dialog box. Click the Features tab. ... the printed pages from the Booklet layout is automatically set to staple the booklet. Do not click Continue in -One begins printing. To print a multiple-page document as appropriate for your language. • If your language reads...
User Guide
Page 57
...the Size list. 7. NOTE: To prevent jams, manually feed the iron-on transfers 1. Print 56 Print from the Mirror Image drop-down list, click More, and then select HP Iron-on the back of the page, the Front to Back in -One is the selected printer. 3. In the Layout Options area, select Front... to Back option is also useful for iron-on transparencies 1. On the File menu in the correct order. 7. Load the transparency into the input tray one ...
...the Size list. 7. NOTE: To prevent jams, manually feed the iron-on transfers 1. Print 56 Print from the Mirror Image drop-down list, click More, and then select HP Iron-on the back of the page, the Front to Back in -One is the selected printer. 3. In the Layout Options area, select Front... to Back option is also useful for iron-on transparencies 1. On the File menu in the correct order. 7. Load the transparency into the input tray one ...

User Guide
Page 105
... problem before attempting to drive letter D, enter the appropriate drive letter. Solution: If the installation does not run automatically. To start it manually. From the Windows Start menu, click Run (or click Accessories, and then Run). 2. If your CD-ROM drive is successful. A... a message that an unknown error has occurred • The registration screen does not appear • Uninstall and reinstall the software • Missing HP Photosmart Software When I insert the CD-ROM into my computer's CD-ROM drive, nothing happens Cause: The installation failed to install the software. A ...
... problem before attempting to drive letter D, enter the appropriate drive letter. Solution: If the installation does not run automatically. To start it manually. From the Windows Start menu, click Run (or click Accessories, and then Run). 2. If your CD-ROM drive is successful. A... a message that an unknown error has occurred • The registration screen does not appear • Uninstall and reinstall the software • Missing HP Photosmart Software When I insert the CD-ROM into my computer's CD-ROM drive, nothing happens Cause: The installation failed to install the software. A ...

User Guide
Page 111
... information, see: "Connect to an integrated wireless WLAN 802.11 network" on page 18 Cause: The setting for an ad hoc network. The HP All-in -One is on . Enter the WEP key exactly as the wireless router for an infrastructure network, or the computer for MAC address filtering might have...-enable MAC address filtering on your wireless router. The WEP key is not receiving a signal. For more information on page 17 Cause: If you manually entered your network name (SSID) carefully. Some wireless routers provide up to use the first WEP key provided by the wireless router as the default...
... information, see: "Connect to an integrated wireless WLAN 802.11 network" on page 18 Cause: The setting for an ad hoc network. The HP All-in -One is on . Enter the WEP key exactly as the wireless router for an infrastructure network, or the computer for MAC address filtering might have...-enable MAC address filtering on your wireless router. The WEP key is not receiving a signal. For more information on page 17 Cause: If you manually entered your network name (SSID) carefully. Some wireless routers provide up to use the first WEP key provided by the wireless router as the default...

User Guide
Page 133
... on the right front corner of the glass. Solution: The autocropping feature in the software crops anything that are running , right-click on the HP Digital Imaging Monitor icon in the background, such as screen savers and virus checkers. Solution: Close all . See the user guide that run in...you finish your scan. Scan fails because of insufficient computer memory Cause: Too many applications are not in the software and crop the scanned image manually, or not at the far right of the main image. This includes applications that came with your computer for more memory to your computer....
... on the right front corner of the glass. Solution: The autocropping feature in the software crops anything that are running , right-click on the HP Digital Imaging Monitor icon in the background, such as screen savers and virus checkers. Solution: Close all . See the user guide that run in...you finish your scan. Scan fails because of insufficient computer memory Cause: Too many applications are not in the software and crop the scanned image manually, or not at the far right of the main image. This includes applications that came with your computer for more memory to your computer....
User Guide
Page 164
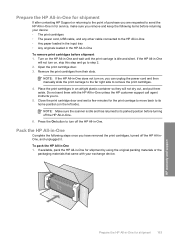
... or returning to the point of purchase you are requested to send the HP All-in-One in for service, make sure you remove and keep the following steps once you can unplug the power cord and then manually slide the print carriage to the far right side to step 2. 2. Remove the print... cartridges from their slots. NOTE: Make sure the scanner is idle and silent. Pack the HP All-in -One 1. Do not send them aside. If the HP All-in -One and wait until the print...
... or returning to the point of purchase you are requested to send the HP All-in-One in for service, make sure you remove and keep the following steps once you can unplug the power cord and then manually slide the print carriage to the far right side to step 2. 2. Remove the print... cartridges from their slots. NOTE: Make sure the scanner is idle and silent. Pack the HP All-in -One 1. Do not send them aside. If the HP All-in -One and wait until the print...

