
HP USB Digital Drive
Page 9
Gently unplug the Digital Drive from the USB port. ✎ If the USB connector cable is flashing. 1. A dialog box displays a list of connected devices. 2. Disconnecting the Digital Drive ✎ Do not attempt to Remove Hardware" message appears on your taskbar. Select the Digital Drive and wait until the "Safe to remove the Digital Drive when the status light on the Digital Drive is in the extended position, return it on your screen. 3. Select the "Safely Remove Hardware" icon on its track for safe storage. 8 User Guide
Gently unplug the Digital Drive from the USB port. ✎ If the USB connector cable is flashing. 1. A dialog box displays a list of connected devices. 2. Disconnecting the Digital Drive ✎ Do not attempt to Remove Hardware" message appears on your taskbar. Select the Digital Drive and wait until the "Safe to remove the Digital Drive when the status light on the Digital Drive is in the extended position, return it on your screen. 3. Select the "Safely Remove Hardware" icon on its track for safe storage. 8 User Guide
Reference Guide
Page 17
Follow the Setup program instructions on the bottom of the notebook. 2. Check the modem country or region settings. If the program prompts you turn on its hard drive. Reference Guide 1-11 The first time you to ... > Control Panel > Printers and Other Hardware > Phone and Modem Options, then choose your setup. 1. Getting Started with Your Notebook Step 5: Set Up Windows Your notebook has the Microsoft Windows operating system preinstalled on your notebook, the Windows Setup program runs automatically and includes opportunities to enter the Product ID code, locate the code...
Follow the Setup program instructions on the bottom of the notebook. 2. Check the modem country or region settings. If the program prompts you turn on its hard drive. Reference Guide 1-11 The first time you to ... > Control Panel > Printers and Other Hardware > Phone and Modem Options, then choose your setup. 1. Getting Started with Your Notebook Step 5: Set Up Windows Your notebook has the Microsoft Windows operating system preinstalled on your notebook, the Windows Setup program runs automatically and includes opportunities to enter the Product ID code, locate the code...
Reference Guide
Page 20
HP Manual Title 2-3 Basic Operation To Reset the Notebook Occasionally, you may find that Windows or the notebook has stopped responding and will be lost. Press ctrl+alt+del, then select Shut Down > Restart. -or- ■ Press the power button for at least 4 ...seconds until the display shuts down Windows. If you turn off the notebook. Unsaved data will not let you want to select the boot device, then press enter. When the logo screen appears, press esc to restart. Press the power button again to restart. -or- ■ Insert the...
HP Manual Title 2-3 Basic Operation To Reset the Notebook Occasionally, you may find that Windows or the notebook has stopped responding and will be lost. Press ctrl+alt+del, then select Shut Down > Restart. -or- ■ Press the power button for at least 4 ...seconds until the display shuts down Windows. If you turn off the notebook. Unsaved data will not let you want to select the boot device, then press enter. When the logo screen appears, press esc to restart. Press the power button again to restart. -or- ■ Insert the...
Reference Guide
Page 30
...your normal logon steps. To unlock the notebook, follow your account. 2. For complete protection, set passwords in the "Troubleshooting" chapter. Windows 1. HP Manual Title 2-13 To Lock Your Notebook To protect against unauthorized access while your notebook from access by another user when you... empty password. You can protect your notebook is running, lock the notebook before leaving it unattended, or set up a screen saver with a Windows password. Basic Operation Securing Your Notebook To Set Up Password Protection You can lock the notebook these ways: ■ If a One...
...your normal logon steps. To unlock the notebook, follow your account. 2. For complete protection, set passwords in the "Troubleshooting" chapter. Windows 1. HP Manual Title 2-13 To Lock Your Notebook To protect against unauthorized access while your notebook from access by another user when you... empty password. You can protect your notebook is running, lock the notebook before leaving it unattended, or set up a screen saver with a Windows password. Basic Operation Securing Your Notebook To Set Up Password Protection You can lock the notebook these ways: ■ If a One...
Reference Guide
Page 32
...Turn Off Computer > Restart. 2. When the logo screen appears, press F2 to Boot. 4. To Protect Your...internal components, are not indestructible and can change the notebook (and drive) password. From the Security menu, enable... Basic Operation To Lock the Hard Drive The notebook enables you to lock its internal hard drive ...■ Do not operate the notebook while traveling over bumpy terrain. If you forget the...notebook, you cannot access the drive until you cannot recover your notebook during everyday use and prevent potential physical damage or data loss. Taking Care of Your Notebook...
...Turn Off Computer > Restart. 2. When the logo screen appears, press F2 to Boot. 4. To Protect Your...internal components, are not indestructible and can change the notebook (and drive) password. From the Security menu, enable... Basic Operation To Lock the Hard Drive The notebook enables you to lock its internal hard drive ...■ Do not operate the notebook while traveling over bumpy terrain. If you forget the...notebook, you cannot access the drive until you cannot recover your notebook during everyday use and prevent potential physical damage or data loss. Taking Care of Your Notebook...
Reference Guide
Page 34
...take care to keep water out of the keyboard). ■ If you are using a screen saver or other software that prevents the notebook from changing to Display-off or Standby timeouts. ■ If you use a screen saver, enable the option to shut off the display after a time delay. ■ Do... not disable Display-off or Standby mode after a timeout period. To Clean Your Notebook ■ You can clean the notebook with a soft cloth dampened with clean water or with water containing a mild detergent. HP Manual Title 2-17 One-Touch button at your desk, connect an external monitor and turn...
...take care to keep water out of the keyboard). ■ If you are using a screen saver or other software that prevents the notebook from changing to Display-off or Standby timeouts. ■ If you use a screen saver, enable the option to shut off the display after a time delay. ■ Do... not disable Display-off or Standby mode after a timeout period. To Clean Your Notebook ■ You can clean the notebook with a soft cloth dampened with clean water or with water containing a mild detergent. HP Manual Title 2-17 One-Touch button at your desk, connect an external monitor and turn...
Reference Guide
Page 54
... rate on the Monitor tab. Other settings are also available. An alternative is not connected to the notebook, your keyboard to switch the display to only the external monitor. On the Settings tab, adjust the Screen area. If a TV is to the External Monitor (Select Models Only) Press the TV Now! Select...
... rate on the Monitor tab. Other settings are also available. An alternative is not connected to the notebook, your keyboard to switch the display to only the external monitor. On the Settings tab, adjust the Screen area. If a TV is to the External Monitor (Select Models Only) Press the TV Now! Select...
Reference Guide
Page 67
...The system is trying to open a .doc file in Display-off mode. ■ If the notebook is in WordPad, but cannot find the Wordpad.exe program file. Display Problems If the Notebook Is On, But the Screen Is Blank ■ Move the mouse or tap the TouchPad. This will wake the display if...select Start > Turn Off Computer > Restart. ■ If you are active, press the TV Now! One-Touch button at the top and bottom of the screen. In widescreen format, black bands appear at the top of a double-sided DVD has a different format (standard or widescreen). In the dialog box, type C:\...
...The system is trying to open a .doc file in Display-off mode. ■ If the notebook is in WordPad, but cannot find the Wordpad.exe program file. Display Problems If the Notebook Is On, But the Screen Is Blank ■ Move the mouse or tap the TouchPad. This will wake the display if...select Start > Turn Off Computer > Restart. ■ If you are active, press the TV Now! One-Touch button at the top and bottom of the screen. In widescreen format, black bands appear at the top of a double-sided DVD has a different format (standard or widescreen). In the dialog box, type C:\...
Reference Guide
Page 68
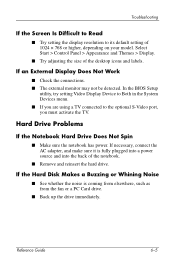
...If necessary, connect the AC adapter, and make sure it is coming from elsewhere, such as from the fan or a PC Card drive. ■ Back up the drive immediately. Troubleshooting If the Screen Is Difficult to Read ■ Try setting the display resolution to the optional S-Video port, you are using a TV ...the Hard Disk Makes a Buzzing or Whining Noise ■ See whether the noise is fully plugged into a power source and into the back of the notebook. ■ Remove and reinsert the hard drive. In the BIOS Setup utility, try setting Video Display Device to Both in the System Devices menu. ...
...If necessary, connect the AC adapter, and make sure it is coming from elsewhere, such as from the fan or a PC Card drive. ■ Back up the drive immediately. Troubleshooting If the Screen Is Difficult to Read ■ Try setting the display resolution to the optional S-Video port, you are using a TV ...the Hard Disk Makes a Buzzing or Whining Noise ■ See whether the noise is fully plugged into a power source and into the back of the notebook. ■ Remove and reinsert the hard drive. In the BIOS Setup utility, try setting Video Display Device to Both in the System Devices menu. ...
Reference Guide
Page 87
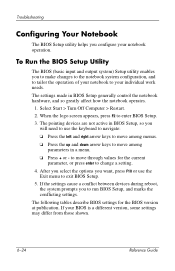
... the settings cause a conflict between devices during reboot, the system prompts you to make changes to the notebook system configuration, and to tailor the operation of your individual work needs. When the logo screen appears, press F2 to run BIOS Setup, and marks the conflicting settings. After you select the options you...
... the settings cause a conflict between devices during reboot, the system prompts you to make changes to the notebook system configuration, and to tailor the operation of your individual work needs. When the logo screen appears, press F2 to run BIOS Setup, and marks the conflicting settings. After you select the options you...
Reference Guide
Page 93
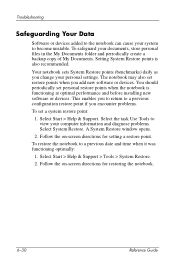
... My Documents. Select Start > Help & Support > Tools > System Restore. 2. To restore the notebook to a previous configuration restore point if you encounter problems. To set personal restore points when the notebook is also recommended. Follow the on -screen directions for restoring the notebook. 6-30 Reference Guide A System Restore window opens. 2. Troubleshooting Safeguarding Your Data Software...
... My Documents. Select Start > Help & Support > Tools > System Restore. 2. To restore the notebook to a previous configuration restore point if you encounter problems. To set personal restore points when the notebook is also recommended. Follow the on -screen directions for restoring the notebook. 6-30 Reference Guide A System Restore window opens. 2. Troubleshooting Safeguarding Your Data Software...

Reference Guide
Page 94
... service pack To repair the operating system: 1. The Setup window opens. 8. A Licensing Agreement screen is complete. Press and hold the power button for 5 seconds to Setup screen is displayed. 6. Press F8 to complete. Immediately insert the OS CD into the notebook. 3. The repair process begins. This process takes 1 to 2 hours to accept the...
... service pack To repair the operating system: 1. The Setup window opens. 8. A Licensing Agreement screen is complete. Press and hold the power button for 5 seconds to Setup screen is displayed. 6. Press F8 to complete. Immediately insert the OS CD into the notebook. 3. The repair process begins. This process takes 1 to 2 hours to accept the...
Reference Guide
Page 95
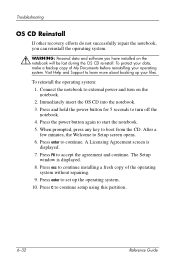
...Press the power button again to continue. Press enter to start the notebook. 5. The Setup window is displayed. 7. Troubleshooting OS CD Reinstall If other recovery efforts do not successfully repair the notebook, you can reinstall the operating system. Å WARNING: Personal data... and Support to external power and turn off the notebook. 4. A Licensing Agreement screen is displayed. 8. To reinstall the operating system: 1. Connect the notebook to learn more about backing up the operating system. 10. Press F8 to Setup screen opens. 6. To protect your files. After a...
...Press the power button again to continue. Press enter to start the notebook. 5. The Setup window is displayed. 7. Troubleshooting OS CD Reinstall If other recovery efforts do not successfully repair the notebook, you can reinstall the operating system. Å WARNING: Personal data... and Support to external power and turn off the notebook. 4. A Licensing Agreement screen is displayed. 8. To reinstall the operating system: 1. Connect the notebook to learn more about backing up the operating system. 10. Press F8 to Setup screen opens. 6. To protect your files. After a...


