
Bluetooth Wireless Technology Basics
Page 7
... wireless button on your BWT-enabled notebook PC: 1. Enable BWT functionality If the wireless light (ICON) is enabled, a Bluetooth icon will change from red to your notebook user documentation if you can use the Bluetooth Setup wizard to begin the configuration process. Right-click the Bluetooth icon, and then select Explore My Bluetooth Places. 2. Enable BWT functionality. 3. Set up the BWT software After the software is installed and BWT functionality is off, turn on HP notebook PCs; Follow the instructions...
... wireless button on your BWT-enabled notebook PC: 1. Enable BWT functionality If the wireless light (ICON) is enabled, a Bluetooth icon will change from red to your notebook user documentation if you can use the Bluetooth Setup wizard to begin the configuration process. Right-click the Bluetooth icon, and then select Explore My Bluetooth Places. 2. Enable BWT functionality. 3. Set up the BWT software After the software is installed and BWT functionality is off, turn on HP notebook PCs; Follow the instructions...

Bluetooth Wireless Technology Basics
Page 8
... wireless technologies by HP BWT-enabled products. Bluetooth wireless technology profiles supported by selecting the Start menu, and then the IPAQ Wireless option. If any of the profiles for a summary of available profiles and the services they can enable or disable one BWT-enabled device to browse a file system on, create or delete files/folders on, or transfer files from a BWT-enabled device to manage and change the default BWT settings and set...
... wireless technologies by HP BWT-enabled products. Bluetooth wireless technology profiles supported by selecting the Start menu, and then the IPAQ Wireless option. If any of the profiles for a summary of available profiles and the services they can enable or disable one BWT-enabled device to browse a file system on, create or delete files/folders on, or transfer files from a BWT-enabled device to manage and change the default BWT settings and set...

HP Pavilion zd8000 Notebook PC - Maintenance and Service Guide
Page 8
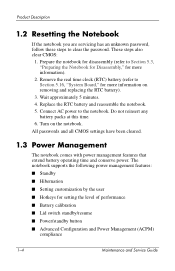
... real time clock (RTC) battery (refer to Section 5.3, "Preparing the Notebook for Disassembly," for setting the level of performance ■ Battery calibration ■ Lid switch standby/resume ■ Power/standby button ■ Advanced Configuration and Power Management (ACPM) compliance 1-4 Maintenance and Service Guide Connect AC power to clear the password. Turn on removing and replacing the RTC battery). 3. Prepare the notebook for disassembly (refer to Section 5.16, "System Board," for more information). 2. These steps also clear CMOS: 1.
... real time clock (RTC) battery (refer to Section 5.3, "Preparing the Notebook for Disassembly," for setting the level of performance ■ Battery calibration ■ Lid switch standby/resume ■ Power/standby button ■ Advanced Configuration and Power Management (ACPM) compliance 1-4 Maintenance and Service Guide Connect AC power to clear the password. Turn on removing and replacing the RTC battery). 3. Prepare the notebook for disassembly (refer to Section 5.16, "System Board," for more information). 2. These steps also clear CMOS: 1.
HP Pavilion zd8000 Notebook PC - Maintenance and Service Guide
Page 90
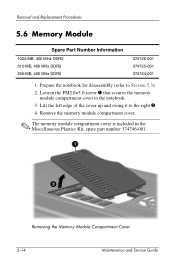
... notebook for disassembly (refer to the right 2. 4. Removing the Memory Module Compartment Cover 5-14 Maintenance and Service Guide Remove the memory module compartment cover. ✎ The memory module compartment cover is included in the Miscellaneous Plastics Kit, spare part number 374746-001. Lift the left edge of the cover up and swing it to Section 5.3). 2. Loosen the PM2.0×5.0 screw 1 that secures the memory module compartment cover to the notebook. 3. Removal and Replacement Procedures 5.6 Memory Module Spare Part Number...
... notebook for disassembly (refer to the right 2. 4. Removing the Memory Module Compartment Cover 5-14 Maintenance and Service Guide Remove the memory module compartment cover. ✎ The memory module compartment cover is included in the Miscellaneous Plastics Kit, spare part number 374746-001. Lift the left edge of the cover up and swing it to Section 5.3). 2. Loosen the PM2.0×5.0 screw 1 that secures the memory module compartment cover to the notebook. 3. Removal and Replacement Procedures 5.6 Memory Module Spare Part Number...
Hardware and Software Guide
Page 4
...Your Work 3-6 When External Power Supply Is Uncertain 3-6 When Using Drive Media 3-7 Using Default Power Settings 3-8 Identifying Power Controls and Indicators 3-8 Turning the Notebook or Display On or Off 3-9 Using Emergency Shutdown Procedures 3-10 Initiating or Resuming from Standby 3-11 Initiating or Restoring from Hibernation 3-12 Managing Power Options 3-13 Using Battery Power 3-16 Identifying the Power Lights 3-16 Switching Between Battery and External Power. . . 3-17 Charging a Battery Pack 3-17 Monitoring the Charge in a Battery Pack 3-18 iv Hardware and Software Guide
...Your Work 3-6 When External Power Supply Is Uncertain 3-6 When Using Drive Media 3-7 Using Default Power Settings 3-8 Identifying Power Controls and Indicators 3-8 Turning the Notebook or Display On or Off 3-9 Using Emergency Shutdown Procedures 3-10 Initiating or Resuming from Standby 3-11 Initiating or Restoring from Hibernation 3-12 Managing Power Options 3-13 Using Battery Power 3-16 Identifying the Power Lights 3-16 Switching Between Battery and External Power. . . 3-17 Charging a Battery Pack 3-17 Monitoring the Charge in a Battery Pack 3-18 iv Hardware and Software Guide

Hardware and Software Guide
Page 7
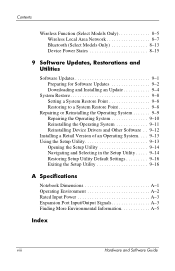
...With Power 7-11 Removing an Optical Disc (Without Power 7-12 Playing an Optical Disc 7-13 Boot Order 7-15 HP USB Digital Drive (Select Models Only 7-16 Installing an Optional SD Memory Card 7-17 Inserting an Optional Digital Drive into the Digital Drive Bay 7-18 Removing an Optional Digital Drive from the Digital Drive Bay 7-19 Connecting a Digital Drive to a USB Port 7-20 8 Communications Modem 8-1 Connecting the Modem 8-2 Network 8-3 Connecting a Network Cable 8-3 Turning a Network Connection Off and On 8-3 Accessing the Network at Startup 8-4 Hardware and Software Guide vii
...With Power 7-11 Removing an Optical Disc (Without Power 7-12 Playing an Optical Disc 7-13 Boot Order 7-15 HP USB Digital Drive (Select Models Only 7-16 Installing an Optional SD Memory Card 7-17 Inserting an Optional Digital Drive into the Digital Drive Bay 7-18 Removing an Optional Digital Drive from the Digital Drive Bay 7-19 Connecting a Digital Drive to a USB Port 7-20 8 Communications Modem 8-1 Connecting the Modem 8-2 Network 8-3 Connecting a Network Cable 8-3 Turning a Network Connection Off and On 8-3 Accessing the Network at Startup 8-4 Hardware and Software Guide vii
Hardware and Software Guide
Page 8
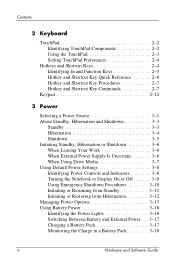
...9-9 Repairing the Operating System 9-10 Reinstalling the Operating System 9-11 Reinstalling Device Drivers and Other Software . . 9-12 Installing a Retail Version of an Operating System. . . . 9-13 Using the Setup Utility 9-13 Opening the Setup Utility 9-14 Navigating and Selecting in the Setup Utility . . . . . 9-14 Restoring Setup Utility Default Settings 9-16 Exiting the Setup Utility 9-16 A Specifications Notebook Dimensions A-1 Operating Environment A-2 Rated Input Power A-3 Expansion Port Input/Output Signals A-3 Finding More Environmental Information A-5 Index viii Hardware...
...9-9 Repairing the Operating System 9-10 Reinstalling the Operating System 9-11 Reinstalling Device Drivers and Other Software . . 9-12 Installing a Retail Version of an Operating System. . . . 9-13 Using the Setup Utility 9-13 Opening the Setup Utility 9-14 Navigating and Selecting in the Setup Utility . . . . . 9-14 Restoring Setup Utility Default Settings 9-16 Exiting the Setup Utility 9-16 A Specifications Notebook Dimensions A-1 Operating Environment A-2 Rated Input Power A-3 Expansion Port Input/Output Signals A-3 Finding More Environmental Information A-5 Index viii Hardware...

Hardware and Software Guide
Page 50
Power Using Emergency Shutdown Procedures Ä CAUTION: Emergency shutdown procedures may result in this chapter. 3-10 Hardware and Software Guide Select the Shut Down button, and then select Shut down from the list. ■ Press and hold down the power/standby button for at least 4 seconds. ■ Unplug the notebook from external power and remove the battery pack For battery pack removal instructions, see the "Replacing a Battery Pack" section, later...
Power Using Emergency Shutdown Procedures Ä CAUTION: Emergency shutdown procedures may result in this chapter. 3-10 Hardware and Software Guide Select the Shut Down button, and then select Shut down from the list. ■ Press and hold down the power/standby button for at least 4 seconds. ■ Unplug the notebook from external power and remove the battery pack For battery pack removal instructions, see the "Replacing a Battery Pack" section, later...
Hardware and Software Guide
Page 65
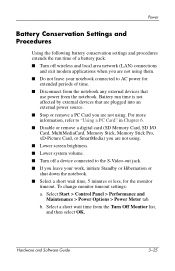
... change monitor timeout settings: a. Hardware and Software Guide 3-25 Select Start > Control Panel > Performance and Maintenance > Power Options > Power Meter tab. Select a short wait time from the notebook. Power Battery Conservation Settings and Procedures Using the following battery conservation settings and procedures extends the run time is not affected by external devices that use power from the Turn Off Monitor list, and then select OK. Battery run time of time. ■ Disconnect from the notebook any external devices that are not using...
... change monitor timeout settings: a. Hardware and Software Guide 3-25 Select Start > Control Panel > Performance and Maintenance > Power Options > Power Meter tab. Select a short wait time from the notebook. Power Battery Conservation Settings and Procedures Using the following battery conservation settings and procedures extends the run time is not affected by external devices that use power from the Turn Off Monitor list, and then select OK. Battery run time of time. ■ Disconnect from the notebook any external devices that are not using...
Hardware and Software Guide
Page 86
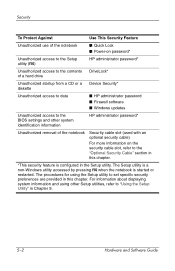
... Unauthorized use of the notebook ■ Quick Lock ■ Power-on password* Unauthorized access to the Setup utility (f10) HP administrator password* Unauthorized access to the contents DriveLock* of a hard drive Unauthorized startup from a CD or a Device Security* diskette Unauthorized access to data ■ HP administrator password ■ Firewall software ■ Windows updates Unauthorized access to the BIOS settings and other Setup utilities, refer to set specific security preferences are provided in this chapter. *This security feature is started or...
... Unauthorized use of the notebook ■ Quick Lock ■ Power-on password* Unauthorized access to the Setup utility (f10) HP administrator password* Unauthorized access to the contents DriveLock* of a hard drive Unauthorized startup from a CD or a Device Security* diskette Unauthorized access to data ■ HP administrator password ■ Firewall software ■ Windows updates Unauthorized access to the BIOS settings and other Setup utilities, refer to set specific security preferences are provided in this chapter. *This security feature is started or...
Hardware and Software Guide
Page 89
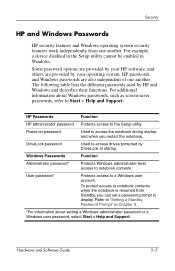
... can set a password prompt to access drives protected by DriveLock at startup. Hardware and Software Guide 5-5 Some password options are provided by your operating system. HP passwords and Windows passwords are provided by your HP software, and others are also independent of one another . Power-on password Used to notebook contents. For example, a device disabled in the Setup utility cannot be enabled in Chapter 3. *For information about Windows passwords, such as screen-saver passwords, refer to Start > Help and Support. Security HP and Windows Passwords HP...
... can set a password prompt to access drives protected by DriveLock at startup. Hardware and Software Guide 5-5 Some password options are provided by your operating system. HP passwords and Windows passwords are provided by your HP software, and others are also independent of one another . Power-on password Used to notebook contents. For example, a device disabled in the Setup utility cannot be enabled in Chapter 3. *For information about Windows passwords, such as screen-saver passwords, refer to Start > Help and Support. Security HP and Windows Passwords HP...

Hardware and Software Guide
Page 92
..., or numbers. ■ Does not display as it is set, entered, changed, or deleted. ■ Must be set with keyboard number keys will not be recognized if you enter it must be entered to 8 letters and numbers and is set, it with the same type keys. Security HP Administrator Password The HP administrator password protects the configuration settings and system identification information in the Setup utility. After this password is not case sensitive. 5-8 Hardware and Software Guide
..., or numbers. ■ Does not display as it is set, entered, changed, or deleted. ■ Must be set with keyboard number keys will not be recognized if you enter it must be entered to 8 letters and numbers and is set, it with the same type keys. Security HP Administrator Password The HP administrator password protects the configuration settings and system identification information in the Setup utility. After this password is not case sensitive. 5-8 Hardware and Software Guide

Hardware and Software Guide
Page 93
... whether the notebook is set an HP administrator password, type your password in the Enter New Password and Confirm New Password fields, and then press enter. ❏ To change an HP administrator password, type your current password in the Enter Current Password field, type the new password in the Enter Password field, press enter 3 times, and then press f10. 5. Shut down the notebook through the operating system. 2. Be sure that the hard drive is displayed in the Setup utility. Use the arrow keys to...
... whether the notebook is set an HP administrator password, type your password in the Enter New Password and Confirm New Password fields, and then press enter. ❏ To change an HP administrator password, type your current password in the Enter Current Password field, type the new password in the Enter Password field, press enter 3 times, and then press f10. 5. Shut down the notebook through the operating system. 2. Be sure that the hard drive is displayed in the Setup utility. Use the arrow keys to...

Hardware and Software Guide
Page 94
... same keys you used to 8 letters and numbers and is not case sensitive. To manage the password: 1. Shut down the notebook through the operating system. 2. After 3 unsuccessful attempts to enter the HP administrator password, you are not sure whether the notebook is turned on password is inserted into the notebook (not into an optional docking device or external MultiBay). 5-10 Hardware and Software Guide After this password is set, it is set with keyboard number keys...
... same keys you used to 8 letters and numbers and is not case sensitive. To manage the password: 1. Shut down the notebook through the operating system. 2. After 3 unsuccessful attempts to enter the HP administrator password, you are not sure whether the notebook is turned on password is inserted into the notebook (not into an optional docking device or external MultiBay). 5-10 Hardware and Software Guide After this password is set, it is set with keyboard number keys...

Hardware and Software Guide
Page 99
... your preferences and exit the Setup utility, press f10, and then follow the instructions on or restarting the notebook. When the Setup Notice is off or in the Setup utility: 1. If you are removing, not changing, the password.) 6. Press f10 while Setup message is inserted into the notebook (not into an optional docking device or external MultiBay). 3. Shut down the notebook through the operating system. 2. Hardware and Software Guide 5-15
... your preferences and exit the Setup utility, press f10, and then follow the instructions on or restarting the notebook. When the Setup Notice is off or in the Setup utility: 1. If you are removing, not changing, the password.) 6. Press f10 while Setup message is inserted into the notebook (not into an optional docking device or external MultiBay). 3. Shut down the notebook through the operating system. 2. Hardware and Software Guide 5-15
Hardware and Software Guide
Page 123
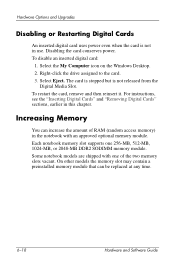
... power. Select Eject. Each notebook memory slot supports one of RAM (random access memory) in the notebook with one 256-MB, 512-MB, 1024-MB, or 2048-MB DDR2 SODIMM memory module. To disable an inserted digital card: 1. Select the My Computer icon on the Windows Desktop. 2. Hardware Options and Upgrades Disabling or Restarting Digital Cards An inserted digital card uses power even when the card is not released from the Digital Media Slot. For instructions...
... power. Select Eject. Each notebook memory slot supports one of RAM (random access memory) in the notebook with one 256-MB, 512-MB, 1024-MB, or 2048-MB DDR2 SODIMM memory module. To disable an inserted digital card: 1. Select the My Computer icon on the Windows Desktop. 2. Hardware Options and Upgrades Disabling or Restarting Digital Cards An inserted digital card uses power even when the card is not released from the Digital Media Slot. For instructions...

Hardware and Software Guide
Page 134
... operating system. 4. Back up information and instructions, select Start > Help and Support. 3. If you have ■ Saved your work and close all open applications. 2. Remove the battery pack. Drives Replacing the Internal Hard Drive The hard drive in Hibernation, turn the computer on your hard drive if desired. For back up the data on and then shut it down the notebook. ■ Disconnected the notebook from external power. 6. Shut down . 7. Close the notebook display. 5. Turn...
... operating system. 4. Back up information and instructions, select Start > Help and Support. 3. If you have ■ Saved your work and close all open applications. 2. Remove the battery pack. Drives Replacing the Internal Hard Drive The hard drive in Hibernation, turn the computer on your hard drive if desired. For back up the data on and then shut it down the notebook. ■ Disconnected the notebook from external power. 6. Shut down . 7. Close the notebook display. 5. Turn...
Hardware and Software Guide
Page 155
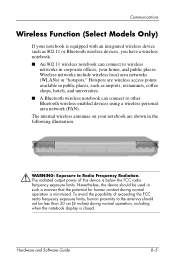
...; A Bluetooth wireless notebook can connect to wireless networks in corporate offices, your notebook are wireless access points available in the following illustration. Å WARNING: Exposure to Radio Frequency Radiation. Communications Wireless Function (Select Models Only) If your notebook is below the FCC radio frequency exposure limits. The radiated output power of exceeding the FCC radio frequency exposure limits, human proximity to other Bluetooth wireless-enabled devices using a wireless personal area network...
...; A Bluetooth wireless notebook can connect to wireless networks in corporate offices, your notebook are wireless access points available in the following illustration. Å WARNING: Exposure to Radio Frequency Radiation. Communications Wireless Function (Select Models Only) If your notebook is below the FCC radio frequency exposure limits. The radiated output power of exceeding the FCC radio frequency exposure limits, human proximity to other Bluetooth wireless-enabled devices using a wireless personal area network...
Hardware and Software Guide
Page 191
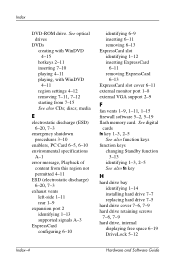
... 3-10 enablers, PC Card 6-5, 6-10 environmental specifications A-1 error message, Playback of content from 7-15 See also CDs; See digital cards fn key 1-3, 2-5 See also function keys function keys changing Standby function 3-13 identifying 1-3, 2-5 See also fn key H hard drive bay identifying 1-14 installing hard drive 7-7 replacing hard drive 7-5 hard drive cover 7-6, 7-9 hard drive retaining screws 7-6, 7-9 hard drive, internal displaying free space 6-19 DriveLock 5-12 Index-4 Hardware and Software Guide Index DVD-ROM drive. discs; See optical drives DVDs creating with WinDVD...
... 3-10 enablers, PC Card 6-5, 6-10 environmental specifications A-1 error message, Playback of content from 7-15 See also CDs; See digital cards fn key 1-3, 2-5 See also function keys function keys changing Standby function 3-13 identifying 1-3, 2-5 See also fn key H hard drive bay identifying 1-14 installing hard drive 7-7 replacing hard drive 7-5 hard drive cover 7-6, 7-9 hard drive retaining screws 7-6, 7-9 hard drive, internal displaying free space 6-19 DriveLock 5-12 Index-4 Hardware and Software Guide Index DVD-ROM drive. discs; See optical drives DVDs creating with WinDVD...
Compaq Presario X6000 and HP Compaq nx9600 Notebook PC - Maintenance and Service Guide
Page 10
... the user ■ Hotkeys for more information). 2. Wait approximately 5 minutes. 4. All passwords and all CMOS settings have been cleared. 1.3 Power Management The notebook comes with power management features that extend battery operating time and conserve power. These steps also clear CMOS: 1. Connect AC power to Section 5.16, "System Board," for setting the level of performance ■ Battery calibration ■ Lid switch standby/resume ■ Power/standby button ■ Advanced Configuration and Power Management (ACPM) compliance 1-4 Maintenance and Service Guide
... the user ■ Hotkeys for more information). 2. Wait approximately 5 minutes. 4. All passwords and all CMOS settings have been cleared. 1.3 Power Management The notebook comes with power management features that extend battery operating time and conserve power. These steps also clear CMOS: 1. Connect AC power to Section 5.16, "System Board," for setting the level of performance ■ Battery calibration ■ Lid switch standby/resume ■ Power/standby button ■ Advanced Configuration and Power Management (ACPM) compliance 1-4 Maintenance and Service Guide


