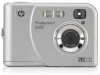

Quick Start Guide
Page 9
Press and hold to zoom in Picture Capture, press / to back out of all menus. 11 Image Display. English 8 and buttons-Scroll through menus and images and access digital zoom. Camera front, side, and bottom 1 2 3 6 5 4 1 Flash. 2 Viewfinder. 3 Self-Timer light. 4 Tripod mount. 5 Dock/USB connector. 6 Battery/Memory Card door. While in ; Getting started 7 press / to zoom out. 9 button-Displays camera menus, selects options, and confirms actions. 10 Back button-Returns you to a previous menu or view.
Press and hold to zoom in Picture Capture, press / to back out of all menus. 11 Image Display. English 8 and buttons-Scroll through menus and images and access digital zoom. Camera front, side, and bottom 1 2 3 6 5 4 1 Flash. 2 Viewfinder. 3 Self-Timer light. 4 Tripod mount. 5 Dock/USB connector. 6 Battery/Memory Card door. While in ; Getting started 7 press / to zoom out. 9 button-Displays camera menus, selects options, and confirms actions. 10 Back button-Returns you to a previous menu or view.

Quick Start Guide
Page 17
... there are fully charged or use an optional HP Photosmart dock or memory card reader. 1. NOTE: Transferring a large number of images, be sure your computer may take up to two hours. Connect the camera and computer using the USB cable that came with your computer. Print images... and video clips to your camera. 3. Turn off the camera. 2. When the Image Display indicates that the printer is turned on, there is connected to the computer, follow the instructions on the camera. Check that the camera is paper in the HP Photosmart Software. Transferring and printing images...
... there are fully charged or use an optional HP Photosmart dock or memory card reader. 1. NOTE: Transferring a large number of images, be sure your computer may take up to two hours. Connect the camera and computer using the USB cable that came with your computer. Print images... and video clips to your camera. 3. Turn off the camera. 2. When the Image Display indicates that the printer is turned on, there is connected to the computer, follow the instructions on the camera. Check that the camera is paper in the HP Photosmart Software. Transferring and printing images...

Quick Start Guide
Page 18
...see either the electronic User Guide or Camera Help located in the Image Display to the printer, the Image Display shows an image. English 2. In the Print Options menu, select Print This Image Now, and press to print. 4. When the camera is being printed. 6. After the printer...printed the image, disconnect the camera from the printer. Use to select the image you want to begin printing. Press . 5. displays on the selected image in any menu. 16 HP Photosmart E330 series Digital Camera Turn off the camera, connect the camera and printer using the USB cable that the image is ...
...see either the electronic User Guide or Camera Help located in the Image Display to the printer, the Image Display shows an image. English 2. In the Print Options menu, select Print This Image Now, and press to print. 4. When the camera is being printed. 6. After the printer...printed the image, disconnect the camera from the printer. Use to select the image you want to begin printing. Press . 5. displays on the selected image in any menu. 16 HP Photosmart E330 series Digital Camera Turn off the camera, connect the camera and printer using the USB cable that the image is ...

Quick Start Guide
Page 20
... camera's behavior. To access this menu, slide to work with images. You can select from the following options: • Display Brightness • Camera Sounds • Date & Time • USB Configuration • Language Camera Help Menu-Provides descriptions of camera ... • View Thumbnails • Photosmart Express (Print, Share, Buy Prints Online) • Favorites • View Slideshow • Move Images to Card • Camera Setup • Camera Help Camera Setup Menu-Allows you to , then press . To access this menu, 18 HP Photosmart E330 series Digital Camera
... camera's behavior. To access this menu, slide to work with images. You can select from the following options: • Display Brightness • Camera Sounds • Date & Time • USB Configuration • Language Camera Help Menu-Provides descriptions of camera ... • View Thumbnails • Photosmart Express (Print, Share, Buy Prints Online) • Favorites • View Slideshow • Move Images to Card • Camera Setup • Camera Help Camera Setup Menu-Allows you to , then press . To access this menu, 18 HP Photosmart E330 series Digital Camera

User Guide
Page 6
... batteries. Turn on the camera To turn on the Battery/Memory Card door. 2. Close the Battery/Memory Card door. NOTE: If using them the first time (see "Using the Self-Timer setting" on page 12). 4 Tripod mount. 5 Dock/USB connector. 6 Battery/Memory Card... door. Open the Battery/Memory Card door by sliding the latch as indicated on the camera, press the button. 4 Getting started Install the batteries 1. Chapter 1 Camera front, side, and bottom 6 5 4 1 2 3 1 Flash. 2...
... batteries. Turn on the camera To turn on the Battery/Memory Card door. 2. Close the Battery/Memory Card door. NOTE: If using them the first time (see "Using the Self-Timer setting" on page 12). 4 Tripod mount. 5 Dock/USB connector. 6 Battery/Memory Card... door. Open the Battery/Memory Card door by sliding the latch as indicated on the camera, press the button. 4 Getting started Install the batteries 1. Chapter 1 Camera front, side, and bottom 6 5 4 1 2 3 1 Flash. 2...

User Guide
Page 20
... number and copy the images manually. Transferring images without HP Photosmart Software If you set the camera's USB Configuration to Disk Drive (see "Using HP Photosmart Express" on page 21). • Images marked for printing do not install the HP Photosmart Software: • You cannot use the HP Photosmart Software to the computer 1. Follow the on the computer screen. Your...
... number and copy the images manually. Transferring images without HP Photosmart Software If you set the camera's USB Configuration to Disk Drive (see "Using HP Photosmart Express" on page 21). • Images marked for printing do not install the HP Photosmart Software: • You cannot use the HP Photosmart Software to the computer 1. Follow the on the computer screen. Your...

User Guide
Page 21
...HP Photosmart printers have built-in this section. For information about how to copy files, refer to any PictBridge-certified printer. Check that the printer is turned on, there is displayed on the camera. 3. For more information, see "Transferring images with your camera. Turn off the camera, connect the camera and printer using the USB... to your camera, then turn on the camera's Image Display, do one ). 2. After verifying that came with HP Photosmart Software" on the camera shows an image. NOTE: You cannot print video clips using the HP Photosmart Software. You...
...HP Photosmart printers have built-in this section. For information about how to copy files, refer to any PictBridge-certified printer. Check that the printer is turned on, there is displayed on the camera. 3. For more information, see "Transferring images with your camera. Turn off the camera, connect the camera and printer using the USB... to your camera, then turn on the camera's Image Display, do one ). 2. After verifying that came with HP Photosmart Software" on the camera shows an image. NOTE: You cannot print video clips using the HP Photosmart Software. You...
User Guide
Page 27
...• Low-For extending battery life. • Medium (Default)-For normal viewing conditions. • High-For very bright lighting conditions. USB Configuration-Specifies how a computer recognizes the camera. Use to highlight a menu option, then press to highlight a setting, then press . 4. See "Connecting to highlight...to the computer" on page 5. See "Set the date and time" on . See "Choose the language" on page 18. • Digital Camera (Default)-Recognizes the camera as a digital camera using MSDC (Mass Storage Device Class). (Language)-Sets the language. 7 Using the...
...• Low-For extending battery life. • Medium (Default)-For normal viewing conditions. • High-For very bright lighting conditions. USB Configuration-Specifies how a computer recognizes the camera. Use to highlight a menu option, then press to highlight a setting, then press . 4. See "Connecting to highlight...to the computer" on page 5. See "Set the date and time" on . See "Choose the language" on page 18. • Digital Camera (Default)-Recognizes the camera as a digital camera using MSDC (Mass Storage Device Class). (Language)-Sets the language. 7 Using the...

User Guide
Page 32
... the USB cable to another USB port on the computer. • Turn the camera off, then on again. I connect to my Macintosh. I cannot transfer images from the camera to my computer. • Either install the HP Photosmart Software (see "Install the software" on page 6), or see "Transferring images without HP Photosmart Software" on page 26). Open the HP Photosmart Camera settings...
... the USB cable to another USB port on the computer. • Turn the camera off, then on again. I connect to my Macintosh. I cannot transfer images from the camera to my computer. • Either install the HP Photosmart Software (see "Install the software" on page 6), or see "Transferring images without HP Photosmart Software" on page 26). Open the HP Photosmart Camera settings...

User Guide
Page 38
...memory. • Slot for memory card. • This camera supports standard, high speed, and high capacity Secure Digital (SD and SDHC) memory cards, 32MB to www.hp.com/ support, select your language and region, enter your camera model number in ) color LTPS TFT LCD with backlight, ...digital zoom Focus Fixed focus-1 m (39.37 in) to infinity Shutter speed 1/1000 to 2 seconds Built-in flash Yes, 6-second typical recharge time (8-second maximum recharge time at power-on) Flash working range To locate the flash working range for video clips Interfaces USB mini-B Standards • USB...
...memory. • Slot for memory card. • This camera supports standard, high speed, and high capacity Secure Digital (SD and SDHC) memory cards, 32MB to www.hp.com/ support, select your language and region, enter your camera model number in ) color LTPS TFT LCD with backlight, ...digital zoom Focus Fixed focus-1 m (39.37 in) to infinity Shutter speed 1/1000 to 2 seconds Built-in flash Yes, 6-second typical recharge time (8-second maximum recharge time at power-on) Flash working range To locate the flash working range for video clips Interfaces USB mini-B Standards • USB...

User Guide
Page 41
... and time 5 setting up destinations 23 share pictures 21 Shutter button 3 shutter speed 36 slideshow 16 software install 6 solving problems 26 sounds of camera 25 specifications 36 State Selector 3 storage 36 Sunset mode 11 support process 32 T Theatre mode 11 Thumbnails 15 Time & Date 5, 25 transfer images... 17, 18 troubleshooting 26 turn on/off power 4 U USB configuration 18, 25 V video clips 9 Video mode 11 View Slideshow 16 viewing thumbnails 15 Vista support 32 W weight 37 Windows Vista support 32 Z ...
... and time 5 setting up destinations 23 share pictures 21 Shutter button 3 shutter speed 36 slideshow 16 software install 6 solving problems 26 sounds of camera 25 specifications 36 State Selector 3 storage 36 Sunset mode 11 support process 32 T Theatre mode 11 Thumbnails 15 Time & Date 5, 25 transfer images... 17, 18 troubleshooting 26 turn on/off power 4 U USB configuration 18, 25 V video clips 9 Video mode 11 View Slideshow 16 viewing thumbnails 15 Vista support 32 W weight 37 Windows Vista support 32 Z ...


