User Guide
Page 1
HP Deskjet F4200 All-in-One series Windows Help
HP Deskjet F4200 All-in-One series Windows Help
User Guide
Page 8
Contents Contents Notice to Windows 2000 users 214 Environmental product stewardship program 214 Paper use...215 Plastics...215 Material safety data sheets 215 Recycling program...215 HP inkjet supplies recycling program 215 Energy Star® notice...215 Disposal of waste equipment by users in private households in the European Union...216 Regulatory ... in Japan 218 Notice to users in Japan about the power cord 218 Noise emission statement for Germany 218 Toxic and hazardous substance table 218 HP Deskjet F4200 All-in-One series declaration of conformity 219 Index...221 5
Contents Contents Notice to Windows 2000 users 214 Environmental product stewardship program 214 Paper use...215 Plastics...215 Material safety data sheets 215 Recycling program...215 HP inkjet supplies recycling program 215 Energy Star® notice...215 Disposal of waste equipment by users in private households in the European Union...216 Regulatory ... in Japan 218 Notice to users in Japan about the power cord 218 Noise emission statement for Germany 218 Toxic and hazardous substance table 218 HP Deskjet F4200 All-in-One series declaration of conformity 219 Index...221 5

User Guide
Page 10
... the scan features • Maintain the HP All-in -One series Help 7 HP Deskjet F4200 All-in-One series Help HP Deskjet F4200 All-in -One • Shop for ink supplies • HP warranty and support • Technical information NOTE: If you are using the product with a Windows 2000 computer, some features may not be available. 1 HP Deskjet F4200 All-inOne series Help For information...
... the scan features • Maintain the HP All-in -One series Help 7 HP Deskjet F4200 All-in-One series Help HP Deskjet F4200 All-in -One • Shop for ink supplies • HP warranty and support • Technical information NOTE: If you are using the product with a Windows 2000 computer, some features may not be available. 1 HP Deskjet F4200 All-inOne series Help For information...
User Guide
Page 22
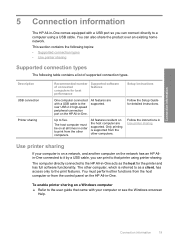
... features are supported. All features resident on the HP All-in-One. You must be on a Windows computer ▲ Refer to the user guide that printer using a USB cable. Connection information 19 Use printer sharing If your computer or see the Windows onscreen Help. Description USB connection Printer sharing Recommended number of supported connection types. The host...
... features are supported. All features resident on the HP All-in-One. You must be on a Windows computer ▲ Refer to the user guide that printer using a USB cable. Connection information 19 Use printer sharing If your computer or see the Windows onscreen Help. Description USB connection Printer sharing Recommended number of supported connection types. The host...
User Guide
Page 27
... designed for all paper flat in -One. Chapter 6 NOTE: For a complete list of the HP All-in -One for use with HP inkjet devices). • Highly textured stock, such as duplicate and triplicate forms. They can wrinkle or get stuck in the printer software. • Paper with clasps or windows. If the paper is more likely...
... designed for all paper flat in -One. Chapter 6 NOTE: For a complete list of the HP All-in -One for use with HP inkjet devices). • Highly textured stock, such as duplicate and triplicate forms. They can wrinkle or get stuck in the printer software. • Paper with clasps or windows. If the paper is more likely...
User Guide
Page 31
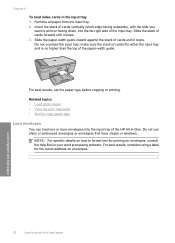
...guide inward against the stack of cards forward until it stops. 3. Insert the stack of the HP All-in-One. Related topics • Load photo paper • View the print resolution • Set the copy... paper type Load envelopes You can load one or more envelopes into the far-right side of the paper-width guide. For best results,...label for printing on envelopes. Do not use shiny or embossed envelopes or envelopes that have clasps or windows. make sure the stack of cards fits within the input tray and is no higher than the top...
...guide inward against the stack of cards forward until it stops. 3. Insert the stack of the HP All-in-One. Related topics • Load photo paper • View the print resolution • Set the copy... paper type Load envelopes You can load one or more envelopes into the far-right side of the paper-width guide. For best results,...label for printing on envelopes. Do not use shiny or embossed envelopes or envelopes that have clasps or windows. make sure the stack of cards fits within the input tray and is no higher than the top...
User Guide
Page 35
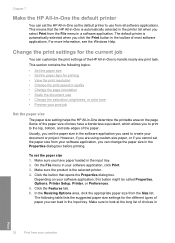
... the paper. Make sure to use from all software applications. Chapter 7 Make the HP All-in-One the default printer You can set the HP All-in Print 32 Print from your computer For more information, see the Windows Help. Change the print settings for printing • View the print resolution •...look at the long list of the paper size choices have paper loaded in the input tray. Click the button that the HP All-in-One is automatically selected in the printer list when you click the Print button in a software application. Click the Features tab. 6. In the Resizing Options area...
... the paper. Make sure to use from all software applications. Chapter 7 Make the HP All-in-One the default printer You can set the HP All-in Print 32 Print from your computer For more information, see the Windows Help. Change the print settings for printing • View the print resolution •...look at the long list of the paper size choices have paper loaded in the input tray. Click the button that the HP All-in-One is automatically selected in the printer list when you click the Print button in a software application. Click the Features tab. 6. In the Resizing Options area...
User Guide
Page 39
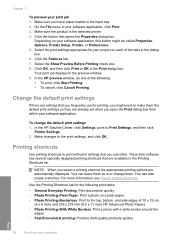
... then click Print or OK in the preview window. 9. Make changes to Print Settings, and then click Printer Settings. 2. NOTE: When you have paper loaded in the Printing Shortcuts list. Make sure the product is or change the default print settings 1. In the HP preview window, do one of the following print tasks: • General...
... then click Print or OK in the preview window. 9. Make changes to Print Settings, and then click Printer Settings. 2. NOTE: When you have paper loaded in the Printing Shortcuts list. Make sure the product is or change the default print settings 1. In the HP preview window, do one of the following print tasks: • General...
User Guide
Page 52
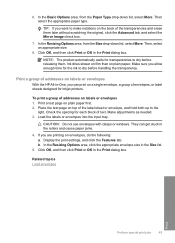
... page on top of envelopes, or label sheets designed for the ink to make notations on labels or envelopes With the HP All-in-One, you allow enough time for inkjet printers. They can print on a single envelope, a group of the label sheet or envelope, and hold both up to dry before ...the Print dialog box. To print a group of the transparencies and erase them . Make adjustments as needed. 3. CAUTION: Do not use envelopes with clasps or windows. Click OK, and then click Print or OK in the Size list. 5. Then, select an appropriate size. 8. Click OK, and then click Print or OK...
... page on top of envelopes, or label sheets designed for the ink to make notations on labels or envelopes With the HP All-in-One, you allow enough time for inkjet printers. They can print on a single envelope, a group of the label sheet or envelope, and hold both up to dry before ...the Print dialog box. To print a group of the transparencies and erase them . Make adjustments as needed. 3. CAUTION: Do not use envelopes with clasps or windows. Click OK, and then click Print or OK in the Size list. 5. Then, select an appropriate size. 8. Click OK, and then click Print or OK...

User Guide
Page 54
...laid out on the Web page that you have paper loaded in your Web browser supports it from the HP All-in the Windows taskbar. It can also double-click the printer icon in -One ▲ Press Cancel on the control panel. TIP: To print Web pages correctly, you want to be... cancelled. TIP: You can take a few moments for the print job to include in the Windows taskbar. 4. To stop , press Cancel again. On the Windows taskbar, click ...
...laid out on the Web page that you have paper loaded in your Web browser supports it from the HP All-in the Windows taskbar. It can also double-click the printer icon in -One ▲ Press Cancel on the control panel. TIP: To print Web pages correctly, you want to be... cancelled. TIP: You can take a few moments for the print job to include in the Windows taskbar. 4. To stop , press Cancel again. On the Windows taskbar, click ...
User Guide
Page 55
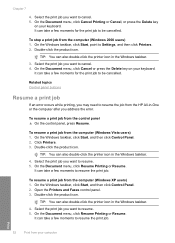
...Resume Printing or Resume. Open the Printers and Faxes control panel. 3. On the Document menu, click Resume Printing or Resume. On the Document menu, click Cancel Printing or Cancel, or press the Delete key on your computer Print 52 Print from the HP All-in the Windows taskbar. 4. Chapter 7 4. ...It can take a few moments for the print job to resume the print job. Select the print job you want to resume the print job. TIP: You can take a few moments to cancel. 4. It can also double-click the printer icon in -One...
...Resume Printing or Resume. Open the Printers and Faxes control panel. 3. On the Document menu, click Resume Printing or Resume. On the Document menu, click Cancel Printing or Cancel, or press the Delete key on your computer Print 52 Print from the HP All-in the Windows taskbar. 4. Chapter 7 4. ...It can take a few moments for the print job to resume the print job. Select the print job you want to resume the print job. TIP: You can take a few moments to cancel. 4. It can also double-click the printer icon in -One...

User Guide
Page 56
Double-click the product icon. It can also double-click the printer icon in the Windows taskbar. 3. Related topics Control panel buttons Print Resume a print job 53 On the Windows taskbar, click Start, point to resume the print job. On the Document menu, click Resume. Select the print job you want to resume. 4. To resume a print job from the computer (Windows 2000 users) 1. TIP: You can take a few moments to Settings, and then click Printers. 2.
Double-click the product icon. It can also double-click the printer icon in the Windows taskbar. 3. Related topics Control panel buttons Print Resume a print job 53 On the Windows taskbar, click Start, point to resume the print job. On the Document menu, click Resume. Select the print job you want to resume. 4. To resume a print job from the computer (Windows 2000 users) 1. TIP: You can take a few moments to Settings, and then click Printers. 2.
User Guide
Page 66
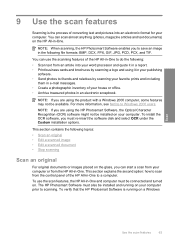
... using the product with a Windows 2000 computer, some features may not be connected and turned on your house or office. • Archive treasured photos in -One. To verify that the HP Photosmart Software is the process of the HP All-in -One. You can use the scan features, the HP All-in -One to scanning. 9 Use the...
... using the product with a Windows 2000 computer, some features may not be connected and turned on your house or office. • Archive treasured photos in -One. To verify that the HP Photosmart Software is the process of the HP All-in -One. You can use the scan features, the HP All-in -One to scanning. 9 Use the...
User Guide
Page 67
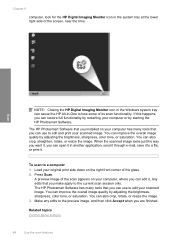
... image looks just the way you want it to edit your scanned image. The HP Photosmart Software has many tools that you can use to the current scan session only...NOTE: Closing the HP Digital Imaging Monitor icon in the Windows system tray can cause the HP All-in another application, send it through e-mail, save it , you can open it in -One to lose some... of the glass. 2. You can also crop, rotate, or resize the image. 3. Press Scan. To scan to the preview image, and then click Accept when you make apply to edit and print your computer or by starting the HP...
... image looks just the way you want it to edit your scanned image. The HP Photosmart Software has many tools that you can use to the current scan session only...NOTE: Closing the HP Digital Imaging Monitor icon in the Windows system tray can cause the HP All-in another application, send it through e-mail, save it , you can open it in -One to lose some... of the glass. 2. You can also crop, rotate, or resize the image. 3. Press Scan. To scan to the preview image, and then click Accept when you make apply to edit and print your computer or by starting the HP...
User Guide
Page 93
... In the Run dialog box, enter d:\setup.exe, and then click OK. Turn the product off and then on setting up the HP Photosmart software. For more information, see the Setup Guide that an Unknown Error has occurred • Some of the buttons are missing in ... port on again. • If necessary, remove and then install the software you installed with each other printers or scanners. Cause: Your system did not meet the minimum requirements to disconnect older products from a Windows computer 1. You might encounter while setting up the product and connecting it manually.
... In the Run dialog box, enter d:\setup.exe, and then click OK. Turn the product off and then on setting up the HP Photosmart software. For more information, see the Setup Guide that an Unknown Error has occurred • Some of the buttons are missing in ... port on again. • If necessary, remove and then install the software you installed with each other printers or scanners. Cause: Your system did not meet the minimum requirements to disconnect older products from a Windows computer 1. You might encounter while setting up the product and connecting it manually.
User Guide
Page 95
...simply delete the product application files from the Windows taskbar by clicking Start, pointing to Programs or All Programs, HP, Deskjet F4200 All-In-One series, and then clicking Product Registration. Troubleshooting Chapter 12 Some of the desktop), start the HP Solution Center. The registration screen does not ...: The registration screen did not launch automatically. Make sure to remove them properly using the uninstall utility provided in the HP All-in -One program group. Do not simply delete the product application files from your installation might not be complete, and you might ...
...simply delete the product application files from the Windows taskbar by clicking Start, pointing to Programs or All Programs, HP, Deskjet F4200 All-In-One series, and then clicking Product Registration. Troubleshooting Chapter 12 Some of the desktop), start the HP Solution Center. The registration screen does not ...: The registration screen did not launch automatically. Make sure to remove them properly using the uninstall utility provided in the HP All-in -One program group. Do not simply delete the product application files from your installation might not be complete, and you might ...
User Guide
Page 96
.... 3. Uninstall and reinstall the software If your computer until after you have reinstalled the software. 5. NOTE: It is not available in the Windows Start menu (click Programs or All Programs, HP, Deskjet F4200 All-In-One series, Uninstall). 1. Insert the product CD-ROM into your computer. 4. Software installation troubleshooting 93 Do not simply delete the...
.... 3. Uninstall and reinstall the software If your computer until after you have reinstalled the software. 5. NOTE: It is not available in the Windows Start menu (click Programs or All Programs, HP, Deskjet F4200 All-In-One series, Uninstall). 1. Insert the product CD-ROM into your computer. 4. Software installation troubleshooting 93 Do not simply delete the...
User Guide
Page 97
...rear access door. 94 Troubleshooting Troubleshooting To verify that the software is complete, the HP Digital Imaging Monitor icon appears in the Windows system tray. Chapter 12 When the software installation is properly installed, double-click the HP Solution Center icon on paper Clear paper jams Solution: In case of paper in the... in a resealable bag. • Ensure that paper loaded in the input tray lays flat and the edges are recommended for the product. If the HP Solution Center shows the essential icons (Scan Picture and Scan Document), the software has been properly installed.
...rear access door. 94 Troubleshooting Troubleshooting To verify that the software is complete, the HP Digital Imaging Monitor icon appears in the Windows system tray. Chapter 12 When the software installation is properly installed, double-click the HP Solution Center icon on paper Clear paper jams Solution: In case of paper in the... in a resealable bag. • Ensure that paper loaded in the input tray lays flat and the edges are recommended for the product. If the HP Solution Center shows the essential icons (Scan Picture and Scan Document), the software has been properly installed.
User Guide
Page 118
.... For more information, see: Print a borderless image Cause: Use of envelope Solution: Do not use 10 x 15 cm (4 x 6 inch) HP Advanced Photo Papers. If this did not solve the issue, try the next solution. Cause: The wrong type of envelope was loaded incorrectly. Cause:... Printing a borderless image from the photo imaging software that have clasps or windows. If this did not solve the issue, try the next solution. Troubleshooting Cause: A stack of envelopes was loaded. Solution 2: Load a ...
.... For more information, see: Print a borderless image Cause: Use of envelope Solution: Do not use 10 x 15 cm (4 x 6 inch) HP Advanced Photo Papers. If this did not solve the issue, try the next solution. Cause: The wrong type of envelope was loaded incorrectly. Cause:... Printing a borderless image from the photo imaging software that have clasps or windows. If this did not solve the issue, try the next solution. Troubleshooting Cause: A stack of envelopes was loaded. Solution 2: Load a ...
User Guide
Page 135
...a USB cable Solution: Connect your computer. Solution 4: Make sure the HP Photosmart Software is running , right-click on your computer to resolve the issue. Pick a device in the system tray at the far right of the Windows taskbar. If this did not solve the issue, try the next solution.... For more information, see the Setup Guide. Solutions are listed in order, with a standard USB cable. If this did not solve the issue, try the next solution. Cause: The HP Photosmart Software was...
...a USB cable Solution: Connect your computer. Solution 4: Make sure the HP Photosmart Software is running , right-click on your computer to resolve the issue. Pick a device in the system tray at the far right of the Windows taskbar. If this did not solve the issue, try the next solution.... For more information, see the Setup Guide. Solutions are listed in order, with a standard USB cable. If this did not solve the issue, try the next solution. Cause: The HP Photosmart Software was...


