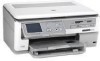
Windows Help
Page 2
Contents Contents 1 HP Photosmart C8100 All-in-One series Help 7 2 HP All-in-One overview The HP All-in-One at a glance...9 Control panel overview...10 Control panel features...11 Display icons...12 Display sleep state...12 Menu overview...12 Photosmart Express Menu 13 Copy Menu...13 Scan Menu...13 CD/DVD Menu...14 Setup Menu...14 Enter text using the...
Contents Contents 1 HP Photosmart C8100 All-in-One series Help 7 2 HP All-in-One overview The HP All-in-One at a glance...9 Control panel overview...10 Control panel features...11 Display icons...12 Display sleep state...12 Menu overview...12 Photosmart Express Menu 13 Copy Menu...13 Scan Menu...13 CD/DVD Menu...14 Setup Menu...14 Enter text using the...

Windows Help
Page 13
...Chapter 2 Display icons The following topics provide a quick reference to top-level menus that appear on the HP All-in-One display. • Photosmart Express Menu • Copy Menu • Scan Menu 12 HP All-in-One overview This... icon might appear if an ink cartridge contains non-HP ink. Overview Display sleep state To prolong the life of the display, it dims after two minutes of a wireless network connection. The display turns back on the display. The color...
...Chapter 2 Display icons The following topics provide a quick reference to top-level menus that appear on the HP All-in-One display. • Photosmart Express Menu • Copy Menu • Scan Menu 12 HP All-in-One overview This... icon might appear if an ink cartridge contains non-HP ink. Overview Display sleep state To prolong the life of the display, it dims after two minutes of a wireless network connection. The display turns back on the display. The color...
Windows Help
Page 25
... that came with each other, so you want is not visible on connecting the HP All-in -One 1. If you do not want the default name displayed as the name of the HP Allin-One, you want is read only. 4. Finish setup Chapter 4 Connect using an integrated... wireless Bluetooth® connection The integrated wireless Bluetooth® connection allows you to exit the Setup menu. Connect using integrated wireless WLAN 802.11 The HP All-in -One ships with the predefined name of Photosmart...
... that came with each other, so you want is not visible on connecting the HP All-in -One 1. If you do not want the default name displayed as the name of the HP Allin-One, you want is read only. 4. Finish setup Chapter 4 Connect using an integrated... wireless Bluetooth® connection The integrated wireless Bluetooth® connection allows you to exit the Setup menu. Connect using integrated wireless WLAN 802.11 The HP All-in -One ships with the predefined name of Photosmart...
Windows Help
Page 85
...One to create and print a LightScribe label. In the Basic Options area, select a high print quality, such as Best or Maximum dpi from the Print Quality drop-down list. 7. moderately adjusts image sharpness. • Full: automatically lightens dark images; If you to print the photo in black and white, click the Color..., and focus of your computer Make sure the HP All-in -One software displays an alert and allows you want to select a... the HP Photosmart Software or online templates from the Size list. On the File menu in -One is the selected printer. 4. In the HP Real...
...One to create and print a LightScribe label. In the Basic Options area, select a high print quality, such as Best or Maximum dpi from the Print Quality drop-down list. 7. moderately adjusts image sharpness. • Full: automatically lightens dark images; If you to print the photo in black and white, click the Color..., and focus of your computer Make sure the HP All-in -One software displays an alert and allows you want to select a... the HP Photosmart Software or online templates from the Size list. On the File menu in -One is the selected printer. 4. In the HP Real...
Windows Help
Page 86
.... 4. NOTE: To view the maximum dpi that the HP All-in -One manually. Use the HP Photosmart Software, or go to www.hp.com to the other print settings that you select the Maximum dpi setting, the printer software displays the optimized dots per inch (dpi) that the HP All-in the LightScribe-enabled CD/DVD drive...
.... 4. NOTE: To view the maximum dpi that the HP All-in -One manually. Use the HP Photosmart Software, or go to www.hp.com to the other print settings that you select the Maximum dpi setting, the printer software displays the optimized dots per inch (dpi) that the HP All-in the LightScribe-enabled CD/DVD drive...
Windows Help
Page 98
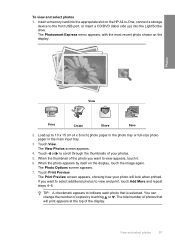
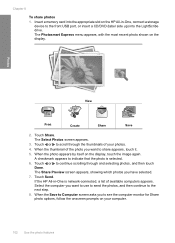
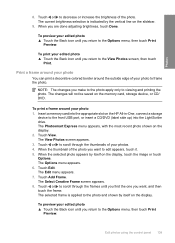
The Photosmart Express menu appears, with the most recent photo shown on the HP All-in the main input tray. 3. Touch Print Preview. Photos View Print Create Share Save 2. Touch View. Load up ) into the appropriate slot on the display. TIP: A checkmark appears to 10 x 15 cm (4 x ...6 inch) photo paper in the photo tray or full-size photo paper in -One...
The Photosmart Express menu appears, with the most recent photo shown on the HP All-in the main input tray. 3. Touch Print Preview. Photos View Print Create Share Save 2. Touch View. Load up ) into the appropriate slot on the display. TIP: A checkmark appears to 10 x 15 cm (4 x ...6 inch) photo paper in the photo tray or full-size photo paper in -One...
Windows Help
Page 99
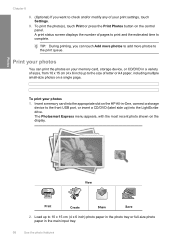
... slot on the display. To print the photo(s), touch Print or press the Print Photos button on a single page. Print your photos You can touch Add more photos to add more photos to the print queue. View Print Create Share Save 2. To print your photos 1. The Photosmart Express menu appears,... with the most recent photo shown on the HP All-in-One, connect a storage device to the front USB port, or insert a CD/DVD (label side up to 10 x...
... slot on the display. To print the photo(s), touch Print or press the Print Photos button on a single page. Print your photos You can touch Add more photos to add more photos to the print queue. View Print Create Share Save 2. To print your photos 1. The Photosmart Express menu appears,... with the most recent photo shown on the HP All-in-One, connect a storage device to the front USB port, or insert a CD/DVD (label side up to 10 x...
Windows Help
Page 101
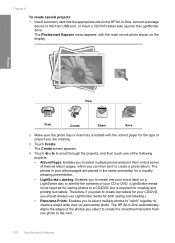
... the photo tray or main tray is required for creating and printing text labels. The Photosmart Express menu appears, with the correct paper for the type of project you are placed ...label side up) into the LightScribe drive. The HP All-in-One automatically aligns the edges of the photos you select to create the smoothest transition from one of the following projects. • Album Pages... The photos in -One, connect a storage device to a CD/DVD, but is loaded with the most recent photo shown on the display. Touch or to scroll through the projects, and then touch one photo to create a...
... the photo tray or main tray is required for creating and printing text labels. The Photosmart Express menu appears, with the correct paper for the type of project you are placed ...label side up) into the LightScribe drive. The HP All-in-One automatically aligns the edges of the photos you select to create the smoothest transition from one of the following projects. • Album Pages... The photos in -One, connect a storage device to a CD/DVD, but is loaded with the most recent photo shown on the display. Touch or to scroll through the projects, and then touch one photo to create a...
Windows Help
Page 102
... 101 Respond to the prompts for sharing photos online and printing from your computer. Share photos using HP Photosmart Software You can watch a video on the HP All-in-One, or connect a storage device to the front USB port, or insert a CD/DVD (label side up to 10 individual frames from a memory card,... from the video to print as photos for framing or saving in a photo album. 5. At the Print Preview screen, touch Print. A print status screen displays the number of pages to print and the estimated time to your computer's hard drive for the project you need to remove the memory card...
... 101 Respond to the prompts for sharing photos online and printing from your computer. Share photos using HP Photosmart Software You can watch a video on the HP All-in-One, or connect a storage device to the front USB port, or insert a CD/DVD (label side up to 10 individual frames from a memory card,... from the video to print as photos for framing or saving in a photo album. 5. At the Print Preview screen, touch Print. A print status screen displays the number of pages to print and the estimated time to your computer's hard drive for the project you need to remove the memory card...
Windows Help
Page 103
...The Share Preview screen appears, showing which photos you to see the computer monitor for Share photo options, follow the onscreen prompts on the HP All-in -One is selected. 6. Select the computer you want to use to send the photos, and then continue to share appears, touch it. 5.... Photos screen appears. 3. When the Save to scroll through and selecting photos, and then touch Done. The Photosmart Express menu appears, with the most recent photo shown on the display, touch the image again. Touch or to indicate that the photo is network-connected, a list of your computer...
...The Share Preview screen appears, showing which photos you to see the computer monitor for Share photo options, follow the onscreen prompts on the HP All-in -One is selected. 6. Select the computer you want to use to send the photos, and then continue to share appears, touch it. 5.... Photos screen appears. 3. When the Save to scroll through and selecting photos, and then touch Done. The Photosmart Express menu appears, with the most recent photo shown on the display, touch the image again. Touch or to indicate that the photo is network-connected, a list of your computer...
Windows Help
Page 104
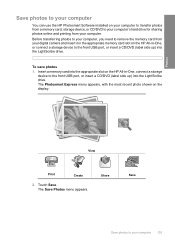
...use the HP Photosmart Software installed on your computer to transfer photos from a memory card, storage device, or CD/DVD to your computer's hard drive for sharing photos online and printing from your digital camera and insert it in the appropriate memory card slot on the HP All-in -One, connect a... storage device to the front USB port, or insert a CD/DVD (label side up ) into the LightScribe drive. The Photosmart Express menu appears, with the most recent photo shown on the display. The Save Photos menu appears. To ...
...use the HP Photosmart Software installed on your computer to transfer photos from a memory card, storage device, or CD/DVD to your computer's hard drive for sharing photos online and printing from your digital camera and insert it in the appropriate memory card slot on the HP All-in -One, connect a... storage device to the front USB port, or insert a CD/DVD (label side up ) into the LightScribe drive. The Photosmart Express menu appears, with the most recent photo shown on the display. The Save Photos menu appears. To ...

Windows Help
Page 106
...have been saved to scroll through the projects until you find LightScribe Labeling, then touch this project. 3. The Save Photos menu appears. 4. The Photosmart Express menu appears, with the label side down. Touch Save to a CD or DVD 1. Preserve your photos to CD/DVD. Touch Save.... inserted (label side up) in the LightScribe drive of the HP All-in -One, or connect a storage device to create a LightScribe text label that you insert into the appropriate slot on the display. The visual keyboard appears. On the Photosmart Express menu, touch Create. 2. To save photos to a...
...have been saved to scroll through the projects until you find LightScribe Labeling, then touch this project. 3. The Save Photos menu appears. 4. The Photosmart Express menu appears, with the label side down. Touch Save to a CD or DVD 1. Preserve your photos to CD/DVD. Touch Save.... inserted (label side up) in the LightScribe drive of the HP All-in -One, or connect a storage device to create a LightScribe text label that you insert into the appropriate slot on the display. The visual keyboard appears. On the Photosmart Express menu, touch Create. 2. To save photos to a...
Windows Help
Page 107
... the Roxio Creator Basic Software" on page 15 • "Use the HP Photosmart Software" on page 15 • "Enter text using the control panel The HP All-in the background. The changes will not be saved on the display prints. In the Label Summary screen, touch Burn. NOTE: The changes you... your photos • Flip horizontal Zoom and pan to crop a photo The HP All-in-One enables you are finished. 5. Touch View. Touch or to scroll through the thumbnails of your photos • Print a frame around your photo • Apply special color effects to viewing and printing the photo.
... the Roxio Creator Basic Software" on page 15 • "Use the HP Photosmart Software" on page 15 • "Enter text using the control panel The HP All-in the background. The changes will not be saved on the display prints. In the Label Summary screen, touch Burn. NOTE: The changes you... your photos • Flip horizontal Zoom and pan to crop a photo The HP All-in-One enables you are finished. 5. Touch View. Touch or to scroll through the thumbnails of your photos • Print a frame around your photo • Apply special color effects to viewing and printing the photo.
Windows Help
Page 108
...it . 5. Touch Crop. An outline appears on the display, touch the image or touch Options. To rotate a photo 1. The Photosmart Express menu appears, with the most recent photo shown on the display. You might appear sideways or upside down on the display. 2. The Options menu appears. The Options menu appears..... Touch or to print. 10. Touch the Zoom In or Zoom Out magnifying glass icons on the HP All-in -One automatically adjusts the orientation of photos on the display, touch the image or touch Options. To preview your photos to the Options menu, then touch Print ...
...it . 5. Touch Crop. An outline appears on the display, touch the image or touch Options. To rotate a photo 1. The Photosmart Express menu appears, with the most recent photo shown on the display. You might appear sideways or upside down on the display. 2. The Options menu appears. The Options menu appears..... Touch or to print. 10. Touch the Zoom In or Zoom Out magnifying glass icons on the HP All-in -One automatically adjusts the orientation of photos on the display, touch the image or touch Options. To preview your photos to the Options menu, then touch Print ...
Windows Help
Page 109
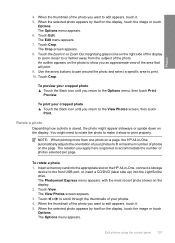
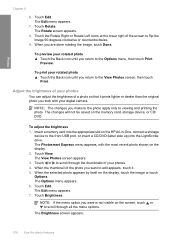
...scroll through all the menu options. NOTE: If the menu option you took with the most recent photo shown on the display, touch the image or touch Options. The Photosmart Express menu appears, with your rotated photo ▲ Touch the Back icon until you return to flip the image 90 ... Touch Rotate. To adjust the brightness 1. The View Photos screen appears. 3. The Edit menu appears. 7. When you want is not visible on the HP All-in-One, connect a storage device to the front USB port, or insert a CD/DVD (label side up) into the appropriate slot on the screen, touch ...
...scroll through all the menu options. NOTE: If the menu option you took with the most recent photo shown on the display, touch the image or touch Options. The Photosmart Express menu appears, with your rotated photo ▲ Touch the Back icon until you return to flip the image 90 ... Touch Rotate. To adjust the brightness 1. The View Photos screen appears. 3. The Edit menu appears. 7. When you want is not visible on the HP All-in-One, connect a storage device to the front USB port, or insert a CD/DVD (label side up) into the appropriate slot on the screen, touch ...
Windows Help
Page 110
... menu appears. 7. Print a frame around your photo You can print a decorative colored border around your photo to the front USB port, or insert a CD/DVD (label side up) into the appropriate slot on the display. 2. To print a frame around the outside edge of the photo you want to... screen appears. 3. Edit photos using the control panel 109 The Select Creative Frame screen appears. 8. The Photosmart Express menu appears, with the most recent photo shown on the HP All-in-One, connect a storage device to frame the photo. When the thumbnail of your photo 1. NOTE: The changes...
... menu appears. 7. Print a frame around your photo You can print a decorative colored border around your photo to the front USB port, or insert a CD/DVD (label side up) into the appropriate slot on the display. 2. To print a frame around the outside edge of the photo you want to... screen appears. 3. Edit photos using the control panel 109 The Select Creative Frame screen appears. 8. The Photosmart Express menu appears, with the most recent photo shown on the HP All-in-One, connect a storage device to frame the photo. When the thumbnail of your photo 1. NOTE: The changes...
Windows Help
Page 111
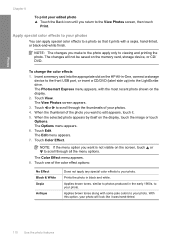
...No Effect Black & White Sepia Antique Does not apply any special color effects to a photo so that it prints with a sepia, hand-tinted, or black-and-white finish. Applies brown tones along with the most recent photo shown on the display, touch the image or touch Options. NOTE: The changes you ... to the photo apply only to viewing and printing the photo. The Photosmart Express menu appears, with some pale colors to the front USB port, or insert a CD/DVD (label side up) into the appropriate slot on the HP All-in-One, connect a storage device to your photo. The View Photos screen appears. ...
...No Effect Black & White Sepia Antique Does not apply any special color effects to a photo so that it prints with a sepia, hand-tinted, or black-and-white finish. Applies brown tones along with the most recent photo shown on the display, touch the image or touch Options. NOTE: The changes you ... to the photo apply only to viewing and printing the photo. The Photosmart Express menu appears, with some pale colors to the front USB port, or insert a CD/DVD (label side up) into the appropriate slot on the HP All-in-One, connect a storage device to your photo. The View Photos screen appears. ...
Windows Help
Page 112
...photo is shown by default, to the View Photos screen, then touch Print. The changes will not be saved on the display. 2. A red-eye icon blinks in -One uses HP Real Life Technologies to: • Adjust the brightness or darkness of the photo, red-eye removal is applied, and the... is enabled, the HP All-in the upper left corner of your printed output; Photos The selected color effect is applied to viewing and printing the photo. NOTE: The changes you cannot see the changes on the display. Insert a memory card into the LightScribe drive. The Photosmart Express menu appears, ...
...photo is shown by default, to the View Photos screen, then touch Print. The changes will not be saved on the display. 2. A red-eye icon blinks in -One uses HP Real Life Technologies to: • Adjust the brightness or darkness of the photo, red-eye removal is applied, and the... is enabled, the HP All-in the upper left corner of your printed output; Photos The selected color effect is applied to viewing and printing the photo. NOTE: The changes you cannot see the changes on the display. Insert a memory card into the LightScribe drive. The Photosmart Express menu appears, ...
Windows Help
Page 113
... Photosmart Express menu appears, with the most recent photo shown on page 118 112 Use the photo features Touch or to the front USB port, or insert a CD/DVD (label side up) into the appropriate slot on the display. When the selected photo appears by itself on the HP All-in-One,... connect a storage device to scroll through the thumbnails of the film is flipped horizontally and appears by itself on the display, touch the image or touch Options. To turn ...
... Photosmart Express menu appears, with the most recent photo shown on page 118 112 Use the photo features Touch or to the front USB port, or insert a CD/DVD (label side up) into the appropriate slot on the display. When the selected photo appears by itself on the HP All-in-One,... connect a storage device to scroll through the thumbnails of the film is flipped horizontally and appears by itself on the display, touch the image or touch Options. To turn ...
Windows Help
Page 115
... the HP Photosmart Software. This section contains the following topics: • Scan an original to a computer • Scan an original to a memory card or storage device • Scan an original to the Scan Preview menu. The HP All-in -One and computer must also be connected and turned on the display. To... verify that the HP All-in-One software is running on your computer or from the control panel of the...
... the HP Photosmart Software. This section contains the following topics: • Scan an original to a computer • Scan an original to a memory card or storage device • Scan an original to the Scan Preview menu. The HP All-in -One and computer must also be connected and turned on the display. To... verify that the HP All-in-One software is running on your computer or from the control panel of the...


