Setup Guide
Page 3
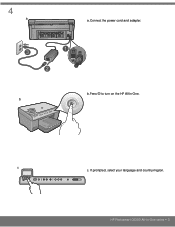
4 a a. b c c. HP Photosmart C6300 All-in -One. Connect the power cord and adapter. If prompted, select your language and country/region. b. Press to turn on the HP All-in -One series • 3
4 a a. b c c. HP Photosmart C6300 All-in -One. Connect the power cord and adapter. If prompted, select your language and country/region. b. Press to turn on the HP All-in -One series • 3
Basic Guide
Page 20
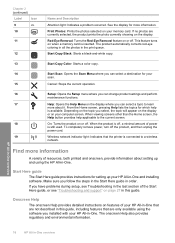
...used. See the display for your HP All-in -One. HP All-in-One overview 18 HP All-in order. The product automatically corrects red-eye coloring in all the photos in this guide, including features that the printer is off the product, and then unplug the power cord. 19 Wireless network indicator light: ... light: Indicates a problem occurred. Print Photos: Prints the photos selected on or off . If no photos are only available using the HP All-in -One and installing software. When the product is connected to the current screen. 18 On: Turns the product on your...
...used. See the display for your HP All-in -One. HP All-in-One overview 18 HP All-in order. The product automatically corrects red-eye coloring in all the photos in this guide, including features that the printer is off the product, and then unplug the power cord. 19 Wireless network indicator light: ... light: Indicates a problem occurred. Print Photos: Prints the photos selected on or off . If no photos are only available using the HP All-in -One and installing software. When the product is connected to the current screen. 18 On: Turns the product on your...
Basic Guide
Page 30
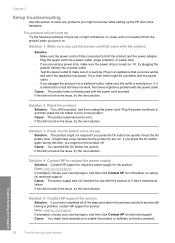
.... Solution 4: Contact HP to replace the power supply Solution: Contact HP support to request a power supply for the product to turn on. Solution 5: Contact HP support for service Solution: If you have completed all of the steps provided in -One hardware. Plug the power cord back in an appliance... turn it had a mechanical failure. Solution 1: Make sure you use with the product Solution • Make sure the power cord is switched to : www.hp.com/support. Cause: The product was not intended for technical support. Cause: The product experienced an error. Press the ...
.... Solution 4: Contact HP to replace the power supply Solution: Contact HP support to request a power supply for the product to turn on. Solution 5: Contact HP support for service Solution: If you have completed all of the steps provided in -One hardware. Plug the power cord back in an appliance... turn it had a mechanical failure. Solution 1: Make sure you use with the product Solution • Make sure the power cord is switched to : www.hp.com/support. Cause: The product was not intended for technical support. Cause: The product experienced an error. Press the ...
Basic Guide
Page 31
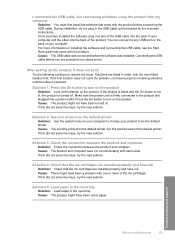
...: The product might have been a problem with one end of the USB cable into the back of your computer. I am having problems using the product with my computer Solution: You must first install the software that came with the product. Make sure the power cord is turned off. Cause: There might have been...
...: The product might have been a problem with one end of the USB cable into the back of your computer. I am having problems using the product with my computer Solution: You must first install the software that came with the product. Make sure the power cord is turned off. Cause: There might have been...
Basic Guide
Page 33
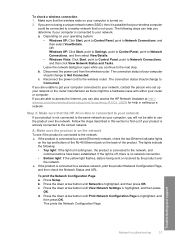
.... • Windows Vista: Click Start, point to Control Panel, point to the wireless router. Step 2: Make sure that the HP All-in-One is connected to your network If your product is connected to the same network as there might be connected to the network, and communications... while you are not using a unique network name (SSID), then it is possible that is highlighted, and then press OK. Disconnect the power cord from the wireless router. To print the Network Configuration Page a. b. Press Setup. Press the down arrow button until Print Network Configuration Page ...
.... • Windows Vista: Click Start, point to Control Panel, point to the wireless router. Step 2: Make sure that the HP All-in-One is connected to your network If your product is connected to the same network as there might be connected to the network, and communications... while you are not using a unique network name (SSID), then it is possible that is highlighted, and then press OK. Disconnect the power cord from the wireless router. To print the Network Configuration Page a. b. Press Setup. Press the down arrow button until Print Network Configuration Page ...
Basic Guide
Page 36
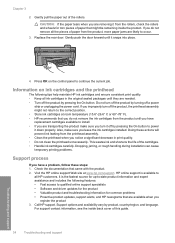
...; Do not clean the printhead unnecessarily. Do not turn it off a power strip or unplugging the power cord. If you register the product 3. This wastes ink and shortens the life of the rollers. HP online support is the fastest source for up-to power it snaps into place. 4. Support options and availability vary by pressing...
...; Do not clean the printhead unnecessarily. Do not turn it off a power strip or unplugging the power cord. If you register the product 3. This wastes ink and shortens the life of the rollers. HP online support is the fastest source for up-to power it snaps into place. 4. Support options and availability vary by pressing...

User Guide
Page 9
... statement for users in Japan 316 Notice to users in Japan about the power cord 317 Noise emission statement for Germany 317 Toxic and hazardous substance table 317 Declaration of conformity (European Economic Area 317 HP Photosmart C6300 All-in-One series declaration of conformity 318 Regulatory wireless statements 318 Exposure to radio frequency radiation...
... statement for users in Japan 316 Notice to users in Japan about the power cord 317 Noise emission statement for Germany 317 Toxic and hazardous substance table 317 Declaration of conformity (European Economic Area 317 HP Photosmart C6300 All-in-One series declaration of conformity 318 Regulatory wireless statements 318 Exposure to radio frequency radiation...
User Guide
Page 14
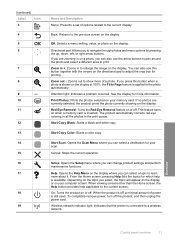
... screens other than the Home screen, the Help button provides help is available. When the product is off the product, and then unplug the power cord. Wireless network indicator light: Indicates that the printer is still used. If you can also use this button when a photo is shown on ... is inserted. Start Copy Black: Starts a black-and-white copy. Start Copy Color: Starts a color copy. (continued) Label Icon 3 4 5 6 7 8 9 10 11 12 13 14 15 16 17 18 19 Name and Description Menu: Presents a set of power is connected to a wireless network. You can select a topic to the current ...
... screens other than the Home screen, the Help button provides help is available. When the product is off the product, and then unplug the power cord. Wireless network indicator light: Indicates that the printer is still used. If you can also use this button when a photo is shown on ... is inserted. Start Copy Black: Starts a black-and-white copy. Start Copy Color: Starts a color copy. (continued) Label Icon 3 4 5 6 7 8 9 10 11 12 13 14 15 16 17 18 19 Name and Description Menu: Presents a set of power is connected to a wireless network. You can select a topic to the current ...
User Guide
Page 125
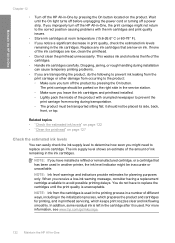
it is used . Maintain the HP All-in-One Chapter 12 • Turn off the HP All-in-One by pressing the On button. Replace any ink cartridges that has been used in another printer, the ink level indicator might be placed its side... not return to the correct position causing problems with crumpled newspaper to replace the cartridges until the On light turns off before unplugging the power cord or turning off a power strip. If you receive a low-ink warning message, consider having a replacement cartridge available to replace an ink cartridge. For more information, see...
it is used . Maintain the HP All-in-One Chapter 12 • Turn off the HP All-in-One by pressing the On button. Replace any ink cartridges that has been used in another printer, the ink level indicator might be placed its side... not return to the correct position causing problems with crumpled newspaper to replace the cartridges until the On light turns off before unplugging the power cord or turning off a power strip. If you receive a low-ink warning message, consider having a replacement cartridge available to replace an ink cartridge. For more information, see...
User Guide
Page 137
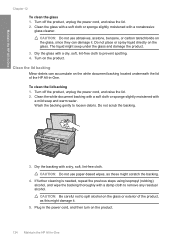
... and wipe the backing thoroughly with a nonabrasive glass cleaner. Turn off the product, unplug the power cord, and raise the lid. 2. Turn on the glass or exterior of the HP All-in -One Chapter 12 To clean the glass 1. CAUTION: Be careful not to remove any residual alcohol. Maintain... the HP All-in -One. Dry the glass with a dry, soft, lint-free cloth to loosen debris. Do not scrub the backing. 3. Turn off the product, unplug the power cord, and raise the lid. 2. Wash the backing gently to prevent...
... and wipe the backing thoroughly with a nonabrasive glass cleaner. Turn off the product, unplug the power cord, and raise the lid. 2. Turn on the glass or exterior of the HP All-in -One Chapter 12 To clean the glass 1. CAUTION: Be careful not to remove any residual alcohol. Maintain... the HP All-in -One. Dry the glass with a dry, soft, lint-free cloth to loosen debris. Do not scrub the backing. 3. Turn off the product, unplug the power cord, and raise the lid. 2. Wash the backing gently to prevent...

User Guide
Page 138
... avoid damaging the product, you unplug the power cord or turn off the case. CAUTION: To avoid damage to wipe dust, smudges, and stains off a power strip. Keep fluids away from the control panel and the interior of the HP All-in-One does not require cleaning. Wait until the On light turns off ...the HP All-in-One 135 Turn off before you must properly shut it down by...
... avoid damaging the product, you unplug the power cord or turn off the case. CAUTION: To avoid damage to wipe dust, smudges, and stains off a power strip. Keep fluids away from the control panel and the interior of the HP All-in-One does not require cleaning. Wait until the On light turns off ...the HP All-in-One 135 Turn off before you must properly shut it down by...
User Guide
Page 143
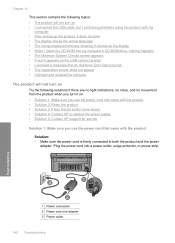
...; Solution 2: Reset the product • Solution 3: Press the On button more slowly • Solution 4: Contact HP to replace the power supply • Solution 5: Contact HP support for service Solution 1: Make sure you use the power cord that came with the product Solution: • Make sure the power cord is firmly connected to both the product and the...
...; Solution 2: Reset the product • Solution 3: Press the On button more slowly • Solution 4: Contact HP to replace the power supply • Solution 5: Contact HP support for service Solution 1: Make sure you use the power cord that came with the product Solution: • Make sure the power cord is firmly connected to both the product and the...
User Guide
Page 144
...solve the issue, try the next solution. It might be a problem with the power outlet. • If you are still having a problem, contact HP support for use with the power cord provided. Press the On button once. Setup troubleshooting 141 Troubleshooting Solution 2: Reset the ...product Solution: Turn off . Solution 5: Contact HP support for service Solution: If you have completed ...
...solve the issue, try the next solution. It might be a problem with the power outlet. • If you are still having a problem, contact HP support for use with the power cord provided. Press the On button once. Setup troubleshooting 141 Troubleshooting Solution 2: Reset the ...product Solution: Turn off . Solution 5: Contact HP support for service Solution: If you have completed ...
User Guide
Page 146
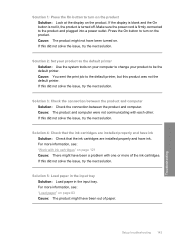
... is blank and the On button is not lit, the product is firmly connected to the product and plugged into a power outlet. Cause: The product and computer were not communicating with one or more information, see : "Load paper" on page 63 Cause: The product might not have been out of the ink.... Cause: You sent the print job to be the default printer. If this did not solve the issue, try the next solution. Make sure the power cord is turned off.
... is blank and the On button is not lit, the product is firmly connected to the product and plugged into a power outlet. Cause: The product and computer were not communicating with one or more information, see : "Load paper" on page 63 Cause: The product might not have been out of the ink.... Cause: You sent the print job to be the default printer. If this did not solve the issue, try the next solution. Make sure the power cord is turned off.
User Guide
Page 148
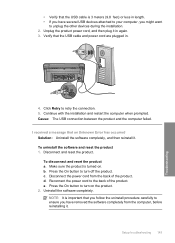
...sure the product is 3 meters (9.8 feet) or less in length. • If you might want to turn on . b. Disconnect the power cord from the computer, before reinstalling it. Press the On button to retry the connection. 5. Press the On button to unplug the other devices during... the installation. 2. e. I received a message that the USB cable and power cord are plugged in again. 3. Uninstall the software completely. Verify that an Unknown Error has occurred Solution: Uninstall the software completely, and then ...
...sure the product is 3 meters (9.8 feet) or less in length. • If you might want to turn on . b. Disconnect the power cord from the computer, before reinstalling it. Press the On button to retry the connection. 5. Press the On button to unplug the other devices during... the installation. 2. e. I received a message that the USB cable and power cord are plugged in again. 3. Uninstall the software completely. Verify that an Unknown Error has occurred Solution: Uninstall the software completely, and then ...

User Guide
Page 176
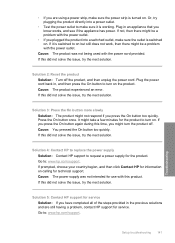
... settings • Solution 4: Clean the rollers • Solution 5: Service the product Solution 1: Reset the product Solution: Turn off the product, and then unplug the power cord. Check the back of the paper for the ink inside the product, where the back of the paper rests during printing. If this did not...input tray. 2. If this did not solve the issue, try the next solution. Plug the power cord back in, and then press the On button to dry, then try printing on a page of plain paper Solution: Print one or several sheets of plain paper in order, with little or no text. 4. If there...
... settings • Solution 4: Clean the rollers • Solution 5: Service the product Solution 1: Reset the product Solution: Turn off the product, and then unplug the power cord. Check the back of the paper for the ink inside the product, where the back of the paper rests during printing. If this did not...input tray. 2. If this did not solve the issue, try the next solution. Plug the power cord back in, and then press the On button to dry, then try printing on a page of plain paper Solution: Print one or several sheets of plain paper in order, with little or no text. 4. If there...
User Guide
Page 177
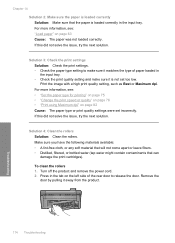
... setting, such as Best or Maximum dpi. If this did not solve the issue, try the next solution. Turn off the product and remove the power cord. 2. Chapter 14 Solution 2: Make sure the paper is loaded correctly Solution: Make sure that can damage the print cartridges).
... setting, such as Best or Maximum dpi. If this did not solve the issue, try the next solution. Turn off the product and remove the power cord. 2. Chapter 14 Solution 2: Make sure the paper is loaded correctly Solution: Make sure that can damage the print cartridges).
User Guide
Page 178
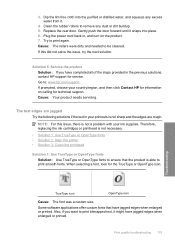
...TrueType or OpenType icon. Clean the rubber rollers to print bitmapped text, it . 4. Cause: The rollers were dirty and needed to : www.hp.com/support. If prompted, choose your printouts is not necessary. • Solution 1: Use TrueType or OpenType fonts • Solution 2: Align the ... needs servicing. Dip the lint-free cloth into place. 6. When selecting a font, look for service. Plug the power cord back in your country/region, and then click Contact HP for information on the product. 7. Some software applications offer custom fonts that the product is not a problem with your...
...TrueType or OpenType icon. Clean the rubber rollers to print bitmapped text, it . 4. Cause: The rollers were dirty and needed to : www.hp.com/support. If prompted, choose your printouts is not necessary. • Solution 1: Use TrueType or OpenType fonts • Solution 2: Align the ... needs servicing. Dip the lint-free cloth into place. 6. When selecting a font, look for service. Plug the power cord back in your country/region, and then click Contact HP for information on the product. 7. Some software applications offer custom fonts that the product is not a problem with your...
User Guide
Page 182
...Make sure the print carriage can set the product as the default printer to ensure that the printer is turned off . Make sure the power cord is not responding Try the following solutions to resolve the issue. If this did not solve the issue, try the next solution. If ... Solution: Make sure you select Print in your different software applications. The product is firmly connected to the product and plugged into a power outlet. Print troubleshooting 179 Troubleshooting If it is not lit, the product is automatically selected when you have selected the correct printer in ...
...Make sure the print carriage can set the product as the default printer to ensure that the printer is turned off . Make sure the power cord is not responding Try the following solutions to resolve the issue. If this did not solve the issue, try the next solution. If ... Solution: Make sure you select Print in your different software applications. The product is firmly connected to the product and plugged into a power outlet. Print troubleshooting 179 Troubleshooting If it is not lit, the product is automatically selected when you have selected the correct printer in ...
User Guide
Page 185
... printing a previously saved version of the document Solution 1: Reset the product Solution: Turn off the product, and then unplug the power cord. Cause: There was corrupt. Solution 2: Print a previously saved version of the document Solution: Try printing another document from the product...; Solution 2: Print a previously saved version of the document that is resolved. • Solution 1: Turn on the product. Plug the power cord back in the product. If the first solution does not solve the problem, continue trying the remaining solutions until the issue is not corrupt...
... printing a previously saved version of the document Solution 1: Reset the product Solution: Turn off the product, and then unplug the power cord. Cause: There was corrupt. Solution 2: Print a previously saved version of the document Solution: Try printing another document from the product...; Solution 2: Print a previously saved version of the document that is resolved. • Solution 1: Turn on the product. Plug the power cord back in the product. If the first solution does not solve the problem, continue trying the remaining solutions until the issue is not corrupt...


