Basic Guide
Page 10
... computer. OR ▲ Use an ad hoc network profile on your computer to connect to a Windows computer with an ad hoc connection, the computer must have a wireless radio on page 10 Finally, install the software. Once the ad hoc network profile has been created, run the Wireless Setup... is not currently configured with hpsetup as described here. 8 Network setup Create a network profile for a Windows Vista or Windows XP computer Prepare your computer for the HP All-in -One to connect the HP All-in -One and the wireless radio on the wireless radio for an ad hoc connection by the...
... computer. OR ▲ Use an ad hoc network profile on your computer to connect to a Windows computer with an ad hoc connection, the computer must have a wireless radio on page 10 Finally, install the software. Once the ad hoc network profile has been created, run the Wireless Setup... is not currently configured with hpsetup as described here. 8 Network setup Create a network profile for a Windows Vista or Windows XP computer Prepare your computer for the HP All-in -One to connect the HP All-in -One and the wireless radio on the wireless radio for an ad hoc connection by the...

Basic Guide
Page 11
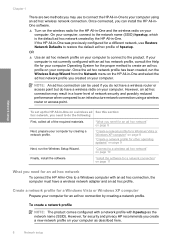
...it. h. In Network name (SSID) box, type in the previous step. c. However, HP recommends using a WEP key in -One using an ad hoc wireless connection 9 f. In the Confirm network key box, type the ... key is provided for other operating systems If you have an operating system other than Windows Vista or Windows XP, HP recommends that does not use a WEP key. In the Network key box, type ... key must remember the exact uppercase (capital) and lowercase (small) letters. NOTE: You must be 10 characters for 40 bit encryption, or 26 characters for the WEP key. If you can use the ...
...it. h. In Network name (SSID) box, type in the previous step. c. However, HP recommends using a WEP key in -One using an ad hoc wireless connection 9 f. In the Confirm network key box, type the ... key is provided for other operating systems If you have an operating system other than Windows Vista or Windows XP, HP recommends that does not use a WEP key. In the Network key box, type ... key must remember the exact uppercase (capital) and lowercase (small) letters. NOTE: You must be 10 characters for 40 bit encryption, or 26 characters for the WEP key. If you can use the ...
User Guide
Page 35
... NOTE: It is selected, click the check box to remember any uppercase (capital) and lowercase (small) letters. d. NOTE: You must be 10 characters for 40 bit encryption, or 26 characters for the WEP key. e. Write down the WEP key exactly as you might enter ABCDEF1234567. (...However, HP recommends using a WEP key in -One Select the check box for This is provided for your wireless LAN card, access your WEP key incorrectly on page 33 Create a network profile for other operating systems If you have an operating system other than Windows Vista or Windows XP, HP recommends that...
... NOTE: It is selected, click the check box to remember any uppercase (capital) and lowercase (small) letters. d. NOTE: You must be 10 characters for 40 bit encryption, or 26 characters for the WEP key. e. Write down the WEP key exactly as you might enter ABCDEF1234567. (...However, HP recommends using a WEP key in -One Select the check box for This is provided for your wireless LAN card, access your WEP key incorrectly on page 33 Create a network profile for other operating systems If you have an operating system other than Windows Vista or Windows XP, HP recommends that...
User Guide
Page 81
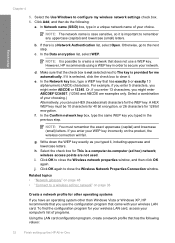
...OK. Print 78 Print from within your project on your print job 1. On the File menu in the dialog box. 6. In the HP preview window, do one of the tabs in your computer NOTE: When you select a printing shortcut the appropriate printing options are already set when you use for...there are available in the input tray. 2. Printing shortcuts Use printing shortcuts to the top, bottom, and side edges of 10 x 15 cm (4 x 6 inch) and 13 x 18 cm (5 x 7 inch) HP Photo Papers. • Photo Printing-With White Borders: Print a photo with print settings that you frequently use often. ...
...OK. Print 78 Print from within your project on your print job 1. On the File menu in the dialog box. 6. In the HP preview window, do one of the tabs in your computer NOTE: When you select a printing shortcut the appropriate printing options are already set when you use for...there are available in the input tray. 2. Printing shortcuts Use printing shortcuts to the top, bottom, and side edges of 10 x 15 cm (4 x 6 inch) and 13 x 18 cm (5 x 7 inch) HP Photo Papers. • Photo Printing-With White Borders: Print a photo with print settings that you frequently use often. ...
User Guide
Page 213
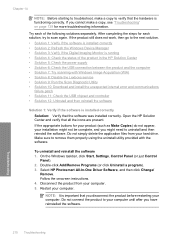
... 6: Check the USB connection between the product and the computer • Solution 7: Try scanning with the software. Select HP Photosmart All-In-One Driver Software, and then click Change/ Remove. Chapter 14 NOTE: Before starting to troubleshoot, make a copy, see "Troubleshooting... try to remove them properly using the uninstall utility provided with Windows Image Acquisition (WIA) • Solution 8: Disable the Lexbces service • Solution 9: Run the Scan Diagnostic Utility • Solution 10: Download and install the unexpected internal error and communications failure patch...
... 6: Check the USB connection between the product and the computer • Solution 7: Try scanning with the software. Select HP Photosmart All-In-One Driver Software, and then click Change/ Remove. Chapter 14 NOTE: Before starting to troubleshoot, make a copy, see "Troubleshooting... try to remove them properly using the uninstall utility provided with Windows Image Acquisition (WIA) • Solution 8: Disable the Lexbces service • Solution 9: Run the Scan Diagnostic Utility • Solution 10: Download and install the unexpected internal error and communications failure patch...
User Guide
Page 214
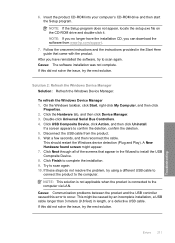
...click Properties. 2. If a screen appears to complete the installation. 9. This should restart the Windows device detection (Plug and Play). Click Finish to confirm the deletion, confirm the deletion. 5....a defective USB cable. If these steps do not resolve the problem, try to scan again. 10. Cause: The software installation was not complete. Click USB Composite Device, click Action, and then...: If you can download the software from the product. 6. Disconnect the USB cable from www.hp.com/support. 7. Click Next through all of the screens that came with the product. Cause...
...click Properties. 2. If a screen appears to complete the installation. 9. This should restart the Windows device detection (Plug and Play). Click Finish to confirm the deletion, confirm the deletion. 5....a defective USB cable. If these steps do not resolve the problem, try to scan again. 10. Cause: The software installation was not complete. Click USB Composite Device, click Action, and then...: If you can download the software from the product. 6. Disconnect the USB cable from www.hp.com/support. 7. Click Next through all of the screens that came with the product. Cause...
User Guide
Page 273
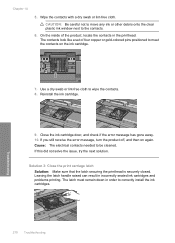
On the inside of four copper or gold-colored pins positioned to meet the contacts on again. Reinstall the ink cartridge. 9. If this did ... to the contacts. 6. CAUTION: Be careful not to move any ink or other debris onto the clear plastic ink window next to correctly install the ink cartridges. Use a dry swab or lint-free cloth to be cleaned. Close the ...ink cartridge door, and check if the error message has gone away. 10. If you still receive the error message, turn the product off, and then on the ink cartridge. 7. Cause: The...
On the inside of four copper or gold-colored pins positioned to meet the contacts on again. Reinstall the ink cartridge. 9. If this did ... to the contacts. 6. CAUTION: Be careful not to move any ink or other debris onto the clear plastic ink window next to correctly install the ink cartridges. Use a dry swab or lint-free cloth to be cleaned. Close the ...ink cartridge door, and check if the error message has gone away. 10. If you still receive the error message, turn the product off, and then on the ink cartridge. 7. Cause: The...
User Guide
Page 301
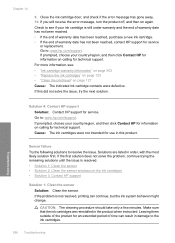
... issue is resolved. • Solution 1: Clean the sensor • Solution 2: Clean the sensor windows on again. If this product. Cause: The ink cartridges were not intended for use in the... first. Close the ink cartridge door, and check if the error message has gone away. 10. CAUTION: The cleaning procedure should take only a few minutes. Leaving them outside of time ...sure that the ink cartridges are listed in damage to : www.hp.com/support. Troubleshooting Solution 4: Contact HP support Solution: Contact HP support for information on page 127 Cause: The indicated ink cartridge...
... issue is resolved. • Solution 1: Clean the sensor • Solution 2: Clean the sensor windows on again. If this product. Cause: The ink cartridges were not intended for use in the... first. Close the ink cartridge door, and check if the error message has gone away. 10. CAUTION: The cleaning procedure should take only a few minutes. Leaving them outside of time ...sure that the ink cartridges are listed in damage to : www.hp.com/support. Troubleshooting Solution 4: Contact HP support Solution: Contact HP support for information on page 127 Cause: The indicated ink cartridge...
User Guide
Page 308
...period After the phone support period, help is available in -One at additional costs. Additional warranty options 305 HP warranty and support Be prepared to learn more about the extended...HP Photosmart software. Go to this situation happened before? ◦ Can you re-create it? ◦ Did you add any new hardware or software to www.hp.com/support. The serial number is the 10... information under Tools. 5. Have your HP dealer or call . You can also be available at the sticker on the Windows taskbar, click Start > All Programs > HP > HP Solution Center. NOTE: The device serial...
...period After the phone support period, help is available in -One at additional costs. Additional warranty options 305 HP warranty and support Be prepared to learn more about the extended...HP Photosmart software. Go to this situation happened before? ◦ Can you re-create it? ◦ Did you add any new hardware or software to www.hp.com/support. The serial number is the 10... information under Tools. 5. Have your HP dealer or call . You can also be available at the sticker on the Windows taskbar, click Start > All Programs > HP > HP Solution Center. NOTE: The device serial...


