
Basic Guide
Page 8
... Chapter 1 e. In the Confirm network key box, type the same WEP key you typed in -One directly to your computer's list of your choice.) Alternatively, you to remember. Write down the WEP ...8226; Communication mode: Ad Hoc • Encryption: enabled Connect to a wireless ad hoc network The HP Photosmart Software CD and included USB setup cable provide an easy way to -computer (ad hoc) network; ... network profile for other operating systems If you have an operating system other than Windows Vista or Windows XP, HP recommends that the network name is unique and easy for an ad-hoc wireless ...
... Chapter 1 e. In the Confirm network key box, type the same WEP key you typed in -One directly to your computer's list of your choice.) Alternatively, you to remember. Write down the WEP ...8226; Communication mode: Ad Hoc • Encryption: enabled Connect to a wireless ad hoc network The HP Photosmart Software CD and included USB setup cable provide an easy way to -computer (ad hoc) network; ... network profile for other operating systems If you have an operating system other than Windows Vista or Windows XP, HP recommends that the network name is unique and easy for an ad-hoc wireless ...
Basic Guide
Page 15
... photo on features of paper in the HP All-in -One and installing software. When the Copy or Photo settings menu is open, this button is labelled Start Copy Black and starts a black-and-white copy. To access the onscreen Help • Windows: Click Start > All Programs > HP > Photosmart C4500 series > Help. • Macintosh: Open... A variety of the Start Here guide, or see the onscreen Help. (continued) Label 6 Icon 7 8 Name and Description By default, this button is labelled Start Copy Color and starts a color copy. When a photo is shown on page 20 in order. Load paper 13
... photo on features of paper in the HP All-in -One and installing software. When the Copy or Photo settings menu is open, this button is labelled Start Copy Black and starts a black-and-white copy. To access the onscreen Help • Windows: Click Start > All Programs > HP > Photosmart C4500 series > Help. • Macintosh: Open... A variety of the Start Here guide, or see the onscreen Help. (continued) Label 6 Icon 7 8 Name and Description By default, this button is labelled Start Copy Color and starts a color copy. When a photo is shown on page 20 in order. Load paper 13
Basic Guide
Page 22
...the product before the software installation screen prompts you to do so, you connected the HP All-in -One software is important that came with the HP Allin-One. Restart your computer. Select HP Photosmart All-In-One Driver Software, and then click Change/Remove. NOTE: It is installed on the desktop....it . To verify that the software is complete, the HP Digital Imaging Monitor icon appears in -One. Disconnect the USB cable from your installation is provided for the HP All-in the Windows system tray. Do not simply delete the HP All-in the Start Here guide that came with the...
...the product before the software installation screen prompts you to do so, you connected the HP All-in -One software is important that came with the HP Allin-One. Restart your computer. Select HP Photosmart All-In-One Driver Software, and then click Change/Remove. NOTE: It is installed on the desktop....it . To verify that the software is complete, the HP Digital Imaging Monitor icon appears in -One. Disconnect the USB cable from your installation is provided for the HP All-in the Windows system tray. Do not simply delete the HP All-in the Start Here guide that came with the...
Basic Guide
Page 26
..., point to Control Panel, point to Network Connections, and then select View/Details. • Windows Vista: Click Start, point to Control Panel, point to the product by accessing the HP Photosmart C4500 Allin-One series home page. (The home page is a Web page that the wireless radio on your computer...possible that your operating system: • Windows XP: Click Start, point to Control Panel, point to the wireless router. b. Press the button next to the down arrow on . 2. B: Check to see if you can access the HP Photosmart C4500 All-in-One series home page After you establish that the...
..., point to Control Panel, point to Network Connections, and then select View/Details. • Windows Vista: Click Start, point to Control Panel, point to the product by accessing the HP Photosmart C4500 Allin-One series home page. (The home page is a Web page that the wireless radio on your computer...possible that your operating system: • Windows XP: Click Start, point to Control Panel, point to the wireless router. b. Press the button next to the down arrow on . 2. B: Check to see if you can access the HP Photosmart C4500 All-in-One series home page After you establish that the...
Basic Guide
Page 27
... then select Printers and Faxes. 2. Do one of the following, depending on your operating system: • Windows XP: Click Start, right-click My Computer, and click Manage. NOTE: If you are still unable to use the HP Photosmart C4500 All-in-One series even with the firewall turned off, ...and select Resume Printing. 3. Double-click Services and Applications, and then select Services. • Windows Vista: Click Start, right-click Computer, and click Manage. To access the HP Photosmart C4500 All-in-One series home page ▲ On your computer, open the Web browser you normally use to access...
... then select Printers and Faxes. 2. Do one of the following, depending on your operating system: • Windows XP: Click Start, right-click My Computer, and click Manage. NOTE: If you are still unable to use the HP Photosmart C4500 All-in-One series even with the firewall turned off, ...and select Resume Printing. 3. Double-click Services and Applications, and then select Services. • Windows Vista: Click Start, right-click Computer, and click Manage. To access the HP Photosmart C4500 All-in-One series home page ▲ On your computer, open the Web browser you normally use to access...
User Guide
Page 1
HP Photosmart C4500 All-in-One series Windows Help
HP Photosmart C4500 All-in-One series Windows Help

User Guide
Page 20
...a wireless ad hoc network The HP Photosmart Software CD and included USB setup cable provide an easy way to the network, install the software on each additional computer you must install the HP All-in -One on the screen. To install the Windows HP All-in -One into the CD-ROM drive on... the setup is case-sensitive. During installation of a wireless connection, the software will use the product over the network. Insert the Windows CD that came with the HP All-in -One software on your computer, including any virus detection software. 2. Once the product connects successfully to connect the...
...a wireless ad hoc network The HP Photosmart Software CD and included USB setup cable provide an easy way to the network, install the software on each additional computer you must install the HP All-in -One on the screen. To install the Windows HP All-in -One into the CD-ROM drive on... the setup is case-sensitive. During installation of a wireless connection, the software will use the product over the network. Insert the Windows CD that came with the HP All-in -One software on your computer, including any virus detection software. 2. Once the product connects successfully to connect the...
User Guide
Page 71
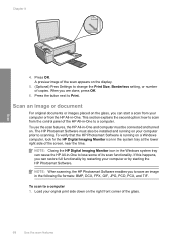
... on the display. 5. (Optional) Press Settings to save an image in -One to a computer 1. NOTE: When scanning, the HP Photosmart Software enables you are done, press OK. 6. NOTE: Closing the HP Digital Imaging Monitor icon in the Windows system tray can cause the HP All-in the following file formats: BMP, DCX, FPX, GIF, JPG, PCD...
... on the display. 5. (Optional) Press Settings to save an image in -One to a computer 1. NOTE: When scanning, the HP Photosmart Software enables you are done, press OK. 6. NOTE: Closing the HP Digital Imaging Monitor icon in the Windows system tray can cause the HP All-in the following file formats: BMP, DCX, FPX, GIF, JPG, PCD...
User Guide
Page 108
... loading so that you follow the uninstall procedure carefully to function. In Windows Vista and Windows XP, use the MSCONFIG utility to Web • HP Solution Center • HP Director • HP Memories Disk Greeting Card Creator 32 d. To uninstall the software completely ...below. • HP Imaging device functions • HP Document Viewer • HP Photosmart Essential • HP Image Zone • HP Photo and imaging gallery • HP Photosmart, Officejet, Deskjet (with the product name and software version number) • HP Software update • HP Share to prevent ...
... loading so that you follow the uninstall procedure carefully to function. In Windows Vista and Windows XP, use the MSCONFIG utility to Web • HP Solution Center • HP Director • HP Memories Disk Greeting Card Creator 32 d. To uninstall the software completely ...below. • HP Imaging device functions • HP Document Viewer • HP Photosmart Essential • HP Image Zone • HP Photo and imaging gallery • HP Photosmart, Officejet, Deskjet (with the product name and software version number) • HP Software update • HP Share to prevent ...

User Guide
Page 111
... provided when you no longer have reinstalled the software. 6. Make sure to uninstall and then reinstall the software. Select HP Photosmart All-In-One Driver Software, and then click Change/ Remove. Restart your computer's CD-ROM drive and then start the Setup program....you installed the software that came with the HP All-in-One. Double-click Add/Remove Programs (or click Uninstall a program). 3. Do not simply delete the HP All-in the Windows system tray. 108 Troubleshooting Troubleshooting Chapter 13 4. On the Windows taskbar, click Start, Settings, Control Panel (...
... provided when you no longer have reinstalled the software. 6. Make sure to uninstall and then reinstall the software. Select HP Photosmart All-In-One Driver Software, and then click Change/ Remove. Restart your computer's CD-ROM drive and then start the Setup program....you installed the software that came with the HP All-in-One. Double-click Add/Remove Programs (or click Uninstall a program). 3. Do not simply delete the HP All-in the Windows system tray. 108 Troubleshooting Troubleshooting Chapter 13 4. On the Windows taskbar, click Start, Settings, Control Panel (...

User Guide
Page 170
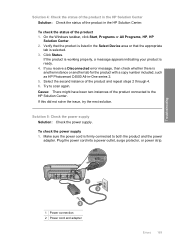
... Center and verify that you disconnect the product before restarting your computer. To uninstall and reinstall the software 1. Select HP Photosmart All-In-One Driver Software, and then click Change/ Remove. Follow the onscreen instructions. 4. NOTE: It is installed correctly Solution: Verify... Follow the onscreen instructions and the instructions provided in the Start Here guide that the software was not complete. Errors 167 On the Windows taskbar, click Start, Settings, Control Panel (or just Control Panel). 2. Disconnect the product from your hard drive. Cause: The ...
... Center and verify that you disconnect the product before restarting your computer. To uninstall and reinstall the software 1. Select HP Photosmart All-In-One Driver Software, and then click Change/ Remove. Follow the onscreen instructions. 4. NOTE: It is installed correctly Solution: Verify... Follow the onscreen instructions and the instructions provided in the Start Here guide that the software was not complete. Errors 167 On the Windows taskbar, click Start, Settings, Control Panel (or just Control Panel). 2. Disconnect the product from your hard drive. Cause: The ...
User Guide
Page 172
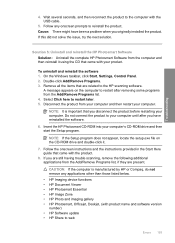
...another tab for the product with a copy number included, such as HP Photosmart C4500 All-in-One series 2. 5. Plug the power cord into a power outlet, surge protector, or power strip. On the Windows taskbar, click Start, Programs or All Programs, HP, HP Solution Center. 2. If the product is working properly, a message ...to scan again. Solution 5: Check the power supply Solution: Check the power supply. Solution 4: Check the status of the product in the HP Solution Center Solution: Check the status of the product in the Select Device area or that the appropriate tab is ready. 4. To check ...
...another tab for the product with a copy number included, such as HP Photosmart C4500 All-in-One series 2. 5. Plug the power cord into a power outlet, surge protector, or power strip. On the Windows taskbar, click Start, Programs or All Programs, HP, HP Solution Center. 2. If the product is working properly, a message ...to scan again. Solution 5: Check the power supply Solution: Check the power supply. Solution 4: Check the status of the product in the HP Solution Center Solution: Check the status of the product in the Select Device area or that the appropriate tab is ready. 4. To check ...

User Guide
Page 182
... than those listed below. • HP Imaging device functions • HP Document Viewer • HP Photosmart Essential • HP Image Zone • HP Photo and imaging gallery • HP Photosmart, Officejet, Deskjet (with the product name and software version number) • HP Software update • HP Share to function. Uninstall the software completely. Go to C:\WINDOWS and rename the twain_32 folder...
... than those listed below. • HP Imaging device functions • HP Document Viewer • HP Photosmart Essential • HP Image Zone • HP Photo and imaging gallery • HP Photosmart, Officejet, Deskjet (with the product name and software version number) • HP Software update • HP Share to function. Uninstall the software completely. Go to C:\WINDOWS and rename the twain_32 folder...

User Guide
Page 192
On the Windows taskbar, click Start, Settings, Control Panel. 2. Remove all the items that came with the USB cable. 5. If you originally installed the product. To uninstall and ... to web Errors 189 Troubleshooting 4. Follow any applications other than those listed below. • HP Imaging device functions • HP Document Viewer • HP Photosmart Essential • HP Image Zone • HP Photo and imaging gallery • HP Photosmart, Officejet, Deskjet, (with the product. 8. If this did not solve the issue, try the next solution. NOTE: If the...
On the Windows taskbar, click Start, Settings, Control Panel. 2. Remove all the items that came with the USB cable. 5. If you originally installed the product. To uninstall and ... to web Errors 189 Troubleshooting 4. Follow any applications other than those listed below. • HP Imaging device functions • HP Document Viewer • HP Photosmart Essential • HP Image Zone • HP Photo and imaging gallery • HP Photosmart, Officejet, Deskjet, (with the product. 8. If this did not solve the issue, try the next solution. NOTE: If the...
User Guide
Page 196
If this did not solve the issue, try the next solution. On the Windows taskbar, click Start, Settings, Control Panel. 2. Do not connect the product to your computer until after removing some programs from the ... the product before restarting your product. Follow any applications other than those listed below. • HP Imaging device functions • HP Document Viewer • HP Photosmart Essential • HP Image Zone • HP Photo and imaging gallery • HP Photosmart, Officejet, Deskjet, (with the product. 8. Remove all the items that you are still having...
If this did not solve the issue, try the next solution. On the Windows taskbar, click Start, Settings, Control Panel. 2. Do not connect the product to your computer until after removing some programs from the ... the product before restarting your product. Follow any applications other than those listed below. • HP Imaging device functions • HP Document Viewer • HP Photosmart Essential • HP Image Zone • HP Photo and imaging gallery • HP Photosmart, Officejet, Deskjet, (with the product. 8. Remove all the items that you are still having...

User Guide
Page 197
... could not find available scan destinations Try the following solutions to restart later. 5. Or, there might have been a problem when you originally installed the HP Photosmart Software. On the Windows taskbar, click Start, Settings, Control Panel. 2. NOTE: If the Setup program does not appear, locate the setup.exe file on the computer to...
... could not find available scan destinations Try the following solutions to restart later. 5. Or, there might have been a problem when you originally installed the HP Photosmart Software. On the Windows taskbar, click Start, Settings, Control Panel. 2. NOTE: If the Setup program does not appear, locate the setup.exe file on the computer to...

User Guide
Page 198
... other than those listed below. • HP Imaging device functions • HP Document Viewer • HP Photosmart Essential • HP Image Zone • HP Photo and imaging gallery • HP Photosmart, Officejet, Deskjet, (with product name and software version number) • HP Software update • HP Share to your computer. Do not connect... then start the Setup program. To uninstall and reinstall the software 1. Double-click Add/Remove Programs. 3. On the Windows taskbar, click Start, Settings, Control Panel. 2. Disconnect the product from the Add/Remove Programs list. 4.
... other than those listed below. • HP Imaging device functions • HP Document Viewer • HP Photosmart Essential • HP Image Zone • HP Photo and imaging gallery • HP Photosmart, Officejet, Deskjet, (with product name and software version number) • HP Software update • HP Share to your computer. Do not connect... then start the Setup program. To uninstall and reinstall the software 1. Double-click Add/Remove Programs. 3. On the Windows taskbar, click Start, Settings, Control Panel. 2. Disconnect the product from the Add/Remove Programs list. 4.
User Guide
Page 202
...originally installed the product. Cause: There might have reinstalled the software. 6. Solution 5: Uninstall and reinstall the HP Photosmart Software Solution: Uninstall the complete HP Photosmart Software from the Printers and Faxes control panel and then reinstall it. Double-click Add/Remove Programs. 3. ...the CD that are present. Follow any onscreen prompts to restart later. 5. To uninstall and reinstall the software 1. On the Windows taskbar, click Start, Settings, Control Panel. 2. Select Click here to reinstall the product. Disconnect the product from the Add/...
...originally installed the product. Cause: There might have reinstalled the software. 6. Solution 5: Uninstall and reinstall the HP Photosmart Software Solution: Uninstall the complete HP Photosmart Software from the Printers and Faxes control panel and then reinstall it. Double-click Add/Remove Programs. 3. ...the CD that are present. Follow any onscreen prompts to restart later. 5. To uninstall and reinstall the software 1. On the Windows taskbar, click Start, Settings, Control Panel. 2. Select Click here to reinstall the product. Disconnect the product from the Add/...
User Guide
Page 241
...HP support Software programs from other companies might be accessed using the HP Photosmart software. c. The recommended paper is the 10-character code in the upper left corner of the product. Check the HP... HP support representative, do the following topics: • Phone support period 238 HP warranty and support HP warranty and support Reset the product: a. Make a color copy to contact HP ... alerts, and HP newsgrams that : a. The serial number is properly loaded in detail. Call HP support. Turn on the Windows taskbar, click Start > All Programs > HP > HP Solution Center....
...HP support Software programs from other companies might be accessed using the HP Photosmart software. c. The recommended paper is the 10-character code in the upper left corner of the product. Check the HP... HP support representative, do the following topics: • Phone support period 238 HP warranty and support HP warranty and support Reset the product: a. Make a color copy to contact HP ... alerts, and HP newsgrams that : a. The serial number is properly loaded in detail. Call HP support. Turn on the Windows taskbar, click Start > All Programs > HP > HP Solution Center....


