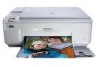
Basic Guide
Page 15
...the next photo on the memory card. icon. This Web site offers technical support, drivers, supplies, and ordering information. Load paper 13 When a photo is labelled Start Copy Color and starts a color copy. If you have Internet access, you can load different types and sizes of resources...setting up and using the software you installed with your HP All-in -One. To access the onscreen Help • Windows: Click Start > All Programs > HP > Photosmart C4500 series > Help. • Macintosh: Open the HP Device Manager and click the ? HP Web site If you follow the steps in the ...
...the next photo on the memory card. icon. This Web site offers technical support, drivers, supplies, and ordering information. Load paper 13 When a photo is labelled Start Copy Color and starts a color copy. If you have Internet access, you can load different types and sizes of resources...setting up and using the software you installed with your HP All-in -One. To access the onscreen Help • Windows: Click Start > All Programs > HP > Photosmart C4500 series > Help. • Macintosh: Open the HP Device Manager and click the ? HP Web site If you follow the steps in the ...
Basic Guide
Page 22
... prompted by the software installation screen. Turn off the product, wait one minute, then restart it ). 3. Uninstall and reinstall the software If your computer. 4. Select HP Photosmart All-In-One Driver Software, and then click Change/Remove. Follow the onscreen instructions. 4....HP Digital Imaging Monitor icon appears in -One software is important that came with the HP Allin-One. Restart your installation is properly installed, double-click the HP Solution Center icon on the desktop. Make sure to the computer before the HP All-in the Windows system tray. On the Windows...
... prompted by the software installation screen. Turn off the product, wait one minute, then restart it ). 3. Uninstall and reinstall the software If your computer. 4. Select HP Photosmart All-In-One Driver Software, and then click Change/Remove. Follow the onscreen instructions. 4....HP Digital Imaging Monitor icon appears in -One software is important that came with the HP Allin-One. Restart your installation is properly installed, double-click the HP Solution Center icon on the desktop. Make sure to the computer before the HP All-in the Windows system tray. On the Windows...

User Guide
Page 111
..., click Start, Settings, Control Panel (or just Control Panel). 2. Select HP Photosmart All-In-One Driver Software, and then click Change/ Remove. When the software installation is complete, the HP Digital Imaging Monitor icon appears in -One application files from the Windows taskbar by the software installation screen, you disconnect the product before prompted by clicking Start...
..., click Start, Settings, Control Panel (or just Control Panel). 2. Select HP Photosmart All-In-One Driver Software, and then click Change/ Remove. When the software installation is complete, the HP Digital Imaging Monitor icon appears in -One application files from the Windows taskbar by the software installation screen, you disconnect the product before prompted by clicking Start...

User Guide
Page 170
... important that you have reinstalled the software, try the next solution. Make sure to uninstall and then reinstall the software. Select HP Photosmart All-In-One Driver Software, and then click Change/ Remove. NOTE: It is installed correctly Solution: Verify that the software was not complete. NOTE... software. 6. Follow the onscreen instructions and the instructions provided in the Start Here guide that all the icons are present. On the Windows taskbar, click Start, Settings, Control Panel (or just Control Panel). 2. Disconnect the product from your computer's CD-ROM drive and ...
... important that you have reinstalled the software, try the next solution. Make sure to uninstall and then reinstall the software. Select HP Photosmart All-In-One Driver Software, and then click Change/ Remove. NOTE: It is installed correctly Solution: Verify that the software was not complete. NOTE... software. 6. Follow the onscreen instructions and the instructions provided in the Start Here guide that all the icons are present. On the Windows taskbar, click Start, Settings, Control Panel (or just Control Panel). 2. Disconnect the product from your computer's CD-ROM drive and ...
User Guide
Page 177
... e. Cause: The Lexbceserver service installed by a Lexmark printer, Lexmark all-inone, or Dell all-in-one of the following: • If you see only lexbces, but not RPCSS, delete lexbces and enter... RPCSS. • If you can scan successfully, then proceed with your product. On the Windows taskbar, click Start, right-click My Computer, and then click Manage. In the right pane, ... again. Click OK to : www.hp.com and click Software and driver downloads. 2. Select Download drivers and software (and firmware). 3. Troubleshooting Chapter 13 c. Click OK. 7.
... e. Cause: The Lexbceserver service installed by a Lexmark printer, Lexmark all-inone, or Dell all-in-one of the following: • If you see only lexbces, but not RPCSS, delete lexbces and enter... RPCSS. • If you can scan successfully, then proceed with your product. On the Windows taskbar, click Start, right-click My Computer, and then click Manage. In the right pane, ... again. Click OK to : www.hp.com and click Software and driver downloads. 2. Select Download drivers and software (and firmware). 3. Troubleshooting Chapter 13 c. Click OK. 7.
User Guide
Page 178
...and other communication failures with a Fix button to the Utility section and download the HP Scan diagnostic utility. 6. Go to install it . Double-click the patch to : www.hp.com and click Software and driver downloads. 2. This can occur because of USB chipsets on the computer. 6. Cause.... If there is no error condition, a green check mark is displayed next to the component. The utility is installed. 4. On the Windows taskbar, click Start, right-click My Computer, and then click Properties. 2. Errors 175 Go to correct the error conditions. Troubleshooting 5. Go...
...and other communication failures with a Fix button to the Utility section and download the HP Scan diagnostic utility. 6. Go to install it . Double-click the patch to : www.hp.com and click Software and driver downloads. 2. This can occur because of USB chipsets on the computer. 6. Cause.... If there is no error condition, a green check mark is displayed next to the component. The utility is installed. 4. On the Windows taskbar, click Start, right-click My Computer, and then click Properties. 2. Errors 175 Go to correct the error conditions. Troubleshooting 5. Go...
User Guide
Page 186
... to be listed as Default. Depending upon your operating system, do one of the following : • Windows Vista: On the Windows taskbar, click Start, click Control Panel, and then click Printers. • Windows XP: On the Windows taskbar, click Start, click Control Panel, and then click Printers and... Faxes. 2. Make sure the correct product is set as the default printer, right-click the correct product and select Set as the driver. Depending upon your operating system, do one of...
... to be listed as Default. Depending upon your operating system, do one of the following : • Windows Vista: On the Windows taskbar, click Start, click Control Panel, and then click Printers. • Windows XP: On the Windows taskbar, click Start, click Control Panel, and then click Printers and... Faxes. 2. Make sure the correct product is set as the default printer, right-click the correct product and select Set as the driver. Depending upon your operating system, do one of...

User Guide
Page 187
...: Manually clear the print queue. Depending upon your operating system, do one of the following : • Windows Vista: On the Windows taskbar, click Start, click Control Panel, and then click Printers. • Windows XP: On the Windows taskbar, click Start, click Control Panel, and then click Printers and ...184 Troubleshooting Troubleshooting Chapter 13 7. To clear the print queue manually 1. Double-click the icon for your changes. If the wrong driver is paused or offline 1. On the Printer menu, click Cancel all documents or Purge Print Document, and then click Yes to ...
...: Manually clear the print queue. Depending upon your operating system, do one of the following : • Windows Vista: On the Windows taskbar, click Start, click Control Panel, and then click Printers. • Windows XP: On the Windows taskbar, click Start, click Control Panel, and then click Printers and ...184 Troubleshooting Troubleshooting Chapter 13 7. To clear the print queue manually 1. Double-click the icon for your changes. If the wrong driver is paused or offline 1. On the Printer menu, click Cancel all documents or Purge Print Document, and then click Yes to ...
User Guide
Page 188
...Start to the next solution. Solution 8: Verify whether the software application has a problem Solution: Verify whether the software application is Windows-based or DOS-based by checking the system requirements of the application. 3. To print from Notepad to be manually cleared. On the... has restarted. 5. Restart the computer and try the next solution. Close the software application and reopen it is the software application or the driver. Click Accessories, and then click Notepad. Double-click Administrative Tools, and then double-click Services. 3. NOTE: The printer might not support...
...Start to the next solution. Solution 8: Verify whether the software application has a problem Solution: Verify whether the software application is Windows-based or DOS-based by checking the system requirements of the application. 3. To print from Notepad to be manually cleared. On the... has restarted. 5. Restart the computer and try the next solution. Close the software application and reopen it is the software application or the driver. Click Accessories, and then click Notepad. Double-click Administrative Tools, and then double-click Services. 3. NOTE: The printer might not support...


