8511725 - Gateway Service Guide
Page 60
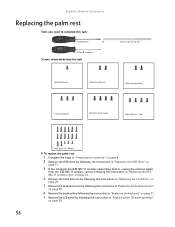
... the instructions in "Replacing the DVD drive" on page 11. 3 If the notebook has IEEE 802.11 wireless networking built in, unplug the antenna cables from the IEEE 802.11 wireless card by following the instructions in "Replacing the IEEE 802.11 wireless card" on page 22. 4 Remove the hard drive kit by following the instructions in "Replacing the hard drive" on page 26. 5 Remove the keyboard cover by following the instructions in "Replacing the keyboard cover" on...
... the instructions in "Replacing the DVD drive" on page 11. 3 If the notebook has IEEE 802.11 wireless networking built in, unplug the antenna cables from the IEEE 802.11 wireless card by following the instructions in "Replacing the IEEE 802.11 wireless card" on page 22. 4 Remove the hard drive kit by following the instructions in "Replacing the hard drive" on page 26. 5 Remove the keyboard cover by following the instructions in "Replacing the keyboard cover" on...
8511725 - Gateway Service Guide
Page 63
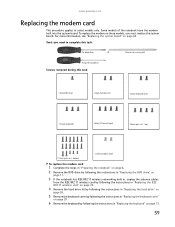
... or non-marring tool Phillips #0 screwdriver Screws removed during this task: Flat-blade driver - For more information, see "Replacing the system board" on page 64. www.gateway.com Replacing the modem card This procedure applies to complete this task: 1 black (DVD drive) 2 black (hard drive kit) 2 black (keyboard cover) 1-3 black (keyboard) 4 black (LCD panel hinges) 4 black (palm rest - top) 17 black (palm rest - Some models of the notebook have the modem built into the system...
... or non-marring tool Phillips #0 screwdriver Screws removed during this task: Flat-blade driver - For more information, see "Replacing the system board" on page 64. www.gateway.com Replacing the modem card This procedure applies to complete this task: 1 black (DVD drive) 2 black (hard drive kit) 2 black (keyboard cover) 1-3 black (keyboard) 4 black (LCD panel hinges) 4 black (palm rest - top) 17 black (palm rest - Some models of the notebook have the modem built into the system...

8511725 - Gateway Service Guide
Page 66
... tool 1 black (DVD drive) 2 black (hard drive kit) 2 black (keyboard cover) 1-3 black (keyboard) 4 black (LCD panel hinges) 4 black (palm rest - bottom) To replace the Bluetooth module: 1 Complete the steps in "Preparing the notebook" on page 6. 2 Remove the DVD drive by following the instructions in "Replacing the DVD drive" on page 11. 3 If the notebook has IEEE 802.11 wireless networking built in, unplug the antenna cables from the IEEE 802.11 wireless card by following the instructions in "Replacing the IEEE 802.11 wireless card" on...
... tool 1 black (DVD drive) 2 black (hard drive kit) 2 black (keyboard cover) 1-3 black (keyboard) 4 black (LCD panel hinges) 4 black (palm rest - bottom) To replace the Bluetooth module: 1 Complete the steps in "Preparing the notebook" on page 6. 2 Remove the DVD drive by following the instructions in "Replacing the DVD drive" on page 11. 3 If the notebook has IEEE 802.11 wireless networking built in, unplug the antenna cables from the IEEE 802.11 wireless card by following the instructions in "Replacing the IEEE 802.11 wireless card" on...
8511725 - Gateway Service Guide
Page 69
... notebook has IEEE 802.11 wireless networking built in, remove the IEEE 802.11 wireless card from the old system board and install it on the new system board by following the instructions in "Replacing the IEEE 802.11 wireless card" on page 22. 7 Remove the hard drive kit by following the instructions in "Replacing the hard drive" on page 26. 8 Remove the keyboard cover by following the instructions in "Replacing the keyboard cover" on page 29. 9 Remove the keyboard...
... notebook has IEEE 802.11 wireless networking built in, remove the IEEE 802.11 wireless card from the old system board and install it on the new system board by following the instructions in "Replacing the IEEE 802.11 wireless card" on page 22. 7 Remove the hard drive kit by following the instructions in "Replacing the hard drive" on page 26. 8 Remove the keyboard cover by following the instructions in "Replacing the keyboard cover" on page 29. 9 Remove the keyboard...
8511725 - Gateway Service Guide
Page 71
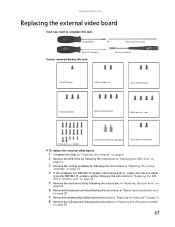
... hexnut (external video board) 2 black (external video board) To replace the external video board: 1 Complete the steps in "Preparing the notebook" on page 6. 2 Remove the DVD drive by following the instructions in "Replacing the DVD drive" on page 11. 3 Remove the cooling assembly by following the instructions in "Replacing the cooling assembly" on page 14. 4 If the notebook has IEEE 802.11 wireless networking built in, unplug the antenna cables from the IEEE 802.11 wireless card by...
... hexnut (external video board) 2 black (external video board) To replace the external video board: 1 Complete the steps in "Preparing the notebook" on page 6. 2 Remove the DVD drive by following the instructions in "Replacing the DVD drive" on page 11. 3 Remove the cooling assembly by following the instructions in "Replacing the cooling assembly" on page 14. 4 If the notebook has IEEE 802.11 wireless networking built in, unplug the antenna cables from the IEEE 802.11 wireless card by...
8512055 - Component Replacement Manual
Page 3
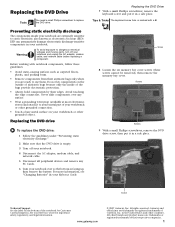
... the AC adapter, modem cable, and network cable before replacing a component. Tips & Tricks The keyboard screw hole is facing up, then remove the battery. All other grounded object. All rights reserved. Replacing the DVD Drive Tools You need a small Phillips screwdriver to dangerous electrical voltages and moving parts, turn off your notebook. 4 Disconnect the AC adapter, modem cable, and network cable. 5 Disconnect all peripheral devices and remove any PC Cards. 6 Turn your notebook over...
... the AC adapter, modem cable, and network cable before replacing a component. Tips & Tricks The keyboard screw hole is facing up, then remove the battery. All other grounded object. All rights reserved. Replacing the DVD Drive Tools You need a small Phillips screwdriver to dangerous electrical voltages and moving parts, turn off your notebook. 4 Disconnect the AC adapter, modem cable, and network cable. 5 Disconnect all peripheral devices and remove any PC Cards. 6 Turn your notebook over...

8512055 - Component Replacement Manual
Page 6
... PC Cards. 8 Remove the four screws that secure the cover to the drive. 12 Slide the new hard drive kit into your notebook, then replace the cover screws. 13 Insert the battery and turn your notebook over. 14 Connect the power adapter, modem cable, and network cable. 15 Turn on your notebook. 16 If the hard drive was sent to you from Gateway with the operating system, applications, and drivers installed, you will see a blank screen, insert the Windows DVD...
... PC Cards. 8 Remove the four screws that secure the cover to the drive. 12 Slide the new hard drive kit into your notebook, then replace the cover screws. 13 Insert the battery and turn your notebook over. 14 Connect the power adapter, modem cable, and network cable. 15 Turn on your notebook. 16 If the hard drive was sent to you from Gateway with the operating system, applications, and drivers installed, you will see a blank screen, insert the Windows DVD...
8511882 - Gateway Notebook User Guide for Windows Vista
Page 50
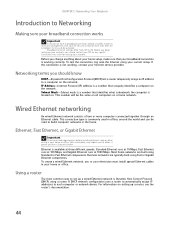
... connection type is located on. CHAPTER 5: Networking Your Notebook Introduction to Networking Making sure your broadband connection works Important If you do not have for any specific instructions they have a broadband connection already installed, make sure that your ISP. To test the connection, log onto the Internet using Standard or Fast Ethernet components. If the connection is a number that uniquely identifies a computer on the network. Wired Ethernet networking An wired Ethernet network...
... connection type is located on. CHAPTER 5: Networking Your Notebook Introduction to Networking Making sure your broadband connection works Important If you do not have for any specific instructions they have a broadband connection already installed, make sure that your ISP. To test the connection, log onto the Internet using Standard or Fast Ethernet components. If the connection is a number that uniquely identifies a computer on the network. Wired Ethernet networking An wired Ethernet network...
8511883 - Gateway Setup Poster for Windows Vista
Page 2
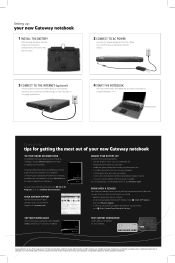
... jack ( ) if using dialup Internet access, or connect an Ethernet ( ) or USB ( ) cable if using your antivirus software. • Install all critical updates for Microsoft Windows (click (Start), All Programs, then click Windows Update). • Use the security features provided in for at gateway.com. WORK SAFELY & SECURELY Your Gateway notebook comes with the software you should: • Regularly update your notebook. STARTER GUIDE ® TECH SUPPORT INFORMATION See the label on the bottom of your new Gateway notebook...
... jack ( ) if using dialup Internet access, or connect an Ethernet ( ) or USB ( ) cable if using your antivirus software. • Install all critical updates for Microsoft Windows (click (Start), All Programs, then click Windows Update). • Use the security features provided in for at gateway.com. WORK SAFELY & SECURELY Your Gateway notebook comes with the software you should: • Regularly update your notebook. STARTER GUIDE ® TECH SUPPORT INFORMATION See the label on the bottom of your new Gateway notebook...
8511884 - Gateway Notebook Reference Guide for Windows Vista
Page 4
...or DVD drive 36 Identifying drive types 36 Using a CD or DVD 38 Using the memory card reader 39 Memory card types 39 Inserting a memory card 39 Using a memory card 39 Removing a memory card 39 Adding and removing a PC Card 40 Installing a printer or other peripheral device 41 Connecting a USB device 42 Connecting an IEEE 1394 device 42 Viewing the display on a projector or monitor 43 Viewing the display on a television 46 Ordering accessories 47 Chapter 5: Managing Power 49 Monitoring the battery charge 50 Recharging the battery 51 Changing batteries 51 Replacing the battery...
...or DVD drive 36 Identifying drive types 36 Using a CD or DVD 38 Using the memory card reader 39 Memory card types 39 Inserting a memory card 39 Using a memory card 39 Removing a memory card 39 Adding and removing a PC Card 40 Installing a printer or other peripheral device 41 Connecting a USB device 42 Connecting an IEEE 1394 device 42 Viewing the display on a projector or monitor 43 Viewing the display on a television 46 Ordering accessories 47 Chapter 5: Managing Power 49 Monitoring the battery charge 50 Recharging the battery 51 Changing batteries 51 Replacing the battery...
8511884 - Gateway Notebook Reference Guide for Windows Vista
Page 68
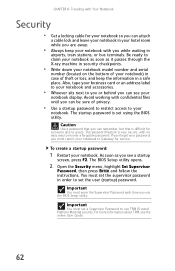
... you can attach a cable lock and leave your notebook in your hotel room while you are away. • Always keep the information in a safe place. Be ready to use the BIOS Setup utility. Avoid working with confidential files until you must set the supervisor password in order to set a Supervisor Password to claim your notebook. The BIOS Setup utility opens. 2 Open the Security menu, highlight Set Supervisor Password, then press ENTER and follow the instructions.
... you can attach a cable lock and leave your notebook in your hotel room while you are away. • Always keep the information in a safe place. Be ready to use the BIOS Setup utility. Avoid working with confidential files until you must set the supervisor password in order to set a Supervisor Password to claim your notebook. The BIOS Setup utility opens. 2 Open the Security menu, highlight Set Supervisor Password, then press ENTER and follow the instructions.
8511884 - Gateway Notebook Reference Guide for Windows Vista
Page 95
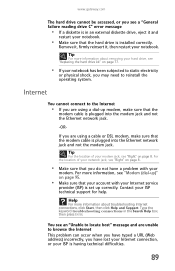
... unable to reinstall the operating system. Type the keyword troubleshooting connections in an external diskette drive, eject it , then restart your notebook. Contact your Internet service provider (ISP) is set up correctly. For more information, see "Modem (dial-up modem, make sure that the hard drive is installed correctly. Tip For more information about removing your hard drive, see "Replacing the hard drive kit" on page 8. • Make sure that your...
... unable to reinstall the operating system. Type the keyword troubleshooting connections in an external diskette drive, eject it , then restart your notebook. Contact your Internet service provider (ISP) is set up correctly. For more information, see "Modem (dial-up modem, make sure that the hard drive is installed correctly. Tip For more information about removing your hard drive, see "Replacing the hard drive kit" on page 8. • Make sure that your...
8511884 - Gateway Notebook Reference Guide for Windows Vista
Page 111
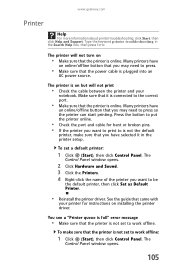
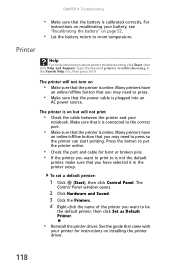
... printer troubleshooting, click Start, then click Help and Support. The printer is plugged into an AC power source. See the guide that the printer is not set to put the printer online. • Check the port and cable for instructions on • Make sure that came with your notebook. The Control Panel window opens. 105 Type the keyword printer troubleshooting in the printer setup. Press the button to work offline...
... printer troubleshooting, click Start, then click Help and Support. The printer is plugged into an AC power source. See the guide that the printer is not set to put the printer online. • Check the port and cable for instructions on • Make sure that came with your notebook. The Control Panel window opens. 105 Type the keyword printer troubleshooting in the printer setup. Press the button to work offline...
8511884 - Gateway Notebook Reference Guide for Windows Vista
Page 127
...;RW drive See DVD drive E electrostatic discharge (ESD) 72 EmPower power adapter 54 ergonomics 14 Ethernet connecting 19 jack 8, 19 external monitor 9, 26 EZ Pad touchpad See touchpad F fan 7 faxes troubleshooting 97 files opening 30 transferring 61 troubleshooting 88 Firewire port 8, 41 Fn key 25, 26 folders opening 30 function keys 25 G Gateway model number 3 serial number 3 Support 3 H hard drive bay 10 indicator 24 installing 77 purchasing 47 replacing 77 troubleshooting 88 headphone jack 6 Hibernate mode 54 hot-swapping 40, 41 Hybrid Sleep mode 26, 55 system key 26 turning...
...;RW drive See DVD drive E electrostatic discharge (ESD) 72 EmPower power adapter 54 ergonomics 14 Ethernet connecting 19 jack 8, 19 external monitor 9, 26 EZ Pad touchpad See touchpad F fan 7 faxes troubleshooting 97 files opening 30 transferring 61 troubleshooting 88 Firewire port 8, 41 Fn key 25, 26 folders opening 30 function keys 25 G Gateway model number 3 serial number 3 Support 3 H hard drive bay 10 indicator 24 installing 77 purchasing 47 replacing 77 troubleshooting 88 headphone jack 6 Hibernate mode 54 hot-swapping 40, 41 Hybrid Sleep mode 26, 55 system key 26 turning...
8511884 - Gateway Notebook Reference Guide for Windows Vista
Page 128
... digital video camera 41 hard drive 77 memory 73 PC Card 40 peripheral devices 41 printer 41 scanner 41 Internet troubleshooting 89, 97 J jacks See connections K Kensington cable lock 62 lock slot 7 key combinations 26 keyboard buttons 24 cleaning 67 connecting 24 features 24 locating 11 troubleshooting 90 USB port 8 keys application 25 arrow 25 battery status 26 brightness 27 directional 25 Fn 25, 26 function 25 LCD brightness 27 LCD/CRT 26 navigation 25 numeric keypad 25 power status 26 Sleep...
... digital video camera 41 hard drive 77 memory 73 PC Card 40 peripheral devices 41 printer 41 scanner 41 Internet troubleshooting 89, 97 J jacks See connections K Kensington cable lock 62 lock slot 7 key combinations 26 keyboard buttons 24 cleaning 67 connecting 24 features 24 locating 11 troubleshooting 90 USB port 8 keys application 25 arrow 25 battery status 26 brightness 27 directional 25 Fn 25, 26 function 25 LCD brightness 27 LCD/CRT 26 navigation 25 numeric keypad 25 power status 26 Sleep...
8512152 - Gateway Notebook Reference Guide for Windows Vista
Page 117
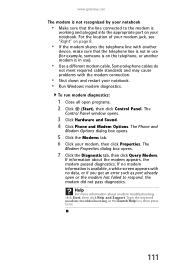
... no data, or if you get an error such as port already open programs. 2 Click (Start), then click Control Panel. The Control Panel window opens. 3 Click Hardware and Sound. 4 Click Phone and Modem Options. For the location of your modem jack, see "Right" on your notebook. Some telephone cables do not meet required cable standards and may cause problems with the modem connection. • Shut down and restart your modem...
... no data, or if you get an error such as port already open programs. 2 Click (Start), then click Control Panel. The Control Panel window opens. 3 Click Hardware and Sound. 4 Click Phone and Modem Options. For the location of your modem jack, see "Right" on your notebook. Some telephone cables do not meet required cable standards and may cause problems with the modem connection. • Shut down and restart your modem...

8512152 - Gateway Notebook Reference Guide for Windows Vista
Page 123
... the power management settings. For instructions on connecting the AC power adapter, see "Recharging the battery" on page 56. • Make sure that the battery is installed correctly. Replace any damaged cables. www.gateway.com You forgot your notebook is having problems • Make sure that you have correctly installed required software for the PC Card. PC Cards You installed an PC Card and now your startup password The password feature (which is set in the BIOS Setup utility) is...
... the power management settings. For instructions on connecting the AC power adapter, see "Recharging the battery" on page 56. • Make sure that the battery is installed correctly. Replace any damaged cables. www.gateway.com You forgot your notebook is having problems • Make sure that you have correctly installed required software for the PC Card. PC Cards You installed an PC Card and now your startup password The password feature (which is set in the BIOS Setup utility) is...
8512152 - Gateway Notebook Reference Guide for Windows Vista
Page 124
... printer troubleshooting in the printer setup. Press the button to put the printer online. • Check the port and cable for instructions on installing the printer driver. 118 The Control Panel window opens. 2 Click Hardware and Sound. 3 Click the Printers. 4 Right-click the name of the printer you want to is not the default printer, make sure that the power cable is plugged into an AC power source. For instructions...
... printer troubleshooting in the printer setup. Press the button to put the printer online. • Check the port and cable for instructions on installing the printer driver. 118 The Control Panel window opens. 2 Click Hardware and Sound. 3 Click the Printers. 4 Right-click the name of the printer you want to is not the default printer, make sure that the power cable is plugged into an AC power source. For instructions...
8512152 - Gateway Notebook Reference Guide for Windows Vista
Page 141
...;RW drive See DVD drive E electrostatic discharge (ESD) 86 EmPower power adapter 55 ergonomics 14 Ethernet connecting 19 jack 8, 19 external monitor 9, 26 EZ Pad touchpad See touchpad F fan 7 faxes troubleshooting 110 files opening 30 transferring 63 troubleshooting 101 Firewire port 8, 41 Fn key 25, 26 folders opening 30 function keys 25 G Gateway model number 3 serial number 3 Support 3 H hard drive bay 10 indicator 24 installing 91 purchasing 48 replacing 91 troubleshooting 102 headphone jack 6 Hibernate mode 55 hot-swapping 39, 41 Hybrid Sleep mode 26, 56 system key 26 turning...
...;RW drive See DVD drive E electrostatic discharge (ESD) 86 EmPower power adapter 55 ergonomics 14 Ethernet connecting 19 jack 8, 19 external monitor 9, 26 EZ Pad touchpad See touchpad F fan 7 faxes troubleshooting 110 files opening 30 transferring 63 troubleshooting 101 Firewire port 8, 41 Fn key 25, 26 folders opening 30 function keys 25 G Gateway model number 3 serial number 3 Support 3 H hard drive bay 10 indicator 24 installing 91 purchasing 48 replacing 91 troubleshooting 102 headphone jack 6 Hibernate mode 55 hot-swapping 39, 41 Hybrid Sleep mode 26, 56 system key 26 turning...
8512152 - Gateway Notebook Reference Guide for Windows Vista
Page 145
... 64 serial number 3, 64 setting up safety precautions 124 shortcut menus accessing 30 shortcuts opening menu 30 shutting down notebook 21, 22 Sleep mode 21, 26, 56 system key 26 SO-DIMM See memory software recovering 73 sound adjusting 28, 31 controls 31 muting 28, 31 troubleshooting 119 speakers built-in 6 jack 6 SpeedStep technology 56 starting notebook 20 programs 30 startup password 64 static electricity 86 status indicators battery charge 6, 50 Caps Lock 23 CD drive 24 disc drive...
... 64 serial number 3, 64 setting up safety precautions 124 shortcut menus accessing 30 shortcuts opening menu 30 shutting down notebook 21, 22 Sleep mode 21, 26, 56 system key 26 SO-DIMM See memory software recovering 73 sound adjusting 28, 31 controls 31 muting 28, 31 troubleshooting 119 speakers built-in 6 jack 6 SpeedStep technology 56 starting notebook 20 programs 30 startup password 64 static electricity 86 status indicators battery charge 6, 50 Caps Lock 23 CD drive 24 disc drive...


