Owners Manual
Page 1
GPSMAP® 64 SERIES / GPSMAP 64X SERIES Owner's Manual
GPSMAP® 64 SERIES / GPSMAP 64X SERIES Owner's Manual

Owners Manual
Page 2
....thisisant.com/directory for current updates and supplemental information concerning the use of this manual may not be copied, in whole or in the U.S. These trademarks may not be used without the written consent of such changes or improvements. Mac® is a registered trademark of Garmin. Windows® is a trademark of Apple Inc., registered in part, without the express permission...
....thisisant.com/directory for current updates and supplemental information concerning the use of this manual may not be copied, in whole or in the U.S. These trademarks may not be used without the written consent of such changes or improvements. Mac® is a registered trademark of Garmin. Windows® is a trademark of Apple Inc., registered in part, without the express permission...
Owners Manual
Page 3
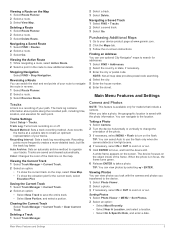
... Device 8 Customizing the Data Fields 8 Data Fields 8 System Settings 9 GPS and Other Satellite Systems 9 Serial Interface Settings 9 Display Settings 9 Adjusting the Backlight Brightness 10 Setting the Device Tones 10 Camera Settings 10 Marine Settings 10 Setting Up Marine Alarms 10 Resetting Data 10 Changing the Page Sequence 10 Adding a Page 10 Removing a Page 10 Customizing the Main Menu 10 Changing the Units of Measure 10 Time Settings 10 Position Format Settings 10 Altimeter Settings 11 Routing Settings 11 Profiles 11 Creating a Custom Profile 11 Editing a Profile...
... Device 8 Customizing the Data Fields 8 Data Fields 8 System Settings 9 GPS and Other Satellite Systems 9 Serial Interface Settings 9 Display Settings 9 Adjusting the Backlight Brightness 10 Setting the Device Tones 10 Camera Settings 10 Marine Settings 10 Setting Up Marine Alarms 10 Resetting Data 10 Changing the Page Sequence 10 Adding a Page 10 Removing a Page 10 Customizing the Main Menu 10 Changing the Units of Measure 10 Time Settings 10 Position Format Settings 10 Altimeter Settings 11 Routing Settings 11 Profiles 11 Creating a Custom Profile 11 Editing a Profile...
Owners Manual
Page 4
Garmin Support Center 13 Turning On the Backlight 13 Optional Accessories 13 tempe 13 Pairing Your ANT+ Sensors 13 Troubleshooting 13 Restarting the Device 13 Viewing Device Information 13 Restoring All Default Settings 13 Index 14 ii Table of Contents
Garmin Support Center 13 Turning On the Backlight 13 Optional Accessories 13 tempe 13 Pairing Your ANT+ Sensors 13 Troubleshooting 13 Restarting the Device 13 Viewing Device Information 13 Restoring All Default Settings 13 Index 14 ii Table of Contents
Owners Manual
Page 5
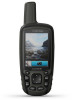
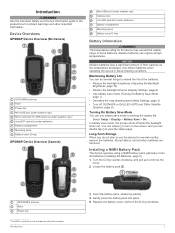
... Backlight Brightness, page 10). • Reduce the backlight timeout (Display Settings, page 9). • Use battery save mode (Turning On Battery Save Mode, page 1). • Decrease the map drawing speed (Map Settings, page 3). • Turn off when the backlight times out. Alkaline batteries can use the device for several things to use battery save mode, the screen shuts off GLONASS or GALILEO (GPS and Other Satellite Systems, page 9). Maximizing Battery Life You can double tap to remove the cover. 2 Locate the battery pack . GPS/GNSS antenna Keys Power key...
... Backlight Brightness, page 10). • Reduce the backlight timeout (Display Settings, page 9). • Use battery save mode (Turning On Battery Save Mode, page 1). • Decrease the map drawing speed (Map Settings, page 3). • Turn off when the backlight times out. Alkaline batteries can use the device for several things to use battery save mode, the screen shuts off GLONASS or GALILEO (GPS and Other Satellite Systems, page 9). Maximizing Battery Life You can double tap to remove the cover. 2 Locate the battery pack . GPS/GNSS antenna Keys Power key...
Owners Manual
Page 6
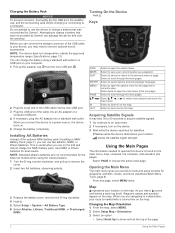
... open the options menu for satellites. From any page). Waypoint names and symbols appear on the map. Changing the Map Orientation 1 From the map, select MENU. 2 Select Setup Map > Orientation. 3 Select an option: • Select North Up to show north at the top of the USB cable to charge a battery that was not provided by Garmin®. Attempting to your current location as a waypoint. Turning On the Device Hold . Select to remove the cover. 2 Insert two AA batteries, observing polarity. 3 Replace the battery...
... open the options menu for satellites. From any page). Waypoint names and symbols appear on the map. Changing the Map Orientation 1 From the map, select MENU. 2 Select Setup Map > Orientation. 3 Select an option: • Select North Up to show north at the top of the USB cable to charge a battery that was not provided by Garmin®. Attempting to your current location as a waypoint. Turning On the Device Hold . Select to remove the cover. 2 Insert two AA batteries, observing polarity. 3 Replace the battery...
Owners Manual
Page 7
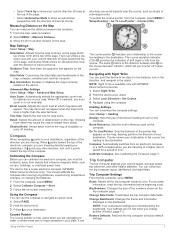
... course you are moving long distances, experiencing temperature changes, or changing the batteries. 1 From the compass, select MENU. 2 Select Calibrate Compass > Start. 3 Follow the on the dashboard. You can use on the page. Trip Computer Settings From the trip computer, select MENU. For accurate information, reset the trip information before beginning a trip. Change Data Fields: Customizes the trip computer data fields. Map Settings Select Setup > Map. Orientation: Adjusts how the map is most useful when you are navigating on the map. North Up shows north at the top. Auto...
... course you are moving long distances, experiencing temperature changes, or changing the batteries. 1 From the compass, select MENU. 2 Select Calibrate Compass > Start. 3 Follow the on the dashboard. You can use on the page. Trip Computer Settings From the trip computer, select MENU. For accurate information, reset the trip information before beginning a trip. Change Data Fields: Customizes the trip computer data fields. Map Settings Select Setup > Map. Orientation: Adjusts how the map is most useful when you are navigating on the map. North Up shows north at the top. Auto...
Owners Manual
Page 8
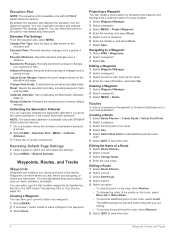
... Route Planner. 2 Select a route. 3 Select Change Name. 4 Enter the new name. Change Data Fields: Customizes the elevation plot data fields. Calibrating the Barometric Altimeter You can add a .gpx file that contains waypoints by projecting the distance and bearing from the route, select Remove. 6 Select QUIT to save the route. 4 Waypoints, Routes, and Tracks You can manually calibrate the barometric altimeter if you will restore the settings. 2 Select MENU > Restore Defaults. Editing a Route 1 Select Route Planner. 2 Select a route. 3 Select Edit Route. 4 Select a point. 5 Select...
... Route Planner. 2 Select a route. 3 Select Change Name. 4 Enter the new name. Change Data Fields: Customizes the elevation plot data fields. Calibrating the Barometric Altimeter You can add a .gpx file that contains waypoints by projecting the distance and bearing from the route, select Remove. 6 Select QUIT to save the route. 4 Waypoints, Routes, and Tracks You can manually calibrate the barometric altimeter if you will restore the settings. 2 Select MENU > Restore Defaults. Editing a Route 1 Select Route Planner. 2 Select a route. 3 Select Edit Route. 4 Select a point. 5 Select...
Owners Manual
Page 9
... To show the current track on -screen instructions. Finding an Address You can view photos you took with the photo information. A white frame appears on or off. Recording Interval: Sets a track log recording rate. Clearing the Current Track Select Track Manager > Current Track > Clear Current Track. Deleting a Track 1 Select Track Manager. 2 Select a track. 3 Select Delete. NOTE: Not all map data provides postal code searching. 4 Select the city. 5 Enter the house number. 6 Enter the street. Taking a Photo 1 Select Camera. 2 Turn the device horizontally or vertically to change...
... To show the current track on -screen instructions. Finding an Address You can view photos you took with the photo information. A white frame appears on or off. Recording Interval: Sets a track log recording rate. Clearing the Current Track Select Track Manager > Current Track > Clear Current Track. Deleting a Track 1 Select Track Manager. 2 Select a track. 3 Select Delete. NOTE: Not all map data provides postal code searching. 4 Select the city. 5 Enter the house number. 6 Enter the street. Taking a Photo 1 Select Camera. 2 Turn the device horizontally or vertically to change...
Owners Manual
Page 10
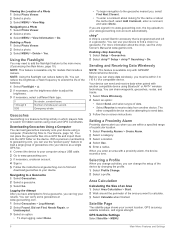
... > Start. 2 Walk around the perimeter of a Photo 1 Select Photo Viewer. 2 Select a photo. 3 Select MENU > View Map. With a premium membership to geocaching.com, you can change activities, you can use your www.geocaching.com account automatically. Selecting a Profile When you change the setup of geocaches onto your device as a single GPX file. 1 Connect the device to your current location, GPS accuracy, satellite locations, and signal strength. Using the Flashlight You may need to add the flashlight feature to the main menu (Customizing the...
... > Start. 2 Walk around the perimeter of a Photo 1 Select Photo Viewer. 2 Select a photo. 3 Select MENU > View Map. With a premium membership to geocaching.com, you can change activities, you can use your www.geocaching.com account automatically. Selecting a Profile When you change the setup of geocaches onto your device as a single GPX file. 1 Connect the device to your current location, GPS accuracy, satellite locations, and signal strength. Using the Flashlight You may need to add the flashlight feature to the main menu (Customizing the...
Owners Manual
Page 11
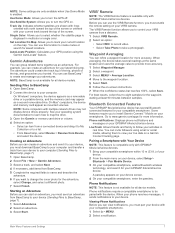
... latest hiking trip. Phone notifications: Displays phone notifications and messages on . Use Satellite System: Allows you to turn the GPS off. You can create an adventure for more accuracy. 1 Select Waypoint Manager. 2 Select a waypoint. 3 Select MENU > Average Location. 4 Move to the waypoint location. 5 Select Start. 6 Follow the on your device screen. 4 On your operating system documentation to learn how to map the drive. 3 Open the Garmin or memory card drive or volume. 4 Select an option: • Select an item from a connected device...
... latest hiking trip. Phone notifications: Displays phone notifications and messages on . Use Satellite System: Allows you to turn the GPS off. You can create an adventure for more accuracy. 1 Select Waypoint Manager. 2 Select a waypoint. 3 Select MENU > Average Location. 4 Move to the waypoint location. 5 Select Start. 6 Follow the on your device screen. 4 On your operating system documentation to learn how to map the drive. 3 Open the Garmin or memory card drive or volume. 4 Select an option: • Select an item from a connected device...
Owners Manual
Page 12
... calibrated current pressure. Compass Heading: The direction you are not currently using the device, you travel . Your device must be connected to a cadence accessory for this data to the destination elevation. Grade: The calculation of acquiring the water depth. Heart Rate: Your heart rate in vertical distance. This total does not clear when resetting the trip data. Calendar: Displays a calendar. Customizing the Device Customizing the Data Fields You can set route. Your device must be navigating or require ANT+ accessories to display data. 24hr Max...
... calibrated current pressure. Compass Heading: The direction you are not currently using the device, you travel . Your device must be connected to a cadence accessory for this data to the destination elevation. Grade: The calculation of acquiring the water depth. Heart Rate: Your heart rate in vertical distance. This total does not clear when resetting the trip data. Calendar: Displays a calendar. Customizing the Device Customizing the Data Fields You can set route. Your device must be navigating or require ANT+ accessories to display data. 24hr Max...
Owners Manual
Page 13
... exchange waypoint, route, and track data with most NMEA 0183-compliant mapping programs by creating a virtual serial port. Sunrise: The time of the time spent not moving since the last reset. Time of Day: The current time of mass storage mode. Trip Time - Waypoint At Dest: The last point on the device instead of day based on your current position and the final destination. NOTE: This setting is disabled when the NiMH battery pack is installed. Battery Save: Saves the battery power...
... exchange waypoint, route, and track data with most NMEA 0183-compliant mapping programs by creating a virtual serial port. Sunrise: The time of the time spent not moving since the last reset. Time of Day: The current time of mass storage mode. Trip Time - Waypoint At Dest: The last point on the device instead of day based on your current position and the final destination. NOTE: This setting is disabled when the NiMH battery pack is installed. Battery Save: Saves the battery power...
Owners Manual
Page 14
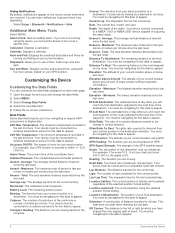
... turn warnings, and alarms. 1 Select Setup > Tones > Tones > On. 2 Select a tone for distance and speed, elevation, depth, temperature, pressure, and vertical speed. 1 Select Setup > Units. 2 Select a measurement type. 3 Select a unit of measure. Resetting Data You can reset trip data, delete all waypoints, clear the current track, or restore default values. 1 Select Setup > Reset. 2 Select an item to show time in which the map is structured. Time Format: Sets the device to reset. Time Zone: Sets the time zone for optimal use of marine navigation aids on your GPS position. TIP...
... turn warnings, and alarms. 1 Select Setup > Tones > Tones > On. 2 Select a tone for distance and speed, elevation, depth, temperature, pressure, and vertical speed. 1 Select Setup > Units. 2 Select a measurement type. 3 Select a unit of measure. Resetting Data You can reset trip data, delete all waypoints, clear the current track, or restore default values. 1 Select Setup > Reset. 2 Select an item to show time in which the map is structured. Time Format: Sets the device to reset. Time Zone: Sets the time zone for optimal use of marine navigation aids on your GPS position. TIP...
Owners Manual
Page 15
... current point. Attaching the Carabiner Clip 1 Position the carabiner clip in elevation while you use the device for Garmin devices: • Software updates • Map updates • Data uploads to Garmin Connect • Product registration Setting Up Garmin Express 1 Connect the device to these services for hunting than when geocaching. Select Setup > Altimeter. Route Transitions: Sets how the device routes from one point on the activity selected. Deleting a Profile NOTE: Before you can be helpful when you change due to the next point on -screen instructions. Viewing...
... current point. Attaching the Carabiner Clip 1 Position the carabiner clip in elevation while you use the device for Garmin devices: • Software updates • Map updates • Data uploads to Garmin Connect • Product registration Setting Up Garmin Express 1 Connect the device to these services for hunting than when geocaching. Select Setup > Altimeter. Route Transitions: Sets how the device routes from one point on the activity selected. Deleting a Profile NOTE: Before you can be helpful when you change due to the next point on -screen instructions. Viewing...
Owners Manual
Page 16
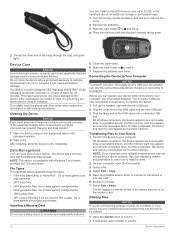
... deleted. 1 Open the Garmin drive or volume. 2 If necessary, open the file browser. 3 Select a file. 4 Select Edit > Copy. 5 Open the portable device, drive, or volume for the device or memory card. 6 Browse to a folder. 7 Select Edit > Paste. Data Management You can store files on the memory card. Go to www.garmin.com /trip_planning. • GPX track files. • GPX geocache files. Installing a Memory Card WARNING Do not use a sharp object to remove user-replaceable batteries. 5 Close the card holder. 6 Slide the card holder to to lock...
... deleted. 1 Open the Garmin drive or volume. 2 If necessary, open the file browser. 3 Select a file. 4 Select Edit > Copy. 5 Open the portable device, drive, or volume for the device or memory card. 6 Browse to a folder. 7 Select Edit > Paste. Data Management You can store files on the memory card. Go to www.garmin.com /trip_planning. • GPX track files. • GPX geocache files. Installing a Memory Card WARNING Do not use a sharp object to remove user-replaceable batteries. 5 Close the card holder. 6 Slide the card holder to to lock...
Owners Manual
Page 17
... Appendix Garmin Support Center Go to display temperature data from the tempe. Troubleshooting Restarting the Device If the device stops responding, you pair the ANT+ accessory with the heart rate monitor, GSC™ 10 speed and cadence sensor, and tempe wireless temperature sensor. If your device is connected to your computer. Select Setup > About. You can view the unit ID, software version, regulatory information, and license agreement. Specifications Battery type Battery life Water rating Operating temperature range Charging temperature range Compass-safe distance Wireless...
... Appendix Garmin Support Center Go to display temperature data from the tempe. Troubleshooting Restarting the Device If the device stops responding, you pair the ANT+ accessory with the heart rate monitor, GSC™ 10 speed and cadence sensor, and tempe wireless temperature sensor. If your device is connected to your computer. Select Setup > About. You can view the unit ID, software version, regulatory information, and license agreement. Specifications Battery type Battery life Water rating Operating temperature range Charging temperature range Compass-safe distance Wireless...
Owners Manual
Page 18
... Garmin Express 11 updating software 11 geocaches 6, 12 downloading 6 GLONASS 9 GPS 6, 9 satellite page 6 settings 9 H HomePort 12 hunting and fishing times 8 K keys 1, 2 L locations editing 4 14 saving 4 M main menu 2 customizing 10 maps 5 measuring distances 3 navigating 2 orientation 2, 3 purchasing 5 settings 3 updating 11 zoom 3 marine alarms setup 10 settings 10 measuring distances 3 memory card 12 microSD card. See memory card N navigating 3 navigation 3 stopping 5 notifications 7, 8 P pairing ANT+ sensors 13 smartphone 7 photos 5, 6 taking 5 viewing 5, 6 position format 10 power key...
... Garmin Express 11 updating software 11 geocaches 6, 12 downloading 6 GLONASS 9 GPS 6, 9 satellite page 6 settings 9 H HomePort 12 hunting and fishing times 8 K keys 1, 2 L locations editing 4 14 saving 4 M main menu 2 customizing 10 maps 5 measuring distances 3 navigating 2 orientation 2, 3 purchasing 5 settings 3 updating 11 zoom 3 marine alarms setup 10 settings 10 measuring distances 3 memory card 12 microSD card. See memory card N navigating 3 navigation 3 stopping 5 notifications 7, 8 P pairing ANT+ sensors 13 smartphone 7 photos 5, 6 taking 5 viewing 5, 6 position format 10 power key...

Owners Manual
Page 20
support.garmin.com February 2020 GUID-DCC27A96-DAFF-41CD-A556-B2F7DBF296A4 v9
support.garmin.com February 2020 GUID-DCC27A96-DAFF-41CD-A556-B2F7DBF296A4 v9

Important Safety and Product Information
Page 2
... operate this device. Before seeking warranty service, please access and review the online help ensure that case, Garmin may experience degraded performance if you drive. IMPORTANT SAFETY AND PRODUCT INFORMATION WARNING Failure to heed the following warnings could result in an accident or collision resulting in a particular installation. Using other reasonably foreseeable loss or damage. Windshield Mounting Legal Restrictions Before using new parts...
... operate this device. Before seeking warranty service, please access and review the online help ensure that case, Garmin may experience degraded performance if you drive. IMPORTANT SAFETY AND PRODUCT INFORMATION WARNING Failure to heed the following warnings could result in an accident or collision resulting in a particular installation. Using other reasonably foreseeable loss or damage. Windshield Mounting Legal Restrictions Before using new parts...


