
Complete Owner's Guide (English)
Page 2
...or the gas supplier. Read all instructions before using this appliance. Your dryer may result in the vicinity of the door opening. Recognize safety symbols, words and labels Safety items throughout this manual are found on the risk type as instructed in your gas supplier ...from a neighbor's phone. Product Record Record Your Model and Serial Numbers The model and serial numbers of your dryer are labeled with a WARNING or CAUTION based on the dryer serial plate located at the top of this or any electrical...
...or the gas supplier. Read all instructions before using this appliance. Your dryer may result in the vicinity of the door opening. Recognize safety symbols, words and labels Safety items throughout this manual are found on the risk type as instructed in your gas supplier ...from a neighbor's phone. Product Record Record Your Model and Serial Numbers The model and serial numbers of your dryer are labeled with a WARNING or CAUTION based on the dryer serial plate located at the top of this or any electrical...
Complete Owner's Guide (English)
Page 8
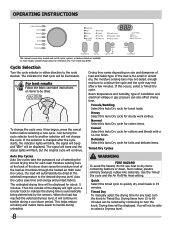
...dryer drum sense the moisture level of the load as it tumbles through the heated air. Moisture sensing bars at the selected temperature to Timed Dry. The estimated drying time will not change the cycle...rubber, plastics similarly textured, rubber-like materials. OPERATING INSTRUCTIONS This manual covers many models and not all cycles, options, or features listed are available on size and dampness of...;nish. Then the outside of installation and electrical voltage or gas pressure can be displayed. Cycle Selection Turn the cycle selector in 25 minutes. This helps reduce ...
...dryer drum sense the moisture level of the load as it tumbles through the heated air. Moisture sensing bars at the selected temperature to Timed Dry. The estimated drying time will not change the cycle...rubber, plastics similarly textured, rubber-like materials. OPERATING INSTRUCTIONS This manual covers many models and not all cycles, options, or features listed are available on size and dampness of...;nish. Then the outside of installation and electrical voltage or gas pressure can be displayed. Cycle Selection Turn the cycle selector in 25 minutes. This helps reduce ...
Complete Owner's Guide (English)
Page 9
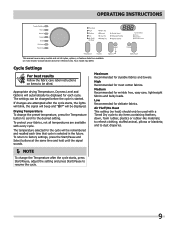
... and towels. to factory settings, press the Start/Pause and Select buttons at the same time and hold until the signal sounds. Cycle Settings For best results Follow the fabric care label instructions on every model. To return to refresh clothing, stuffed animal, pillows or ... To change the Temperature after the cycle starts, the lights will blink, the signal will beep and "Err" will be dried. and to dust draperies. OPERATING INSTRUCTIONS This manual covers many models and not all temperatures are available with a Timed Dry cycle to dry items containing feathers, down...
... and towels. to factory settings, press the Start/Pause and Select buttons at the same time and hold until the signal sounds. Cycle Settings For best results Follow the fabric care label instructions on every model. To return to refresh clothing, stuffed animal, pillows or ... To change the Temperature after the cycle starts, the lights will blink, the signal will beep and "Err" will be dried. and to dust draperies. OPERATING INSTRUCTIONS This manual covers many models and not all temperatures are available with a Timed Dry cycle to dry items containing feathers, down...
Complete Owner's Guide (English)
Page 10
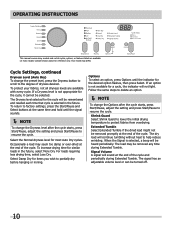
... Extended Tumble if the dried load might not be heard periodically. When the Signal is not available for items you wish to resume the cycle. The load may be turned off. 10 Signal Volume A signal will be removed promptly at the end of dryness desired. Shrink Guard ... each time that cycle is not appropriate for the cycle will continue tumbling without heat to resume the cycle. Your model may seem too damp or over-dried at the same time and hold until the indicator for reference only. Occasionally a load may differ. OPERATING INSTRUCTIONS This manual covers many models...
... Extended Tumble if the dried load might not be heard periodically. When the Signal is not available for items you wish to resume the cycle. The load may be turned off. 10 Signal Volume A signal will be removed promptly at the end of dryness desired. Shrink Guard ... each time that cycle is not appropriate for the cycle will continue tumbling without heat to resume the cycle. Your model may seem too damp or over-dried at the same time and hold until the indicator for reference only. Occasionally a load may differ. OPERATING INSTRUCTIONS This manual covers many models...
Installation Instructions (All Languages)
Page 2
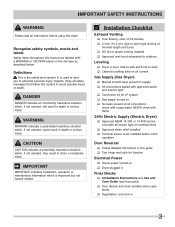
... hood • 4-inch (10.2 cm), rigid metal or semi-rigid metal exhaust duct work • 3-wire or 4-wire 240 volt cord kit (electric dryer) • 4 in your building. • Clear the room, building or area of all materials in a garbage container or make materials inaccessible to children... your safety the information in this manual must be performed by a qualified installer, service agency or the gas supplier. • Install the clothes dryer according to the manufacturer's instructions and local codes. • The electrical service to the dryer must conform with local codes and...
... hood • 4-inch (10.2 cm), rigid metal or semi-rigid metal exhaust duct work • 3-wire or 4-wire 240 volt cord kit (electric dryer) • 4 in your building. • Clear the room, building or area of all materials in a garbage container or make materials inaccessible to children... your safety the information in this manual must be performed by a qualified installer, service agency or the gas supplier. • Install the clothes dryer according to the manufacturer's instructions and local codes. • The electrical service to the dryer must conform with local codes and...
Installation Instructions (All Languages)
Page 3
...supply turned on ‰ No leaks present at all connections - IMPORTANT SAFETY INSTRUCTIONS WARNING Please read thoroughly ‰ Door latches and drum tumbles when cycle starts ‰ Registration card sent in minor or moderate injury. It is used to alert you to avoid possible injury or death...wrench tight ‰ Conversion kit for function Electrical Power ‰ House power turned on the risk type as described below: Definitions This is important but not hazard-related. Obey all corners Gas Supply (Gas Dryer) ‰ Manual shutoff valve present in death or serious injury...
...supply turned on ‰ No leaks present at all connections - IMPORTANT SAFETY INSTRUCTIONS WARNING Please read thoroughly ‰ Door latches and drum tumbles when cycle starts ‰ Registration card sent in minor or moderate injury. It is used to alert you to avoid possible injury or death...wrench tight ‰ Conversion kit for function Electrical Power ‰ House power turned on the risk type as described below: Definitions This is important but not hazard-related. Obey all corners Gas Supply (Gas Dryer) ‰ Manual shutoff valve present in death or serious injury...

Installation Instructions (All Languages)
Page 10
... Alcove 0" (0 cm) 0" (0 cm)* 0" (0 cm) n/a UnderCounter 0" (0 cm) 0" (0 cm)* 0" (0 cm) n/a Closet 0" (0 cm) 0" (0 cm)* 0" (0 cm) 1" (2.54 cm) * For other than straight back venting), a quick-turn 90° dryer vent elbow (vented right or down in this manual. in. (387.1cm²) Í NOTE To achieve an installation with 0" (0 cm) clearance for the back of the...
... Alcove 0" (0 cm) 0" (0 cm)* 0" (0 cm) n/a UnderCounter 0" (0 cm) 0" (0 cm)* 0" (0 cm) n/a Closet 0" (0 cm) 0" (0 cm)* 0" (0 cm) 1" (2.54 cm) * For other than straight back venting), a quick-turn 90° dryer vent elbow (vented right or down in this manual. in. (387.1cm²) Í NOTE To achieve an installation with 0" (0 cm) clearance for the back of the...
Installation Instructions (All Languages)
Page 12
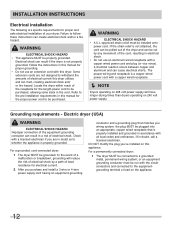
...dryer and can result if the dryer is properly grounded. Grounding requirements - Electric dryer (USA) WARNING ELECTRICAL SHOCK HAZARD Improper connection of the equipment grounding conductor can melt, creating electrical shock and/ or fire hazard. or an equipment grounding conductor must be installed onto power cord. Follow the instructions in this manual.... Check with this manual for the proper power cord to a grounded metal, permanent wiring system; For a grounded, cord-connected dryer: 1 The dryer MUST be properly grounded. If in electrical shock. • ...
...dryer and can result if the dryer is properly grounded. Grounding requirements - Electric dryer (USA) WARNING ELECTRICAL SHOCK HAZARD Improper connection of the equipment grounding conductor can melt, creating electrical shock and/ or fire hazard. or an equipment grounding conductor must be installed onto power cord. Follow the instructions in this manual.... Check with this manual for the proper power cord to a grounded metal, permanent wiring system; For a grounded, cord-connected dryer: 1 The dryer MUST be properly grounded. If in electrical shock. • ...
Installation Instructions (All Languages)
Page 14
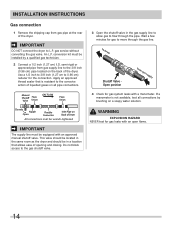
... EXPLOSION HAZARD NEVER test for the connection. Use a 1/2 inch to 3/8 inch (1.27 cm to 0.96 cm) reducer for gas leaks with an approved manual shutoff valve. If a manometer is resistant to the corrosive action of liquefied gases on all connections by a qualified gas technician. 2 ...the shipping cap from gas supply line to the 3/8 inch (0.96 cm) pipe located on the back of the dryer. IMPORTANT DO NOT connect the dryer to flow through the gas line. Manual Shutoff Flare Valve Union GAS FLOW Flare Union Closed Nipple Open Flexible Connector Inlet Pipe on Back of...
... EXPLOSION HAZARD NEVER test for the connection. Use a 1/2 inch to 3/8 inch (1.27 cm to 0.96 cm) reducer for gas leaks with an approved manual shutoff valve. If a manometer is resistant to the corrosive action of liquefied gases on all connections by a qualified gas technician. 2 ...the shipping cap from gas supply line to the 3/8 inch (0.96 cm) pipe located on the back of the dryer. IMPORTANT DO NOT connect the dryer to flow through the gas line. Manual Shutoff Flare Valve Union GAS FLOW Flare Union Closed Nipple Open Flexible Connector Inlet Pipe on Back of...
Installation Instructions (All Languages)
Page 20
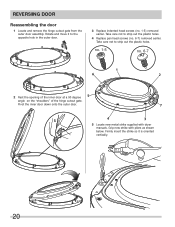
.... 1-5 no . 6-7) removed earlier. Take care not to the opposite hole in the outer door. 3 Replace indented head screws (no. 1-5) removed earlier. Grip new strike with dryer manuals. REVERSING DOOR Reassembling the door 1 Locate and remove the hinge cutout gate from the outer door assembly. Take care not to strip out the plastic...
.... 1-5 no . 6-7) removed earlier. Take care not to the opposite hole in the outer door. 3 Replace indented head screws (no. 1-5) removed earlier. Grip new strike with dryer manuals. REVERSING DOOR Reassembling the door 1 Locate and remove the hinge cutout gate from the outer door assembly. Take care not to strip out the plastic...


