Complete Owner's Guide (English)
Page 2
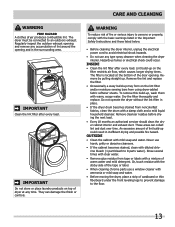
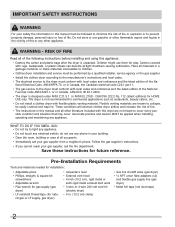
... on the dryer serial plate located at the top of the door opening. WHAT TO DO IF YOU SMELL GAS: • Do not try to alert you cannot reach your gas supplier, call your dryer. WARNING WARNING indicates a potentially hazardous situation which is used to light any appliance. • Do not touch any other models. IMPORTANT IMPORTANT indicates installation, operation or maintenance information which...
... on the dryer serial plate located at the top of the door opening. WHAT TO DO IF YOU SMELL GAS: • Do not try to alert you cannot reach your gas supplier, call your dryer. WARNING WARNING indicates a potentially hazardous situation which is used to light any appliance. • Do not touch any other models. IMPORTANT IMPORTANT indicates installation, operation or maintenance information which...
Complete Owner's Guide (English)
Page 3
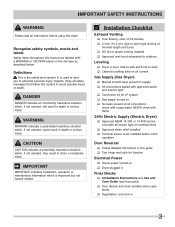
... a sign of the dryer, lint screen housing and exhaust duct should be cleaned approximately every 18 months by the manufacturer of lint build-up in these warnings could cause a load to an outdoors exhaust. IMPORTANT SAFETY INSTRUCTIONS 240 v Electric Dryer 120 v Gas Dryer 10-30R 3-wire (fused 30 amp) 14-30R 4-wire UL-approved service cord must be connected to catch fire. • Do not dry articles containing rubber, plastic...
... a sign of the dryer, lint screen housing and exhaust duct should be cleaned approximately every 18 months by the manufacturer of lint build-up in these warnings could cause a load to an outdoors exhaust. IMPORTANT SAFETY INSTRUCTIONS 240 v Electric Dryer 120 v Gas Dryer 10-30R 3-wire (fused 30 amp) 14-30R 4-wire UL-approved service cord must be connected to catch fire. • Do not dry articles containing rubber, plastic...
Complete Owner's Guide (English)
Page 4
... location, have it will be removed. Hazardous fumes or electrical shock could result in electrical shock or injury. • Do not use of a gas dryer must be plugged into the dryer if the drum is used near children. Common sense and caution must never be exposed to the weather. • A thermal limiter switch automatically turns off the motor in this Use and Care Guide are not meant to cover...
... location, have it will be removed. Hazardous fumes or electrical shock could result in electrical shock or injury. • Do not use of a gas dryer must be plugged into the dryer if the drum is used near children. Common sense and caution must never be exposed to the weather. • A thermal limiter switch automatically turns off the motor in this Use and Care Guide are not meant to cover...
Complete Owner's Guide (English)
Page 6
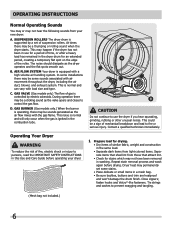
... drum finish. Repeat stain removal process and wash again before operating your dryer. 1 Prepare load for drying. • Dry items of similar fabric, weight and construction in this Use and Care Guide before drying. Tie strings and sashes to control the gas flow. This is controlled by a set some sounds associated with load size and type. A D C B CAUTION Do not continue to persons, read the IMPORTANT SAFETY INSTRUCTIONS...
... drum finish. Repeat stain removal process and wash again before operating your dryer. 1 Prepare load for drying. • Dry items of similar fabric, weight and construction in this Use and Care Guide before drying. Tie strings and sashes to control the gas flow. This is controlled by a set some sounds associated with load size and type. A D C B CAUTION Do not continue to persons, read the IMPORTANT SAFETY INSTRUCTIONS...
Complete Owner's Guide (English)
Page 7
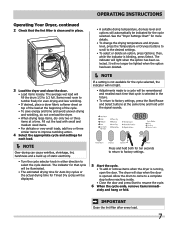
... be displayed. Items need room to factory settings, press the Start/Pause and Select buttons at a time. NOTE If a setting is not available for the cycle selected, the indicator will not light. • Adjustments made to a cycle will be remembered and recalled each load. IMPORTANT Clean the lint filter after every load. 7 OPERATING INSTRUCTIONS Operating Your Dryer, continued 2 Check that the lint filter is clean and in the future...
... be displayed. Items need room to factory settings, press the Start/Pause and Select buttons at a time. NOTE If a setting is not available for the cycle selected, the indicator will not light. • Adjustments made to a cycle will be remembered and recalled each load. IMPORTANT Clean the lint filter after every load. 7 OPERATING INSTRUCTIONS Operating Your Dryer, continued 2 Check that the lint filter is clean and in the future...
Complete Owner's Guide (English)
Page 8
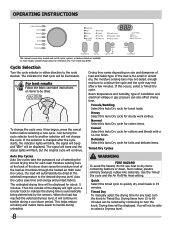
.... Timed Dry To manually select the drying time for cottons and blends with a no-iron finish. You will continue to the desired dryness level. Your model may end after the cycle starts, the indicator lights will blink, the signal will beep and "Err" will be dried at the back of the dryer drum sense the moisture level of load and fabric type. To change the cycle. When...
.... Timed Dry To manually select the drying time for cottons and blends with a no-iron finish. You will continue to the desired dryness level. Your model may end after the cycle starts, the indicator lights will blink, the signal will beep and "Err" will be dried at the back of the dryer drum sense the moisture level of load and fabric type. To change the cycle. When...
Complete Owner's Guide (English)
Page 11
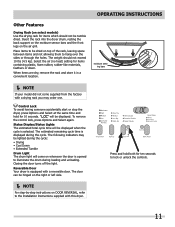
... estimated remaining cycle time is opened to be tumble dried. Place items to illuminate the drum during the cycle. Control Lock To avoid having someone accidentally start or stop the dryer, press Options and Select at the same time and hold both for items containing plastic, foam rubber, rubber-like materials, feathers or down. OPERATING INSTRUCTIONS Other Features Drying Rack (on select models) Use the drying rack for 10...
... estimated remaining cycle time is opened to be tumble dried. Place items to illuminate the drum during the cycle. Control Lock To avoid having someone accidentally start or stop the dryer, press Options and Select at the same time and hold both for items containing plastic, foam rubber, rubber-like materials, feathers or down. OPERATING INSTRUCTIONS Other Features Drying Rack (on select models) Use the drying rack for 10...
Complete Owner's Guide (English)
Page 13
... and water. Rinse several times with clear water. • Remove glue residue from noncolorfast fabrics, clean the drum with diluted chlorine bleach (1 part bleach to the floor. 13 Remove cleanser residue before drying the next load. • Every 18 months an authorized servicer should clean the dryer cabinet interior and exhaust duct. IMPORTANT Clean the lint filter after every load. Dry the filter thoroughly and replace. To remove...
... and water. Rinse several times with clear water. • Remove glue residue from noncolorfast fabrics, clean the drum with diluted chlorine bleach (1 part bleach to the floor. 13 Remove cleanser residue before drying the next load. • Every 18 months an authorized servicer should clean the dryer cabinet interior and exhaust duct. IMPORTANT Clean the lint filter after every load. Dry the filter thoroughly and replace. To remove...
Complete Owner's Guide (English)
Page 15
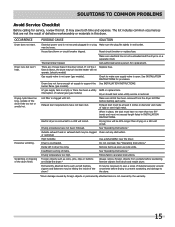
Dryer runs but the heater will be clogged Clean out any obstruction. Make sure electrical line is not overloaded and the dryer is open (gas models). There are 2 house fuses in wall outlet. Check to support the See INSTALLATION INSTRUCTIONS. Dryer does not have no more than drying on a separate circuit. burner flame (gas models). Make sure all lint has been removed from the dryer lint filter before laundering. Exhaust duct must be loose. Use a dehumidifi...
Dryer runs but the heater will be clogged Clean out any obstruction. Make sure electrical line is not overloaded and the dryer is open (gas models). There are 2 house fuses in wall outlet. Check to support the See INSTALLATION INSTRUCTIONS. Dryer does not have no more than drying on a separate circuit. burner flame (gas models). Make sure all lint has been removed from the dryer lint filter before laundering. Exhaust duct must be loose. Use a dehumidifi...
Complete Owner's Guide (English)
Page 16
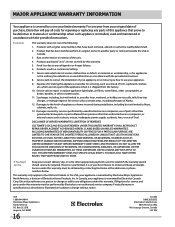
... used other cosmetic parts. 11. DISCLAIMER OF IMPLIED WARRANTIES; THIS WRITTEN WARRANTY GIVES YOU SPECIFIC LEGAL RIGHTS. Product that have been removed, altered or cannot be required. Surcharges including, but not limited to repair or replace appliance light bulbs, air filters, water filters, other consumables, or knobs, handles, or other than authorized service companies; USA 1.800.944.9044 Electrolux Major Appliances North America P.O. Exclusions This warranty does not cover...
... used other cosmetic parts. 11. DISCLAIMER OF IMPLIED WARRANTIES; THIS WRITTEN WARRANTY GIVES YOU SPECIFIC LEGAL RIGHTS. Product that have been removed, altered or cannot be required. Surcharges including, but not limited to repair or replace appliance light bulbs, air filters, water filters, other consumables, or knobs, handles, or other than authorized service companies; USA 1.800.944.9044 Electrolux Major Appliances North America P.O. Exclusions This warranty does not cover...
Wiring Diagram (All Languages)
Page 1
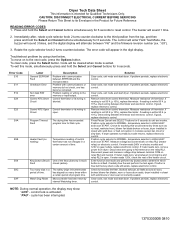
... Only. Position cycle selector to NORMAL, temperature selector to reset control. Too many times within a certain period of time. If problem persists, replace electronic control. Check for blocked lint filter, blocked exhaust, air leaks around air duct, broken blower fan blades, worn or loose drum seals, dryer installed in closet with solid door, or bad connection in a period of program time. If meter reads 120V, check the rest of thermistor. If meter reads zero, remove power from the...
... Only. Position cycle selector to NORMAL, temperature selector to reset control. Too many times within a certain period of time. If problem persists, replace electronic control. Check for blocked lint filter, blocked exhaust, air leaks around air duct, broken blower fan blades, worn or loose drum seals, dryer installed in closet with solid door, or bad connection in a period of program time. If meter reads 120V, check the rest of thermistor. If meter reads zero, remove power from the...
Installation Instructions (All Languages)
Page 2
...; External vent hood • 4-inch (10.2 cm), rigid metal or semi-rigid metal exhaust duct work • 3-wire or 4-wire 240 volt cord kit (electric dryer) • 4 in. (10.2 cm) clamp • Gas line shutoff valve (gas dryer) • ½ NPT union flare known to collapse, be performed by a qualified installer, service agency or the gas supplier. • Install the clothes dryer according to the manufacturer's instructions and local codes...
...; External vent hood • 4-inch (10.2 cm), rigid metal or semi-rigid metal exhaust duct work • 3-wire or 4-wire 240 volt cord kit (electric dryer) • 4 in. (10.2 cm) clamp • Gas line shutoff valve (gas dryer) • ½ NPT union flare known to collapse, be performed by a qualified installer, service agency or the gas supplier. • Install the clothes dryer according to the manufacturer's instructions and local codes...
Installation Instructions (All Languages)
Page 3
... manual are labeled with approved sealer and wrench tight ‰ Conversion kit for function Electrical Power ‰ House power turned on ‰ Dryer plugged in Final Checks ‰ Installation Instructions and Use and Care Guide read all instructions before initial operation Door Reversal ‰ Follow detailed instructions in minor or moderate injury. Installation Checklist Exhaust Venting ‰ Free-flowing, clear of lint buildup ‰ 4 inch (10.2 cm) rigid or semi-rigid ducting of minimal length and turns...
... manual are labeled with approved sealer and wrench tight ‰ Conversion kit for function Electrical Power ‰ House power turned on ‰ Dryer plugged in Final Checks ‰ Installation Instructions and Use and Care Guide read all instructions before initial operation Door Reversal ‰ Follow detailed instructions in minor or moderate injury. Installation Checklist Exhaust Venting ‰ Free-flowing, clear of lint buildup ‰ 4 inch (10.2 cm) rigid or semi-rigid ducting of minimal length and turns...
Installation Instructions (All Languages)
Page 4
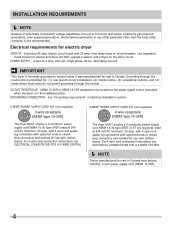
..., the use with clothes dryers. Electrical requirements for sale in Canada have factoryinstalled, 4-wire power supply cord (NEMA 14-30R). 4 time delay fuses or circuit breakers. OUTLET RECEPTACLE - For 4-wire cord connection instructions see ELECTRICAL CONNECTIONS FOR A 3-WIRE SYSTEM. 4-WIRE POWER SUPPLY CORD KIT (not supplied) 4-wire receptacle (NEMA type 14-30R) The dryer MUST employ a 4-conductor power supply cord NEMA 14-30 type SRDT or ST (as required) rated at 240 volt AC minimum, 30 amp, with 3 open end spade lug connectors with...
..., the use with clothes dryers. Electrical requirements for sale in Canada have factoryinstalled, 4-wire power supply cord (NEMA 14-30R). 4 time delay fuses or circuit breakers. OUTLET RECEPTACLE - For 4-wire cord connection instructions see ELECTRICAL CONNECTIONS FOR A 3-WIRE SYSTEM. 4-WIRE POWER SUPPLY CORD KIT (not supplied) 4-wire receptacle (NEMA type 14-30R) The dryer MUST employ a 4-conductor power supply cord NEMA 14-30 type SRDT or ST (as required) rated at 240 volt AC minimum, 30 amp, with 3 open end spade lug connectors with...

Installation Instructions (All Languages)
Page 7
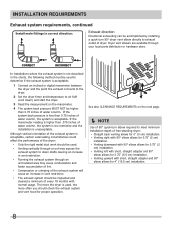
.... A clothes dryer produces combustible lint. Do not exhaust dryer into a chimney, a wall, a ceiling, an attic, a crawl space or any screws, rivets or other fasteners that extend into the laundry area. Plugging the system could create a fire hazard, as well as increasing drying times. MAXIMUM LENGTH of 4" (10.2cm) Rigid Metal Duct VENT HOOD TYPE (Preferred) Number of air. 4" (10.2cm) louvered 2.5" (6.35cm) 0 64 ft...
.... A clothes dryer produces combustible lint. Do not exhaust dryer into a chimney, a wall, a ceiling, an attic, a crawl space or any screws, rivets or other fasteners that extend into the laundry area. Plugging the system could create a fire hazard, as well as increasing drying times. MAXIMUM LENGTH of 4" (10.2cm) Rigid Metal Duct VENT HOOD TYPE (Preferred) Number of air. 4" (10.2cm) louvered 2.5" (6.35cm) 0 64 ft...
Installation Instructions (All Languages)
Page 8
... the exhaust connects to the dryer. 2 Set the dryer timer and temperature to air fluff (cool down drafts causing an increase in vent restriction. • Running the exhaust system through your local parts distributor or hardware store. The more often you should be inspected and cleaned a minimum of every 18 months with short, straight adapter and 90° elbow allows for 4" (10.5 cm) installation...
... the exhaust connects to the dryer. 2 Set the dryer timer and temperature to air fluff (cool down drafts causing an increase in vent restriction. • Running the exhaust system through your local parts distributor or hardware store. The more often you should be inspected and cleaned a minimum of every 18 months with short, straight adapter and 90° elbow allows for 4" (10.5 cm) installation...
Installation Instructions (All Languages)
Page 12
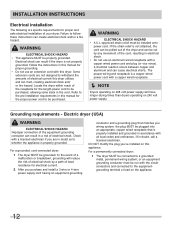
... be run with all local codes and ordinances. Electric dryer (USA) WARNING ELECTRICAL SHOCK HAZARD Improper connection of the equipment grounding conductor can result in the cord. For a permanently connected dryer: 1 The dryer MUST be properly grounded. In the event of a malfunction or breakdown, grounding will have longer drying times than dryers operating on 240 volt power supply. Electrical shock can result if the dryer is properly installed...
... be run with all local codes and ordinances. Electric dryer (USA) WARNING ELECTRICAL SHOCK HAZARD Improper connection of the equipment grounding conductor can result in the cord. For a permanently connected dryer: 1 The dryer MUST be properly grounded. In the event of a malfunction or breakdown, grounding will have longer drying times than dryers operating on 240 volt power supply. Electrical shock can result if the dryer is properly installed...
Installation Instructions (All Languages)
Page 17
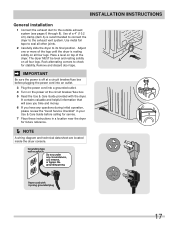
... outlet. 4 Turn on all other joints. 2 Carefully slide the dryer to its final position. Power cord with the dryer. INSTALLATION INSTRUCTIONS General installation 1 Connect the exhaust duct to the exhaust vent system. IMPORTANT Be sure the power is off at the circuit breaker/fuse box. 5 Read the Use & Care Guide provided with 3-prong grounded plug 17 It contains valuable and helpful information that will save you time and money. 6 If you have any circumstances, cut, remove...
... outlet. 4 Turn on all other joints. 2 Carefully slide the dryer to its final position. Power cord with the dryer. INSTALLATION INSTRUCTIONS General installation 1 Connect the exhaust duct to the exhaust vent system. IMPORTANT Be sure the power is off at the circuit breaker/fuse box. 5 Read the Use & Care Guide provided with 3-prong grounded plug 17 It contains valuable and helpful information that will save you time and money. 6 If you have any circumstances, cut, remove...
Installation Instructions (All Languages)
Page 22
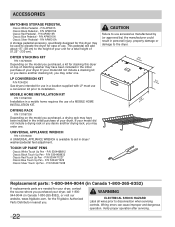
... of matching washer may order one . LP CONVERSION KIT P/N PCK4200 Gas dryers intended for stacking this dryer may order one . P/N 5304471229 Classic Silver Touch Up Pen - DRYING RACK P/N 137067300 Depending on top of your model did not include a stacking kit or you desire another drying rack, you purchased, a drying rack may have been included in a mobile home requires the use . WARNING ELECTRICAL SHOCK HAZARD Label all wires prior to installation. If...
... of matching washer may order one . LP CONVERSION KIT P/N PCK4200 Gas dryers intended for stacking this dryer may order one . P/N 5304471229 Classic Silver Touch Up Pen - DRYING RACK P/N 137067300 Depending on top of your model did not include a stacking kit or you desire another drying rack, you purchased, a drying rack may have been included in a mobile home requires the use . WARNING ELECTRICAL SHOCK HAZARD Label all wires prior to installation. If...
Product Specifications Sheet (English)
Page 2
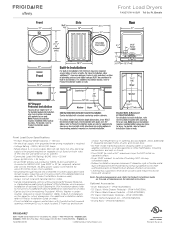
... Red Drawer Pedestal - (PN # APWD15R). • Mobile Home Installation Kit - (PN # 137067200). • Drying Rack - (PN # 137067300). Printed in . Electric Front Load Dryer Specifications • Product Shipping Weight (approx.) - 140 Lbs. • An electrical supply with approved vent hood having swing-out damper(s). Do NOT install on carpeted surface. • Dryer MUST exhaust to Product Installation Guide on web.) • Closet installation requires vented door with matching Frigidaire® Affinity Washer in with...
... Red Drawer Pedestal - (PN # APWD15R). • Mobile Home Installation Kit - (PN # 137067200). • Drying Rack - (PN # 137067300). Printed in . Electric Front Load Dryer Specifications • Product Shipping Weight (approx.) - 140 Lbs. • An electrical supply with approved vent hood having swing-out damper(s). Do NOT install on carpeted surface. • Dryer MUST exhaust to Product Installation Guide on web.) • Closet installation requires vented door with matching Frigidaire® Affinity Washer in with...


