Quick Guide and Warranty
Page 1
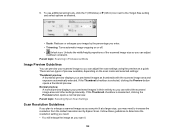
English XP-330/XP-430/XP-434 Quick Guide This guide includes basic information about your network. User's Guide See the online User's Guide for additional information. Visit www.epson.com/support/wireless (U.S.) or www.epson.ca/support/wireless (Canada) to your product and troubleshooting tips. Print... and scan directly from your smartphone, tablet, or computer. Support Visit www.epson.com/support (U.S.) or www.epson.ca/support (Canada) where you can download drivers, view manuals, see FAQs, or e-mail Epson support. Wireless Videos View easy-to Facebook® and the cloud with ECO...
English XP-330/XP-430/XP-434 Quick Guide This guide includes basic information about your network. User's Guide See the online User's Guide for additional information. Visit www.epson.com/support/wireless (U.S.) or www.epson.ca/support/wireless (Canada) to your product and troubleshooting tips. Print... and scan directly from your smartphone, tablet, or computer. Support Visit www.epson.com/support (U.S.) or www.epson.ca/support (Canada) where you can download drivers, view manuals, see FAQs, or e-mail Epson support. Wireless Videos View easy-to Facebook® and the cloud with ECO...
Quick Guide and Warranty
Page 5
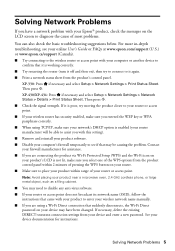
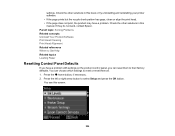
...(SSID), follow the instructions that came with your product to enter your wireless network name manually. ■ If you are connecting the product via Wi-Fi Protected Setup (WPS) ...'s firewall temporarily to see your online User's Guide or FAQs at www.epson.com/support (U.S.) or www.epson.ca/support (Canada). ■ Try connecting to the wireless router or ...may be causing the problem. Solving Network Problems 5 Then press x. ■ Check the signal strength. XP-430/XP-434: Press if necessary and select Setup > Network Settings > Network Status > Details > Print Status Sheet. ...
...(SSID), follow the instructions that came with your product to enter your wireless network name manually. ■ If you are connecting the product via Wi-Fi Protected Setup (WPS) ...'s firewall temporarily to see your online User's Guide or FAQs at www.epson.com/support (U.S.) or www.epson.ca/support (Canada). ■ Try connecting to the wireless router or ...may be causing the problem. Solving Network Problems 5 Then press x. ■ Check the signal strength. XP-430/XP-434: Press if necessary and select Setup > Network Settings > Network Status > Details > Print Status Sheet. ...

User Manual
Page 38
3. Note: To enter the wireless network name manually, select Other SSIDs and press the OK button. If you do not see your wireless network and press the OK button. Press the OK button .... 4. Then highlight a number or symbol and press the OK button to confirm Wi-Fi settings. 7. Press the up or down arrow button to select it manually. Enter your network name as described in the next step. 5. Press the OK button to highlight a character or a function button displayed on the keypad. Then...
3. Note: To enter the wireless network name manually, select Other SSIDs and press the OK button. If you do not see your wireless network and press the OK button. Press the OK button .... 4. Then highlight a number or symbol and press the OK button to confirm Wi-Fi settings. 7. Press the up or down arrow button to select it manually. Enter your network name as described in the next step. 5. Press the OK button to highlight a character or a function button displayed on the keypad. Then...

User Manual
Page 60
... they are scanning in Full Auto mode or using thumbnail preview in another mode in Epson Scan, the edges of your original may be cropped by about 0.2 inch (4.5 mm) from the edge of the indicated corner. Manually position your original facedown on the scanner glass. 2. Note: You can place multiple originals on...
... they are scanning in Full Auto mode or using thumbnail preview in another mode in Epson Scan, the edges of your original may be cropped by about 0.2 inch (4.5 mm) from the edge of the indicated corner. Manually position your original facedown on the scanner glass. 2. Note: You can place multiple originals on...
User Manual
Page 72
Click the Settings button. Print a test copy of the following options for 2-Sided Printing: • Manual (Long-edge binding) to print your double-sided print job by printing one side and prompting you want to flip the paper over on the ... paper over on the long edge to print the other side. 2. Follow any instructions displayed on the short edge to print the other side. • Manual (Short-edge binding) to print your double-sided print job by printing one side and prompting you to use. 4. Select one of your double-sided...
Click the Settings button. Print a test copy of the following options for 2-Sided Printing: • Manual (Long-edge binding) to print your double-sided print job by printing one side and prompting you want to flip the paper over on the ... paper over on the long edge to print the other side. 2. Follow any instructions displayed on the short edge to print the other side. • Manual (Short-edge binding) to print your double-sided print job by printing one side and prompting you to use. 4. Select one of your double-sided...

User Manual
Page 74
... on the paper, select the Center option. • Select the Zoom to option to reduce or enlarge your printer software. • Select Image Options to manually adjust the color correction settings or turn off color management in the % menu. 2. To add the following Color Correction options: • Select Automatic to automatically...
... on the paper, select the Center option. • Select the Zoom to option to reduce or enlarge your printer software. • Select Image Options to manually adjust the color correction settings or turn off color management in the % menu. 2. To add the following Color Correction options: • Select Automatic to automatically...

User Manual
Page 86
... every menu. • To disable the automatic update feature, select the Never option. 4. Click OK to check for updates manually. Selecting Basic Print Settings - Parent topic: Printing with your product software on Epson's support website. OS X Selecting Page Setup Settings - You see this window: 3. OS X Selecting Print Layout Options - OS X 86 Note...
... every menu. • To disable the automatic update feature, select the Never option. 4. Click OK to check for updates manually. Selecting Basic Print Settings - Parent topic: Printing with your product software on Epson's support website. OS X Selecting Page Setup Settings - You see this window: 3. OS X Selecting Print Layout Options - OS X 86 Note...

User Manual
Page 94
... Select one of flawed photos. ColorSync Prints using standard color profiles for Brightness, Contrast, Saturation, and individual color tones. Color Options Settings Manual Settings Lets you can also adjust the midtone density using the Gamma setting. Fix Photo Improves the color, contrast, and sharpness of the ...using only your product and paper to work, both eyes and the nose must be visible in the subject's face. Color Matching Settings EPSON Color Controls Lets you selected on the Color Matching and Color Options menus. Color Matching and Color Options - For this to help ...
... Select one of flawed photos. ColorSync Prints using standard color profiles for Brightness, Contrast, Saturation, and individual color tones. Color Options Settings Manual Settings Lets you can also adjust the midtone density using the Gamma setting. Fix Photo Improves the color, contrast, and sharpness of the ...using only your product and paper to work, both eyes and the nose must be visible in the subject's face. Color Matching Settings EPSON Color Controls Lets you selected on the Color Matching and Color Options menus. Color Matching and Color Options - For this to help ...

User Manual
Page 106
...and adjust them on the type of content you are scanning, selects settings for it, and saves your scanned image. Parent topic: Selecting Epson Scan Settings 106 You can also select various image adjustment options, and preview and size your scanned image. You can also select various ...in Full Auto Mode Scanning in Home Mode Scanning in Office Mode Scanning in various modes to customize your scan. Professional Mode You can manually customize all available settings, and preview and size your scanned image. You can also select various image adjustment options. Home Mode You can...
...and adjust them on the type of content you are scanning, selects settings for it, and saves your scanned image. Parent topic: Selecting Epson Scan Settings 106 You can also select various image adjustment options, and preview and size your scanned image. You can also select various ...in Full Auto Mode Scanning in Home Mode Scanning in Office Mode Scanning in various modes to customize your scan. Professional Mode You can manually customize all available settings, and preview and size your scanned image. You can also select various image adjustment options. Home Mode You can...

User Manual
Page 119
... Save, and click OK. The marquee is not available in Home Mode 119 • To resize the scan area, place your custom scan size. Note: Manually adjusting the marquee will be scanned. 4. The marquee only indicates the area of the image that is automatically proportioned for your cursor over the edge...
... Save, and click OK. The marquee is not available in Home Mode 119 • To resize the scan area, place your custom scan size. Note: Manually adjusting the marquee will be scanned. 4. The marquee only indicates the area of the image that is automatically proportioned for your cursor over the edge...

User Manual
Page 134
Note: Manually adjusting the marquee will be scanned. 4. You see this window: 5. Name the custom size, enter the size, click Save, and click OK. To create a scanned ...
Note: Manually adjusting the marquee will be scanned. 4. You see this window: 5. Name the custom size, enter the size, click Save, and click OK. To create a scanned ...
User Manual
Page 135
Parent topic: Selecting Epson Scan Settings Scan Resolution Guidelines If you plan to enlarge a scanned image so you can print it at a larger size, you may need to determine ... previewed images as a guide. If the Thumbnail checkbox is deselected, clicking the Preview button opens a normal preview. Normal preview A normal preview displays your image by Epson Scan. Parent topic: Scanning in their entirety so you can select the scanned image area and other settings...
Parent topic: Selecting Epson Scan Settings Scan Resolution Guidelines If you plan to enlarge a scanned image so you can print it at a larger size, you may need to determine ... previewed images as a guide. If the Thumbnail checkbox is deselected, clicking the Preview button opens a normal preview. Normal preview A normal preview displays your image by Epson Scan. Parent topic: Scanning in their entirety so you can select the scanned image area and other settings...

User Manual
Page 169
... to select more than one or more copies of the photo (up to print. 6. To select print settings for printing. 8. Press the + or - You must manually browse the photos if you cannot restart the slide show . 5. button to resume the slide show . Press the down arrow again to select one photo...
... to select more than one or more copies of the photo (up to print. 6. To select print settings for printing. 8. Press the + or - You must manually browse the photos if you cannot restart the slide show . 5. button to resume the slide show . Press the down arrow again to select one photo...

User Manual
Page 173
..., do one or more copies of the following: • To allow your photos, press the arrow buttons displayed to place photos in the layout manually, select Place photos manually and press the OK button. Press the + button to select a photo to 99). 11. Depending on the layout you selected, you want to...
..., do one or more copies of the following: • To allow your photos, press the arrow buttons displayed to place photos in the layout manually, select Place photos manually and press the OK button. Press the + button to select a photo to 99). 11. Depending on the layout you selected, you want to...
User Manual
Page 220
... Memory Card Problems Uninstall Your Product Software Where to Get Help Checking for Software Updates Periodically, it's a good idea to check Epson's support website for updates. You can also manually update the software by selecting Software Update here: • Accessing the Windows Desktop and right-clicking the product icon in the Windows...
... Memory Card Problems Uninstall Your Product Software Where to Get Help Checking for Software Updates Periodically, it's a good idea to check Epson's support website for updates. You can also manually update the software by selecting Software Update here: • Accessing the Windows Desktop and right-clicking the product icon in the Windows...
User Manual
Page 224
You can reset them all. 1. Check the other solutions in this screen: 224 You see this manual. Check the other solutions in this book or try uninstalling and reinstalling your printer software. • If the page prints but the nozzle ...not print, the product may have a problem with settings on the product control panel, you have a problem. settings. If they do not work, contact Epson. Press the home button, if necessary. 2. Parent topic: Solving Problems Related concepts Uninstall Your Product Software Print Head Cleaning Print Head Alignment Related references Where...
You can reset them all. 1. Check the other solutions in this screen: 224 You see this manual. Check the other solutions in this book or try uninstalling and reinstalling your printer software. • If the page prints but the nozzle ...not print, the product may have a problem with settings on the product control panel, you have a problem. settings. If they do not work, contact Epson. Press the home button, if necessary. 2. Parent topic: Solving Problems Related concepts Uninstall Your Product Software Print Head Cleaning Print Head Alignment Related references Where...
User Manual
Page 228
... product's MAC address to your device and enter a new password. Then follow the instructions that came with your product to enter your wireless network name manually. • If your router or access point has security enabled, determine the kind of the usable channels and change to a usable channel, if necessary. •...
... product's MAC address to your device and enter a new password. Then follow the instructions that came with your product to enter your wireless network name manually. • If your router or access point has security enabled, determine the kind of the usable channels and change to a usable channel, if necessary. •...
User Manual
Page 230
... the signal strength. See your router documentation or contact your Mac documentation for instructions. Note: If you are both using DHCP, set the IP address manually. • Make sure your router or access point documentation for instructions on . • Make sure you cannot print over the network. If your network does...
... the signal strength. See your router documentation or contact your Mac documentation for instructions. Note: If you are both using DHCP, set the IP address manually. • Make sure your router or access point documentation for instructions on . • Make sure you cannot print over the network. If your network does...

User Manual
Page 235
... correct paper size when you reprint. • If paper is Slow Parent topic: Solving Problems 235 Nothing Prints Product Icon Does Not Appear in this manual. Product Software Related tasks Cancelling Printing Using a Product Button Related topics Loading Paper Solving Problems Printing from your computer. Control Panel Paper or Media Type...
... correct paper size when you reprint. • If paper is Slow Parent topic: Solving Problems 235 Nothing Prints Product Icon Does Not Appear in this manual. Product Software Related tasks Cancelling Printing Using a Product Button Related topics Loading Paper Solving Problems Printing from your computer. Control Panel Paper or Media Type...

User Manual
Page 237
...position. (The ink cartridge holder should be beneath the cutout in the product case.) Note: If the print head is not in this manual to push it . 2. Click OK to the taskbar. 8. Click the Maintenance tab. 4. Parent topic: Solving Problems Printing from a ...follow these steps: 1. Parent topic: Solving Problems Printing from a Computer Related topics Replacing Ink Cartridges 237 Click the Monitoring Preferences button. 7. Select Enable EPSON Status Monitor 3, then click OK. 6. • Windows 7: Click and select Devices and Printers. • Windows Vista: Click , select Control ...
...position. (The ink cartridge holder should be beneath the cutout in the product case.) Note: If the print head is not in this manual to push it . 2. Click OK to the taskbar. 8. Click the Maintenance tab. 4. Parent topic: Solving Problems Printing from a ...follow these steps: 1. Parent topic: Solving Problems Printing from a Computer Related topics Replacing Ink Cartridges 237 Click the Monitoring Preferences button. 7. Select Enable EPSON Status Monitor 3, then click OK. 6. • Windows 7: Click and select Devices and Printers. • Windows Vista: Click , select Control ...


