User Manual
Page 28
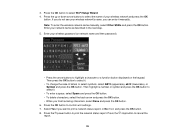
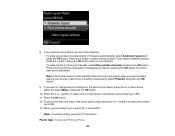
...the OK button to print the network status report. Press the power button to confirm wi-fi settings. 7. Note: To enter the wireless network name manually, select Other SSIDs and press the OK button. Press the OK button to print a network status report, or No if not, and press the OK... button. Select Yes if you finish entering characters, select Done and press the OK button. 6. Press the up or down arrow buttons to select it manually. Enter your wireless network's name, you can enter it . • To enter a space, select Space and press the OK button. • To delete characters, ...
...the OK button to print the network status report. Press the power button to confirm wi-fi settings. 7. Note: To enter the wireless network name manually, select Other SSIDs and press the OK button. Press the OK button to print a network status report, or No if not, and press the OK... button. Select Yes if you finish entering characters, select Done and press the OK button. 6. Press the up or down arrow buttons to select it manually. Enter your wireless network's name, you can enter it . • To enter a space, select Space and press the OK button. • To delete characters, ...

User Manual
Page 75
... option. 4. You see this feature. 1. Parent topic: Printing with Windows Related tasks Checking for Software Updates Printing with Mac OS X You can check for updates manually. Note: If you choose to disable the automatic update feature, you can print with your product using any Mac OS X printing program, as described in...
... option. 4. You see this feature. 1. Parent topic: Printing with Windows Related tasks Checking for Software Updates Printing with Mac OS X You can check for updates manually. Note: If you choose to disable the automatic update feature, you can print with your product using any Mac OS X printing program, as described in...
User Manual
Page 83
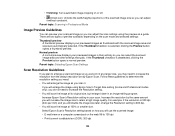
..., contrast, and sharpness of the available options. Off (No Color Adjustment) Turns off color management. Color Options Settings Manual Settings Lets you select manual color adjustments. Click the arrow next to Advanced Settings and select the Fix Red-Eye setting to reduce or remove redeye... printer software, or turn off Fix Photo to retain the special color effects. If your application software. 83 Color Matching Settings EPSON Color Controls Lets you manage color using the Gamma setting. Color Matching and Color Options - Depending on the selected color mode,...
..., contrast, and sharpness of the available options. Off (No Color Adjustment) Turns off color management. Color Options Settings Manual Settings Lets you select manual color adjustments. Click the arrow next to Advanced Settings and select the Fix Red-Eye setting to reduce or remove redeye... printer software, or turn off Fix Photo to retain the special color effects. If your application software. 83 Color Matching Settings EPSON Color Controls Lets you manage color using the Gamma setting. Color Matching and Color Options - Depending on the selected color mode,...

User Manual
Page 94
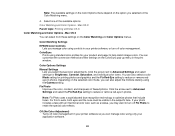
Professional Mode You can also select various image adjustment options. You can manually customize all available settings, and preview and size your scanned image. Home Mode You can also select various image adjustment options and preview your ... you are scanning. Full Auto Mode This mode automatically detects the type of control over your scanned image. Related topics Selecting Epson Scan Settings Selecting Epson Scan Settings After starting Epson Scan, you can quickly scan text documents and adjust them on the type of content you are scanning, selects settings for...
Professional Mode You can also select various image adjustment options. You can manually customize all available settings, and preview and size your scanned image. Home Mode You can also select various image adjustment options and preview your ... you are scanning. Full Auto Mode This mode automatically detects the type of control over your scanned image. Related topics Selecting Epson Scan Settings Selecting Epson Scan Settings After starting Epson Scan, you can quickly scan text documents and adjust them on the type of content you are scanning, selects settings for...

User Manual
Page 106
The marquee only indicates the area of the image that will not change the target size of the marquee, then click and drag the edge where you want it . • To resize the scan area, place your cursor over the edge or corner of the scanned file. Note: Manually adjusting the marquee will be scanned. 106 3. Do the following, as necessary, to work with the selected scan area: • To move the marquee, click inside the scan area and drag the marquee where you want it .
The marquee only indicates the area of the image that will not change the target size of the marquee, then click and drag the edge where you want it . • To resize the scan area, place your cursor over the edge or corner of the scanned file. Note: Manually adjusting the marquee will be scanned. 106 3. Do the following, as necessary, to work with the selected scan area: • To move the marquee, click inside the scan area and drag the marquee where you want it .

User Manual
Page 121
The marquee only indicates the area of the marquee, then click and drag the edge where you want it . • To resize the scan area, place your cursor over the edge or corner of the image that will not change the target size of the scanned file. 3. Do the following, as necessary, to work with the selected scan area: • To move the marquee, click inside the scan area and drag the marquee where you want it . Note: Manually adjusting the marquee will be scanned. 121
The marquee only indicates the area of the marquee, then click and drag the edge where you want it . • To resize the scan area, place your cursor over the edge or corner of the image that will not change the target size of the scanned file. 3. Do the following, as necessary, to work with the selected scan area: • To move the marquee, click inside the scan area and drag the marquee where you want it . Note: Manually adjusting the marquee will be scanned. 121
User Manual
Page 123
... displays your scan. If the Thumbnail checkbox is 300 dpi (dots per inch) and you can select the scanned image area and other settings manually. Increase Epson Scan's Resolution setting in your previewed images in Professional Mode Image Preview Guidelines You can adjust the scan settings using...you do not need : • You will use the scanned image: • E-mail/view on a computer screen/post on how you can adjust it . Select Epson Scan's Resolution setting based on the web: 96 to 150 dpi • Print/convert to 600 dpi. • You will enlarge the image using the...
... displays your scan. If the Thumbnail checkbox is 300 dpi (dots per inch) and you can select the scanned image area and other settings manually. Increase Epson Scan's Resolution setting in your previewed images in Professional Mode Image Preview Guidelines You can adjust the scan settings using...you do not need : • You will use the scanned image: • E-mail/view on a computer screen/post on how you can adjust it . Select Epson Scan's Resolution setting based on the web: 96 to 150 dpi • Print/convert to 600 dpi. • You will enlarge the image using the...

User Manual
Page 139
... one or more copies of the photo (up to resume the slide show . Press OK to select a photo to pause the slide show. You must manually browse the photos if you cannot restart the slide show . 5. To select print settings for printing, press the arrow buttons and repeat the selections above...
... one or more copies of the photo (up to resume the slide show . Press OK to select a photo to pause the slide show. You must manually browse the photos if you cannot restart the slide show . 5. To select print settings for printing, press the arrow buttons and repeat the selections above...
User Manual
Page 143
..., press the start button. Press the + or - buttons to select the number (up or down arrow buttons to place photos in the layout manually, select Place photos manually and press the OK button. When you need to select Finished, and press the OK button. 9. buttons to select one or more than one...
..., press the start button. Press the + or - buttons to select the number (up or down arrow buttons to place photos in the layout manually, select Place photos manually and press the OK button. When you need to select Finished, and press the OK button. 9. buttons to select one or more than one...
User Manual
Page 189
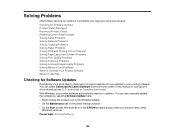
... Software Where to Get Help Checking for Software Updates Periodically, it's a good idea to check Epson's support website for solutions to your product software. You can also manually update the software by selecting Software Update here: • Right-clicking the product icon in the... Solving Setup Problems Solving Network Problems Solving Copying Problems Solving Paper Problems Solving Problems Printing from the Home screen of this manual or visit Epson's driver download site (U.S. Solving Problems Check these sections for free updates to problems you may have using your product. ...
... Software Where to Get Help Checking for Software Updates Periodically, it's a good idea to check Epson's support website for solutions to your product software. You can also manually update the software by selecting Software Update here: • Right-clicking the product icon in the... Solving Setup Problems Solving Network Problems Solving Copying Problems Solving Paper Problems Solving Problems Printing from the Home screen of this manual or visit Epson's driver download site (U.S. Solving Problems Check these sections for free updates to problems you may have using your product. ...
User Manual
Page 192
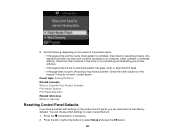
... product check: • If the page prints and the nozzle check pattern is complete, the product is operating properly. Check the other solutions in this manual. You can reset them all. 1. Press the left or right arrow buttons to their factory defaults. Press the home button, if necessary. 2. If they do...
... product check: • If the page prints and the nozzle check pattern is complete, the product is operating properly. Check the other solutions in this manual. You can reset them all. 1. Press the left or right arrow buttons to their factory defaults. Press the home button, if necessary. 2. If they do...
User Manual
Page 196
... is using one of the usable channels and change to a usable channel, if necessary. • If you may need to enter your wireless network name manually. • If your router or access point has security enabled, determine the kind of the Internet Protocol. Note: Avoid placing your product near a microwave oven...
... is using one of the usable channels and change to a usable channel, if necessary. • If you may need to enter your wireless network name manually. • If your router or access point has security enabled, determine the kind of the Internet Protocol. Note: Avoid placing your product near a microwave oven...

User Manual
Page 198
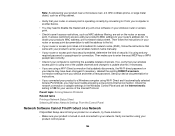
...Network Problems Related tasks Printing a Network Status Sheet Selecting Wireless Network Settings From the Control Panel Cannot Scan Over a Network If you cannot start Epson Scan for scanning over a network, try these solutions: • Make sure that your product is turned on. • Make sure you ...check any cable connections and turn it back on the product's LCD screen, make sure the product's IP address is set the IP address manually. • Make sure your computer and product are both using DHCP, set correctly for instructions on disabling the Privacy Separator function. •...
...Network Problems Related tasks Printing a Network Status Sheet Selecting Wireless Network Settings From the Control Panel Cannot Scan Over a Network If you cannot start Epson Scan for scanning over a network, try these solutions: • Make sure that your product is turned on. • Make sure you ...check any cable connections and turn it back on the product's LCD screen, make sure the product's IP address is set the IP address manually. • Make sure your computer and product are both using DHCP, set correctly for instructions on disabling the Privacy Separator function. •...
User Manual
Page 204
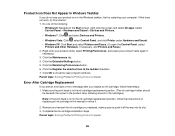
...Solving Problems Printing from a Computer Error After Cartridge Replacement If you see your product icon in the Windows taskbar, first try this manual to the cartridges.) Note: If the print head is in the ink cartridge replacement position. (The ink cartridge holder should be ... and select Devices and Printers. • Windows Vista: Click , select Control Panel, and click Printer under Hardware and Sound. • Windows XP: Click Start and select Printers and Faxes. (Or open program windows. Complete the ink cartridge installation steps. Right-click your product name, select ...
...Solving Problems Printing from a Computer Error After Cartridge Replacement If you see your product icon in the Windows taskbar, first try this manual to the cartridges.) Note: If the print head is in the ink cartridge replacement position. (The ink cartridge holder should be ... and select Devices and Printers. • Windows Vista: Click , select Control Panel, and click Printer under Hardware and Sound. • Windows XP: Click Start and select Printers and Faxes. (Or open program windows. Complete the ink cartridge installation steps. Right-click your product name, select ...
Product Specifications
Page 3
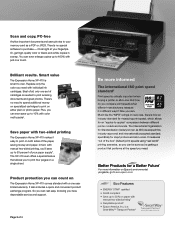
... printing, you'll save up to 400% with two-sided printing The Expression Home XP-410 makes it in -ones. Much like the "MPG" ratings on The Expression Home XP-410 comes standard with manual two-sided printing4 • Recyclable product5 • Epson America, Inc. Replace only the color you compare print speeds when 4.5 different manufacturers...
... printing, you'll save up to 400% with two-sided printing The Expression Home XP-410 makes it in -ones. Much like the "MPG" ratings on The Expression Home XP-410 comes standard with manual two-sided printing4 • Recyclable product5 • Epson America, Inc. Replace only the color you compare print speeds when 4.5 different manufacturers...
Quick Guide and Warranty
Page 18
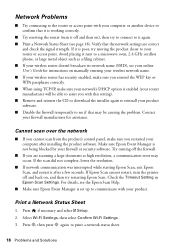
...If your wireless router doesn't broadcast its network name (SSID), see if that may occur. Contact your firewall manufacturer for instructions on manually entering your wireless network name. ■ If your wireless router has security enabled, make sure you are correct and check the ...select F Setup. 2. If the scan did not complete, lower the resolution. ■ If network communication was interrupted while starting Epson Scan, exit Epson Scan, and restart it after installing the product software. Verify that the network settings are scanning a large document at high resolution, ...
...If your wireless router doesn't broadcast its network name (SSID), see if that may occur. Contact your firewall manufacturer for instructions on manually entering your wireless network name. ■ If your wireless router has security enabled, make sure you are correct and check the ...select F Setup. 2. If the scan did not complete, lower the resolution. ■ If network communication was interrupted while starting Epson Scan, exit Epson Scan, and restart it after installing the product software. Verify that the network settings are scanning a large document at high resolution, ...


