PostScript Printing Information
Page 1
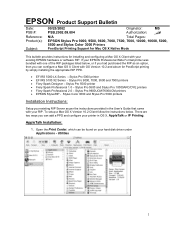
... under Applications - Stylus Pro 5500 printer • Fiery Spark Professional 1.0 - Utilities 1 Stylus Pro 5000 printer • EFI RS 5100 X2 Series - EPSON Product Support Bulletin Date: PSB #: Reference: Product(s): Subject: 09/25/2002 Originator: MS PSB.2002.09.004 Authorization: N/A Total Pages: EPSON Stylus Pro 9000, 9500, 9600, 7000, 7500, 7600, 10000, 10600, 5000, 5500 and Stylus Color 3000 Printers PostScript Printing Support for...
... under Applications - Stylus Pro 5500 printer • Fiery Spark Professional 1.0 - Utilities 1 Stylus Pro 5000 printer • EFI RS 5100 X2 Series - EPSON Product Support Bulletin Date: PSB #: Reference: Product(s): Subject: 09/25/2002 Originator: MS PSB.2002.09.004 Authorization: N/A Total Pages: EPSON Stylus Pro 9000, 9500, 9600, 7000, 7500, 7600, 10000, 10600, 5000, 5500 and Stylus Color 3000 Printers PostScript Printing Support for...
PostScript Printing Information
Page 2
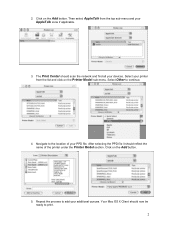
Select Other to add your devices. Repeat the process to continue. 4. Click on the Add button. The Print Center should now be ready to the location of the printer under the Printer Model section. Your Mac OS X Client should scan the network and find all your additional queues. 2. Click on the Add button. 5. After selecting the PPD file it should reflect the name of your AppleTalk zone if applicable. 3. Select your printer from the top sub-menu and your PPD file. Navigate to print. 2 Then select AppleTalk from the list and click on the Printer Model sub-menu.
Select Other to add your devices. Repeat the process to continue. 4. Click on the Add button. The Print Center should now be ready to the location of the printer under the Printer Model section. Your Mac OS X Client should scan the network and find all your additional queues. 2. Click on the Add button. 5. After selecting the PPD file it should reflect the name of your AppleTalk zone if applicable. 3. Select your printer from the top sub-menu and your PPD file. Navigate to print. 2 Then select AppleTalk from the list and click on the Printer Model sub-menu.
PostScript Printing Information
Page 3
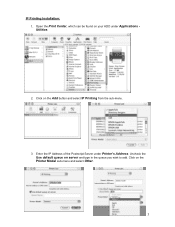
Click on your HDD under Printer's Address. Open the Print Center, which can be found on the Printer Model sub-menu and select Other. 3 Click on server and type in the queue you wish to add. IP Printing Installation: 1. Uncheck the Use default queue on the Add button and select IP Printing from the sub-menu. 3. Enter the IP Address of the Postscript Server under Applications - Utilities 2.
Click on your HDD under Printer's Address. Open the Print Center, which can be found on the Printer Model sub-menu and select Other. 3 Click on server and type in the queue you wish to add. IP Printing Installation: 1. Uncheck the Use default queue on the Add button and select IP Printing from the sub-menu. 3. Enter the IP Address of the Postscript Server under Applications - Utilities 2.

PostScript Printing Information
Page 4
... the PPD file it must be ready to print. Note: The StylusRIP does not have a separate folder on the Add button. 5. In order to add your PPD file. Navigate to select the printer's PPD. Click on the CD to the location of the printer under the Printer Model section. Repeat the process to select...
... the PPD file it must be ready to print. Note: The StylusRIP does not have a separate folder on the Add button. 5. In order to add your PPD file. Navigate to select the printer's PPD. Click on the CD to the location of the printer under the Printer Model section. Repeat the process to select...

Printer Guide
Page 2
... SEIKO EPSON CORPORATION. DX3, PhotoEnhance, SelecType, EPSON Archival, EPSON Photographic Dye, EPSON UltraChrome, and EPSON Store are registered trademarks of any and all rights in any form or by any consumable products other printers. Part Number: CPD-15012 9/02 ii EPSON is ... marks. Trademarks EPSON, EPSON Stylus, ESC/P, and Micro Piezo are trademarks and EPSON Preferred is designed only for damages, losses, costs, or expenses incurred by purchaser or third parties as Original EPSON Products or EPSON Approved Products by Epson America, Inc. Printed on recycled paper...
... SEIKO EPSON CORPORATION. DX3, PhotoEnhance, SelecType, EPSON Archival, EPSON Photographic Dye, EPSON UltraChrome, and EPSON Store are registered trademarks of any and all rights in any form or by any consumable products other printers. Part Number: CPD-15012 9/02 ii EPSON is ... marks. Trademarks EPSON, EPSON Stylus, ESC/P, and Micro Piezo are trademarks and EPSON Preferred is designed only for damages, losses, costs, or expenses incurred by purchaser or third parties as Original EPSON Products or EPSON Approved Products by Epson America, Inc. Printed on recycled paper...

Printer Guide
Page 4
... Requirements 5 ENERGY STAR Compliance 6 Important Safety Instructions 6 Ink Cartridge Safety Instructions 7 1 Setting Up the Printer Unpacking and Assembly 1-2 Unpacking the Stand 1-2 Assembling the Stand 1-3 Unpacking the Printer 1-4 Mounting the Printer on the Stand 1-5 Attaching the Basket 1-8 Connecting the Power...Ethernet Port 1-25 Installing the Printer Software 1-26 Installing the Software for Macintosh 1-26 Installing the Software for Windows 1-29 Setting Up Your FireWire Port 1-32 Optimizing Print Speed 1-33 Using the Photo Printing Accelerator 1-33 Using the Speed ...
... Requirements 5 ENERGY STAR Compliance 6 Important Safety Instructions 6 Ink Cartridge Safety Instructions 7 1 Setting Up the Printer Unpacking and Assembly 1-2 Unpacking the Stand 1-2 Assembling the Stand 1-3 Unpacking the Printer 1-4 Mounting the Printer on the Stand 1-5 Attaching the Basket 1-8 Connecting the Power...Ethernet Port 1-25 Installing the Printer Software 1-26 Installing the Software for Macintosh 1-26 Installing the Software for Windows 1-29 Setting Up Your FireWire Port 1-32 Optimizing Print Speed 1-33 Using the Photo Printing Accelerator 1-33 Using the Speed ...
Printer Guide
Page 5
... Up on a Windows XP Network 1-46 Setting Up on a Windows NT 4.0 or Windows 2000 Network . 1-49 2 Using Paper and Other Media Selecting Paper for Your Printer 2-2 Paper Handling Guidelines 2-2 Printing on EPSON Media 2-3 Selecting the Media Type Setting 2-7 Using Roll Paper 2-11 Loading Paper onto the Spindle 2-11 Loading Roll Paper for...
... Up on a Windows XP Network 1-46 Setting Up on a Windows NT 4.0 or Windows 2000 Network . 1-49 2 Using Paper and Other Media Selecting Paper for Your Printer 2-2 Paper Handling Guidelines 2-2 Printing on EPSON Media 2-3 Selecting the Media Type Setting 2-7 Using Roll Paper 2-11 Loading Paper onto the Spindle 2-11 Loading Roll Paper for...
Printer Guide
Page 6
...Checking Printer Status 3-14 Selecting Configuration Options 3-15 4 Printing with EPSON Drivers for Windows Choosing Basic Print Options 4-2 Choosing Paper and Layout Options 4-5 Choosing Advanced Print Options 4-7 Color Management Settings 4-9 Paper Configuration Settings 4-10 Managing Print Jobs ...4-14 5 Maintaining and Transporting the Printer Checking Printer Status and Part Life 5-2 Printing a Status Check 5-2 Checking Ink Levels and Component Life 5-3 Running a Cleaning Cycle 5-4 Printing a Nozzle Check Pattern 5-4 Cleaning the Print Head from the Control Panel 5-5 Performing...
...Checking Printer Status 3-14 Selecting Configuration Options 3-15 4 Printing with EPSON Drivers for Windows Choosing Basic Print Options 4-2 Choosing Paper and Layout Options 4-5 Choosing Advanced Print Options 4-7 Color Management Settings 4-9 Paper Configuration Settings 4-10 Managing Print Jobs ...4-14 5 Maintaining and Transporting the Printer Checking Printer Status and Part Life 5-2 Printing a Status Check 5-2 Checking Ink Levels and Component Life 5-3 Running a Cleaning Cycle 5-4 Printing a Nozzle Check Pattern 5-4 Cleaning the Print Head from the Control Panel 5-5 Performing...

Printer Guide
Page 7
viii | Contents Transporting or Storing the Printer 5-24 Preparing the Printer for Shipment 5-24 Moving the Printer on the Stand 5-26 Replacing the Waste Ink System 5-27 6 Resolving Problems Diagnosing Problems 6-1 Using the Control Panel to Check the Printer 6-2 Improving Print Quality 6-4 Solving Operational Problems 6-7 Solving Miscellaneous Printing Problems 6-8 Solving Paper Problems 6-10 Solving Roll Paper Feed Problems...
viii | Contents Transporting or Storing the Printer 5-24 Preparing the Printer for Shipment 5-24 Moving the Printer on the Stand 5-26 Replacing the Waste Ink System 5-27 6 Resolving Problems Diagnosing Problems 6-1 Using the Control Panel to Check the Printer 6-2 Improving Print Quality 6-4 Solving Operational Problems 6-7 Solving Miscellaneous Printing Problems 6-8 Solving Paper Problems 6-10 Solving Roll Paper Feed Problems...
Printer Guide
Page 8
...daily use-loading paper, replacing ink cartridges, running cleaning cycles, aligning the print head, and clearing paper jams. Attach it to your printer. 1 With its innovative ink, print head, and print engine technologies, the Stylus Pro 10600 delivers truly photographic output at print speeds faster than you for ...choosing the EPSON Stylus Pro 10600-the most out of its kind. Introduction Thank you ever thought possible. TIP Tips contain additional hints on page 3. Note Notes contain important information about the printer, drivers, and utility software. Your printer is ...
...daily use-loading paper, replacing ink cartridges, running cleaning cycles, aligning the print head, and clearing paper jams. Attach it to your printer. 1 With its innovative ink, print head, and print engine technologies, the Stylus Pro 10600 delivers truly photographic output at print speeds faster than you for ...choosing the EPSON Stylus Pro 10600-the most out of its kind. Introduction Thank you ever thought possible. TIP Tips contain additional hints on page 3. Note Notes contain important information about the printer, drivers, and utility software. Your printer is ...
Printer Guide
Page 9
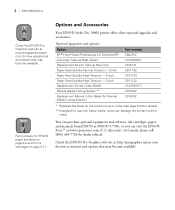
sales only). Check the EPSON Pro Graphics web site at http://prographics.epson.com for ink cartridges on page 2-2 and for new accessories and options that may become available. Note Part numbers for EPSON paper are listed on page 5-11. com for dealer referral. Options and Accessories Your EPSON Stylus Pro 10600 printer offers these optional upgrades and accessories: Optional equipment...
sales only). Check the EPSON Pro Graphics web site at http://prographics.epson.com for ink cartridges on page 2-2 and for new accessories and options that may become available. Note Part numbers for EPSON paper are listed on page 5-11. com for dealer referral. Options and Accessories Your EPSON Stylus Pro 10600 printer offers these optional upgrades and accessories: Optional equipment...

Printer Guide
Page 10
... Canada, please call (562) 276-1305. At this site, you can purchase ink cartridges, paper, and accessories from EPSON at (800) 873-7766, or by visiting the EPSON Store at http://support.epson.com. EPSON also provides technical assistance 24 hours a day through Friday, and 7 AM to... change without notice. sales only). You'll also need your printer. TIP If you experience difficulty with your printer serial number and proof of professional printing products through the EPSON PreferredSM Protection Plan. Dial (888) 377-6611, 6 AM to 8 PM, Pacific Time,...
... Canada, please call (562) 276-1305. At this site, you can purchase ink cartridges, paper, and accessories from EPSON at (800) 873-7766, or by visiting the EPSON Store at http://support.epson.com. EPSON also provides technical assistance 24 hours a day through Friday, and 7 AM to... change without notice. sales only). You'll also need your printer. TIP If you experience difficulty with your printer serial number and proof of professional printing products through the EPSON PreferredSM Protection Plan. Dial (888) 377-6611, 6 AM to 8 PM, Pacific Time,...
Printer Guide
Page 11
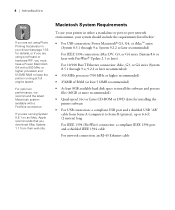
... have a Power Macintosh G4 with a FireWire connection. If you are using Photo Printing Accelerator in either a standalone or peer-to-peer network environment, your driver (see page 1-33 for installing the printer software • For USB connection: a compliant USB port and a shielded USB...series (System 8.5.1 through 9.x; 9.2.2 or later recommended) • 350 MHz processor (700 MHz or higher recommended) • 256MB of RAM (at full engine speed. System 9.2.2 or later recommended) For IEEE 1394 connection: iMac DV, G3, or G4 series (System 8.6 or later with FireWire® Update ...
... have a Power Macintosh G4 with a FireWire connection. If you are using Photo Printing Accelerator in either a standalone or peer-to-peer network environment, your driver (see page 1-33 for installing the printer software • For USB connection: a compliant USB port and a shielded USB...series (System 8.5.1 through 9.x; 9.2.2 or later recommended) • 350 MHz processor (700 MHz or higher recommended) • 256MB of RAM (at full engine speed. System 9.2.2 or later recommended) For IEEE 1394 connection: iMac DV, G3, or G4 series (System 8.6 or later with FireWire® Update ...
Printer Guide
Page 12
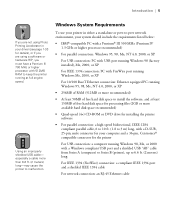
... If you are not using Photo Printing Accelerator in either a standalone or peer-to-peer network environment, your computer and a 36-pin, Centronics® compatible connector for the printer For USB connection: a computer running... more available hard disk space recommended) • Quad-speed (4×) CD-ROM or DVD drive for installing the printer software • For parallel connection: a high-speed bidirectional, IEEE-1284 compliant parallel cable, 6 to 10 ft....software, and at full engine speed. especially a cable more than 6.6 ft. (2 meters) long-may cause the printer to malfunction.
... If you are not using Photo Printing Accelerator in either a standalone or peer-to-peer network environment, your computer and a 36-pin, Centronics® compatible connector for the printer For USB connection: a computer running... more available hard disk space recommended) • Quad-speed (4×) CD-ROM or DVD drive for installing the printer software • For parallel connection: a high-speed bidirectional, IEEE-1284 compliant parallel cable, 6 to 10 ft....software, and at full engine speed. especially a cable more than 6.6 ft. (2 meters) long-may cause the printer to malfunction.
Printer Guide
Page 13
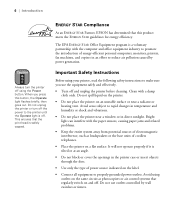
...to properly grounded power outlets. 6 | Introduction ENERGY STAR Compliance As an ENERGY STAR Partner, EPSON has determined that this button, the Operate light flashes briefly, then goes out. Clean with ...• Keep the entire system away from potential sources of energy-efficient personal computers, monitors, printers, fax machines, and copiers in direct sunlight. When you use outlets controlled by power generation... the base units of power source indicated on a flat surface. This ensures that the print head is tilted or at an angle. • Do not block or cover the openings...
...to properly grounded power outlets. 6 | Introduction ENERGY STAR Compliance As an ENERGY STAR Partner, EPSON has determined that this button, the Operate light flashes briefly, then goes out. Clean with ...• Keep the entire system away from potential sources of energy-efficient personal computers, monitors, printers, fax machines, and copiers in direct sunlight. When you use outlets controlled by power generation... the base units of power source indicated on a flat surface. This ensures that the print head is tilted or at an angle. • Do not block or cover the openings...
Printer Guide
Page 14
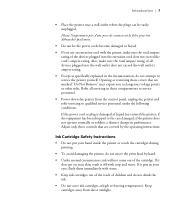
...water. • Keep ink cartridges out of the reach of all devices plugged into the extension cord does not exceed the cord's ampere rating. if liquid has entered the printer; If it does get on your hand inside the printer or touch the cartridges during printing. • To avoid...• If you to dangerous voltage points or other risks. Adjust only those compartments to service personnel. • Power down the printer from direct sunlight. 7 Ink Cartridge Safety Instructions • Do not put your skin, wash it gets in those controls that are covered by hand. •...
...water. • Keep ink cartridges out of the reach of all devices plugged into the extension cord does not exceed the cord's ampere rating. if liquid has entered the printer; If it does get on your hand inside the printer or touch the cartridges during printing. • To avoid...• If you to dangerous voltage points or other risks. Adjust only those compartments to service personnel. • Power down the printer from direct sunlight. 7 Ink Cartridge Safety Instructions • Do not put your skin, wash it gets in those controls that are covered by hand. •...

Printer Guide
Page 16
...following information: • Unpacking and assembly • Connecting the power cord • Installing the ink cartridges • Loading the roll paper • Connecting the printer to direct sunlight, excessive heat, moisture, or dust. You should allow at least two hours for... • Installing the printer software • Optimizing print speed • Running a nozzle check • Aligning the print head • Setting up the printer on a network 1-1 Setting Up the Printer | 1-1 Chapter 1: Setting Up the Printer Note When choosing a place for the printer, leave adequate room for...
...following information: • Unpacking and assembly • Connecting the power cord • Installing the ink cartridges • Loading the roll paper • Connecting the printer to direct sunlight, excessive heat, moisture, or dust. You should allow at least two hours for... • Installing the printer software • Optimizing print speed • Running a nozzle check • Aligning the print head • Setting up the printer on a network 1-1 Setting Up the Printer | 1-1 Chapter 1: Setting Up the Printer Note When choosing a place for the printer, leave adequate room for...

Printer Guide
Page 17
Unpacking the Stand After unpacking the stand, make sure you have all these steps to unpack and assemble your printer. 1-2 | Setting Up the Printer Unpacking and Assembly Follow these items: Upright supports Cross bar Metal rods, long Metal rods, short Allen wrench Paper basket Paper supports (10) Bolts Wing nuts and washers 1-2
Unpacking the Stand After unpacking the stand, make sure you have all these steps to unpack and assemble your printer. 1-2 | Setting Up the Printer Unpacking and Assembly Follow these items: Upright supports Cross bar Metal rods, long Metal rods, short Allen wrench Paper basket Paper supports (10) Bolts Wing nuts and washers 1-2
Printer Guide
Page 18
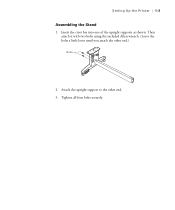
Tighten all four bolts securely. 1-3 Then attach it with two bolts using the included Allen wrench. (Leave the bolts a little loose until you attach the other end. 3. Insert the cross bar into one of the upright supports as shown. Setting Up the Printer | 1-3 Assembling the Stand 1. Attach the upright support to the other end.) Bolts 2.
Tighten all four bolts securely. 1-3 Then attach it with two bolts using the included Allen wrench. (Leave the bolts a little loose until you attach the other end. 3. Insert the cross bar into one of the upright supports as shown. Setting Up the Printer | 1-3 Assembling the Stand 1. Attach the upright support to the other end.) Bolts 2.
Printer Guide
Page 19
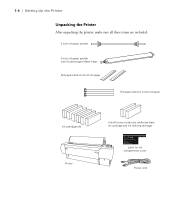
1-4 | Setting Up the Printer Unpacking the Printer After unpacking the printer, make sure all these items are included: 3-inch roll paper spindle 2-inch roll paper spindle with Doubleweight Matte Paper Roll paper belts for 2-inch roll paper Roll paper belts for 3-inch roll paper Ink cartridges (6) Printer UltraChrome model only: additional black ink cartridge and ink draining cartridge Label for ink compartment cover Power cord 1-4
1-4 | Setting Up the Printer Unpacking the Printer After unpacking the printer, make sure all these items are included: 3-inch roll paper spindle 2-inch roll paper spindle with Doubleweight Matte Paper Roll paper belts for 2-inch roll paper Roll paper belts for 3-inch roll paper Ink cartridges (6) Printer UltraChrome model only: additional black ink cartridge and ink draining cartridge Label for ink compartment cover Power cord 1-4

