Printer Basics
Page 25
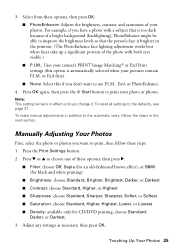
... or Darkest. 3. Adjust any settings as necessary, then press OK. Manually Adjusting Your Photos First, select the photo or photos you want to choose one of your photos. Press the Print Settings button. 2. To reset all settings to the automatic ones, follow these options, then press r. ■ Filter...; Press d or u to use P.I .M. 3. or Exif data). ■ None: Select this option is automatically selected when your photo or photos. Note: This setting remains in effect until you don't want to improve the brightness levels so that the person's face is brighter in...
... or Darkest. 3. Adjust any settings as necessary, then press OK. Manually Adjusting Your Photos First, select the photo or photos you want to choose one of your photos. Press the Print Settings button. 2. To reset all settings to the automatic ones, follow these options, then press r. ■ Filter...; Press d or u to use P.I .M. 3. or Exif data). ■ None: Select this option is automatically selected when your photo or photos. Note: This setting remains in effect until you don't want to improve the brightness levels so that the person's face is brighter in...
Printer Basics
Page 26
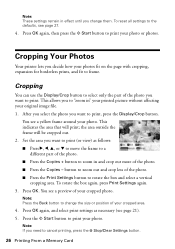
... remain in effect until you want to print. Cropping Your Photos Your printer lets you to "zoom in" your printed picture without affecting your cropped photo. You see a preview of the photo you change the size or position of the photo. ■ Press the Print Settings button to rotate the ...cropping area. the area outside the frame will print; You see a yellow frame around your photo. To reset all settings to frame. Press OK again, then press the x Start button to print your photo. This allows you decide how your cropped area. 4. This indicates the area that will be...
... remain in effect until you want to print. Cropping Your Photos Your printer lets you to "zoom in" your printed picture without affecting your cropped photo. You see a preview of the photo you change the size or position of the photo. ■ Press the Print Settings button to rotate the ...cropping area. the area outside the frame will print; You see a yellow frame around your photo. To reset all settings to frame. Press OK again, then press the x Start button to print your photo. This allows you decide how your cropped area. 4. This indicates the area that will be...
Printer Basics
Page 28
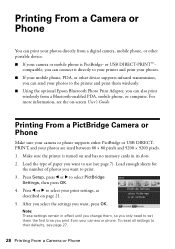
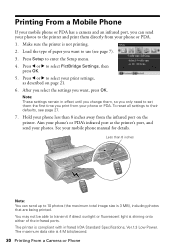
... printer and print them wirelessly. ■ Using the optional Epson Bluetooth Photo Print Adapter, you can also print wirelessly from a Bluetooth-enabled PDA, mobile phone, or computer. Load enough sheets for the number of paper you want to their defaults, see the on-screen User's Guide. To reset ...infrared transmission, you can send your camera or phone. Load the type of photos you want to your printer and print your photos. ■ If your mobile phone, PDA, or other portable device. ■ If your photos are sized between 80 × 80 pixels and 9200 × 9200 pixels...
... printer and print them wirelessly. ■ Using the optional Epson Bluetooth Photo Print Adapter, you can also print wirelessly from a Bluetooth-enabled PDA, mobile phone, or computer. Load enough sheets for the number of paper you want to their defaults, see the on-screen User's Guide. To reset ...infrared transmission, you can send your camera or phone. Load the type of photos you want to your printer and print your photos. ■ If your mobile phone, PDA, or other portable device. ■ If your photos are sized between 80 × 80 pixels and 9200 × 9200 pixels...
Printer Basics
Page 30
...direct sunlight or fluorescent light is shining onto either of paper you want , press OK. Press Setup to the printer and print them directly from your photos to enter the Setup menu. 4. The printer is 4 M bits/second. 30 Printing From a Camera or Phone After you select the settings you want ... ports. Press l or r to set them , so you print from your print settings, as described on the printer. Note: These settings remain in effect until you change them the first time you only need to select your phone or PDA. 1. To reset all settings to their defaults, see page 7). 3.
...direct sunlight or fluorescent light is shining onto either of paper you want , press OK. Press Setup to the printer and print them directly from your photos to enter the Setup menu. 4. The printer is 4 M bits/second. 30 Printing From a Camera or Phone After you select the settings you want ... ports. Press l or r to set them , so you print from your print settings, as described on the printer. Note: These settings remain in effect until you change them the first time you only need to select your phone or PDA. 1. To reset all settings to their defaults, see page 7). 3.
Printer Basics
Page 71
...61 printing, 59 screen, 59 Proof sheet, printing, 18 Q Quality setting, 25 R Red eyes, removing, 24 Replacing ink cartridges, 51 to 56 Resetting default settings, 27 S Safety instructions, 63 to 64 Saturation, 25 Screen error messages, 57 to 58 problems, 59 safety instructions, 64 using, 6 Sepia..., 25 Setup button, 6 Sharpness, 25 Sizing photos, 26 to 27 Software ArcSoft PhotoImpression, 62 Epson Print CD, 31 Stop/Clear Settings button, 6 Stopping printing, 17, 41, 44 Storing prints, 11 T Technical support, 62 Touching...
...61 printing, 59 screen, 59 Proof sheet, printing, 18 Q Quality setting, 25 R Red eyes, removing, 24 Replacing ink cartridges, 51 to 56 Resetting default settings, 27 S Safety instructions, 63 to 64 Saturation, 25 Screen error messages, 57 to 58 problems, 59 safety instructions, 64 using, 6 Sepia..., 25 Setup button, 6 Sharpness, 25 Sizing photos, 26 to 27 Software ArcSoft PhotoImpression, 62 Epson Print CD, 31 Stop/Clear Settings button, 6 Stopping printing, 17, 41, 44 Storing prints, 11 T Technical support, 62 Touching...


