
Instruction Manual
Page 2
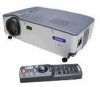
... accessories from their box, check that the following items are missing, contact your vendor or an Epson Service Center. • Projector main unit • Lens cover with cord • Remote control • Two remote control batteries (AA manganese, R6) • Power cord • Computer cable • A/V cable (red/white/yellow) • USB mouse cable...
... accessories from their box, check that the following items are missing, contact your vendor or an Epson Service Center. • Projector main unit • Lens cover with cord • Remote control • Two remote control batteries (AA manganese, R6) • Power cord • Computer cable • A/V cable (red/white/yellow) • USB mouse cable...
Instruction Manual
Page 3
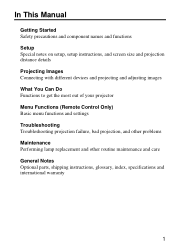
... details Projecting Images Connecting with different devices and projecting and adjusting images What You Can Do Functions to get the most out of your projector Menu Functions (Remote Control Only) Basic menu functions and settings Troubleshooting Troubleshooting projection failure, bad projection, and other problems Maintenance Performing lamp replacement and other routine maintenance...
... details Projecting Images Connecting with different devices and projecting and adjusting images What You Can Do Functions to get the most out of your projector Menu Functions (Remote Control Only) Basic menu functions and settings Troubleshooting Troubleshooting projection failure, bad projection, and other problems Maintenance Performing lamp replacement and other routine maintenance...

Instruction Manual
Page 4
... an External Audio Device 27 3.4 Projecting Images 28 3.5 Adjusting Images 32 3.6 Ending After the Projection 35 4. Getting Started 1.1 Safety Precautions 8 1.2 Component Names and Functions 12 1.3 Remote Control 15 2. Contents In This Manual 1 Contents 2 Features 4 1.
... an External Audio Device 27 3.4 Projecting Images 28 3.5 Adjusting Images 32 3.6 Ending After the Projection 35 4. Getting Started 1.1 Safety Precautions 8 1.2 Component Names and Functions 12 1.3 Remote Control 15 2. Contents In This Manual 1 Contents 2 Features 4 1.

Instruction Manual
Page 5
... Failures 58 6.2 When Indicators Do Not Help 60 7. Menu Functions (Remote Control Only) 5.1 Learning Basic Operations 46 5.2 Video Menu 47 5.3 Audio Menu 49 5.4 Effect Menu 50 5.5 Setting Menu 51 5.6 Advanced Menu 53 5.7 About Menu 54 5.8 Reset All Menu 55 6. Maintenance 7.1 Projector Cleaning, Lens Replacement, Air Intake Vent Cleaning 66 7.2 Lamp Replacement 68...
... Failures 58 6.2 When Indicators Do Not Help 60 7. Menu Functions (Remote Control Only) 5.1 Learning Basic Operations 46 5.2 Video Menu 47 5.3 Audio Menu 49 5.4 Effect Menu 50 5.5 Setting Menu 51 5.6 Advanced Menu 53 5.7 About Menu 54 5.8 Reset All Menu 55 6. Maintenance 7.1 Projector Cleaning, Lens Replacement, Air Intake Vent Cleaning 66 7.2 Lamp Replacement 68...

Instruction Manual
Page 6
...Stamp Horizontal bar 4 Wireless Mouse Remote Control for Computer Mouse Operations (see pages 33 and 51) This built-in well-illuminated areas. Presentation Effects Function (Remote control Effect button, see page 42) Use of your projector provides clear, sharp presentations even in... function allows easy correction of various projector functions, including cursor/stamp, horizontal bar display, and image ...
...Stamp Horizontal bar 4 Wireless Mouse Remote Control for Computer Mouse Operations (see pages 33 and 51) This built-in well-illuminated areas. Presentation Effects Function (Remote control Effect button, see page 42) Use of your projector provides clear, sharp presentations even in... function allows easy correction of various projector functions, including cursor/stamp, horizontal bar display, and image ...

Instruction Manual
Page 7
Automatic image sizing with Wide/Tele button (see page 40) Enlarges an image (from standard to 4x size vertically and horizontally). Enlargement Reduction 5 E-Zoom Function (Remote control E-Zoom button, see page 41) Allows image enlargement and reduction.
Automatic image sizing with Wide/Tele button (see page 40) Enlarges an image (from standard to 4x size vertically and horizontally). Enlargement Reduction 5 E-Zoom Function (Remote control E-Zoom button, see page 41) Allows image enlargement and reduction.

Instruction Manual
Page 9
1 Getting Started 1.1 Safety Precautions 8 1.2 Component Names and Functions 12 1.3 Remote Control 15 7
1 Getting Started 1.1 Safety Precautions 8 1.2 Component Names and Functions 12 1.3 Remote Control 15 7

Instruction Manual
Page 11
... penetration may cause fire or electric shock. Fire or electric shock may deform the unit or remote control or cause internal components to malfunction, leading to fire. 9 Heat may result. The projector cabinet contains lenses, a lamp, and many other high temperature location. Do not leave the ...unit or the remote control containing batteries in an outlet. • Insert firmly and completely. • Do not pull out with care. The intense light may damage your vendor or an Epson Service Center for repair. Handle the power cord ...
... penetration may cause fire or electric shock. Fire or electric shock may deform the unit or remote control or cause internal components to malfunction, leading to fire. 9 Heat may result. The projector cabinet contains lenses, a lamp, and many other high temperature location. Do not leave the ...unit or the remote control containing batteries in an outlet. • Insert firmly and completely. • Do not pull out with care. The intense light may damage your vendor or an Epson Service Center for repair. Handle the power cord ...

Instruction Manual
Page 14
1.2 Component Names and Functions Projector Unit [Front] Operation Display Indicator Operating Panel Problem/Alarm Display Indicator Wide/Tele Button Focus Ring Front Foot Remote Control Receiver [Side] Lens Cover Front Foot Speaker Air Exhaust Vent Power Terminal Foot Lever [Rear] Air Intake Vent Air Intake Vent Input/Output Terminals [Bottom] Front Foot Front Foot Rear Foot 12 Lamp Cover
1.2 Component Names and Functions Projector Unit [Front] Operation Display Indicator Operating Panel Problem/Alarm Display Indicator Wide/Tele Button Focus Ring Front Foot Remote Control Receiver [Side] Lens Cover Front Foot Speaker Air Exhaust Vent Power Terminal Foot Lever [Rear] Air Intake Vent Air Intake Vent Input/Output Terminals [Bottom] Front Foot Front Foot Rear Foot 12 Lamp Cover

Instruction Manual
Page 15
...image. Keystone (Select) Button (see pages 33, 51) Adjust when screen is distorted trapezoidally. USB Mouse Terminal (See page 39) Used when using the remote control as a wireless mouse. S-Video Terminal (See page 25) For input of S-video signal from computer. Mouse/Com Terminal (See page 39) Used... In Terminal (See page 24) For input of audio signal from A/V device. L/R Audio Terminals (See page 25) For input of audio signal from projector. [Wide/Tele Button (see page 41)] Press the right side of the button (Tele) to turn the power off. Audio Out Terminal (See page...
...image. Keystone (Select) Button (see pages 33, 51) Adjust when screen is distorted trapezoidally. USB Mouse Terminal (See page 39) Used when using the remote control as a wireless mouse. S-Video Terminal (See page 25) For input of S-video signal from computer. Mouse/Com Terminal (See page 39) Used... In Terminal (See page 24) For input of audio signal from A/V device. L/R Audio Terminals (See page 25) For input of audio signal from projector. [Wide/Tele Button (see page 41)] Press the right side of the button (Tele) to turn the power off. Audio Out Terminal (See page...

Instruction Manual
Page 16
... Executes an assigned effect function. R/C On Off Button (see page 29, 35) Switches projector power on and off . Volume Button (See page 34) Adjusts volume. [Back] Indicator Lights during signal output from remote control. Computer, S-Video, Video Button (See page 30) Switches to turn the power ... video source. Help Button (See page 44) Provides topic-specific explanation for scrolling, menu item selection, and as the right mouse button. Remote Control [Front] Freeze Button (See page 43) Temporarily stops a moving picture. Menu Button (See page 46) Displays or cancels menus. ...
... Executes an assigned effect function. R/C On Off Button (see page 29, 35) Switches projector power on and off . Volume Button (See page 34) Adjusts volume. [Back] Indicator Lights during signal output from remote control. Computer, S-Video, Video Button (See page 30) Switches to turn the power ... video source. Help Button (See page 44) Provides topic-specific explanation for scrolling, menu item selection, and as the right mouse button. Remote Control [Front] Freeze Button (See page 43) Temporarily stops a moving picture. Menu Button (See page 46) Displays or cancels menus. ...

Instruction Manual
Page 17
... conditions during use the remote control. • Point the remote control towards the screen to malfunction. • If the remote control malfunctions or stops operating, the batteries may not operate beyond certain distances and angles from the receiver on the projector unit. • Certain... screens may shorten the operating distance (approximately 10m (393.70inches) ) of direct sunlight, fluorescent light, and similar light sources. These may cause the remote control to reflect its signal during use. [...
... conditions during use the remote control. • Point the remote control towards the screen to malfunction. • If the remote control malfunctions or stops operating, the batteries may not operate beyond certain distances and angles from the receiver on the projector unit. • Certain... screens may shorten the operating distance (approximately 10m (393.70inches) ) of direct sunlight, fluorescent light, and similar light sources. These may cause the remote control to reflect its signal during use. [...

Instruction Manual
Page 18
... the battery cover. Be sure to match the polarity to insert batteries in the direction shown by the arrow. Press the battery cover into the remote control until it clicks firmly into place. 16 Slide the catch of batteries approximately every 3 months. 3. Remove the battery cover. Point: • Battery type (2) AA... manganese cells (R6) • Use of 30 minutes per day will require a change of the battery cover in your remote control. 1. Caution: Be sure to use fresh batteries of the same type as the old. 2.
... the battery cover. Be sure to match the polarity to insert batteries in the direction shown by the arrow. Press the battery cover into the remote control until it clicks firmly into place. 16 Slide the catch of batteries approximately every 3 months. 3. Remove the battery cover. Point: • Battery type (2) AA... manganese cells (R6) • Use of 30 minutes per day will require a change of the battery cover in your remote control. 1. Caution: Be sure to use fresh batteries of the same type as the old. 2.

Instruction Manual
Page 31
The operation display indicator begins to steady green. Depending on . The operation display indicator lights green. 29 Press the Power button to "On". 2. "No-Signal" is displayed. To use the remote control, turn the remote control R/C On Off switch to switch power on your settings, there may be no display. (See page 51) After approximately 30 seconds, the operation display indicator changes from flashing green to flash green, and projection begins. Projection When preparations are complete, you are ready for projection. 1.
The operation display indicator begins to steady green. Depending on . The operation display indicator lights green. 29 Press the Power button to "On". 2. "No-Signal" is displayed. To use the remote control, turn the remote control R/C On Off switch to switch power on your settings, there may be no display. (See page 51) After approximately 30 seconds, the operation display indicator changes from flashing green to flash green, and projection begins. Projection When preparations are complete, you are ready for projection. 1.

Instruction Manual
Page 32
... connections again. • If the same static image is pressed, the video source cycles between Computer, SVideo, and Video. Point: • When you use the remote control to select the video source you wish to project, you wish to Computer. 4. Each time the Source button is projected for some time, the...
... connections again. • If the same static image is pressed, the video source cycles between Computer, SVideo, and Video. Point: • When you use the remote control to select the video source you wish to project, you wish to Computer. 4. Each time the Source button is projected for some time, the...

Instruction Manual
Page 36
... button and perform adjustment using the Video Menu. Adjusted values set automatically are engaged, press the Auto button to "Menu Screen Operations (Remote Control Only)" (see page 47). • When functions such as E-Zoom or A/V muting are "Tracking", "Position (vertical and ...this function does not operate. button to adjust the volume to a computer input signal. Adjusting the Volume (Remote Control Only) Press the Volume +, - Adjusting Images (Remote Control Only) [Optimizing Computer Video (Using the Auto button)] This function applies automatically optimized adjustment values to...
... button and perform adjustment using the Video Menu. Adjusted values set automatically are engaged, press the Auto button to "Menu Screen Operations (Remote Control Only)" (see page 47). • When functions such as E-Zoom or A/V muting are "Tracking", "Position (vertical and ...this function does not operate. button to adjust the volume to a computer input signal. Adjusting the Volume (Remote Control Only) Press the Volume +, - Adjusting Images (Remote Control Only) [Optimizing Computer Video (Using the Auto button)] This function applies automatically optimized adjustment values to...

Instruction Manual
Page 38
...the lens cover. 36 Set the remote control R/C On Off switch to the remote control and exhaust the batteries. If the remote control will be used for a long period or you are moving the unit, set the remote control R/C On Off switch to Off. Support the projector unit with your hands, pull ...upward on the foot levers with your fingers, and lower the unit slowly. 2. Foot Levers 1. Point: Unless the remote control R/C On Off switch is flashing orange. ...
...the lens cover. 36 Set the remote control R/C On Off switch to the remote control and exhaust the batteries. If the remote control will be used for a long period or you are moving the unit, set the remote control R/C On Off switch to Off. Support the projector unit with your hands, pull ...upward on the foot levers with your fingers, and lower the unit slowly. 2. Foot Levers 1. Point: Unless the remote control R/C On Off switch is flashing orange. ...

Instruction Manual
Page 40
... at a separate location. • The Esc button has the same action as a right mouse button, and the Enter button has the same action as follows. Remote Control Mouse 38 Esc Button: Left mouse button Enter Button: Right mouse button • This function cannot be used while an Effect Function, E-Zoom function..., menu function, or Help function is possible Enter Button Remote Control Mouse Point: • If mouse button functions are swapped on your computer, the functions on the...
... at a separate location. • The Esc button has the same action as a right mouse button, and the Enter button has the same action as follows. Remote Control Mouse 38 Esc Button: Left mouse button Enter Button: Right mouse button • This function cannot be used while an Effect Function, E-Zoom function..., menu function, or Help function is possible Enter Button Remote Control Mouse Point: • If mouse button functions are swapped on your computer, the functions on the...

Instruction Manual
Page 42
Press the E-Zoom button on the remote control to scroll in any direction to enlarge or reduce the display on screen. (The Esc button releases this feature.) Point: 24-step partial enlargement and reduction by factors of an image. Push the Enter button in that direction. Magnification factor is available. Reduction Enlargement 1. Push up Push left Push right Push down 40 4.2 Enlarging an Image The remote control included lets you enlarge portions of 1x-4x is displayed. 2.
Press the E-Zoom button on the remote control to scroll in any direction to enlarge or reduce the display on screen. (The Esc button releases this feature.) Point: 24-step partial enlargement and reduction by factors of an image. Push the Enter button in that direction. Magnification factor is available. Reduction Enlargement 1. Push up Push left Push right Push down 40 4.2 Enlarging an Image The remote control included lets you enlarge portions of 1x-4x is displayed. 2.

Instruction Manual
Page 44
... Effect1 button to display a horizontal bar. 2. 4.4 Adding Image Effects Using the Effect1 and Effect2 buttons, you to move the horizontal bar up or down by remote control. 1.
... Effect1 button to display a horizontal bar. 2. 4.4 Adding Image Effects Using the Effect1 and Effect2 buttons, you to move the horizontal bar up or down by remote control. 1.


