Network Installation Guide
Page 2
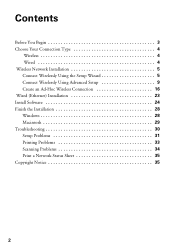
Contents Before You Begin 3 Choose Your Connection Type 4 Wireless 4 Wired 4 Wireless Network Installation 5 Connect Wirelessly Using the Setup Wizard 5 Connect Wirelessly Using Advanced Setup 9 Create an Ad-Hoc Wireless Connection 16 Wired (Ethernet) Installation 23 Install Software 24 Finish the Installation 28 Windows 28 Macintosh 29 Troubleshooting 30 Setup Problems 31 Printing Problems 33 Scanning Problems 34 Print a Network Status Sheet 35 Copyright Notice 35 2
Contents Before You Begin 3 Choose Your Connection Type 4 Wireless 4 Wired 4 Wireless Network Installation 5 Connect Wirelessly Using the Setup Wizard 5 Connect Wirelessly Using Advanced Setup 9 Create an Ad-Hoc Wireless Connection 16 Wired (Ethernet) Installation 23 Install Software 24 Finish the Installation 28 Windows 28 Macintosh 29 Troubleshooting 30 Setup Problems 31 Printing Problems 33 Scanning Problems 34 Print a Network Status Sheet 35 Copyright Notice 35 2
Network Installation Guide
Page 3
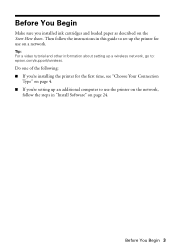
... installing the printer for use the printer on the network, follow the instructions in "Install Software" on page 24. Then follow the steps in this guide to set up the printer for the first time, see "Choose Your Connection Type" on page 4. ■ If you installed ink cartridges and loaded paper as described on the Start Here sheet. Tip: For a video tutorial and other information about setting up a wireless network, go to: epson.com/support/wireless. Before You Begin Make...
... installing the printer for use the printer on the network, follow the instructions in "Install Software" on page 24. Then follow the steps in this guide to set up the printer for the first time, see "Choose Your Connection Type" on page 4. ■ If you installed ink cartridges and loaded paper as described on the Start Here sheet. Tip: For a video tutorial and other information about setting up a wireless network, go to: epson.com/support/wireless. Before You Begin Make...
Network Installation Guide
Page 8
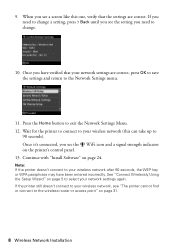
Continue with "Install Software" on the printer's control panel. 13. Press the Home button to select your network settings are correct. Wait for the printer to connect to your wireless network (this one, verify that your network settings again. Note: If the printer doesn't connect to the wireless router or access point" on page 5 to exit the Network Settings Menu. 12. See "Connect Wirelessly Using the Setup Wizard" on page 31. 8 Wireless Network Installation When you see the setting you see "The...
Continue with "Install Software" on the printer's control panel. 13. Press the Home button to select your network settings are correct. Wait for the printer to connect to your wireless network (this one, verify that your network settings again. Note: If the printer doesn't connect to the wireless router or access point" on page 5 to exit the Network Settings Menu. 12. See "Connect Wirelessly Using the Setup Wizard" on page 31. 8 Wireless Network Installation When you see the setting you see "The...

Network Installation Guide
Page 11
... you see the character you 're done entering your wireless network name (SSID). to select a character. Press the x Menu button to delete a character. 10. Important: Network names are case-sensitive. to switch between uppercase, lowercase, or numeric/special characters. Press the x Menu button to enter your wireless network name, press OK. Use the arrow buttons on the printer's control panel to switch between uppercase, lowercase, or numeric/special characters...
... you see the character you 're done entering your wireless network name (SSID). to select a character. Press the x Menu button to delete a character. 10. Important: Network names are case-sensitive. to switch between uppercase, lowercase, or numeric/special characters. Press the x Menu button to enter your wireless network name, press OK. Use the arrow buttons on the printer's control panel to switch between uppercase, lowercase, or numeric/special characters...
Network Installation Guide
Page 22
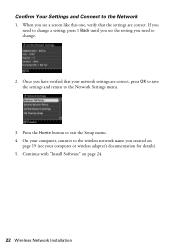
... network settings are correct. Once you created on page 24. 22 Wireless Network Installation Press the Home button to the Network 1. On your computer, connect to the wireless network name you have verified that the settings are correct, press OK to save the settings and return to change . 2. When you see the setting you need to change a setting, press y Back until you need to the Network Settings menu. 3. If you see a screen...
... network settings are correct. Once you created on page 24. 22 Wireless Network Installation Press the Home button to the Network 1. On your computer, connect to the wireless network name you have verified that the settings are correct, press OK to save the settings and return to change . 2. When you see the setting you need to change a setting, press y Back until you need to the Network Settings menu. 3. If you see a screen...

Network Installation Guide
Page 30
... prompts on the screen to add your product on a network, check these sections for help: ■ "Setup Problems" below ■ "Printing Problems" on page 33 ■ "Scanning Problems" on the right side of the screen to print a test page, install bonus software, and finish the installation. 7. Follow the steps on page 34 This section also explains how to scan and print. You're ready to print a Network Status Sheet (see this screen, click Add Printer. 5. When you have problems setting up to...
... prompts on the screen to add your product on a network, check these sections for help: ■ "Setup Problems" below ■ "Printing Problems" on page 33 ■ "Scanning Problems" on the right side of the screen to print a test page, install bonus software, and finish the installation. 7. Follow the steps on page 34 This section also explains how to scan and print. You're ready to print a Network Status Sheet (see this screen, click Add Printer. 5. When you have problems setting up to...
Network Installation Guide
Page 31
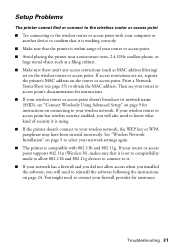
Troubleshooting 31 Print a Network Status Sheet (see "Connect Wirelessly Using Advanced Setup" on page 9 for instructions on connecting to confirm that it is using. ■ If the printer doesn't connect to obtain the MAC address. If your wireless router or access point has wireless security enabled, you will also need to know what kind of your wireless network. If your router or access point supports 802.11n (Wireless N), makes sure that the printer is compatible with your computer or another...
Troubleshooting 31 Print a Network Status Sheet (see "Connect Wirelessly Using Advanced Setup" on page 9 for instructions on connecting to confirm that it is using. ■ If the printer doesn't connect to obtain the MAC address. If your wireless router or access point has wireless security enabled, you will also need to know what kind of your wireless network. If your router or access point supports 802.11n (Wireless N), makes sure that the printer is compatible with your computer or another...
Network Installation Guide
Page 33
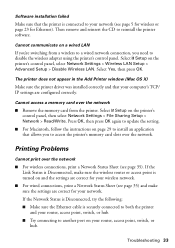
... Setup > Network > Read/Write. Printing Problems Cannot print over the network. Select Yes, then press OK. Software installation failed Make sure that the printer is connected to your network (see page 35). The printer does not appear in the Add Printer window (Mac OS X) Make sure the printer driver was installed correctly and that your computer's TCP/ IP settings are correct for your network. If the Link Status is turned on the printer's control panel, select Network Settings > Wireless LAN Setup > Advanced Setup > Disable Wireless LAN. Cannot access a memory card...
... Setup > Network > Read/Write. Printing Problems Cannot print over the network. Select Yes, then press OK. Software installation failed Make sure that the printer is connected to your network (see page 35). The printer does not appear in the Add Printer window (Mac OS X) Make sure the printer driver was installed correctly and that your computer's TCP/ IP settings are correct for your network. If the Link Status is turned on the printer's control panel, select Network Settings > Wireless LAN Setup > Advanced Setup > Disable Wireless LAN. Cannot access a memory card...
Network Installation Guide
Page 34
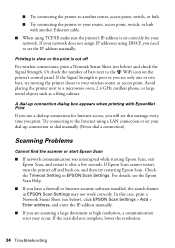
... using a LAN connection or set the IP address manually. If Epson Scan cannot restart, turn the printer off For wireless connections, print a Network Status Sheet (see below ), click EPSON Scan Settings > Add > Enter address, and enter the IP address manually. ■ If you are scanning a large document at high resolution, a communication error may not work correctly. In this message every time you print. A dial-up connection dialog box appears when printing with another router, access point, switch, or hub. ■ Try connecting the printer to your router, access point, switch...
... using a LAN connection or set the IP address manually. If Epson Scan cannot restart, turn the printer off For wireless connections, print a Network Status Sheet (see below ), click EPSON Scan Settings > Add > Enter address, and enter the IP address manually. ■ If you are scanning a large document at high resolution, a communication error may not work correctly. In this message every time you print. A dial-up connection dialog box appears when printing with another router, access point, switch, or hub. ■ Try connecting the printer to your router, access point, switch...
Quick Guide
Page 1
WorkForce® 610 Series Quick Guide Basic Printing, Copying, Scanning, and Faxing Maintenance Solving Problems
WorkForce® 610 Series Quick Guide Basic Printing, Copying, Scanning, and Faxing Maintenance Solving Problems
Quick Guide
Page 2
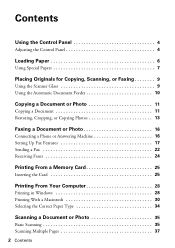
Contents Using the Control Panel 4 Adjusting the Control Panel 4 Loading Paper 6 Using Special Papers 7 Placing Originals for Copying, Scanning, or Faxing 9 Using the Scanner Glass 9 Using the Automatic Document Feeder 10 Copying a Document or Photo 11 Copying a Document 11 Restoring, Cropping, or Copying Photos 13 Faxing a Document or Photo 16 Connecting a Phone or Answering Machine 16 Setting Up Fax Features 17 Sending a Fax 22 Receiving Faxes 24 Printing From a Memory Card 25 Inserting the Card 25 Printing From Your Computer 28 Printing in Windows 28 Printing With a ...
Contents Using the Control Panel 4 Adjusting the Control Panel 4 Loading Paper 6 Using Special Papers 7 Placing Originals for Copying, Scanning, or Faxing 9 Using the Scanner Glass 9 Using the Automatic Document Feeder 10 Copying a Document or Photo 11 Copying a Document 11 Restoring, Cropping, or Copying Photos 13 Faxing a Document or Photo 16 Connecting a Phone or Answering Machine 16 Setting Up Fax Features 17 Sending a Fax 22 Receiving Faxes 24 Printing From a Memory Card 25 Inserting the Card 25 Printing From Your Computer 28 Printing in Windows 28 Printing With a ...
Quick Guide
Page 17
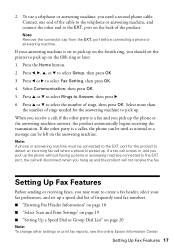
... set the printer to pick up the phone without having a phone or answering machine connected to pick up on the answering machine. Press u or d to select Rings to select Setup, then press OK 3. Select more than the number of frequently used as normal or a message can be used fax numbers. ■ "Entering Fax Header Information" on page 18 ■ "Select Scan and Print Settings" on page 19 ■ "Setting Up a Speed Dial or Group Dial List...
... set the printer to pick up the phone without having a phone or answering machine connected to pick up on the answering machine. Press u or d to select Rings to select Setup, then press OK 3. Select more than the number of frequently used as normal or a message can be used fax numbers. ■ "Entering Fax Header Information" on page 18 ■ "Select Scan and Print Settings" on page 19 ■ "Setting Up a Speed Dial or Group Dial List...
Quick Guide
Page 20
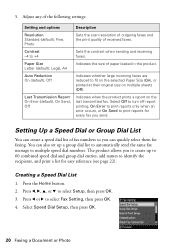
... Photo Last Transmission Report On Error (default), On Send, Off Indicates when the product prints a report on multiple sheets (Off). Auto Reduction On (default), Off Indicates whether large incoming faxes are reduced to select Fax Setting, then press OK. 4. The product allows you send. Adjust any of the following settings: Setting and options Description Resolution Standard (default), Fine, Photo Sets the scan resolution of outgoing faxes and the print quality of paper loaded in the product. Paper Size Letter (default), Legal...
... Photo Last Transmission Report On Error (default), On Send, Off Indicates when the product prints a report on multiple sheets (Off). Auto Reduction On (default), Off Indicates whether large incoming faxes are reduced to select Fax Setting, then press OK. 4. The product allows you send. Adjust any of the following settings: Setting and options Description Resolution Standard (default), Fine, Photo Sets the scan resolution of outgoing faxes and the print quality of paper loaded in the product. Paper Size Letter (default), Legal...

Quick Guide
Page 23
... Automatic Document Feeder, your fax is automatically scanned and faxed. To cancel faxing, press y Stop/Clear Settings. Note: Don't hang up the phone until the product begins transmitting the fax. ■ To select a speed dial or group dial entry, press Speed/Group Dial/Backspace. 4. Note: If the fax number is scanned: If you see a redialing message and the product redials after the first page is busy, you see the screen at right, select Send...
... Automatic Document Feeder, your fax is automatically scanned and faxed. To cancel faxing, press y Stop/Clear Settings. Note: Don't hang up the phone until the product begins transmitting the fax. ■ To select a speed dial or group dial entry, press Speed/Group Dial/Backspace. 4. Note: If the fax number is scanned: If you see a redialing message and the product redials after the first page is busy, you see the screen at right, select Send...
Quick Guide
Page 24
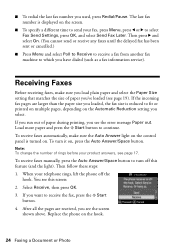
... fax, press the x Start button. 4. To receive faxes manually, press the Auto Answer/Space button to which you 've loaded (see page 19). ■ To redial the last fax number you see the error message Paper out. Then follow these steps: 1. When your telephone rings, lift the phone off this screen: 2. To receive faxes automatically, make sure you load plain paper and select the Paper Size setting that matches the size of rings before your fax, press Menu...
... fax, press the x Start button. 4. To receive faxes manually, press the Auto Answer/Space button to which you 've loaded (see page 19). ■ To redial the last fax number you see the error message Paper out. Then follow these steps: 1. When your telephone rings, lift the phone off this screen: 2. To receive faxes automatically, make sure you load plain paper and select the Paper Size setting that matches the size of rings before your fax, press Menu...

Quick Guide
Page 31
... in your paper type (see the settings shown below.) Copy and page settings Application settings 6. Choose Print Settings from Preview, you 're printing from the pop-up menu, then select the following print settings: Choose Print Settings Select your application before printing. Select the basic page setup options. For borderless photos, choose a Paper Size setting with a Sheet Feeder - Or check for your application at the bottom of this window. (If you see page 34) Select Color or Black/Grayscale output Select...
... in your paper type (see the settings shown below.) Copy and page settings Application settings 6. Choose Print Settings from Preview, you 're printing from the pop-up menu, then select the following print settings: Choose Print Settings Select your application before printing. Select the basic page setup options. For borderless photos, choose a Paper Size setting with a Sheet Feeder - Or check for your application at the bottom of this window. (If you see page 34) Select Color or Black/Grayscale output Select...
Quick Guide
Page 45
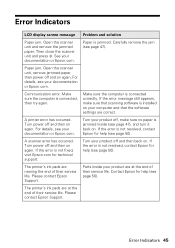
... error. Please contact Epson Support. The printer's ink pads are at the end of their service life. See your documentation or Epson.com. Open the scanner unit, remove jammed paper, then power off and then back on . If the error is installed on again. Contact Epson for help (see page 50). Then close the scanner unit and press x. A scanner error has occurred. If the error is connected, then try again. Please contact Epson Support. Error Indicators LCD display screen message Problem and solution Paper jam...
... error. Please contact Epson Support. The printer's ink pads are at the end of their service life. See your documentation or Epson.com. Open the scanner unit, remove jammed paper, then power off and then back on . If the error is installed on again. Contact Epson for help (see page 50). Then close the scanner unit and press x. A scanner error has occurred. If the error is connected, then try again. Please contact Epson Support. Error Indicators LCD display screen message Problem and solution Paper jam...
Quick Guide
Page 49
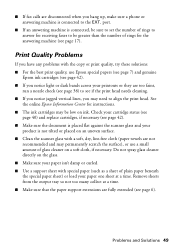
... to align the print head. See the online Epson Information Center for the answering machine (see page 42). ■ Make sure the document is placed flat against the scanner glass and your product is connected, be sure to set the number of plain paper beneath the special paper sheet) or load your cartridge status (see page 40) and replace cartridges, if necessary (see page 17). Problems and Solutions 49 Check your paper one sheet at a time. ■ Make sure...
... to align the print head. See the online Epson Information Center for the answering machine (see page 42). ■ Make sure the document is placed flat against the scanner glass and your product is connected, be sure to set the number of plain paper beneath the special paper sheet) or load your cartridge status (see page 40) and replace cartridges, if necessary (see page 17). Problems and Solutions 49 Check your paper one sheet at a time. ■ Make sure...

Quick Guide
Page 52
...: if the power cord or plug is in use. ■ Do not touch the flat white cable inside the product, and be ink remaining around the printer. If the liquid crystal solution gets on the document table when placing the originals. ■ Do not open the scanner section while the product is damaged; If discomfort or vision problems remain after...
...: if the power cord or plug is in use. ■ Do not touch the flat white cable inside the product, and be ink remaining around the printer. If the liquid crystal solution gets on the document table when placing the originals. ■ Do not open the scanner section while the product is damaged; If discomfort or vision problems remain after...
Quick Guide
Page 53
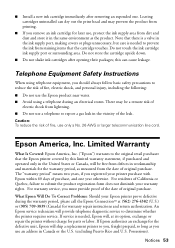
... the date of fire, use a telephone to determine whether the printer requires service. Possessions). ■ Install a new ink cartridge immediately after opening their packages; Do not store the cartridge upside down. ■ Do not shake ink cartridges after removing an expended one year otherwise. There may prevent the product from dirt and dust and store it in the United States or Canada, will ship a replacement printer...
... the date of fire, use a telephone to determine whether the printer requires service. Possessions). ■ Install a new ink cartridge immediately after opening their packages; Do not store the cartridge upside down. ■ Do not shake ink cartridges after removing an expended one year otherwise. There may prevent the product from dirt and dust and store it in the United States or Canada, will ship a replacement printer...


