
Literature/Product Sheet
Page 1
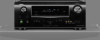
...Connectivity & Future-ready Expandability • Power Amp Assign function, for system configuration flexibility, allowing surround back, front height effects, and 2nd zone multi-room configuration • Dock connectivity for iPod® and network streaming Ease-of-Use • On-Screen Display • Audyssey...the centerpiece of an exciting home theater system, the AVR-1611 is both fast and easy, thanks to six measurement points - High level resolution filters for satellite speakers and also subwoofer State-of-the-art Denon Solutions for Maximizing Content Quality • Stable power ...
...Connectivity & Future-ready Expandability • Power Amp Assign function, for system configuration flexibility, allowing surround back, front height effects, and 2nd zone multi-room configuration • Dock connectivity for iPod® and network streaming Ease-of-Use • On-Screen Display • Audyssey...the centerpiece of an exciting home theater system, the AVR-1611 is both fast and easy, thanks to six measurement points - High level resolution filters for satellite speakers and also subwoofer State-of-the-art Denon Solutions for Maximizing Content Quality • Stable power ...

Owners Manual - English
Page 2
The top surface over . 13. PRECAUTION: SURFACE CHAUDE. Ne touchez pas les zones chaudes, tout particulièrement vers l'inscription "Hot surface mark" et le panneau supérieur. Read these instructions. 3. Keep these instructions. 2. A polarized plug has ... been tested and found to comply with the manufacturer's instructions. 8. For Canadian customers: This Class B digital apparatus complies with arrowhead symbol, within easy access by DENON may be within an equilateral triangle, is no guarantee that produce heat. 9.
The top surface over . 13. PRECAUTION: SURFACE CHAUDE. Ne touchez pas les zones chaudes, tout particulièrement vers l'inscription "Hot surface mark" et le panneau supérieur. Read these instructions. 3. Keep these instructions. 2. A polarized plug has ... been tested and found to comply with the manufacturer's instructions. 8. For Canadian customers: This Class B digital apparatus complies with arrowhead symbol, within easy access by DENON may be within an equilateral triangle, is no guarantee that produce heat. 9.

Owners Manual - English
Page 4
...ray Disc player/DVD player 20 Playing an iPod 21 Tuning in radio stations 23 Selecting a listening mode (Surround mode 24 Standard playback 24 DENON original surround playback 26 Stereo playback 26 Direct playback 26 Advanced version 27 Speaker installation/connection (Other than 5.1-channel 28 Install 28 Connect 29... the connected devices by remote control unit 56 Operating AV equipment 56 Registering preset codes 56 Operating components 58 Specifying the zone used with the product. Simple version Basic version ENGLISH Getting started 1 Accessories 1 About this...
...ray Disc player/DVD player 20 Playing an iPod 21 Tuning in radio stations 23 Selecting a listening mode (Surround mode 24 Standard playback 24 DENON original surround playback 26 Stereo playback 26 Direct playback 26 Advanced version 27 Speaker installation/connection (Other than 5.1-channel 28 Install 28 Connect 29... the connected devices by remote control unit 56 Operating AV equipment 56 Registering preset codes 56 Operating components 58 Specifying the zone used with the product. Simple version Basic version ENGLISH Getting started 1 Accessories 1 About this...

Owners Manual - English
Page 10
...in six positions, as shown below. GExample qH FL SW C FR GExample wH FL SW C FR 1 Set up the zone mode Press ZONE SELECT to switch the zone mode to six positions). • Even if the listening environment is the position where listeners would normally sit or where one would...: • Volume : "12 o'clock position" • Crossover frequency : "Maximum/Highest Frequency" • Low pass filter : "Off" • Standby mode : "Off" Press ZONE SELECT nn Set up the operation mode Press AMP to set up the subwoofer as shown in the illustration (up to "MAIN". Audyssey MultEQ®...
...in six positions, as shown below. GExample qH FL SW C FR GExample wH FL SW C FR 1 Set up the zone mode Press ZONE SELECT to switch the zone mode to six positions). • Even if the listening environment is the position where listeners would normally sit or where one would...: • Volume : "12 o'clock position" • Crossover frequency : "Maximum/Highest Frequency" • Low pass filter : "Off" • Standby mode : "Off" Press ZONE SELECT nn Set up the operation mode Press AMP to set up the subwoofer as shown in the illustration (up to "MAIN". Audyssey MultEQ®...

Owners Manual - English
Page 34
For the method of a change the speaker connections or subwoofer volume. Press ZONE SELECT nn Set up speakers (Audyssey® Auto Setup)" (vpage 6). Normal ZONE2 Front Height Front Bi-Amp Front B Set when using 7.1-channel (Front/Center/Surround/...) speakers. w Press o p to page 8 " Preparation " step 5. Simple version Basic version ENGLISH Set up speakers Here we describe how to set up the zone mode Press ZONE SELECT to switch the zone mode to "MAIN". The "MAIN" indicator lights. BACK/AMP ASSIGN terminals. Set for connecting the front height speakers to the SURR. BACK...
For the method of a change the speaker connections or subwoofer volume. Press ZONE SELECT nn Set up speakers (Audyssey® Auto Setup)" (vpage 6). Normal ZONE2 Front Height Front Bi-Amp Front B Set when using 7.1-channel (Front/Center/Surround/...) speakers. w Press o p to page 8 " Preparation " step 5. Simple version Basic version ENGLISH Set up speakers Here we describe how to set up the zone mode Press ZONE SELECT to switch the zone mode to "MAIN". The "MAIN" indicator lights. BACK/AMP ASSIGN terminals. Set for connecting the front height speakers to the SURR. BACK...

Owners Manual - English
Page 36
... when it is at once from the front (front speaker / front height speaker / center speaker) or rear (surround speaker / surround back speaker). 1 Press ZONE SELECT to switch the zone mode to "MAIN". Channel Level FL 0.0dB SR 0.0dB C 0.0dB SBR 0.0dB FR 0.0dB SBL 0.0dB SW 0.0dB SL 0.0dB • The sleep... 40 50 120 110 100 90 80 70 60 You can adjust the channel level either according to the playback sources or to the main zone is turned off with the remote control unit can be obtained. To cancel the sleep timer Press SLEEP to select the speaker. Fader FRONT ...
... when it is at once from the front (front speaker / front height speaker / center speaker) or rear (surround speaker / surround back speaker). 1 Press ZONE SELECT to switch the zone mode to "MAIN". Channel Level FL 0.0dB SR 0.0dB C 0.0dB SBR 0.0dB FR 0.0dB SBL 0.0dB SW 0.0dB SL 0.0dB • The sleep... 40 50 120 110 100 90 80 70 60 You can adjust the channel level either according to the playback sources or to the main zone is turned off with the remote control unit can be obtained. To cancel the sleep timer Press SLEEP to select the speaker. Fader FRONT ...

Owners Manual - English
Page 37
...settings (input mode, surround mode, HDMI output mode, MultEQ, Dynamic EQ, Dynamic Volume, audio delay etc.) last selected for the different zones (vpage 35 "Quick select function"). • If QUICK SELECT on the display. nnConnecting and setting the speakers "Amp Assign" setting (...vpage 49) and audio signals output Connecting the speakers MAIN ZONE ZONE2 Output signal : Stereo (L / R) This unit ZONE2 Naming quick select settings See "Quick Select Name" (vpage 54). Playback in a ...
...settings (input mode, surround mode, HDMI output mode, MultEQ, Dynamic EQ, Dynamic Volume, audio delay etc.) last selected for the different zones (vpage 35 "Quick select function"). • If QUICK SELECT on the display. nnConnecting and setting the speakers "Amp Assign" setting (...vpage 49) and audio signals output Connecting the speakers MAIN ZONE ZONE2 Output signal : Stereo (L / R) This unit ZONE2 Naming quick select settings See "Quick Select Name" (vpage 54). Playback in a ...

Owners Manual - English
Page 38
... save three settings for ZONE2. 2 Press QUICK SELECT at "Mute Level" (vpage 53) in ZONE2 can be turned off. The audio signal of the MAIN ZONE only can be memorized. GAdjustable rangeH - - - -80dB - -40dB - 18dB (When the "Volume Display" (vpage 53) setting is "Relative") GAdjustable rangeH 0 - 41 -...99 (When the "Volume Display" (vpage 53) setting is "Absolute") • At the time of input source select button in step 1 then press ZONE/DEVICE OFF. nnSaving the settings 1 Set the items below to the settings you want to "ZONE2". The remote control unit switches to the operating mode...
... save three settings for ZONE2. 2 Press QUICK SELECT at "Mute Level" (vpage 53) in ZONE2 can be turned off. The audio signal of the MAIN ZONE only can be memorized. GAdjustable rangeH - - - -80dB - -40dB - 18dB (When the "Volume Display" (vpage 53) setting is "Relative") GAdjustable rangeH 0 - 41 -...99 (When the "Volume Display" (vpage 53) setting is "Absolute") • At the time of input source select button in step 1 then press ZONE/DEVICE OFF. nnSaving the settings 1 Set the items below to the settings you want to "ZONE2". The remote control unit switches to the operating mode...

Owners Manual - English
Page 41
... "O" is registered. ENGLISH Inputting characters "Preset Name" (vpage 41), "Rename" (vpage 43), "Zone Rename" (vpage 54) and "Quick Select Name" (vpage 54)can be switched by pressing SHIFT ... 7 D E F d e f 3 T U V t u v 8 G H I g h i 4 W X Y Z w x y z 9 J K L j k l 5 0 (Space) ' ( ) z • The input character type can be input are as shown below . Example: For changing the input source from "DVD" to "DENON" q Place the cursor at the character to be changed with the remote control unit. • Select a character on the TV screen to "E". "V" changes to input...
... "O" is registered. ENGLISH Inputting characters "Preset Name" (vpage 41), "Rename" (vpage 43), "Zone Rename" (vpage 54) and "Quick Select Name" (vpage 54)can be switched by pressing SHIFT ... 7 D E F d e f 3 T U V t u v 8 G H I g h i 4 W X Y Z w x y z 9 J K L j k l 5 0 (Space) ' ( ) z • The input character type can be input are as shown below . Example: For changing the input source from "DVD" to "DENON" q Place the cursor at the character to be changed with the remote control unit. • Select a character on the TV screen to "E". "V" changes to input...

Owners Manual - English
Page 42
... . Advanced version Information Remote control operation buttons Move the cursor (Up/Down/Left/Right) Confirm the setting Return to "MAIN". Menu operation 1 Press ZONE SELECT to switch the zone mode to previous menu 39 Input Setup Perform settings related to input source playback. • You do not have to change the settings...
... . Advanced version Information Remote control operation buttons Move the cursor (Up/Down/Left/Right) Confirm the setting Return to "MAIN". Menu operation 1 Press ZONE SELECT to switch the zone mode to previous menu 39 Input Setup Perform settings related to input source playback. • You do not have to change the settings...
Owners Manual - English
Page 45
...", the mode is switched according to the input contents. • If a source is played in both MAIN ZONE (audio and video) and ZONE2 (audio only) modes in the same room, audio in MAIN ZONE and ZONE2 modes may vary depending on the HDMI content information. This can be set to "Analog". •...
...", the mode is switched according to the input contents. • If a source is played in both MAIN ZONE (audio and video) and ZONE2 (audio only) modes in the same room, audio in MAIN ZONE and ZONE2 modes may vary depending on the HDMI content information. This can be set to "Analog". •...

Owners Manual - English
Page 46
... mode. The menu is "DOCK". Setting items Rename Change the display name of the selected input source. Menu operation 1 Press ZONE SELECT to switch the zone mode to the defaults. Default The input source name is canceled. No : Do not reset to the previous item, press RETURN...there are played repeatedly. Setting details All : All files are differences in the surround mode can be adjusted to the default setting. nn When DENON control dock for which "HDMI" or "Digital" is displayed. OFF : Shuffle playback mode is returned to your liking. The items (parameters...
... mode. The menu is "DOCK". Setting items Rename Change the display name of the selected input source. Menu operation 1 Press ZONE SELECT to switch the zone mode to the defaults. Default The input source name is canceled. No : Do not reset to the previous item, press RETURN...there are played repeatedly. Setting details All : All files are differences in the surround mode can be adjusted to the default setting. nn When DENON control dock for which "HDMI" or "Digital" is displayed. OFF : Shuffle playback mode is returned to your liking. The items (parameters...

Owners Manual - English
Page 51
...RTN]:Back Option Setup (vpage 53) 4-5.Option Setup 1.Volume Control 2.Source Delete 3.On-Screen Display 4.Remote Preset Codes 5.Quick Select Name 6.ZONE Rename 7.Display [ENT]:Select [RTN]:Back 48 Remote control operation buttons Move the cursor (Up/Down/Left/Right) Confirm the setting Return to..."MAIN" indicator lights. 2 Press AMP to set the remote control unit to "MAIN". The menu display disappears. Menu operation 1 Press ZONE SELECT to switch the zone mode to amplifier operation mode. 3 Press MENU. Auto Lipsync : ON HDMI Audio Out : Amp HDMI Control : OFF 1.2ch Direct/...
...RTN]:Back Option Setup (vpage 53) 4-5.Option Setup 1.Volume Control 2.Source Delete 3.On-Screen Display 4.Remote Preset Codes 5.Quick Select Name 6.ZONE Rename 7.Display [ENT]:Select [RTN]:Back 48 Remote control operation buttons Move the cursor (Up/Down/Left/Right) Confirm the setting Return to..."MAIN" indicator lights. 2 Press AMP to set the remote control unit to "MAIN". The menu display disappears. Menu operation 1 Press ZONE SELECT to switch the zone mode to amplifier operation mode. 3 Press MENU. Auto Lipsync : ON HDMI Audio Out : Amp HDMI Control : OFF 1.2ch Direct/...
Owners Manual - English
Page 52
... the frequencies Back" and "Front Height" can be used without changing the settings. Setting details Normal : Set when using the surround back speakers with MAIN ZONE, change the speaker settings after performing Audyssey Auto Setup, it will not be possible to select MultEQ, Dynamic EQ and Dynamic Volume (vpage 46, 47...
... the frequencies Back" and "Front Height" can be used without changing the settings. Setting details Normal : Set when using the surround back speakers with MAIN ZONE, change the speaker settings after performing Audyssey Auto Setup, it will not be possible to select MultEQ, Dynamic EQ and Dynamic Volume (vpage 46, 47...

Owners Manual - English
Page 56
... Set how volume is displayed. • Relative : Display ---dB (Min), in the range -80.5 dB - 18 dB. • Absolute : Display in the various zones cannot be selected using SOURCE SELECT. Volume Limit : Make a setting for maximum volume. • OFF : Do not set a maximum volume. • -20dB (61) ...8226; The "Volume Display" setting applies to "Delete" cannot be deleted. • Input sources set level. Setting items Volume Control Set the MAIN ZONE (room where the unit is displayed from the last session 0) : Always use this source. • Delete : Do not use the muting on ...
... Set how volume is displayed. • Relative : Display ---dB (Min), in the range -80.5 dB - 18 dB. • Absolute : Display in the various zones cannot be selected using SOURCE SELECT. Volume Limit : Make a setting for maximum volume. • OFF : Do not set a maximum volume. • -20dB (61) ...8226; The "Volume Display" setting applies to "Delete" cannot be deleted. • Input sources set level. Setting items Volume Control Set the MAIN ZONE (room where the unit is displayed from the last session 0) : Always use this source. • Delete : Do not use the muting on ...
Owners Manual - English
Page 57
... Template : The display name can be input. Use ui to select "Operation", then press ENTER. • Watch / Listen to one you prefer. each zone to / Play / For 4. Bright : Normal display brightness. OFF : Turns the display off . Bright Dim Setup Lock Protect settings from the previously set "...8226; Yes : Reset to the defaults. • No : Do not reset to select "Template", then press ENTER. 3. Setting items Setting details Zone Rename • Up to the defaults. Change the display title of this to change the displayed name for 10 seconds after operation. • 10sec :...
... Template : The display name can be input. Use ui to select "Operation", then press ENTER. • Watch / Listen to one you prefer. each zone to / Play / For 4. Bright : Normal display brightness. OFF : Turns the display off . Bright Dim Setup Lock Protect settings from the previously set "...8226; Yes : Reset to the defaults. • No : Do not reset to select "Template", then press ENTER. 3. Setting items Setting details Zone Rename • Up to the defaults. Change the display title of this to change the displayed name for 10 seconds after operation. • 10sec :...

Owners Manual - English
Page 58
... item shows information about settings for individual program sources. "Status" for ZONE2. It automatically corrects the standard signal level for MAIN ZONE. The figure is set to "ZONE2". D8 / E1 - G8 Advanced version Information Remote control operation buttons Move the cursor (Up/Down/Left/Right) Confirm the ...
... item shows information about settings for individual program sources. "Status" for ZONE2. It automatically corrects the standard signal level for MAIN ZONE. The figure is set to "ZONE2". D8 / E1 - G8 Advanced version Information Remote control operation buttons Move the cursor (Up/Down/Left/Right) Confirm the ...

Owners Manual - English
Page 59
... Control dock for iPod zz If a preset code is registered for the zone selected in step 1 is switched. • The operation mode of the remote control unit is set top box Motorola 01376 DVD player DENON z Control dock for iPod DENON 32134 42517 zzIf a control dock for iPod is enabled in the included...
... Control dock for iPod zz If a preset code is registered for the zone selected in step 1 is switched. • The operation mode of the remote control unit is set top box Motorola 01376 DVD player DENON z Control dock for iPod DENON 32134 42517 zzIf a control dock for iPod is enabled in the included...

Owners Manual - English
Page 60
..."TV", "TV/DVD", or "TV/VCR" can be switched by pressing the remote control unit's CH + or CH -. Daewoo Dantax Denon Disney DSE Durabrand [ENT]:Select [RTN]:Back • When there are several pages of the brand name. both [PowerON][DeviceON] 3.Input Code... remote control unit cannot control the device. The zone mode indicator flashes twice. 11 Enter a five-digit code using 0 - 9. Category :DVD Brand :DENON Code[1/3]:30490 Setup Remote 1.Press [Source]button. 2.Press and Hold 3sec. Category :DVD Brand :DENON Code[1/3]:30490 Setup Remote 1.Press [Source]button. ...
..."TV", "TV/DVD", or "TV/VCR" can be switched by pressing the remote control unit's CH + or CH -. Daewoo Dantax Denon Disney DSE Durabrand [ENT]:Select [RTN]:Back • When there are several pages of the brand name. both [PowerON][DeviceON] 3.Input Code... remote control unit cannot control the device. The zone mode indicator flashes twice. 11 Enter a five-digit code using 0 - 9. Category :DVD Brand :DENON Code[1/3]:30490 Setup Remote 1.Press [Source]button. 2.Press and Hold 3sec. Category :DVD Brand :DENON Code[1/3]:30490 Setup Remote 1.Press [Source]button. ...

Owners Manual - English
Page 61
... return MENU. [ENT]:OK • The menu screen is retrieved. nnBlu-ray Disc player / HD-DVD player / DVD player / DVD recorder operation Operation buttons ZONE/DEVICE ON ZONE/DEVICE OFF CH +, - MENU TOP MENU uio p ENTER SETUP RETURN 6 7 1 8 9 3 2 0 - 9, +10 TV POWER TV INPUT Function ... chapter or channel selection TV power on /standby (Default : SONY) Switch TV input (Default : SONY) 58 nnCD player / CD recorder operation Operation buttons ZONE/DEVICE ON ZONE/DEVICE OFF uio p ENTER 6 7 1 8 9 3 2 0 - 9, +10 TV POWER TV INPUT Function Power onz Power standbyz Cursor operation Enter ...
... return MENU. [ENT]:OK • The menu screen is retrieved. nnBlu-ray Disc player / HD-DVD player / DVD player / DVD recorder operation Operation buttons ZONE/DEVICE ON ZONE/DEVICE OFF CH +, - MENU TOP MENU uio p ENTER SETUP RETURN 6 7 1 8 9 3 2 0 - 9, +10 TV POWER TV INPUT Function ... chapter or channel selection TV power on /standby (Default : SONY) Switch TV input (Default : SONY) 58 nnCD player / CD recorder operation Operation buttons ZONE/DEVICE ON ZONE/DEVICE OFF uio p ENTER 6 7 1 8 9 3 2 0 - 9, +10 TV POWER TV INPUT Function Power onz Power standbyz Cursor operation Enter ...


