Owner's Manual
Page 4
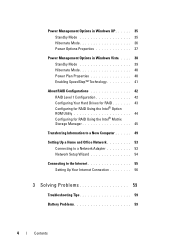
... Standby Mode 39 Hibernate Mode 40 Power Plan Properties 40 Enabling SpeedStep™ Technology 41 About RAID Configurations 42 RAID Level 1 Configuration 42 Configuring Your Hard Drives for RAID 43 Configuring for RAID Using the Intel® Option ROM Utility 44 Configuring for RAID Using the Intel® Matrix Storage Manager 45...
... Standby Mode 39 Hibernate Mode 40 Power Plan Properties 40 Enabling SpeedStep™ Technology 41 About RAID Configurations 42 RAID Level 1 Configuration 42 Configuring Your Hard Drives for RAID 43 Configuring for RAID Using the Intel® Option ROM Utility 44 Configuring for RAID Using the Intel® Matrix Storage Manager 45...
Owner's Manual
Page 5
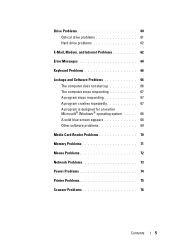
Drive Problems 60 Optical drive problems 61 Hard drive problems 62 E-Mail, Modem, and Internet Problems 62 Error Messages 64 Keyboard Problems 66 Lockups and Software Problems 66 The computer does not start up ...
Drive Problems 60 Optical drive problems 61 Hard drive problems 62 E-Mail, Modem, and Internet Problems 62 Error Messages 64 Keyboard Problems 66 Lockups and Software Problems 66 The computer does not start up ...
Owner's Manual
Page 6
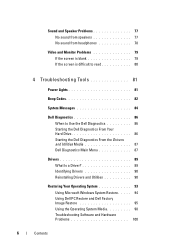
... 80 4 Troubleshooting Tools 81 Power Lights 81 Beep Codes 82 System Messages 84 Dell Diagnostics 86 When to Use the Dell Diagnostics 86 Starting the Dell Diagnostics From Your Hard Drive 86 Starting the Dell Diagnostics From the Drivers and Utilities Media 87 Dell Diagnostics Main Menu 87 Drivers 89 What Is a Driver 89 Identifying Drivers 90...
... 80 4 Troubleshooting Tools 81 Power Lights 81 Beep Codes 82 System Messages 84 Dell Diagnostics 86 When to Use the Dell Diagnostics 86 Starting the Dell Diagnostics From Your Hard Drive 86 Starting the Dell Diagnostics From the Drivers and Utilities Media 87 Dell Diagnostics Main Menu 87 Drivers 89 What Is a Driver 89 Identifying Drivers 90...
Owner's Manual
Page 7
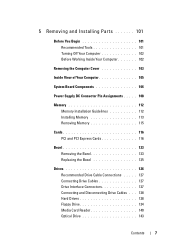
... 112 Installing Memory 113 Removing Memory 115 Cards 116 PCI and PCI Express Cards 116 Bezel 123 Removing the Bezel 123 Replacing the Bezel 125 Drives 126 Recommended Drive Cable Connections . . . . . 127 Connecting Drive Cables 127 Drive Interface Connectors 127 Connecting and Disconnecting Drive Cables . . . 128 Hard Drives 128 Floppy Drive 134 Media Card Reader 140 Optical...
... 112 Installing Memory 113 Removing Memory 115 Cards 116 PCI and PCI Express Cards 116 Bezel 123 Removing the Bezel 123 Replacing the Bezel 125 Drives 126 Recommended Drive Cable Connections . . . . . 127 Connecting Drive Cables 127 Drive Interface Connectors 127 Connecting and Disconnecting Drive Cables . . . 128 Hard Drives 128 Floppy Drive 134 Media Card Reader 140 Optical...
Owner's Manual
Page 13
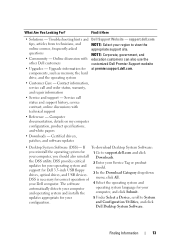
.... components, such as memory, the hard drive, and the operating system • Customer Care - Computer documentation, details on my computer configuration, product specifications, and white papers • Downloads - What Are You Looking For? If To download Desktop System Software: you should also reinstall the DSS utility. support.dell.com tips, articles from technicians...
.... components, such as memory, the hard drive, and the operating system • Customer Care - Computer documentation, details on my computer configuration, product specifications, and white papers • Downloads - What Are You Looking For? If To download Desktop System Software: you should also reinstall the DSS utility. support.dell.com tips, articles from technicians...
Owner's Manual
Page 17
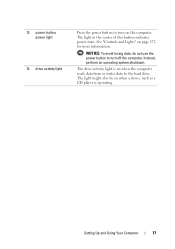
Instead, perform an operating system shutdown. See "Controls and Lights" on the computer. The drive activity light is operating. 13 power button, power light 14 drive activity light Press the power button to turn off the computer. The light in the center of this button indicates power state. The light might also be on when a device such as a CD player is on when the computer reads data from or writes data to turn on page 172 for more information. NOTICE: To avoid losing data, do not use the power button to the hard drive. Setting Up and Using Your Computer 17
Instead, perform an operating system shutdown. See "Controls and Lights" on the computer. The drive activity light is operating. 13 power button, power light 14 drive activity light Press the power button to turn off the computer. The light in the center of this button indicates power state. The light might also be on when a device such as a CD player is on when the computer reads data from or writes data to turn on page 172 for more information. NOTICE: To avoid losing data, do not use the power button to the hard drive. Setting Up and Using Your Computer 17

Owner's Manual
Page 29
..., rewrite, or update information on your source CD or DVD, and then click Disc Copy. Use blank CD-RWs if you have one CD/DVD drive, ensure that CD-R again (see the Sonic documentation for more information). Setting Up and Using Your Computer 29 Using Blank CDs and DVDs CD-RW.... Blank DVD+/-Rs can write to erase, rewrite, or update information on the disc later. Use blank DVD+/-RWs if you have inserted your computer hard drive. The computer copies the data from the source CD or DVD to record music or permanently store data files. When prompted, insert a blank CD or...
..., rewrite, or update information on your source CD or DVD, and then click Disc Copy. Use blank CD-RWs if you have one CD/DVD drive, ensure that CD-R again (see the Sonic documentation for more information). Setting Up and Using Your Computer 29 Using Blank CDs and DVDs CD-RW.... Blank DVD+/-Rs can write to erase, rewrite, or update information on the disc later. Use blank DVD+/-RWs if you have inserted your computer hard drive. The computer copies the data from the source CD or DVD to record music or permanently store data files. When prompted, insert a blank CD or...
Owner's Manual
Page 35
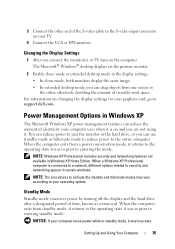
... , effectively doubling the amount of viewable work space. Changing the Display Settings 1 After you can reduce power to just the monitor or the hard drive, or you are not using it was in prior to entering standby mode. NOTE: Windows XP Professional includes security and networking features not available ... your computer loses power while in standby mode, it was in prior to entering the mode. When the computer exits from one screen to support.dell.com. NOTICE: If your graphics card, go to the other end of time, known as a time-out. For information on your operating system...
... , effectively doubling the amount of viewable work space. Changing the Display Settings 1 After you can reduce power to just the monitor or the hard drive, or you are not using it was in prior to entering standby mode. NOTE: Windows XP Professional includes security and networking features not available ... your computer loses power while in standby mode, it was in prior to entering the mode. When the computer exits from one screen to support.dell.com. NOTICE: If your graphics card, go to the other end of time, known as a time-out. For information on your operating system...
Owner's Manual
Page 36
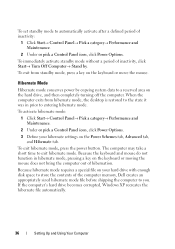
... Panel→ Pick a category→ Performance and Maintenance. 2 Under or pick a Control Panel icon, click Power Options. If the computer's hard drive becomes corrupted, Windows XP recreates the hibernate file automatically. 36 Setting Up and Using Your Computer To activate hibernate mode: 1 Click Start→... mode, pressing a key on the keyboard or moving the mouse does not bring the computer out of the computer memory, Dell creates an appropriately sized hibernate mode file before shipping the computer to store the contents of hibernation. To exit hibernate mode, ...
... Panel→ Pick a category→ Performance and Maintenance. 2 Under or pick a Control Panel icon, click Power Options. If the computer's hard drive becomes corrupted, Windows XP recreates the hibernate file automatically. 36 Setting Up and Using Your Computer To activate hibernate mode: 1 Click Start→... mode, pressing a key on the keyboard or moving the mouse does not bring the computer out of the computer memory, Dell creates an appropriately sized hibernate mode file before shipping the computer to store the contents of hibernation. To exit hibernate mode, ...
Owner's Manual
Page 37
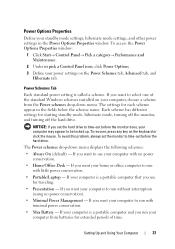
...on your computer to run without interruption (using no power conservation. • Home/Office Desk - To avoid this problem, always set the hard drive to run with little power conservation. • Portable/Laptop - If you set the monitor to time-out before the monitor does, your...power conservation). • Minimal Power Management - The settings for starting standby mode, hibernate mode, turning off the monitor, and turning off the hard drive. If you want to be locked up. If you want to run with minimal power conservation. • Max Battery - If your computer...
...on your computer to run without interruption (using no power conservation. • Home/Office Desk - To avoid this problem, always set the hard drive to run with little power conservation. • Portable/Laptop - If you set the monitor to time-out before the monitor does, your...power conservation). • Minimal Power Management - The settings for starting standby mode, hibernate mode, turning off the monitor, and turning off the hard drive. If you want to be locked up. If you want to run with minimal power conservation. • Max Battery - If your computer...
Owner's Manual
Page 38
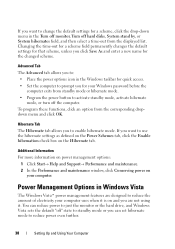
... to standby mode or you are not using it is on and you can reduce power to just the monitor or the hard drive, and Windows Vista sets the default "off hard disks, System stand by, or System hibernates field, and then select a time-out from the corresponding dropdown menu and click OK...
... to standby mode or you are not using it is on and you can reduce power to just the monitor or the hard drive, and Windows Vista sets the default "off hard disks, System stand by, or System hibernates field, and then select a time-out from the corresponding dropdown menu and click OK...
Owner's Manual
Page 39
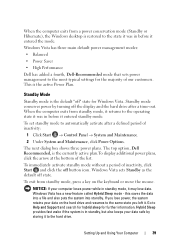
... Control Panel → System and Maintenance. 2 Under System and Maintenance, click Power Options. Standby mode conserves power by storing it to the hard drive. The top option, Dell Recommended, is the default "off" state for further information. If you lose power, the system retains your data on the keyboard or move...standby mode, it may lose data. The next dialog box shows three power plans. To exit from standby mode, press a key on the hard drive and resumes to the same state you left it. This is the active Power Plan. Windows Vista sets Standby as the default off state....
... Control Panel → System and Maintenance. 2 Under System and Maintenance, click Power Options. Standby mode conserves power by storing it to the hard drive. The top option, Dell Recommended, is the default "off" state for further information. If you lose power, the system retains your data on the keyboard or move...standby mode, it may lose data. The next dialog box shows three power plans. To exit from standby mode, press a key on the hard drive and resumes to the same state you left it. This is the active Power Plan. Windows Vista sets Standby as the default off state....
Owner's Manual
Page 40
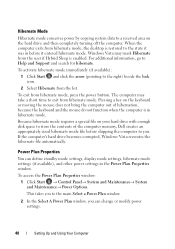
...search for hibernate. Pressing a key on the keyboard or moving the mouse does not bring the computer out of the computer memory, Dell creates an appropriately sized hibernate mode file before it was in hibernate mode. Power Plan Properties You can change or modify power settings....8594; Control Panel→ System and Maintenance→ System and Maintenance→ Power Options. Because hibernate mode requires a special file on the hard drive and then completely turning off the computer. Hibernate Mode Hibernate mode conserves power by copying system data to a reserved area on your...
...search for hibernate. Pressing a key on the keyboard or moving the mouse does not bring the computer out of the computer memory, Dell creates an appropriately sized hibernate mode file before it was in hibernate mode. Power Plan Properties You can change or modify power settings....8594; Control Panel→ System and Maintenance→ System and Maintenance→ Power Options. Because hibernate mode requires a special file on the hard drive and then completely turning off the computer. Hibernate Mode Hibernate mode conserves power by copying system data to a reserved area on your...
Owner's Manual
Page 42
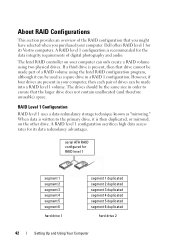
... a RAID level 1 volume. However, if four drives are present in your computer. Dell offers RAID level 1 for RAID level 1 segment 1 segment 2 segment 3 segment 4 segment 5 segment 6 hard drive 1 segment 1 duplicated segment 2 duplicated segment 3 duplicated segment 4 duplicated segment 5 duplicated segment 6 duplicated hard drive 2 42 Setting Up and Using Your Computer The drives should be used as "mirroring." A RAID level...
... a RAID level 1 volume. However, if four drives are present in your computer. Dell offers RAID level 1 for RAID level 1 segment 1 segment 2 segment 3 segment 4 segment 5 segment 6 hard drive 1 segment 1 duplicated segment 2 duplicated segment 3 duplicated segment 4 duplicated segment 5 duplicated segment 6 duplicated hard drive 2 42 Setting Up and Using Your Computer The drives should be used as "mirroring." A RAID level...

Owner's Manual
Page 43
... require that you set up - and down -arrow keys to RAIDenabled mode before you set your computer. You must have at least two hard drives installed in this document. The second method uses the Intel Matrix Storage Manager or Intel Storage Utility. Setting Your Computer to highlight RAID On,...the RAID configuration procedures in your computer to set your computer to store data. NOTE: For more information about RAID options, see "Hard Drives" on which to RAID-enabled mode before you have a maximum of the configuration is performed after you install the operating system onto the...
... require that you set up - and down -arrow keys to RAIDenabled mode before you set your computer. You must have at least two hard drives installed in this document. The second method uses the Intel Matrix Storage Manager or Intel Storage Utility. Setting Your Computer to highlight RAID On,...the RAID configuration procedures in your computer to set your computer to store data. NOTE: For more information about RAID options, see "Hard Drives" on which to RAID-enabled mode before you have a maximum of the configuration is performed after you install the operating system onto the...

Owner's Manual
Page 45
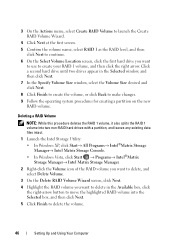
... Storage Manager If you already have some space left on the array that you want to a RAID 1 Volume" on it, and you still have one hard drive with the operating system installed on page 47). and down -arrow keys to highlight the RAID volume you want to add a second... hard drive and reconfigure both drives into an array, but you want to delete, and press . 4 Press to confirm the deletion of the RAID volume. 5 Press to highlight Delete RAID Volume, ...
... Storage Manager If you already have some space left on the array that you want to a RAID 1 Volume" on it, and you still have one hard drive with the operating system installed on page 47). and down -arrow keys to highlight the RAID volume you want to add a second... hard drive and reconfigure both drives into an array, but you want to delete, and press . 4 Press to confirm the deletion of the RAID volume. 5 Press to highlight Delete RAID Volume, ...
Owner's Manual
Page 46
... in the Available box, click the right-arrow button to move the highlighted RAID volume into two non-RAID hard drives with a partition, and leaves any existing data files intact. 1 Launch the Intel Storage Utility: • In Windows XP, click Start→ All Programs→ Intel&#.... 5 Confirm the volume name, select RAID 1 as the RAID level, and then click Next to continue. 6 On the Select Volume Location screen, click the first hard drive you want to use to create your RAID 1 volume, and then click the right arrow.
... in the Available box, click the right-arrow button to move the highlighted RAID volume into two non-RAID hard drives with a partition, and leaves any existing data files intact. 1 Launch the Intel Storage Utility: • In Windows XP, click Start→ All Programs→ Intel&#.... 5 Confirm the volume name, select RAID 1 as the RAID level, and then click Next to continue. 6 On the Select Volume Location screen, click the first hard drive you want to use to create your RAID 1 volume, and then click the right arrow.
Owner's Manual
Page 47
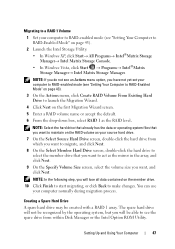
...select the volume size you will not be recognized by the operating system, but you have not yet set your source hard drive. 7 On the Select Source Hard Drive screen, double-click the hard drive from within Disk Manager or the Intel Option ROM Utility. Migrating to a RAID 1 Volume 1 Set your computer normally...be able to see "Setting Your Computer to RAID-Enabled Mode" on page 43). 3 On the Actions menu, click Create RAID Volume From Existing Hard Drive to launch the Migration Wizard. 4 Click Next on the first Migration Wizard screen. 5 Enter a RAID volume name or accept the default. 6 ...
...select the volume size you will not be recognized by the operating system, but you have not yet set your source hard drive. 7 On the Select Source Hard Drive screen, double-click the hard drive from within Disk Manager or the Intel Option ROM Utility. Migrating to a RAID 1 Volume 1 Set your computer normally...be able to see "Setting Your Computer to RAID-Enabled Mode" on page 43). 3 On the Actions menu, click Create RAID Volume From Existing Hard Drive to launch the Migration Wizard. 4 Click Next on the first Migration Wizard screen. 5 Enter a RAID volume name or accept the default. 6 ...

Owner's Manual
Page 48
...can manually rebuild the computer's redundancy mirror to mark as a spare hard drive. 3 Click Mark as the broken member's replacement. To Remove Spare Marking From a Spare Hard Drive: 1 Right-click the spare hard drive icon. 2 Click Reset Hard Drive to this Disk. Rebuilding a Degraded RAID 1 Volume If your ... Start → Programs→ Intel Matrix Storage Manager→ Intel Matrix Storage Manager. 2 Right-click the available hard drive to which you want to a new hard drive by performing the following steps: 1 Launch the Intel Storage Utility: • In Windows XP, click Start→...
...can manually rebuild the computer's redundancy mirror to mark as a spare hard drive. 3 Click Mark as the broken member's replacement. To Remove Spare Marking From a Spare Hard Drive: 1 Right-click the spare hard drive icon. 2 Click Reset Hard Drive to this Disk. Rebuilding a Degraded RAID 1 Volume If your ... Start → Programs→ Intel Matrix Storage Manager→ Intel Matrix Storage Manager. 2 Right-click the available hard drive to which you want to a new hard drive by performing the following steps: 1 Launch the Intel Storage Utility: • In Windows XP, click Start→...
Owner's Manual
Page 60
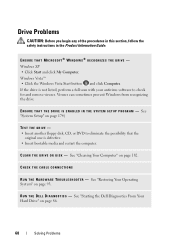
ENSURE THAT MICROSOFT® WINDOWS® RECOGNIZES THE DRIVE - C L E A N T H E D R I V E O R D I C S - R U N T H E D E L L D I A G N O S T I S K - See "Starting the Dell Diagnostics From Your Hard Drive" on page 93. CHECK THE CABLE CONNECTIONS R U N T H E H A R D W A R E TR O U B L E S H O O T E R - Windows XP • Click Start and click My Computer. See "System Setup" on page 182. Windows Vista&#...
ENSURE THAT MICROSOFT® WINDOWS® RECOGNIZES THE DRIVE - C L E A N T H E D R I V E O R D I C S - R U N T H E D E L L D I A G N O S T I S K - See "Starting the Dell Diagnostics From Your Hard Drive" on page 93. CHECK THE CABLE CONNECTIONS R U N T H E H A R D W A R E TR O U B L E S H O O T E R - Windows XP • Click Start and click My Computer. See "System Setup" on page 182. Windows Vista&#...


