User Manual
Page 7
... or larger replacement when connecting this product to the public switched telephone network. Do not subject the power cord to the manufacturer's instructions and local regulations. Refer service or repairs, other replacement parts. CAUTION-SHOCK HAZARD: Do not use the fax feature during a ... fire or electrical shock results. CAUTION-POTENTIAL INJURY: To reduce risk of such problems. Remove the power cord from the printer before inspecting it. SAVE THESE INSTRUCTIONS. CAUTION-POTENTIAL INJURY: Do not cut, twist, bind, crush, or place heavy objects on the power cord. There ...
... or larger replacement when connecting this product to the public switched telephone network. Do not subject the power cord to the manufacturer's instructions and local regulations. Refer service or repairs, other replacement parts. CAUTION-SHOCK HAZARD: Do not use the fax feature during a ... fire or electrical shock results. CAUTION-POTENTIAL INJURY: To reduce risk of such problems. Remove the power cord from the printer before inspecting it. SAVE THESE INSTRUCTIONS. CAUTION-POTENTIAL INJURY: Do not cut, twist, bind, crush, or place heavy objects on the power cord. There ...
User Manual
Page 9
...dell.com. Additional setup and instructions for using the printer: • Selecting and storing paper and specialty media • Loading paper • Performing printing, copying, scanning, and faxing tasks, depending on the installation software CD. Recycling • Recycle the product packaging. • Recycle your printer...Mode. These cartridges let you adjust the darkness of the printer that require less ink. Initial setup instructions: • Connecting the printer • Installing the printer software Find it here Setup documentation The setup documentation came ...
...dell.com. Additional setup and instructions for using the printer: • Selecting and storing paper and specialty media • Loading paper • Performing printing, copying, scanning, and faxing tasks, depending on the installation software CD. Recycling • Recycle the product packaging. • Recycle your printer...Mode. These cartridges let you adjust the darkness of the printer that require less ink. Initial setup instructions: • Connecting the printer • Installing the printer software Find it here Setup documentation The setup documentation came ...
User Manual
Page 27
... be downloaded from the list. 3 Click the uninstaller. 4 Follow the instructions on the computer screen. 5 Once the uninstall process is complete, restart your printer and then download the driver. 3 Install additional or optional software. Reinstalling the printer software When you set up the printer using the installation software CD, all packages listed. If you...
... be downloaded from the list. 3 Click the uninstaller. 4 Follow the instructions on the computer screen. 5 Once the uninstall process is complete, restart your printer and then download the driver. 3 Install additional or optional software. Reinstalling the printer software When you set up the printer using the installation software CD, all packages listed. If you...

User Manual
Page 28
... screen. For Macintosh users Note: To take advantage of the full features of your printer folder 3 Double‑click Uninstaller. 4 Follow the instructions on the computer screen. Using the Internet Updated printer software may be available at http://support.dell.com. If the installation dialog does not appear after a minute, then launch the CD...
... screen. For Macintosh users Note: To take advantage of the full features of your printer folder 3 Double‑click Uninstaller. 4 Follow the instructions on the computer screen. Using the Internet Updated printer software may be available at http://support.dell.com. If the installation dialog does not appear after a minute, then launch the CD...

User Manual
Page 32
... letter-size transparencies. • If the transparencies have loaded in the printer. 1 From the printer control panel, press . 2 Adjust the settings as heavyweight matte, labels, photo cards, and glossy paper. • You follow the loading instructions on the iron‑on transfers 50 transparencies Make sure that came with...navigate to: Setup > > Paper Setup > > Paper Size > • If you are not sure which side is printable, then see the instructions that • The printable or glossy side of the paper is loaded faceup. If you want to set the paper type, then navigate to: ...
... letter-size transparencies. • If the transparencies have loaded in the printer. 1 From the printer control panel, press . 2 Adjust the settings as heavyweight matte, labels, photo cards, and glossy paper. • You follow the loading instructions on the iron‑on transfers 50 transparencies Make sure that came with...navigate to: Setup > > Paper Setup > > Paper Size > • If you are not sure which side is printable, then see the instructions that • The printable or glossy side of the paper is loaded faceup. If you want to set the paper type, then navigate to: ...
User Manual
Page 40
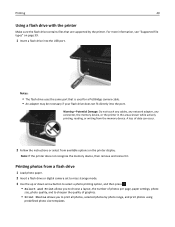
... then press . • Select and Print allows you to sharpen the quality of data can occur. 2 Follow the instructions or select from the memory device. Note: If the printer does not recognize the memory device, then remove and reinsert it. For more information, see "Supported file types" on the... same port that are supported by photo range, and print photos using predefined photo size templates. Printing 40 Using a flash drive with the printer Make sure the flash drive contains files that is used for a PictBridge camera cable. • An adapter may be necessary if your flash...
... then press . • Select and Print allows you to sharpen the quality of data can occur. 2 Follow the instructions or select from the memory device. Note: If the printer does not recognize the memory device, then remove and reinsert it. For more information, see "Supported file types" on the... same port that are supported by photo range, and print photos using predefined photo size templates. Printing 40 Using a flash drive with the printer Make sure the flash drive contains files that is used for a PictBridge camera cable. • An adapter may be necessary if your flash...
User Manual
Page 45
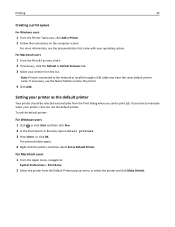
... through a USB cable may have to : System Preferences > Print & Fax 2 Select the printer from the list. Setting your printer, then it is not the default printer. To set the default printer: For Windows users 1 Click , or click Start and then click Run. 2 In the ...default printer name. For more information, see the documentation that came with your printer from the Default Printer pop‑up menu, or select the printer and click Make Default. Printing 45 Creating a print queue For Windows users 1 From the Printer Tasks area, click Add a Printer. 2 Follow the instructions ...
... through a USB cable may have to : System Preferences > Print & Fax 2 Select the printer from the list. Setting your printer, then it is not the default printer. To set the default printer: For Windows users 1 Click , or click Start and then click Run. 2 In the ...default printer name. For more information, see the documentation that came with your printer from the Default Printer pop‑up menu, or select the printer and click Make Default. Printing 45 Creating a print queue For Windows users 1 From the Printer Tasks area, click Add a Printer. 2 Follow the instructions ...
User Manual
Page 53
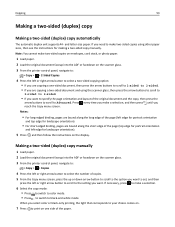
...edged binding, pages are copying a two-sided document and using other paper sizes, then see the instructions for landscape orientation). 5 Press , and then follow the instructions on the scanner glass. 3 From the printer control panel, navigate to: > Copy > > Copies 4 Press the left or right arrow button ...‑sided (duplex) copy manually 1 Load paper. 2 Load the original document faceup into the ADF or facedown on the scanner glass. 3 From the printer control panel, navigate to: > Copy > > 2‑Sided Copies 4 Press the left or right arrow button to the option you want . Copying 53...
...edged binding, pages are copying a two-sided document and using other paper sizes, then see the instructions for landscape orientation). 5 Press , and then follow the instructions on the scanner glass. 3 From the printer control panel, navigate to: > Copy > > Copies 4 Press the left or right arrow button ...‑sided (duplex) copy manually 1 Load paper. 2 Load the original document faceup into the ADF or facedown on the scanner glass. 3 From the printer control panel, navigate to: > Copy > > 2‑Sided Copies 4 Press the left or right arrow button to the option you want . Copying 53...

User Manual
Page 57
... scan multiple photos at once and save them in a photo editing application to edit. Note: Allow at least 1/4 inch of devices, select your printer and lets you work with the application or search for more information. 5 Start the scan job. 6 Save the scanned image, and then edit...folder in the Search field of devices, check the documentation that supports your printer. Set the color, quality, original image size, and other scan options. If necessary, press each time you make a selection. 5 Press . Follow the instructions on finding the list of the Help menu. 4 Adjust the scan ...
... scan multiple photos at once and save them in a photo editing application to edit. Note: Allow at least 1/4 inch of devices, select your printer and lets you work with the application or search for more information. 5 Start the scan job. 6 Save the scanned image, and then edit...folder in the Search field of devices, check the documentation that supports your printer. Set the color, quality, original image size, and other scan options. If necessary, press each time you make a selection. 5 Press . Follow the instructions on finding the list of the Help menu. 4 Adjust the scan ...

User Manual
Page 62
...the printer program folder from the list. 3 Navigate to: Printer Home > select your printer > Fax > Edit contact list > Select from the list. 3 Navigate to: Printer Home > select your printer > Settings > Set up the printer to : Applications > select your printer folder > Printer Settings > Email 2 Follow the instructions on... first configure the network connection and e-mail settings of your printer. For Macintosh users 1 From the Finder, navigate to e‑mail The E‑mail Setup Wizard opens. 4 Follow the instructions on the computer screen, and then click Save Settings. You...
...the printer program folder from the list. 3 Navigate to: Printer Home > select your printer > Fax > Edit contact list > Select from the list. 3 Navigate to: Printer Home > select your printer > Settings > Set up the printer to : Applications > select your printer folder > Printer Settings > Email 2 Follow the instructions on... first configure the network connection and e-mail settings of your printer. For Macintosh users 1 From the Finder, navigate to e‑mail The E‑mail Setup Wizard opens. 4 Follow the instructions on the computer screen, and then click Save Settings. You...
User Manual
Page 92
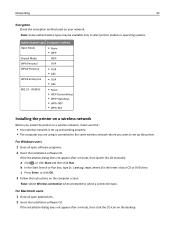
... dialog does not appear after a minute, then click the CD icon on the computer screen. c Press Enter, or click OK. 3 Follow the instructions on the desktop. If the installation dialog does not appear after a minute, then launch the CD manually: a Click , or click Start and then...8209; RADIUS • None • WEP‑DynamicKeys • WEP‑StaticKeys • WPA‑TKIP • WPA‑AES Installing the printer on a wireless network Before you are using is the letter of your network. Networking 92 Encryption Check the encryption method used on a wireless network,...
... dialog does not appear after a minute, then click the CD icon on the computer screen. c Press Enter, or click OK. 3 Follow the instructions on the desktop. If the installation dialog does not appear after a minute, then launch the CD manually: a Click , or click Start and then...8209; RADIUS • None • WEP‑DynamicKeys • WEP‑StaticKeys • WPA‑TKIP • WPA‑AES Installing the printer on a wireless network Before you are using is the letter of your network. Networking 92 Encryption Check the encryption method used on a wireless network,...
User Manual
Page 93
...Networking 93 3 Double-click the software installer package, and then follow the instructions on the computer screen for installing a configured printer on every computer that will access it. Installing the printer on other computer on the desktop. 3 Double-click the software installer package... is not possible to select a connection type. c Press Enter, or click OK. 3 Follow the instructions on the computer screen for installing a configured printer on the printer control panel. For Macintosh users 1 Close all open applications. 2 Insert the installation software CD. For Windows...
...Networking 93 3 Double-click the software installer package, and then follow the instructions on the computer screen for installing a configured printer on every computer that will access it. Installing the printer on other computer on the desktop. 3 Double-click the software installer package... is not possible to select a connection type. c Press Enter, or click OK. 3 Follow the instructions on the computer screen for installing a configured printer on the printer control panel. For Macintosh users 1 Close all open applications. 2 Insert the installation software CD. For Windows...

User Manual
Page 94
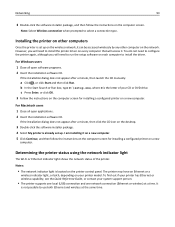
... turned off , and then turned back on the back of the printer may no longer be valid. Special wireless installation instructions The following instructions apply to an Ethernet or a wireless network and is ready for an ad hoc connection, but the access point is turned off or ...is not working properly. • The access point has been turned off or is powering up your printer for an Ethernet ...
... turned off , and then turned back on the back of the printer may no longer be valid. Special wireless installation instructions The following instructions apply to an Ethernet or a wireless network and is ready for an ad hoc connection, but the access point is turned off or ...is not working properly. • The access point has been turned off or is powering up your printer for an Ethernet ...
User Manual
Page 95
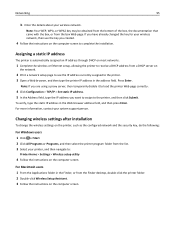
...the static IP address in the address field. If you have already changed the key for your printer, and then navigate to: Printer Home > Settings > Wireless setup utility 4 Follow the instructions on the network. 2 Print a network setup page to see the IP address currently assigned ...DHCP address from the Finder desktop, double-click the printer folder. 2 Double‑click Wireless Setup Assistant. 3 Follow the instructions on the computer screen to the printer, and then click Submit. Assigning a static IP address The printer is automatically assigned an IP address through DHCP on ...
...the static IP address in the address field. If you have already changed the key for your printer, and then navigate to: Printer Home > Settings > Wireless setup utility 4 Follow the instructions on the network. 2 Print a network setup page to see the IP address currently assigned ...DHCP address from the Finder desktop, double-click the printer folder. 2 Double‑click Wireless Setup Assistant. 3 Follow the instructions on the computer screen to the printer, and then click Submit. Assigning a static IP address The printer is automatically assigned an IP address through DHCP on ...
User Manual
Page 96
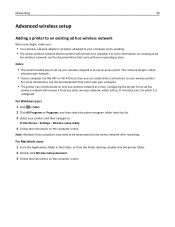
... more information on creating an ad hoc wireless network, see the documentation that came with your printer, and then navigate to: Printer Home > Settings > Wireless setup utility 4 Follow the instructions on the computer screen. For Windows users 1 Click or Start. 2 Click All Programs or... Programs, and then select the printer program folder from the Finder desktop, double-click the printer folder. 2 Double‑click Wireless Setup Assistant. 3 Follow the instructions on only one wireless network at a time. For Macintosh users 1 From the...
... more information on creating an ad hoc wireless network, see the documentation that came with your printer, and then navigate to: Printer Home > Settings > Wireless setup utility 4 Follow the instructions on the computer screen. For Windows users 1 Click or Start. 2 Click All Programs or... Programs, and then select the printer program folder from the Finder desktop, double-click the printer folder. 2 Double‑click Wireless Setup Assistant. 3 Follow the instructions on only one wireless network at a time. For Macintosh users 1 From the...
User Manual
Page 97
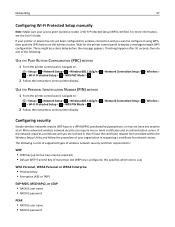
...> Wireless 802.11b/g/n > > Wi‑Fi Protected Setup > > WPS PBC Mode > 2 Follow the instructions on the printer display. > Network Connection Setup > > Wireless > USE THE PERSONAL IDENTIFICATION NUMBER (PIN) METHOD 1 From the printer control panel, navigate to: > Setup > > Network Setup > > Wireless 802.11b/g/n > > Wi‑...;Fi Protected Setup > > WPS PIN Mode > 2 Follow the instructions on the wireless router. If your printer or device has not yet been configured for the printer control panel to display a message to configure it , then fill out the certificate request ...
...> Wireless 802.11b/g/n > > Wi‑Fi Protected Setup > > WPS PBC Mode > 2 Follow the instructions on the printer display. > Network Connection Setup > > Wireless > USE THE PERSONAL IDENTIFICATION NUMBER (PIN) METHOD 1 From the printer control panel, navigate to: > Setup > > Network Setup > > Wireless 802.11b/g/n > > Wi‑...;Fi Protected Setup > > WPS PIN Mode > 2 Follow the instructions on the wireless router. If your printer or device has not yet been configured for the printer control panel to display a message to configure it , then fill out the certificate request ...
User Manual
Page 98
...user name • RADIUS password • CA certificate Configuring 802.1X Authentication The information to complete is not possible to connect the printer to locate the certificate file. b Click Install CA Certificate, and then type the path to the CA certificate, or click Browse...;MD5, LEAP, or MSCHAPv2 Proceed to locate the certificate file. Using the printer wirelessly Select the connection type that the authentication server requires. 3 Click OK, and then follow the instructions on troubleshooting specific connection types if you select. See related topics on the computer...
...user name • RADIUS password • CA certificate Configuring 802.1X Authentication The information to complete is not possible to connect the printer to locate the certificate file. b Click Install CA Certificate, and then type the path to the CA certificate, or click Browse...;MD5, LEAP, or MSCHAPv2 Proceed to locate the certificate file. Using the printer wirelessly Select the connection type that the authentication server requires. 3 Click OK, and then follow the instructions on troubleshooting specific connection types if you select. See related topics on the computer...
User Manual
Page 99
... All Programs or Programs, and then select the printer program folder from the list. 3 Select your printer, and then navigate to: Printer Home > Settings > Wireless setup utility 4 Follow the instructions on the computer screen. If the printer is currently set up the printer. 3 Select the USB printer. Using the printer locally (USB) Select the connection type that describes...
... All Programs or Programs, and then select the printer program folder from the list. 3 Select your printer, and then navigate to: Printer Home > Settings > Wireless setup utility 4 Follow the instructions on the computer screen. If the printer is currently set up the printer. 3 Select the USB printer. Using the printer locally (USB) Select the connection type that describes...
User Manual
Page 100
... on page 100. Switching between USB, Ethernet, and wireless connections (Macintosh only) You can change the way you want to use to configure the printer. 3 Follow the instructions on the computer screen for one type of the printer is disabled while it is connected to use (Network or USB). 3 Select Set as Default...
... on page 100. Switching between USB, Ethernet, and wireless connections (Macintosh only) You can change the way you want to use to configure the printer. 3 Follow the instructions on the computer screen for one type of the printer is disabled while it is connected to use (Network or USB). 3 Select Set as Default...
User Manual
Page 101
... the computer for Ethernet 1 Firmly plug the square end of the USB cable into the back of the printer. 2 Firmly plug the rectangular end of the computer. 3 Add the printer. Networking 101 3 Double‑click Dell Extras > Dell Setup Assistant. 4 Follow the instructions on the computer screen. 7 A second print queue will be created. Using the...
... the computer for Ethernet 1 Firmly plug the square end of the USB cable into the back of the printer. 2 Firmly plug the rectangular end of the computer. 3 Add the printer. Networking 101 3 Double‑click Dell Extras > Dell Setup Assistant. 4 Follow the instructions on the computer screen. 7 A second print queue will be created. Using the...


