User Guide
Page 1
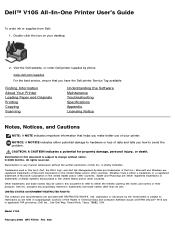
...either a trademark or a registered trademark of Microsoft Corporation in subparagraph (c)(1)(ii) of data and tells you have the Dell printer Service Tag available. UNITED STATES GOVERNMENT RESTRICTED RIGHTS This software and documentation are either potential damage to restrictions as set... in trademarks and trade names other countries. Windows Vista is strictly forbidden. Model V105 February 2008 SRV FX703 Rev. Dell™ V105 All-In-One Printer User's Guide To order ink or supplies from Dell: 1. NOTICE: A NOTICE indicates either registered trademarks or trademarks of...
...either a trademark or a registered trademark of Microsoft Corporation in subparagraph (c)(1)(ii) of data and tells you have the Dell printer Service Tag available. UNITED STATES GOVERNMENT RESTRICTED RIGHTS This software and documentation are either potential damage to restrictions as set... in trademarks and trade names other countries. Windows Vista is strictly forbidden. Model V105 February 2008 SRV FX703 Rev. Dell™ V105 All-In-One Printer User's Guide To order ink or supplies from Dell: 1. NOTICE: A NOTICE indicates either registered trademarks or trademarks of...
User Guide
Page 5
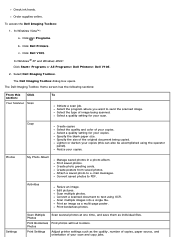
...: 1. Click ® Programs. b. In Windows® XP and Windows 2000: Click Start® Programs or All Programs® Dell Printers® Dell V105. 2. The Dell Imaging Toolbox Home screen has the following sections: From this can also be accomplished using OCR. Select a quality setting for your copies ...Photo Album Manage saved photos in a photo album. Convert a scanned document to PDF. Specify the size of image being copied. Click Dell V105. Settings Scan Multiple Photos Scan several photos at one time, and save them as a multi-page poster.
...: 1. Click ® Programs. b. In Windows® XP and Windows 2000: Click Start® Programs or All Programs® Dell Printers® Dell V105. 2. The Dell Imaging Toolbox Home screen has the following sections: From this can also be accomplished using OCR. Select a quality setting for your copies ...Photo Album Manage saved photos in a photo album. Convert a scanned document to PDF. Specify the size of image being copied. Click Dell V105. Settings Scan Multiple Photos Scan several photos at one time, and save them as a multi-page poster.
User Guide
Page 6
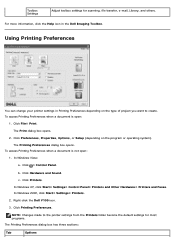
...Using Printing Preferences You can change your printer settings in the Dell Imaging Toolbox. The Printing Preferences dialog box opens. In Windows XP, click Start® Settings® Control Panel® Printers and Other Hardware® Printers and Faxes. For more information, ...click the Help icon in Printing Preferences depending on the program or operating system). c. Click Hardware and Sound. Click Printers. Right-click the Dell V105 icon. 3. Click File®...
...Using Printing Preferences You can change your printer settings in the Dell Imaging Toolbox. The Printing Preferences dialog box opens. In Windows XP, click Start® Settings® Control Panel® Printers and Other Hardware® Printers and Faxes. For more information, ...click the Help icon in Printing Preferences depending on the program or operating system). c. Click Hardware and Sound. Click Printers. Right-click the Dell V105 icon. 3. Click File®...
User Guide
Page 9
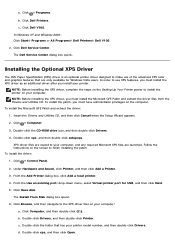
In Windows XP and Windows 2000: Click Start® Programs or All Programs® Dell Printers® Dell V105. 2. XPS driver files are copied to your computer, and any required Microsoft XPS files are only available for USB, and then click... To install the Microsoft QFE Patch and extract the driver: 1. From the Add Printer dialog box, click Add a local printer. 4. Click Dell V105. The Dell Service Center dialog box opens. Double-click the folder that are launched. d. Click Dell Printers. Follow the instructions on your computer: a. Click Browse, and then navigate to ...
In Windows XP and Windows 2000: Click Start® Programs or All Programs® Dell Printers® Dell V105. 2. XPS driver files are copied to your computer, and any required Microsoft XPS files are only available for USB, and then click... To install the Microsoft QFE Patch and extract the driver: 1. From the Add Printer dialog box, click Add a local printer. 4. Click Dell V105. The Dell Service Center dialog box opens. Double-click the folder that are launched. d. Click Dell Printers. Follow the instructions on your computer: a. Click Browse, and then navigate to ...

User Guide
Page 10
... appear when using your screen to complete the installation. Click Dell Printers. In Windows XP and WIndows 2000: Click Start® Programs or All Programs® Dell Printers® Dell V105. 2. b. When the printer software installation screen appears, click Using a USB cable or Using a wireless network. c. Click Uninstall Dell V105. 3. Double-click the CD-ROM drive icon, and then...
... appear when using your screen to complete the installation. Click Dell Printers. In Windows XP and WIndows 2000: Click Start® Programs or All Programs® Dell Printers® Dell V105. 2. b. When the printer software installation screen appears, click Using a USB cable or Using a wireless network. c. Click Uninstall Dell V105. 3. Double-click the CD-ROM drive icon, and then...
User Guide
Page 16
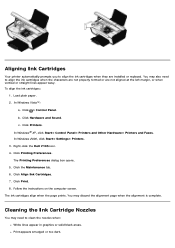
..., click Start® Control Panel® Printers and Other Hardware® Printers and Faxes. c. You may need to align the ink cartridges when the characters are not properly formed or are installed or replaced. Right-click the Dell V105 icon. 4. Follow the instructions on the computer... screen. Load plain paper. 2. Click Printing Preferences. Click ® Control Panel. Click Printers. Click the Maintenance tab. 6. The ink cartridges align when the...
..., click Start® Control Panel® Printers and Other Hardware® Printers and Faxes. c. You may need to align the ink cartridges when the characters are not properly formed or are installed or replaced. Right-click the Dell V105 icon. 4. Follow the instructions on the computer... screen. Load plain paper. 2. Click Printing Preferences. Click ® Control Panel. Click Printers. Click the Maintenance tab. 6. The ink cartridges align when the...
User Guide
Page 17
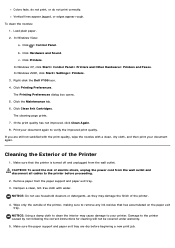
... rough. Load plain paper. 2. The Printing Preferences dialog box opens. 5. CAUTION: To avoid the risk of the printer, making sure to the printer caused by not following the correct instructions for cleaning will not be covered under warranty. 5. Click Hardware and Sound. Make...To clean the nozzles: 1. Click Printing Preferences. Click ® Control Panel. In Windows 2000, click Start® Settings® Printers. 3. Right-click the Dell V105 icon. 4. Click the Maintenance tab. 6. Click Clean Ink Cartridges. If you are dry before proceeding. 2. Make sure the paper ...
... rough. Load plain paper. 2. The Printing Preferences dialog box opens. 5. CAUTION: To avoid the risk of the printer, making sure to the printer caused by not following the correct instructions for cleaning will not be covered under warranty. 5. Click Hardware and Sound. Make...To clean the nozzles: 1. Click Printing Preferences. Click ® Control Panel. In Windows 2000, click Start® Settings® Printers. 3. Right-click the Dell V105 icon. 4. Click the Maintenance tab. 6. Click Clean Ink Cartridges. If you are dry before proceeding. 2. Make sure the paper ...
User Guide
Page 23
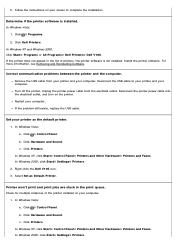
...still exists, replace the USB cable. In Windows XP, click Start® Control Panel® Printers and Other Hardware® Printers and Faxes. Click Printers. Right-click the Dell V105 icon. 3. c. Set your computer. Click Hardware and Sound. In Windows Vista: 1. Check ...for multiple instances of printers, the printer software is installed. Click ® Control Panel. Restart your printer as Default Printer. In Windows XP and Windows 2000: Click Start® Programs or All Programs® Dell Printers® Dell V105. Reconnect the printer power cable into the electrical ...
...still exists, replace the USB cable. In Windows XP, click Start® Control Panel® Printers and Other Hardware® Printers and Faxes. Click Printers. Right-click the Dell V105 icon. 3. c. Set your computer. Click Hardware and Sound. In Windows Vista: 1. Check ...for multiple instances of printers, the printer software is installed. Click ® Control Panel. Restart your printer as Default Printer. In Windows XP and Windows 2000: Click Start® Programs or All Programs® Dell Printers® Dell V105. Reconnect the printer power cable into the electrical ...

User Guide
Page 24
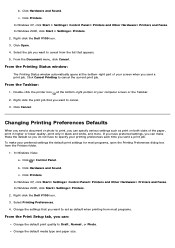
...and Sound. What Flashing appears lights on the Operator Panel. Click Set as the default printer: a. Click Printers. In Windows 2000, click Start® Settings® Printers. 2. Right-click the Dell V105 icon. 3. Error Codes and Flashing Lights on the Operator Panel For more information, see... and Flashing Lights on What it to check the latest information on the printer. Check for multiple objects for your printer, please visit http://support.dell.com/support. Right-click the Dell V105 icon. Delete the other copies of these print objects to each cartridge. ...
...and Sound. What Flashing appears lights on the Operator Panel. Click Set as the default printer: a. Click Printers. In Windows 2000, click Start® Settings® Printers. 2. Right-click the Dell V105 icon. 3. Error Codes and Flashing Lights on the Operator Panel For more information, see... and Flashing Lights on What it to check the latest information on the printer. Check for multiple objects for your printer, please visit http://support.dell.com/support. Right-click the Dell V105 icon. Delete the other copies of these print objects to each cartridge. ...
User Guide
Page 27
...you have loaded the paper correctly. In Windows Vista: a. With an image open, click the Advanced tab. 6. Uninstall the printer software, and then reinstall it with a clean, lint-free cloth dampened with water. For more information, see Removing and Reinstalling...or Windows 2000: Click Start® Programs or All Programs® Dell Printers® Dell V105. 2. Select Dell Imaging Toolbox. Click ® Programs. b. Click Dell V105. Close all applications not in your computer. The Dell Imaging Toolbox dialog box opens. 3. Click Image Patterns. Copying Problems Check...
...you have loaded the paper correctly. In Windows Vista: a. With an image open, click the Advanced tab. 6. Uninstall the printer software, and then reinstall it with a clean, lint-free cloth dampened with water. For more information, see Removing and Reinstalling...or Windows 2000: Click Start® Programs or All Programs® Dell Printers® Dell V105. 2. Select Dell Imaging Toolbox. Click ® Programs. b. Click Dell V105. Close all applications not in your computer. The Dell Imaging Toolbox dialog box opens. 3. Click Image Patterns. Copying Problems Check...
User Guide
Page 28
... and error messages on your scanned document. 9. Check the USB cable. In Windows XP or Windows 2000: Click Start® Programs or All Programs® Dell Printers® Dell V105. 2. From the Home screen, click My Photo Album. 4. Move the slider from magazine/newspaper (descreen). 8. c. Click OK. Check paper sizes. drop down menu, select...
... and error messages on your scanned document. 9. Check the USB cable. In Windows XP or Windows 2000: Click Start® Programs or All Programs® Dell Printers® Dell V105. 2. From the Home screen, click My Photo Album. 4. Move the slider from magazine/newspaper (descreen). 8. c. Click OK. Check paper sizes. drop down menu, select...
User Guide
Page 29
...computer, reconnect the USB cable as shown on the printer. Click Dell Printers. Reconnect the printer power cable into the electrical outlet, and turn on the Setting Up Your Printer poster, and then restart the computer. Click Dell V105. To make this setting the default for all scan ...jobs, select Always use these settings when scanning. 7. Determine if the printer software is not installed. In Windows XP or Windows 2000: Click Start® Programs or All Programs® Dell Printers® Dell V105. For more information, see Removing and Reinstalling Software. From the Home ...
...computer, reconnect the USB cable as shown on the printer. Click Dell Printers. Reconnect the printer power cable into the electrical outlet, and turn on the Setting Up Your Printer poster, and then restart the computer. Click Dell V105. To make this setting the default for all scan ...jobs, select Always use these settings when scanning. 7. Determine if the printer software is not installed. In Windows XP or Windows 2000: Click Start® Programs or All Programs® Dell Printers® Dell V105. For more information, see Removing and Reinstalling Software. From the Home ...
User Guide
Page 30
... menu, select a pattern depending on your document or photo before scanning. In Windows XP or Windows 2000: Click Start® Programs or All Programs® Dell Printers® Dell V105. 2. Click Custom Settings. 5. From the Home screen, click My Photo Album. 4. Remove image patterns from magazine/newspaper (descreen). 8. c. Click ® Programs...
... menu, select a pattern depending on your document or photo before scanning. In Windows XP or Windows 2000: Click Start® Programs or All Programs® Dell Printers® Dell V105. 2. Click Custom Settings. 5. From the Home screen, click My Photo Album. 4. Remove image patterns from magazine/newspaper (descreen). 8. c. Click ® Programs...
User Guide
Page 31
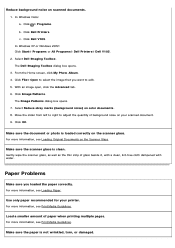
... sure you want to adjust the quantity of background noise on your printer. For more information, see Print Media Guidelines. In Windows Vista: a. Click Dell V105. In Windows XP or Windows 2000: Click Start® Programs or All Programs® Dell Printers® Dell V105. 2. For more information, see Loading Original Documents on scanned documents. 1. Use only...
... sure you want to adjust the quantity of background noise on your printer. For more information, see Print Media Guidelines. In Windows Vista: a. Click Dell V105. In Windows XP or Windows 2000: Click Start® Programs or All Programs® Dell Printers® Dell V105. 2. For more information, see Loading Original Documents on scanned documents. 1. Use only...
User Guide
Page 34
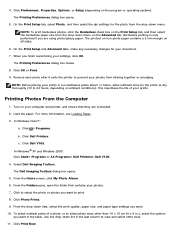
...OK. Click ® Programs. b. In Windows® XP and Windows 2000: Click Start® Programs or All Programs® Dell Printers® Dell V105. 4. From the Folders pane, open the folder that they are using photo/glossy paper. To select multiple prints of your document....1. Load the paper. In Windows Vista™: a. Click Photo Prints. 9. Click Print Now. Click Dell Printers. c. Click Dell V105. Select Dell Imaging Toolbox. Remove each photo after it exits the printer to select photo sizes other sizes. 11. NOTE: Before placing your photos. 7. From the Home screen...
...OK. Click ® Programs. b. In Windows® XP and Windows 2000: Click Start® Programs or All Programs® Dell Printers® Dell V105. 4. From the Folders pane, open the folder that they are using photo/glossy paper. To select multiple prints of your document....1. Load the paper. In Windows Vista™: a. Click Photo Prints. 9. Click Print Now. Click Dell Printers. c. Click Dell V105. Select Dell Imaging Toolbox. Remove each photo after it exits the printer to select photo sizes other sizes. 11. NOTE: Before placing your photos. 7. From the Home screen...
User Guide
Page 35
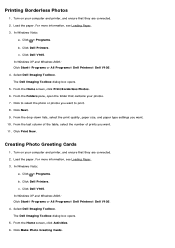
... prints you want. 10. Load the paper. Turn on your photos. 7. In Windows XP and Windows 2000: Click Start® Programs or All Programs® Dell Printers® Dell V105. 4. The Dell Imaging Toolbox dialog box opens. 5. c. From the Home screen, click Print Borderless Photos. 6. For more information, see Loading Paper. 3. Select...
... prints you want. 10. Load the paper. Turn on your photos. 7. In Windows XP and Windows 2000: Click Start® Programs or All Programs® Dell Printers® Dell V105. 4. The Dell Imaging Toolbox dialog box opens. 5. c. From the Home screen, click Print Borderless Photos. 6. For more information, see Loading Paper. 3. Select...
User Guide
Page 41
... Cancel Printing to cancel. 3. Click Hardware and Sound. In Windows XP, click Start® Settings® Control Panel® Printers and Other Hardware® Printers and Faxes. Change the default media type and paper size. From the Taskbar: 1. To make these the default so you do... When you send a document or photo to print, you want to Draft, Normal, or Photo. Select Printing Preferences. 4. b. Click Printers. Click ® Control Panel. Right-click the Dell V105 icon. 3. Click Printers. Right-click the print job that you send a print job. Right-click the...
... Cancel Printing to cancel. 3. Click Hardware and Sound. In Windows XP, click Start® Settings® Control Panel® Printers and Other Hardware® Printers and Faxes. Change the default media type and paper size. From the Taskbar: 1. To make these the default so you do... When you send a document or photo to print, you want to Draft, Normal, or Photo. Select Printing Preferences. 4. b. Click Printers. Click ® Control Panel. Right-click the Dell V105 icon. 3. Click Printers. Right-click the print job that you send a print job. Right-click the...
User Guide
Page 47
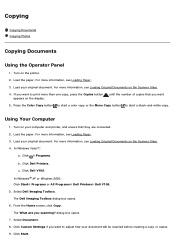
... creating a copy or copies. 9. In Windows® XP or Windows 2000: Click Start® Programs or All Programs® Dell Printers® Dell V105. 5. Click Start. For more information, see Loading Original Documents on the Scanner Glass. 4. If you scanning? Using Your Computer 1. For more ...than one copy, press the Copies button appears on the display. From the Home screen, click Copy. The What are connected. 2. ...
... creating a copy or copies. 9. In Windows® XP or Windows 2000: Click Start® Programs or All Programs® Dell Printers® Dell V105. 5. Click Start. For more information, see Loading Original Documents on the Scanner Glass. 4. If you scanning? Using Your Computer 1. For more ...than one copy, press the Copies button appears on the display. From the Home screen, click Copy. The What are connected. 2. ...
User Guide
Page 48
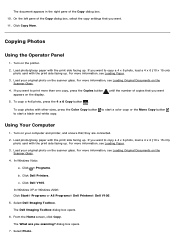
...you want 5. Copying Photos Using the Operator Panel 1. If you want to start a black-and-white copy. For more than one copy, press the Copies button appears on the scanner glass. until the number of the Copy dialog box. 10. To copy a... Paper. 3. For more information, see Loading Original Documents on your original photo on the printer. 2. Click ® Programs. b. Click Dell Printers. c. In Windows XP or Windows 2000: Click Start® Programs or All Programs® Dell Printers® Dell V105. 5. The Dell Imaging Toolbox dialog box opens. 6. Select Photo.
...you want 5. Copying Photos Using the Operator Panel 1. If you want to start a black-and-white copy. For more than one copy, press the Copies button appears on the scanner glass. until the number of the Copy dialog box. 10. To copy a... Paper. 3. For more information, see Loading Original Documents on your original photo on the printer. 2. Click ® Programs. b. Click Dell Printers. c. In Windows XP or Windows 2000: Click Start® Programs or All Programs® Dell Printers® Dell V105. 5. The Dell Imaging Toolbox dialog box opens. 6. Select Photo.
User Guide
Page 52
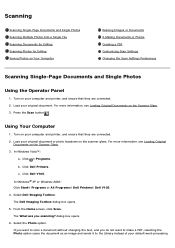
...document. Press the Scan button . Load your default word-processing Click Dell V105. Select the Photo option. c. The What are connected. 2. Load your computer and printer, and ensure that they are connected. 2. Turn on the scanner glass. Select Dell Imaging Toolbox. Turn on Your Computer Resizing Images or Documents E-Mailing... Photos Using the Operator Panel 1. In Windows® XP or Windows 2000: Click Start® Programs or All Programs® Dell Printers® Dell V105. 4. From the Home screen, click Scan. dialog box opens. 6. In Windows Vista™: a.
...document. Press the Scan button . Load your default word-processing Click Dell V105. Select the Photo option. c. The What are connected. 2. Load your computer and printer, and ensure that they are connected. 2. Turn on the scanner glass. Select Dell Imaging Toolbox. Turn on Your Computer Resizing Images or Documents E-Mailing... Photos Using the Operator Panel 1. In Windows® XP or Windows 2000: Click Start® Programs or All Programs® Dell Printers® Dell V105. 4. From the Home screen, click Scan. dialog box opens. 6. In Windows Vista™: a.


