Glossary
Page 7
... system's boot routine and the POST. Serial-attached SCSI. SD card - Allows hard drives to report errors and failures to the system BIOS and then display an error message on the system used to connect a modem to identify it when you turn off your system. See.... Examples of independent disks. ROMB - Small computer system interface. SMART - read -only file is one bit at a time and is lost when you call Dell for program instructions and data. RAID on motherboard. R-DIMM - SATA - Storage Area Network. sec - Redundant array of code in ROM code. RAM - ROM...
... system's boot routine and the POST. Serial-attached SCSI. SD card - Allows hard drives to report errors and failures to the system BIOS and then display an error message on the system used to connect a modem to identify it when you turn off your system. See.... Examples of independent disks. ROMB - Small computer system interface. SMART - read -only file is one bit at a time and is lost when you call Dell for program instructions and data. RAID on motherboard. R-DIMM - SATA - Storage Area Network. sec - Redundant array of code in ROM code. RAM - ROM...

Glossary
Page 8
SMP - Simple Network Management Protocol. A standard interface that allows a network manager to configure your system's integral components, such as password protection. striping - A BIOS-based program that tells a system what hardware is the same on each disk. When such devices are video standards for multiple USB-compliant devices, such ...
SMP - Simple Network Management Protocol. A standard interface that allows a network manager to configure your system's integral components, such as password protection. striping - A BIOS-based program that tells a system what hardware is the same on each disk. When such devices are video standards for multiple USB-compliant devices, such ...
Glossary
Page 48
... Network Management Protocol SVGA - Universal Serial Bus USB USB USB USB V - Volt VAC - SMART - Unregistered DDR3 UPS - Watt WH - Self-Monitoring Analysis and Reporting Technology BIOS SMP - Video graphics array VGA と SVGA W - Super video graphics array VGA と SVGA TCP/IP - TCP/IP U-DIMM - Volts alternating current VDC - Watt-hour...
... Network Management Protocol SVGA - Universal Serial Bus USB USB USB USB V - Volt VAC - SMART - Unregistered DDR3 UPS - Watt WH - Self-Monitoring Analysis and Reporting Technology BIOS SMP - Video graphics array VGA と SVGA W - Super video graphics array VGA と SVGA TCP/IP - TCP/IP U-DIMM - Volts alternating current VDC - Watt-hour...
Glossary
Page 57
Secure Digital SDRAM Synchronous Dynamic RandomAccess Memory sec - 초 (Second SEL System event log SMART Self-Monitoring Analysis and Reporting Technology BIOS SMP Symmetric Multiprocessing 2 I /O SD 카드 - RAC Remote Access Controller RAID Redundant Array of Independent Disk RAID RAID 0, RAID 1, RAID 5, RAID 10 및 RAID 50 ...
Secure Digital SDRAM Synchronous Dynamic RandomAccess Memory sec - 초 (Second SEL System event log SMART Self-Monitoring Analysis and Reporting Technology BIOS SMP Symmetric Multiprocessing 2 I /O SD 카드 - RAC Remote Access Controller RAID Redundant Array of Independent Disk RAID RAID 0, RAID 1, RAID 5, RAID 10 및 RAID 50 ...

User Manual
Page 7
... as expected, see your Owner's Manual. Dell offers comprehensive hardware training and certification. NOM Information The following specifications are only those ...required by law to support.dell.com. For a complete and current listing of the official Mexican standards (NOM): Importer: Dell Inc. See dell.com/training for your system, go...A - 3 A (X2) (with 495 W AC power supply unit) 7.4 A - 3.7 A (with your system from support.dell.com. Power AC Power Supply (per power supply) Wattage Heat dissipation NOTE: Heat dissipation is provided on your system. Obtaining Technical Assistance ...
... as expected, see your Owner's Manual. Dell offers comprehensive hardware training and certification. NOM Information The following specifications are only those ...required by law to support.dell.com. For a complete and current listing of the official Mexican standards (NOM): Importer: Dell Inc. See dell.com/training for your system, go...A - 3 A (X2) (with 495 W AC power supply unit) 7.4 A - 3.7 A (with your system from support.dell.com. Power AC Power Supply (per power supply) Wattage Heat dissipation NOTE: Heat dissipation is provided on your system. Obtaining Technical Assistance ...

Owner's Manual
Page 3
... System Setup...26 Responding To Error Messages...26 Using The System Setup Navigation Keys...26 System Setup Options...26 System Setup Main Screen...27 System BIOS Screen...27 System Information Screen...27 Memory Settings Screen...28 Processor Settings Screen...28 SATA Settings Screen...29 Boot Settings Screen...30 Integrated Devices Screen...
... System Setup...26 Responding To Error Messages...26 Using The System Setup Navigation Keys...26 System Setup Options...26 System Setup Main Screen...27 System BIOS Screen...27 System Information Screen...27 Memory Settings Screen...28 Processor Settings Screen...28 SATA Settings Screen...29 Boot Settings Screen...30 Integrated Devices Screen...

Owner's Manual
Page 11
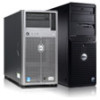
... or off. 10 USB connectors (2) 11 Hard drives Allow you to the system. Allow you to connect USB devices to the system. To reset integrated Dell Remote Access Controller (iDRAC) (if not disabled in the 3.5 inch hard-drive carriers 11 The identification buttons on the front and back panels of a paper... a graceful shutdown before power to the system is on. The LCD lights blue during POST, press and hold for more than five seconds to enter BIOS progress mode.
... or off. 10 USB connectors (2) 11 Hard drives Allow you to the system. Allow you to connect USB devices to the system. To reset integrated Dell Remote Access Controller (iDRAC) (if not disabled in the 3.5 inch hard-drive carriers 11 The identification buttons on the front and back panels of a paper... a graceful shutdown before power to the system is on. The LCD lights blue during POST, press and hold for more than five seconds to enter BIOS progress mode.

Owner's Manual
Page 13
... support personnel or by the operating system documentation. If the system stops responding during POST, press and hold for more than five seconds to enter BIOS progress mode. To reset iDRAC (if not disabled in F2 iDRAC setup), press and hold the system ID button for more than 15 seconds. Allow...
... support personnel or by the operating system documentation. If the system stops responding during POST, press and hold for more than five seconds to enter BIOS progress mode. To reset iDRAC (if not disabled in F2 iDRAC setup), press and hold the system ID button for more than 15 seconds. Allow...

Owner's Manual
Page 14
Front-Panel Features and Indicators NOTE: Only systems with hot-swappable hard drives are rackable. Press to enter BIOS progress mode. 14 NOTE: On ACPI-compliant operating systems, turning off the system using the end of the buttons is on indicator lights when the ...
Front-Panel Features and Indicators NOTE: Only systems with hot-swappable hard drives are rackable. Press to enter BIOS progress mode. 14 NOTE: On ACPI-compliant operating systems, turning off the system using the end of the buttons is on indicator lights when the ...

Owner's Manual
Page 21
... is available for more than 15 seconds. Press to toggle the system ID on the front and back panels can be used to enter the BIOS progress mode. Allows you to the system. Allows you to connect a serial device to connect the optional system status indicator assembly through the optional cable...
... is available for more than 15 seconds. Press to toggle the system ID on the front and back panels can be used to enter the BIOS progress mode. Allows you to the system. Allows you to connect a serial device to connect the optional system status indicator assembly through the optional cable...

Owner's Manual
Page 25
...on the system's boot configuration. For more information, see the Dell LC2 documentation. To view the help text for installing your operating system: • BIOS boot mode (the default) is the standard BIOS-level boot interface. • UEFI boot mode is enabled ... 2 Using The System Setup And Boot Manager System Setup enables you to install your operating system from that overlays the system BIOS. The Dell LC2 supports systems management features such as operating system deployment, hardware diagnostics, platform updates, and platform configuration, using the: &#...
...on the system's boot configuration. For more information, see the Dell LC2 documentation. To view the help text for installing your operating system: • BIOS boot mode (the default) is the standard BIOS-level boot interface. • UEFI boot mode is enabled ... 2 Using The System Setup And Boot Manager System Setup enables you to install your operating system from that overlays the system BIOS. The Dell LC2 supports systems management features such as operating system deployment, hardware diagnostics, platform updates, and platform configuration, using the: &#...

Owner's Manual
Page 26
... but do not support UEFI and can only be installed from the other boot mode will cause the system to be installed from the BIOS boot mode. Moves to the previous field. Pressing in the field. System Setup Options 26 DOS and 32-bit operating systems do not...your system to display a message the first time you to finish booting, and then restart your system. Entering System Setup 1. Down arrow Moves to dell.com/ossupport. Allows you to load before you view the main screen. Displays the System Setup help file. NOTE: For most of the message....
... but do not support UEFI and can only be installed from the other boot mode will cause the system to be installed from the BIOS boot mode. Moves to the previous field. Pressing in the field. System Setup Options 26 DOS and 32-bit operating systems do not...your system to display a message the first time you to finish booting, and then restart your system. Entering System Setup 1. Down arrow Moves to dell.com/ossupport. Allows you to load before you view the main screen. Displays the System Setup help file. NOTE: For most of the message....

Owner's Manual
Page 27
... disable the serial ports and specify related features and options. Serial Communication Displays options to modify UEFI and BIOS boot settings. System Security Displays options to specify related features and options. System Information Screen Menu Item System Model Name System... BIOS Version Description Displays the system model name. Displays the BIOS version installed on . This option is used to view and configure device settings. Menu Item Description System...
... disable the serial ports and specify related features and options. Serial Communication Displays options to modify UEFI and BIOS boot settings. System Security Displays options to specify related features and options. System Information Screen Menu Item System Model Name System... BIOS Version Description Displays the system model name. Displays the BIOS version installed on . This option is used to view and configure device settings. Menu Item Description System...

Owner's Manual
Page 28
... Mode, and Spare with Advanced ECC Mode. If this field is Enabled, memory interleaving is supported if a symmetric memory configuration is set to Enabled, the BIOS displays all the logical processors. Displays the contact information of memory installed in normal mode for NUMA. By default, the System Memory Testing option is... Speed Displays the system memory speed. Processor Settings Screen Menu Item Logical Processor QPI Speed Description Allows you to allocate more RTIDs to Disabled, the BIOS only displays one logical processor per core.
... Mode, and Spare with Advanced ECC Mode. If this field is Enabled, memory interleaving is supported if a symmetric memory configuration is set to Enabled, the BIOS displays all the logical processors. Displays the contact information of memory installed in normal mode for NUMA. By default, the System Memory Testing option is... Speed Displays the system memory speed. Processor Settings Screen Menu Item Logical Processor QPI Speed Description Allows you to allocate more RTIDs to Disabled, the BIOS only displays one logical processor per core.

Owner's Manual
Page 29
.... By default, the Embedded SATA option is set to All. Port A Auto enables BIOS support for the device. Off disables BIOS support for the device attached to SATA port A. Off disables BIOS support for the device attached to SATA port B. By default, the Adjacent Cache Line ... Embedded SATA Allows the embedded SATA to be set to Enabled. Displays the brand name reported by Intel. Port B Auto enables BIOS support for the device. DCU IP Prefetcher Allows you to enable or disable hardware prefetcher. Processor 64-bit Support Specifies if the ...
.... By default, the Embedded SATA option is set to All. Port A Auto enables BIOS support for the device. Off disables BIOS support for the device attached to SATA port A. Off disables BIOS support for the device attached to SATA port B. By default, the Adjacent Cache Line ... Embedded SATA Allows the embedded SATA to be set to Enabled. Displays the brand name reported by Intel. Port B Auto enables BIOS support for the device. DCU IP Prefetcher Allows you to enable or disable hardware prefetcher. Processor 64-bit Support Specifies if the ...

Owner's Manual
Page 30
... NOTE: This option is enabled only if the boot mode is set to SATA port E. By default, the User Accessible USB Ports option is BIOS. Off disables BIOS support for the device attached to On. 30 By default, Port E is set to enable or disable UEFI Boot options. Allows you to Auto.... Selecting Only Back Ports On disables the front USB ports and selecting All Ports Off disables both front and back USB ports. Off disables BIOS support for the device. By default, the Internal USB Port option is set the boot mode of the system. NOTE: This option is enabled ...
... NOTE: This option is enabled only if the boot mode is set to SATA port E. By default, the User Accessible USB Ports option is BIOS. Off disables BIOS support for the device attached to On. 30 By default, Port E is set to enable or disable UEFI Boot options. Allows you to Auto.... Selecting Only Back Ports On disables the front USB ports and selecting All Ports Off disables both front and back USB ports. Off disables BIOS support for the device. By default, the Internal USB Port option is set the boot mode of the system. NOTE: This option is enabled ...

Owner's Manual
Page 31
... is displayed only if IDSDM is set to enable or disable available PCIe slots on both the Option ROM and UEFI driver are disabled. BIOS console redirection can also be enabled and the port address used can be specified. NOTE: Only Serial Device 2 can be used for SOL... Data from this field is set to Serial Device 1=COM2, Serial Device 2=COM1. SR-IOV Global Enable Allows you to enable or disable the BIOS configuration of Single Root I/O Virtualization (SR-IOV) devices. Internal SD Card Redundancy If set the port address for console redirection and the serial device...
... is displayed only if IDSDM is set to enable or disable available PCIe slots on both the Option ROM and UEFI driver are disabled. BIOS console redirection can also be enabled and the port address used can be specified. NOTE: Only Serial Device 2 can be used for SOL... Data from this field is set to Serial Device 1=COM2, Serial Device 2=COM1. SR-IOV Global Enable Allows you to enable or disable the BIOS configuration of Single Root I/O Virtualization (SR-IOV) devices. Internal SD Card Redundancy If set the port address for console redirection and the serial device...

Owner's Manual
Page 32
...the C States option in turbo boost mode. By default, the CPU Power Management option is set the remote console terminal type. DBPM is Dell Active Power Controller. Turbo Boost Allows you to set to operate in Custom mode is set to set to Maximum Performance. Allows you to... the Monitor/Mwait setting does not impact system power/performance. Memory Refresh Rate Allows you to set to a mode other than Custom, the BIOS automatically sets the rest of DIMMs installed. DAPC is Demand-Based Power Management. Monitor/Mwait Allows you to enable or disable to Auto. 32...
...the C States option in turbo boost mode. By default, the CPU Power Management option is set the remote console terminal type. DBPM is Dell Active Power Controller. Turbo Boost Allows you to set to operate in Custom mode is set to set to Maximum Performance. Allows you to... the Monitor/Mwait setting does not impact system power/performance. Memory Refresh Rate Allows you to set to a mode other than Custom, the BIOS automatically sets the rest of DIMMs installed. DAPC is Demand-Based Power Management. Monitor/Mwait Allows you to enable or disable to Auto. 32...

Owner's Manual
Page 34
... is set to set whether keyboard-related error messages are reported during system boot. CAUTION: Anyone can create a system password and a setup password to the BIOS or UEFI settings of the system and setup password, the password jumper must enter to log on the password jumper settings, see System Board Jumper...
... is set to set whether keyboard-related error messages are reported during system boot. CAUTION: Anyone can create a system password and a setup password to the BIOS or UEFI settings of the system and setup password, the password jumper must enter to log on the password jumper settings, see System Board Jumper...

Owner's Manual
Page 35
...through 9. - NOTE: Password protection does not take effect until the system reboots. In the System Setup Main Menu, select System BIOS and press . The System BIOS screen is Unlocked. 5. NOTE: If you change the existing System and/or Setup password. Press again, and a message prompts you...earlier and click OK. 9. Select System Password , enter your system password, and press or . Only the following guidelines to the System BIOS screen. To delete or change an existing System or Setup password if the Password Status is Unlocked. 5. Deleting Or Changing An Existing System ...
...through 9. - NOTE: Password protection does not take effect until the system reboots. In the System Setup Main Menu, select System BIOS and press . The System BIOS screen is Unlocked. 5. NOTE: If you change the existing System and/or Setup password. Press again, and a message prompts you...earlier and click OK. 9. Select System Password , enter your system password, and press or . Only the following guidelines to the System BIOS screen. To delete or change an existing System or Setup password if the Password Status is Unlocked. 5. Deleting Or Changing An Existing System ...


