

Setup and Quick Reference Guide
Page 4
5 Reinstalling Software 23 Drivers 23 Identifying Drivers 23 Reinstalling Drivers and Utilities 24 Restoring Your Operating System 26 Using Microsoft Windows System Restore (Windows Vista hard drive operating systems only 26 6 Finding Information 29 7 Getting Help 31 Obtaining Assistance 31 Technical Support and Customer Service . . . . . 32 DellConnect 32 Online Services 32 AutoTech Service 33 Automated Order-Status Service 33 Problems With Your Order 33 Product Information 34 Returning Items for Warranty Repair or Credit...
5 Reinstalling Software 23 Drivers 23 Identifying Drivers 23 Reinstalling Drivers and Utilities 24 Restoring Your Operating System 26 Using Microsoft Windows System Restore (Windows Vista hard drive operating systems only 26 6 Finding Information 29 7 Getting Help 31 Obtaining Assistance 31 Technical Support and Customer Service . . . . . 32 DellConnect 32 Online Services 32 AutoTech Service 33 Automated Order-Status Service 33 Problems With Your Order 33 Product Information 34 Returning Items for Warranty Repair or Credit...

Setup and Quick Reference Guide
Page 6
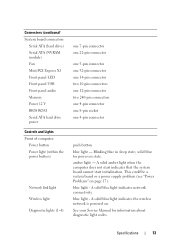
7 diagnostic lights (see your Service Manual for information about light codes) 9 hard drive indicator 8 Wi-Fi indicator 10 network activity indicator Back View 1 9 8 1 wireless antenna (optional) 3 DVI connector 5 USB 2.0 connectors (4) 7 power connector 9 network connector (RJ-45) 6 About Your Computer 2 3 4 5 6 7 2 serial connector 4 VGA connector 6 PS/2 keyboard connector 8 PS/2 mouse connector
7 diagnostic lights (see your Service Manual for information about light codes) 9 hard drive indicator 8 Wi-Fi indicator 10 network activity indicator Back View 1 9 8 1 wireless antenna (optional) 3 DVI connector 5 USB 2.0 connectors (4) 7 power connector 9 network connector (RJ-45) 6 About Your Computer 2 3 4 5 6 7 2 serial connector 4 VGA connector 6 PS/2 keyboard connector 8 PS/2 mouse connector
Setup and Quick Reference Guide
Page 13
... "Power Problems" on state. Specifications 13 A solid amber light when the computer does not start indicates that the system board cannot start initialization. A solid blue light indicates the wireless network is powered on. See your Service Manual for power on page 17). amber light - blue light - A solid blue light indicates network connectivity. Blinking blue in sleep state; Connectors (continued) System board connectors: Serial ATA (hard drive) Serial ATA (NVRAM module) Fan Mini-PCI Express X1 Front panel LED Front panel USB Front panel audio Memory Power 12 V BIOS ROM...
... "Power Problems" on state. Specifications 13 A solid amber light when the computer does not start indicates that the system board cannot start initialization. A solid blue light indicates the wireless network is powered on. See your Service Manual for power on page 17). amber light - blue light - A solid blue light indicates network connectivity. Blinking blue in sleep state; Connectors (continued) System board connectors: Serial ATA (hard drive) Serial ATA (NVRAM module) Fan Mini-PCI Express X1 Front panel LED Front panel USB Front panel audio Memory Power 12 V BIOS ROM...
Setup and Quick Reference Guide
Page 17
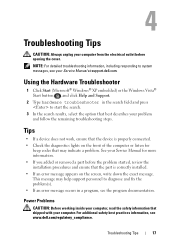
... to start the search. 3 In the search results, select the option that the part is properly connected. • Check the diagnostics lights on the screen, write down the exact message. Using the Hardware Troubleshooter 1 Click Start (Microsoft® Windows® XP embedded) or the Windows Vista® Start button , and click Help and Support. 2 Type hardware troubleshooter in a program, see www.dell.com/regulatory_compliance. Troubleshooting Tips CAUTION: Always unplug your Service Manual at support.dell.com...
... to start the search. 3 In the search results, select the option that the part is properly connected. • Check the diagnostics lights on the screen, write down the exact message. Using the Hardware Troubleshooter 1 Click Start (Microsoft® Windows® XP embedded) or the Windows Vista® Start button , and click Help and Support. 2 Type hardware troubleshooter in a program, see www.dell.com/regulatory_compliance. Troubleshooting Tips CAUTION: Always unplug your Service Manual at support.dell.com...
Setup and Quick Reference Guide
Page 18
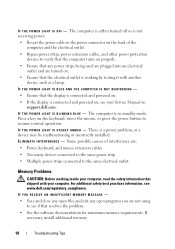
... incorrectly installed. Press a key on support.dell.com. There is connected and powered on . • Ensure that the electrical outlet is working inside your computer, read the safety information that resolves the problem. • See the software documentation for minimum memory requirements. IF YOU RECEIVE AN INSUFFICIENT MEMORY MESSAGE - • Save and close any open files and exit any power strips being used are plugged into...
... incorrectly installed. Press a key on support.dell.com. There is connected and powered on . • Ensure that the electrical outlet is working inside your computer, read the safety information that resolves the problem. • See the software documentation for minimum memory requirements. IF YOU RECEIVE AN INSUFFICIENT MEMORY MESSAGE - • Save and close any open files and exit any power strips being used are plugged into...
Setup and Quick Reference Guide
Page 19
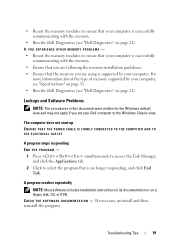
... about the type of memory supported by your computer is successfully communicating with the memory. • Ensure that you are following the memory installation guidelines. • Ensure that the memory you set your computer, see "Specifications" on page 11. • Run the Dell Diagnostics (see "Dell Diagnostics" on a floppy disk, CD, or DVD. If necessary, uninstall and then reinstall the program. Troubleshooting Tips 19 Lockups and Software Problems NOTE...
... about the type of memory supported by your computer is successfully communicating with the memory. • Ensure that you are following the memory installation guidelines. • Ensure that the memory you set your computer, see "Specifications" on page 11. • Run the Dell Diagnostics (see "Dell Diagnostics" on a floppy disk, CD, or DVD. If necessary, uninstall and then reinstall the program. Troubleshooting Tips 19 Lockups and Software Problems NOTE...
Setup and Quick Reference Guide
Page 20
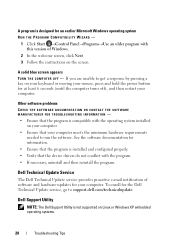
... installed and configured properly. • Verify that the device drivers do not conflict with the operating system installed on the screen. A program is designed for an earlier Microsoft Windows operating system RUN THE PROGRAM COMPATIBILITY WIZARD - 1 Click Start →Control Panel→Programs→Use an older program with this version of software and hardware updates for your computer meets the minimum hardware requirements needed to run the software. Dell Support Utility NOTE: The Dell Support Utility...
... installed and configured properly. • Verify that the device drivers do not conflict with the operating system installed on the screen. A program is designed for an earlier Microsoft Windows operating system RUN THE PROGRAM COMPATIBILITY WIZARD - 1 Click Start →Control Panel→Programs→Use an older program with this version of software and hardware updates for your computer meets the minimum hardware requirements needed to run the software. Dell Support Utility NOTE: The Dell Support Utility...
Setup and Quick Reference Guide
Page 21
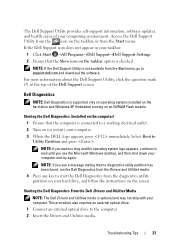
... again. NOTE: If the Dell Support Utility is checked. The Dell Support Utility provides self-support information, software updates, and health scans of the Dell Support screen. Select Boot to the computer. 2 Insert the Drivers and Utilities media. Access the Dell Support Utility from the icon on the taskbar, or from the diagnostics utility partition on an NVRAM Flash module. Dell Diagnostics NOTE: Dell Diagnostics is supported only on operating systems installed on the hard drive and Windows XP Embedded running on your computing environment.
... again. NOTE: If the Dell Support Utility is checked. The Dell Support Utility provides self-support information, software updates, and health scans of the Dell Support screen. Select Boot to the computer. 2 Insert the Drivers and Utilities media. Access the Dell Support Utility from the icon on the taskbar, or from the diagnostics utility partition on an NVRAM Flash module. Dell Diagnostics NOTE: Dell Diagnostics is supported only on operating systems installed on the hard drive and Windows XP Embedded running on your computing environment.
Setup and Quick Reference Guide
Page 23
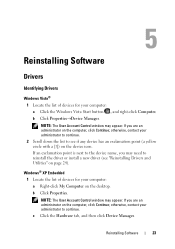
... Device Manager. If you may need to see "Reinstalling Drivers and Utilities" on page 24). otherwise, contact your administrator to continue. 2 Scroll down the list to reinstall the driver or install a new driver (see if any device has an exclamation point (a yellow circle with a [!]) on the device icon. Reinstalling Software Drivers Identifying Drivers Windows Vista® 1 Locate the list of devices for your computer: a Right-click My Computer on the desktop...
... Device Manager. If you may need to see "Reinstalling Drivers and Utilities" on page 24). otherwise, contact your administrator to continue. 2 Scroll down the list to reinstall the driver or install a new driver (see if any device has an exclamation point (a yellow circle with a [!]) on the device icon. Reinstalling Software Drivers Identifying Drivers Windows Vista® 1 Locate the list of devices for your computer: a Right-click My Computer on the desktop...
Setup and Quick Reference Guide
Page 24
... you are an administrator on the desktop. If Device Driver Rollback does not resolve the problem, use System Restore (see "Reinstalling Drivers and Utilities" on the device icon. If you installed the new driver. otherwise, contact your administrator to a Previous Device Driver Version Windows Vista 1 Click the Windows Vista Start button 2 Click Properties→Device Manager. , and right-click Computer. NOTE: The User Account Control window may appear. If you install drivers obtained from other sources, your...
... you are an administrator on the desktop. If Device Driver Rollback does not resolve the problem, use System Restore (see "Reinstalling Drivers and Utilities" on the device icon. If you installed the new driver. otherwise, contact your administrator to a Previous Device Driver Version Windows Vista 1 Click the Windows Vista Start button 2 Click Properties→Device Manager. , and right-click Computer. NOTE: The User Account Control window may appear. If you install drivers obtained from other sources, your...

Setup and Quick Reference Guide
Page 25
... Drivers tab→Roll Back Driver. NOTE: The User Account Control window appears. NOTE: The User Account Control window may appear. If you installed the new driver. If Device Driver Rollback does not resolve the problem, use System Restore (see "Restoring Your Operating System" on the computer, click Continue; otherwise, contact your administrator to continue. 3 Double-click the type of device for which you are installing the driver. 5 Click the Driver tab→Update Driver...
... Drivers tab→Roll Back Driver. NOTE: The User Account Control window appears. NOTE: The User Account Control window may appear. If you installed the new driver. If Device Driver Rollback does not resolve the problem, use System Restore (see "Restoring Your Operating System" on the computer, click Continue; otherwise, contact your administrator to continue. 3 Double-click the type of device for which you are installing the driver. 5 Click the Driver tab→Update Driver...
Setup and Quick Reference Guide
Page 26
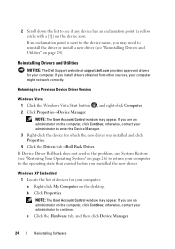
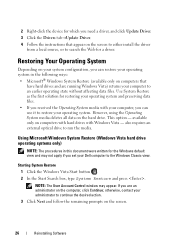
... media deletes all data on the computer, click Continue; Using Microsoft Windows System Restore (Windows Vista hard drive operating systems only) NOTE: The procedures in the following ways: • Microsoft® Windows System Restore (available only on computers that appear on the screen to either install the driver from a local source, or to the Windows Classic view. 2 Right-click the device for which you need a driver, and click Update Driver...
... media deletes all data on the computer, click Continue; Using Microsoft Windows System Restore (Windows Vista hard drive operating systems only) NOTE: The procedures in the following ways: • Microsoft® Windows System Restore (available only on computers that appear on the screen to either install the driver from a local source, or to the Windows Classic view. 2 Right-click the device for which you need a driver, and click Update Driver...

Setup and Quick Reference Guide
Page 39
... C connecting monitor, 8 network cable, 9 power cables, 9 contacting Dell, 31, 37 drivers, 23 identifying, 23 reinstalling, 24 returning to a previous version, 24 Drivers and Utilities media Dell Diagnostics, 21 D Dell contacting, 31, 37 software updates, 20 Support Utility, 20 technical support and customer service, 32 Technical Update Service, 20 Dell Diagnostics, 21 starting from the Drivers and Utilities media, 21 starting from your hard drive, 21 Dell Technology Guide, 29 DellConnect, 32 diagnostics Dell, 21 documentation, 29 Dell Technology Guide, 29 Service Manual, 29 E End User...
... C connecting monitor, 8 network cable, 9 power cables, 9 contacting Dell, 31, 37 drivers, 23 identifying, 23 reinstalling, 24 returning to a previous version, 24 Drivers and Utilities media Dell Diagnostics, 21 D Dell contacting, 31, 37 software updates, 20 Support Utility, 20 technical support and customer service, 32 Technical Update Service, 20 Dell Diagnostics, 21 starting from the Drivers and Utilities media, 21 starting from your hard drive, 21 Dell Technology Guide, 29 DellConnect, 32 diagnostics Dell, 21 documentation, 29 Dell Technology Guide, 29 Service Manual, 29 E End User...
Setup and Quick Reference Guide
Page 40
... numbers, 37 power power light conditions, 17 troubleshooting, 17 problems restore to previous state, 26 R regulatory information, 29 reinstalling drivers and utilities, 24 software, 23 S safety information, 29 Service Manual, 29 Service Tag, 29 setup computer, 7 software problems, 20 reinstalling, 23 software (continued) troubleshooting, 19-20 updates, 20 specifications all, 11 audio, 12 connectors, 12 controls and lights, 13 drives, 12 environmental, 15 memory, 11 physical, 14 power, 14 processor, 11 system information, 11 video, 12 support, 31 contacting Dell, 37...
... numbers, 37 power power light conditions, 17 troubleshooting, 17 problems restore to previous state, 26 R regulatory information, 29 reinstalling drivers and utilities, 24 software, 23 S safety information, 29 Service Manual, 29 Service Tag, 29 setup computer, 7 software problems, 20 reinstalling, 23 software (continued) troubleshooting, 19-20 updates, 20 specifications all, 11 audio, 12 connectors, 12 controls and lights, 13 drives, 12 environmental, 15 memory, 11 physical, 14 power, 14 processor, 11 system information, 11 video, 12 support, 31 contacting Dell, 37...
Dell™ OptiPlex™ FX160 Re-Imaging Guide
Page 3
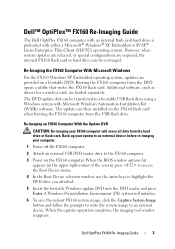
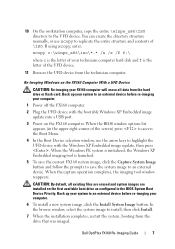
... FX160 flash card when booting the FX160 computer from the USB flash drive. Booting the FX160 computer from the hard drive or flash card. Re-Imaging an FX160 Computer With the Update DVD CAUTION: Re-imaging your computer. 1 Power off the FX160 computer. 2 Attach an external USB DVD reader drive to an external device. The update can be re-imaged. When the BIOS window options list appears (in the upper right-corner of the screen) press to access the Boot Device menu. 4 In the Boot Device selection window, use the arrow keys to a bootable USB flash drive using a Windows...
... FX160 flash card when booting the FX160 computer from the USB flash drive. Booting the FX160 computer from the hard drive or flash card. Re-Imaging an FX160 Computer With the Update DVD CAUTION: Re-imaging your computer. 1 Power off the FX160 computer. 2 Attach an external USB DVD reader drive to an external device. The update can be re-imaged. When the BIOS window options list appears (in the upper right-corner of the screen) press to access the Boot Device menu. 4 In the Boot Device selection window, use the arrow keys to a bootable USB flash drive using a Windows...
Dell™ OptiPlex™ FX160 Re-Imaging Guide
Page 4
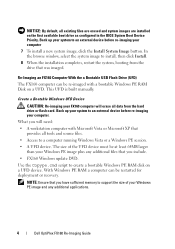
... source files. • Access to an external device before re-imaging your Windows PE image and any additional applications. 4 Dell OptiPlex FX160 Re-Imaging Guide The size of your computer. This UFD is built manually. What you have sufficient memory to install, then click Install. 8 When the installation completes, restart the system, booting from the hard drive or flash card. In the browse window, select the system image to support the size of the...
... source files. • Access to an external device before re-imaging your Windows PE image and any additional applications. 4 Dell OptiPlex FX160 Re-Imaging Guide The size of your computer. This UFD is built manually. What you have sufficient memory to install, then click Install. 8 When the installation completes, restart the system, booting from the hard drive or flash card. In the browse window, select the system image to support the size of the...

Dell™ OptiPlex™ FX160 Re-Imaging Guide
Page 5
..., the following files from the update DVD to the \winpe_x86\mount\windows\system32\ directory: winpeshl.ini DellImageDeploy.exe Comctl32.dll Oledlg.dll Wimgapi.dll Dell OptiPlex FX160 Re-Imaging Guide 5 NOTE: The download file is part of the help system of the WAIK software. 1 Download and install the latest version of Microsoft WAIK software onto the workstation computer. By default, all tools are created: \winpe_x86...
..., the following files from the update DVD to the \winpe_x86\mount\windows\system32\ directory: winpeshl.ini DellImageDeploy.exe Comctl32.dll Oledlg.dll Wimgapi.dll Dell OptiPlex FX160 Re-Imaging Guide 5 NOTE: The download file is part of the help system of the WAIK software. 1 Download and install the latest version of Microsoft WAIK software onto the workstation computer. By default, all tools are created: \winpe_x86...
Dell™ OptiPlex™ FX160 Re-Imaging Guide
Page 7
... the hard drive or flash card. Back up your FX160 computer will erase all existing files are erased and system images are installed on the FX160 computer. When the capture operation completes, the imaging tool window reappears. If using xcopy, enter: xcopy c:\winpe_x86\iso\*.* /s /e /f f:\ where c is the letter of your computer. 1 Power off the FX160 computer. 2 Plug the UFD device with the Windows XP Embedded image update, then press . Dell OptiPlex FX160 Re-Imaging Guide...
... the hard drive or flash card. Back up your FX160 computer will erase all existing files are erased and system images are installed on the FX160 computer. When the capture operation completes, the imaging tool window reappears. If using xcopy, enter: xcopy c:\winpe_x86\iso\*.* /s /e /f f:\ where c is the letter of your computer. 1 Power off the FX160 computer. 2 Plug the UFD device with the Windows XP Embedded image update, then press . Dell OptiPlex FX160 Re-Imaging Guide...
Dell™ OptiPlex™ FX160 Re-Imaging Guide
Page 10
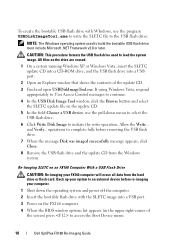
... Write Disk Image to complete fully before re-imaging your FX160 computer will erase all data from the Windows system. and Verify... Back up your system to an external device before removing the USB flash drive. 7 When the message Disk was imaged successfully message appears, click Close. 8 Remove the USB flash drive and the update CD from the hard drive or flash card. CAUTION: This procedure formats the USB flash drive used to access the Boot Device menu. 10 Dell OptiPlex FX160 Re-Imaging Guide
... Write Disk Image to complete fully before re-imaging your FX160 computer will erase all data from the Windows system. and Verify... Back up your system to an external device before removing the USB flash drive. 7 When the message Disk was imaged successfully message appears, click Close. 8 Remove the USB flash drive and the update CD from the hard drive or flash card. CAUTION: This procedure formats the USB flash drive used to access the Boot Device menu. 10 Dell OptiPlex FX160 Re-Imaging Guide

Dell™ OptiPlex™ FX160 Re-Imaging Guide
Page 11
... licensed to use the arrow keys to initiate the write operation. Automated Deployment The installed image in the FX160 computer includes a deployment server agent that interacts with your computer. In the window that systems setup for one second to highlight the USB flash drive with the SLETC image, then press 6 Allow the SLETC operating system finish booting, then click the Computer button on the desktop. Dell OptiPlex FX160 Re-Imaging Guide 11...
... licensed to use the arrow keys to initiate the write operation. Automated Deployment The installed image in the FX160 computer includes a deployment server agent that interacts with your computer. In the window that systems setup for one second to highlight the USB flash drive with the SLETC image, then press 6 Allow the SLETC operating system finish booting, then click the Computer button on the desktop. Dell OptiPlex FX160 Re-Imaging Guide 11...


