

Setup and Quick Reference Guide
Page 4
5 Reinstalling Software 23 Drivers 23 Identifying Drivers 23 Reinstalling Drivers and Utilities 24 Restoring Your Operating System 26 Using Microsoft Windows System Restore (Windows Vista hard drive operating systems only 26 6 Finding Information 29 7 Getting Help 31 Obtaining Assistance 31 Technical Support and Customer Service . . . . . 32 DellConnect 32 Online Services 32 AutoTech ... Order-Status Service 33 Problems With Your Order 33 Product Information 34 Returning Items for Warranty Repair or Credit . . . . . 34 Before You Call 35 Contacting Dell 37 Index 39 4 Contents
5 Reinstalling Software 23 Drivers 23 Identifying Drivers 23 Reinstalling Drivers and Utilities 24 Restoring Your Operating System 26 Using Microsoft Windows System Restore (Windows Vista hard drive operating systems only 26 6 Finding Information 29 7 Getting Help 31 Obtaining Assistance 31 Technical Support and Customer Service . . . . . 32 DellConnect 32 Online Services 32 AutoTech ... Order-Status Service 33 Problems With Your Order 33 Product Information 34 Returning Items for Warranty Repair or Credit . . . . . 34 Before You Call 35 Contacting Dell 37 Index 39 4 Contents

Setup and Quick Reference Guide
Page 6
7 diagnostic lights (see your Service Manual for information about light codes) 9 hard drive indicator 8 Wi-Fi indicator 10 network activity indicator Back View 1 9 8 1 wireless antenna (optional) 3 DVI connector 5 USB 2.0 connectors (4) 7 power connector 9 network connector (RJ-45) 6 About Your Computer 2 3 4 5 6 7 2 serial connector 4 VGA connector 6 PS/2 keyboard connector 8 PS/2 mouse connector
7 diagnostic lights (see your Service Manual for information about light codes) 9 hard drive indicator 8 Wi-Fi indicator 10 network activity indicator Back View 1 9 8 1 wireless antenna (optional) 3 DVI connector 5 USB 2.0 connectors (4) 7 power connector 9 network connector (RJ-45) 6 About Your Computer 2 3 4 5 6 7 2 serial connector 4 VGA connector 6 PS/2 keyboard connector 8 PS/2 mouse connector
Setup and Quick Reference Guide
Page 12
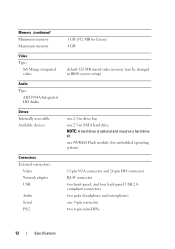
... memory (can be changed in BIOS system setup) one 2.5-in SATA hard drive NOTE: A hard drive is optional and requires a hard drive kit. Memory (continued) Minimum memory Maximum memory Video Type: SiS Mirage integrated video Audio Type: ADI 1984A Integrated HD Audio Drives Internally accessible Available devices Connectors External connectors: Video Network adapter USB Audio...-pin DVI connector RJ-45 connector two front-panel, and four back-panel USB 2.0compliant connectors two jacks (headphone and microphone) one 2.5-in drive bay one 9-pin connector two 6-pin mini-DINs 12 Specifications
... memory (can be changed in BIOS system setup) one 2.5-in SATA hard drive NOTE: A hard drive is optional and requires a hard drive kit. Memory (continued) Minimum memory Maximum memory Video Type: SiS Mirage integrated video Audio Type: ADI 1984A Integrated HD Audio Drives Internally accessible Available devices Connectors External connectors: Video Network adapter USB Audio...-pin DVI connector RJ-45 connector two front-panel, and four back-panel USB 2.0compliant connectors two jacks (headphone and microphone) one 2.5-in drive bay one 9-pin connector two 6-pin mini-DINs 12 Specifications
Setup and Quick Reference Guide
Page 13
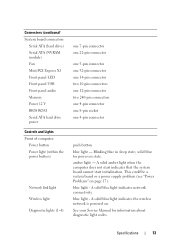
...system board cannot start initialization. blue light - See your Service Manual for power on state. Connectors (continued) System board connectors: Serial ATA (hard drive) Serial ATA (NVRAM module) Fan Mini-PCI Express X1 Front panel LED Front panel USB Front panel audio Memory Power 12 V BIOS ROM Serial... ATA hard drive power Controls and Lights Front of computer: Power button Power light (within the power button) Network link light Wireless light Diagnostic lights (1-4) ...
...system board cannot start initialization. blue light - See your Service Manual for power on state. Connectors (continued) System board connectors: Serial ATA (hard drive) Serial ATA (NVRAM module) Fan Mini-PCI Express X1 Front panel LED Front panel USB Front panel audio Memory Power 12 V BIOS ROM Serial... ATA hard drive power Controls and Lights Front of computer: Power button Power light (within the power button) Network link light Wireless light Diagnostic lights (1-4) ...
Setup and Quick Reference Guide
Page 14
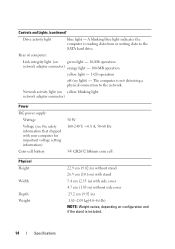
... light blue light - Rear of computer: Link integrity light (on configuration and if the stand is not detecting a physical connection to the SATA hard drive. The computer is included. 14 Specifications Network activity light (on yellow blinking light network adapter connector) Power DC power supply: Wattage Voltage (see the safety ...
... light blue light - Rear of computer: Link integrity light (on configuration and if the stand is not detecting a physical connection to the SATA hard drive. The computer is included. 14 Specifications Network activity light (on yellow blinking light network adapter connector) Power DC power supply: Wattage Voltage (see the safety ...
Setup and Quick Reference Guide
Page 21
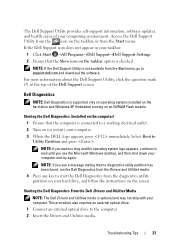
... provides self-support information, software updates, and health scans of the Dell Support screen. Troubleshooting Tips 21 Starting the Dell Diagnostics From the Dell Drivers and Utilities Media NOTE: The Dell Drivers and Utilities media is supported only on operating systems installed on the hard drive and Windows XP Embedded running on the computer) 1 Ensure that...
... provides self-support information, software updates, and health scans of the Dell Support screen. Troubleshooting Tips 21 Starting the Dell Diagnostics From the Dell Drivers and Utilities Media NOTE: The Dell Drivers and Utilities media is supported only on operating systems installed on the hard drive and Windows XP Embedded running on the computer) 1 Ensure that...
Setup and Quick Reference Guide
Page 26
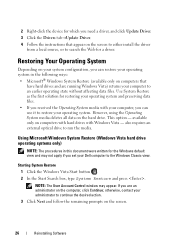
...you received the Operating System media with Windows Vista - otherwise, contact your operating system. Using Microsoft Windows System Restore (Windows Vista hard drive operating systems only) NOTE: The procedures in the following ways: • Microsoft® Windows System Restore (available only on ...computers that appear on computers with hard drives with your computer, you can restore your operating system and preserving data files. • If you set your Dell computer to search the Web for restoring your operating system in this ...
...you received the Operating System media with Windows Vista - otherwise, contact your operating system. Using Microsoft Windows System Restore (Windows Vista hard drive operating systems only) NOTE: The procedures in the following ways: • Microsoft® Windows System Restore (available only on ...computers that appear on computers with hard drives with your computer, you can restore your operating system and preserving data files. • If you set your Dell computer to search the Web for restoring your operating system in this ...

Setup and Quick Reference Guide
Page 39
..., 20 Support Utility, 20 technical support and customer service, 32 Technical Update Service, 20 Dell Diagnostics, 21 starting from the Drivers and Utilities media, 21 starting from your hard drive, 21 Dell Technology Guide, 29 DellConnect, 32 diagnostics Dell, 21 documentation, 29 Dell Technology Guide, 29 Service Manual, 29 E End User License Agreement (EULA), 29 ergonomics...
..., 20 Support Utility, 20 technical support and customer service, 32 Technical Update Service, 20 Dell Diagnostics, 21 starting from the Drivers and Utilities media, 21 starting from your hard drive, 21 Dell Technology Guide, 29 DellConnect, 32 diagnostics Dell, 21 documentation, 29 Dell Technology Guide, 29 Service Manual, 29 E End User License Agreement (EULA), 29 ergonomics...
Dell™ OptiPlex™ FX160 Re-Imaging Guide
Page 3
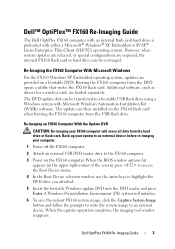
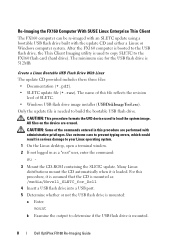
... Windows update DVD into the DVD reader and press Enter. Dell™ OptiPlex™ FX160 Re-Imaging Guide The Dell OptiPlex FX160 computer with an internal flash card hard drive is preloaded with Microsoft Windows Automation Installation Kit (WAIK) software. Re-Imaging the FX160 Computer With Microsoft Windows For the FX160 Windows XP Embedded operating system, updates are provided on...
... Windows update DVD into the DVD reader and press Enter. Dell™ OptiPlex™ FX160 Re-Imaging Guide The Dell OptiPlex FX160 computer with an internal flash card hard drive is preloaded with Microsoft Windows Automation Installation Kit (WAIK) software. Re-Imaging the FX160 Computer With Microsoft Windows For the FX160 Windows XP Embedded operating system, updates are provided on...
Dell™ OptiPlex™ FX160 Re-Imaging Guide
Page 4
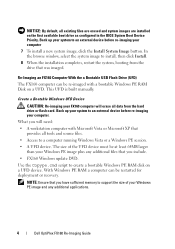
...Imaging an FX160 Computer With the a Bootable USB Flash Drive (UFD) The FX160 computer can be re-imaged with Microsoft Vista or Microsoft XP that you have sufficient memory to an external device before re-imaging your Windows PE image plus any additional applications. 4 Dell OptiPlex FX160 Re-...you include. • FX160 Windows update DVD. This UFD is built manually. Use the Copype.cmd script to install, then click Install. 8 When the installation completes, restart the system, booting from the drive that you will erase all data from the hard drive or flash card. With...
...Imaging an FX160 Computer With the a Bootable USB Flash Drive (UFD) The FX160 computer can be re-imaged with Microsoft Vista or Microsoft XP that you have sufficient memory to an external device before re-imaging your Windows PE image plus any additional applications. 4 Dell OptiPlex FX160 Re-...you include. • FX160 Windows update DVD. This UFD is built manually. Use the Copype.cmd script to install, then click Install. 8 When the installation completes, restart the system, booting from the drive that you will erase all data from the hard drive or flash card. With...
Dell™ OptiPlex™ FX160 Re-Imaging Guide
Page 7
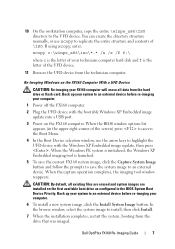
... device from the hard drive or flash card. When the Windows PE system is initialized, the Windows XP Embedded imaging tool is the letter of your FX160 computer will erase all existing files are erased and system images are installed on the FX160 computer. Dell OptiPlex FX160 Re-Imaging Guide ...7 Back up your system to an external device before re-imaging your computer. 1 Power off the FX160 computer. 2 Plug the UFD device with the Windows XP Embedded image...
... device from the hard drive or flash card. When the Windows PE system is initialized, the Windows XP Embedded imaging tool is the letter of your FX160 computer will erase all existing files are erased and system images are installed on the FX160 computer. Dell OptiPlex FX160 Re-Imaging Guide ...7 Back up your system to an external device before re-imaging your computer. 1 Power off the FX160 computer. 2 Plug the UFD device with the Windows XP Embedded image...
Dell™ OptiPlex™ FX160 Re-Imaging Guide
Page 8
Create a Linux Bootable USB Flash Drive With Linux The update CD provided includes these three files: • Documentation (*.pdf). • SLETC update file (*.raw). For this procedure, it is mounted. 8 Dell OptiPlex FX160 Re-Imaging Guide After the FX160 computer is booted to load the system image. Only..., which could result in serious damage to the FX160 flash card (hard drive). CAUTION: Some of this procedure are erased. The minimum size for the USB flash drive is needed to determine if the USB flash drive is loaded. Many Linux distributions mount the CD ...
Create a Linux Bootable USB Flash Drive With Linux The update CD provided includes these three files: • Documentation (*.pdf). • SLETC update file (*.raw). For this procedure, it is mounted. 8 Dell OptiPlex FX160 Re-Imaging Guide After the FX160 computer is booted to load the system image. Only..., which could result in serious damage to the FX160 flash card (hard drive). CAUTION: Some of this procedure are erased. The minimum size for the USB flash drive is needed to determine if the USB flash drive is loaded. Many Linux distributions mount the CD ...
Dell™ OptiPlex™ FX160 Re-Imaging Guide
Page 10
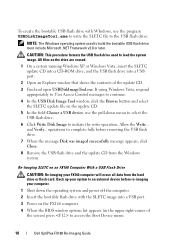
...the Boot Device menu. 10 Dell OptiPlex FX160 Re-Imaging Guide All files on the drive are erased. 1 On a system running Windows XP or Windows Vista, insert the SLETC update CD into a CD-ROM drive, and the USB flash drive into a USB port. 3 Power on the FX160 computer. 4 When the ...external device before removing the USB flash drive. 7 When the message Disk was imaged successfully message appears, click Close. 8 Remove the USB flash drive and the update CD from the hard drive or flash card. CAUTION: This procedure formats the USB flash drive used to initiate the write operation. and...
...the Boot Device menu. 10 Dell OptiPlex FX160 Re-Imaging Guide All files on the drive are erased. 1 On a system running Windows XP or Windows Vista, insert the SLETC update CD into a CD-ROM drive, and the USB flash drive into a USB port. 3 Power on the FX160 computer. 4 When the ...external device before removing the USB flash drive. 7 When the message Disk was imaged successfully message appears, click Close. 8 Remove the USB flash drive and the update CD from the hard drive or flash card. CAUTION: This procedure formats the USB flash drive used to initiate the write operation. and...

Dell™ OptiPlex™ FX160 Re-Imaging Guide
Page 11
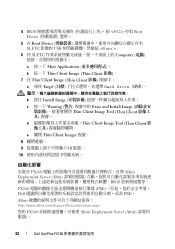
...internal flash card. e Close the Thin Client Imager window. 8 Shut down menu and select Hard Drive. c In the Warning window, click Erase and Install Image. The FX160 computer includes a Preboot Execution Environment (PXE) capable network interface. Automated Deployment The installed image ...in the FX160 computer includes a deployment server agent that interacts with an Altiris Deployment Server, providing an environment for automated deployment are configured to use the arrow keys to initiate the write operation. Dell OptiPlex FX160 Re-Imaging Guide 11 ...
...internal flash card. e Close the Thin Client Imager window. 8 Shut down menu and select Hard Drive. c In the Warning window, click Erase and Install Image. The FX160 computer includes a Preboot Execution Environment (PXE) capable network interface. Automated Deployment The installed image ...in the FX160 computer includes a deployment server agent that interacts with an Altiris Deployment Server, providing an environment for automated deployment are configured to use the arrow keys to initiate the write operation. Dell OptiPlex FX160 Re-Imaging Guide 11 ...

Dell™ OptiPlex™ FX160 Re-Imaging Guide
Page 22
...Applications b 单击 Thin Client Image (Thin Client 7 在 Thin Client Image (Thin Client a 找到 Target Hard Drive b Install Image c 在 Warning Erase and Install Image Thin Client Image Tool (Thin Client d Thin Client Image Tool (...e 关闭 Thin Client Image (Thin Client 8 9 USB 10 在 FX160 Altiris Deployment Server BIOS FX160 PXE PXE。 Altiris http://www.altiris.com/Support/Documentation.aspx 您的 FX160 Altiris Deployment Server。 22 Dell OptiPlex FX160
...Applications b 单击 Thin Client Image (Thin Client 7 在 Thin Client Image (Thin Client a 找到 Target Hard Drive b Install Image c 在 Warning Erase and Install Image Thin Client Image Tool (Thin Client d Thin Client Image Tool (...e 关闭 Thin Client Image (Thin Client 8 9 USB 10 在 FX160 Altiris Deployment Server BIOS FX160 PXE PXE。 Altiris http://www.altiris.com/Support/Documentation.aspx 您的 FX160 Altiris Deployment Server。 22 Dell OptiPlex FX160
Dell™ OptiPlex™ FX160 Re-Imaging Guide
Page 32
...;找 Target Hard Drive b 按住 Install Image c 按一下 Warning Erase and Install Image Thin Client Image Tool (Thin Client d Thin Client Image Tool (Thin Client e 關閉 Thin Client Imager 視窗。 8 9 USB 裝置。 10 安裝在 FX160 Altiris Deployment Server (Altiris BIOS FX160 PXE Dell PXE。...
...;找 Target Hard Drive b 按住 Install Image c 按一下 Warning Erase and Install Image Thin Client Image Tool (Thin Client d Thin Client Image Tool (Thin Client e 關閉 Thin Client Imager 視窗。 8 9 USB 裝置。 10 安裝在 FX160 Altiris Deployment Server (Altiris BIOS FX160 PXE Dell PXE。...
Dell™ OptiPlex™ FX160 Re-Imaging Guide
Page 95
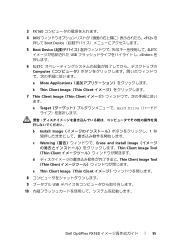
3 FX160 4 BIOS F12> を 押して Boot Device 5 Boot Device SLETC USB Enter 6 SLETC Computer a More Applications b Thin Client Image(Thin Client 7 Thin Client Image(Thin Client ます。 a Target Hard Drive b Install Image 1 c Warning Erase and Install Image Thin Client Image Tool (Thin Client d Thin Client Image Tool (Thin Client e Thin Client Image(Thin Client 8 9 USB 10 Dell OptiPlex FX160 95
3 FX160 4 BIOS F12> を 押して Boot Device 5 Boot Device SLETC USB Enter 6 SLETC Computer a More Applications b Thin Client Image(Thin Client 7 Thin Client Image(Thin Client ます。 a Target Hard Drive b Install Image 1 c Warning Erase and Install Image Thin Client Image Tool (Thin Client d Thin Client Image Tool (Thin Client e Thin Client Image(Thin Client 8 9 USB 10 Dell OptiPlex FX160 95
Dell™ OptiPlex™ FX160 Re-Imaging Guide
Page 107
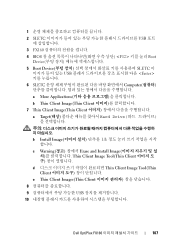
1 2 SLETC USB 3 FX160 4 BIOS F12 Boot Device 5 Boot Device SLETC USB Enter 6 SLETC Computer a More Applications b Thin Client Image(Thin Client 7 Thin Client Image(Thin Client a Target Hard Drive b Install Image 1 c Warning Erase and Install Image Thin Client Image Tool(Thin Client d Thin Client Image Tool(Thin Client e Thin Client Imager(Thin Client 8 9 USB 10 Dell OptiPlex FX160 107
1 2 SLETC USB 3 FX160 4 BIOS F12 Boot Device 5 Boot Device SLETC USB Enter 6 SLETC Computer a More Applications b Thin Client Image(Thin Client 7 Thin Client Image(Thin Client a Target Hard Drive b Install Image 1 c Warning Erase and Install Image Thin Client Image Tool(Thin Client d Thin Client Image Tool(Thin Client e Thin Client Imager(Thin Client 8 9 USB 10 Dell OptiPlex FX160 107


