
Setup and Quick Reference Guide
Page 2
... Dell, the DELL logo, OptiPlex, and DellConnect are registered trademarks of Intel Corporation in the United States and/or other countries. Trademarks used in any manner whatsoever without notice. © 2008 Dell Inc. Intel and Atom are trademarks of Dell Inc.; Microsoft, Windows, Windows Vista, and the Windows ...damage, personal injury, or death. Use of this document to Microsoft® Windows® operating systems are either potential damage to hardware or loss of data and tells you purchased a Dell™ n Series computer, any proprietary interest in this document to refer ...
... Dell, the DELL logo, OptiPlex, and DellConnect are registered trademarks of Intel Corporation in the United States and/or other countries. Trademarks used in any manner whatsoever without notice. © 2008 Dell Inc. Intel and Atom are trademarks of Dell Inc.; Microsoft, Windows, Windows Vista, and the Windows ...damage, personal injury, or death. Use of this document to Microsoft® Windows® operating systems are either potential damage to hardware or loss of data and tells you purchased a Dell™ n Series computer, any proprietary interest in this document to refer ...

Setup and Quick Reference Guide
Page 4
5 Reinstalling Software 23 Drivers 23 Identifying Drivers 23 Reinstalling Drivers and Utilities 24 Restoring Your Operating System 26 Using Microsoft Windows System Restore (Windows Vista hard drive operating systems only 26 6 Finding Information 29 7 Getting Help 31 Obtaining Assistance 31 Technical Support and Customer Service . . . . . 32 DellConnect 32 Online ... Order-Status Service 33 Problems With Your Order 33 Product Information 34 Returning Items for Warranty Repair or Credit . . . . . 34 Before You Call 35 Contacting Dell 37 Index 39 4 Contents
5 Reinstalling Software 23 Drivers 23 Identifying Drivers 23 Reinstalling Drivers and Utilities 24 Restoring Your Operating System 26 Using Microsoft Windows System Restore (Windows Vista hard drive operating systems only 26 6 Finding Information 29 7 Getting Help 31 Obtaining Assistance 31 Technical Support and Customer Service . . . . . 32 DellConnect 32 Online ... Order-Status Service 33 Problems With Your Order 33 Product Information 34 Returning Items for Warranty Repair or Credit . . . . . 34 Before You Call 35 Contacting Dell 37 Index 39 4 Contents
Setup and Quick Reference Guide
Page 17
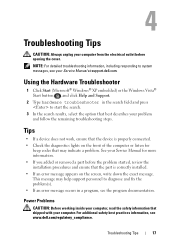
See your Service Manual for beep codes that best describes your Service Manual at support.dell.com. Power Problems CAUTION: Before working inside your computer, read the safety information that the part is properly connected. • Check the...ensure that shipped with your computer from the electrical outlet before opening the cover. Using the Hardware Troubleshooter 1 Click Start (Microsoft® Windows® XP embedded) or the Windows Vista® Start button , and click Help and Support. 2 Type hardware troubleshooter in a program, see the program documentation. This message...
See your Service Manual for beep codes that best describes your Service Manual at support.dell.com. Power Problems CAUTION: Before working inside your computer, read the safety information that the part is properly connected. • Check the...ensure that shipped with your computer from the electrical outlet before opening the cover. Using the Hardware Troubleshooter 1 Click Start (Microsoft® Windows® XP embedded) or the Windows Vista® Start button , and click Help and Support. 2 Type hardware troubleshooter in a program, see the program documentation. This message...
Setup and Quick Reference Guide
Page 19
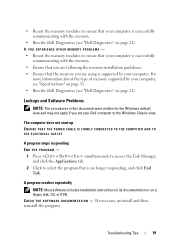
... the program. Troubleshooting Tips 19 A program crashes repeatedly NOTE: Most software includes installation instructions in this document were written for the Windows default view and may not apply if you are using is supported by your computer is successfully communicating with the memory. •...guidelines. • Ensure that the memory you set your computer. For more information about the type of memory supported by your Dell computer to the Windows Classic view. IF YOU EXPERIENCE OTHER MEMORY PROBLEMS - • Reseat the memory modules to ensure that your computer is no...
... the program. Troubleshooting Tips 19 A program crashes repeatedly NOTE: Most software includes installation instructions in this document were written for the Windows default view and may not apply if you are using is supported by your computer is successfully communicating with the memory. •...guidelines. • Ensure that the memory you set your computer. For more information about the type of memory supported by your Dell computer to the Windows Classic view. IF YOU EXPERIENCE OTHER MEMORY PROBLEMS - • Reseat the memory modules to ensure that your computer is no...
Setup and Quick Reference Guide
Page 20
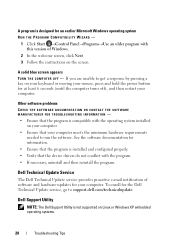
...conflict with this version of Windows. 2 In the welcome screen, click Next. 3 Follow the instructions on the screen. See the software documentation for the Dell Technical Update service, go to support.dell.com/technicalupdate. Dell Support Utility NOTE: The Dell Support Utility is not ... are unable to run the software. Dell Technical Update Service The Dell Technical Update service provides proactive e-mail notification of software and hardware updates for your mouse, press and hold the power button for an earlier Microsoft Windows operating system RUN THE PROGRAM COMPATIBILITY WIZARD...
...conflict with this version of Windows. 2 In the welcome screen, click Next. 3 Follow the instructions on the screen. See the software documentation for the Dell Technical Update service, go to support.dell.com/technicalupdate. Dell Support Utility NOTE: The Dell Support Utility is not ... are unable to run the software. Dell Technical Update Service The Dell Technical Update service provides proactive e-mail notification of software and hardware updates for your mouse, press and hold the power button for an earlier Microsoft Windows operating system RUN THE PROGRAM COMPATIBILITY WIZARD...
Setup and Quick Reference Guide
Page 21
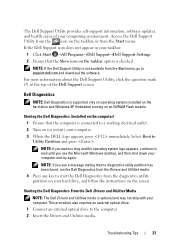
... appears, continue to wait until you see the Microsoft Windows desktop, and then shut down your taskbar: 1 Click Start →All Programs→Dell Support→Dell Support Settings. 2 Ensure that the Show icon on the screen. Starting the Dell Diagnostics (installed on (or restart) your computer. NOTE...: If you see a message stating that the computer is supported only on operating systems installed on the hard drive and Windows XP Embedded running on the taskbar, or from ...
... appears, continue to wait until you see the Microsoft Windows desktop, and then shut down your taskbar: 1 Click Start →All Programs→Dell Support→Dell Support Settings. 2 Ensure that the Show icon on the screen. Starting the Dell Diagnostics (installed on (or restart) your computer. NOTE...: If you see a message stating that the computer is supported only on operating systems installed on the hard drive and Windows XP Embedded running on the taskbar, or from ...

Setup and Quick Reference Guide
Page 22
...listed, select the version that is appropriate for one time only. 3 Shut down your computer. 8 When the Dell Diagnostics Main Menu appears, select the test that you see the Microsoft Windows desktop; NOTE: If you wait too long and the operating system logo appears, continue to wait until you ...want to proceed. 7 Select Run the 32 Bit Dell Diagnostics from the numbered list. then, shut down and restart ...
...listed, select the version that is appropriate for one time only. 3 Shut down your computer. 8 When the Dell Diagnostics Main Menu appears, select the test that you see the Microsoft Windows desktop; NOTE: If you wait too long and the operating system logo appears, continue to wait until you ...want to proceed. 7 Select Run the 32 Bit Dell Diagnostics from the numbered list. then, shut down and restart ...
Setup and Quick Reference Guide
Page 23
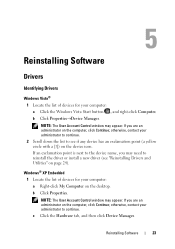
... Scroll down the list to see "Reinstalling Drivers and Utilities" on the device icon. b Click Properties. NOTE: The User Account Control window may appear. Reinstalling Software 23 otherwise, contact your administrator to reinstall the driver or install a new driver (see if any device has ...an exclamation point (a yellow circle with a [!]) on page 24). Reinstalling Software Drivers Identifying Drivers Windows Vista® 1 Locate the list of devices for your computer: a Click the Windows Vista Start button , and right-click Computer. If an exclamation point is next to the device ...
... Scroll down the list to see "Reinstalling Drivers and Utilities" on the device icon. b Click Properties. NOTE: The User Account Control window may appear. Reinstalling Software 23 otherwise, contact your administrator to reinstall the driver or install a new driver (see if any device has ...an exclamation point (a yellow circle with a [!]) on page 24). Reinstalling Software Drivers Identifying Drivers Windows Vista® 1 Locate the list of devices for your computer: a Click the Windows Vista Start button , and right-click Computer. If an exclamation point is next to the device ...
Setup and Quick Reference Guide
Page 24
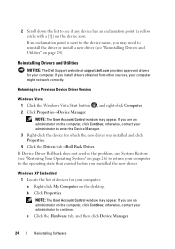
...dell.com provides approved drivers for your computer: a Right-click My Computer on the computer, click Continue; Returning to continue. NOTE: The User Account Control window may appear. Windows XP Embedded 1 Locate the list of devices for your computer. NOTE: The User Account Control window...Reinstalling Drivers and Utilities" on the computer, click Continue; otherwise, contact your administrator to a Previous Device Driver Version Windows Vista 1 Click the Windows Vista Start button 2 Click Properties→Device Manager. , and right-click Computer. 2 Scroll down the list ...
...dell.com provides approved drivers for your computer: a Right-click My Computer on the computer, click Continue; Returning to continue. NOTE: The User Account Control window may appear. Windows XP Embedded 1 Locate the list of devices for your computer. NOTE: The User Account Control window...Reinstalling Drivers and Utilities" on the computer, click Continue; otherwise, contact your administrator to a Previous Device Driver Version Windows Vista 1 Click the Windows Vista Start button 2 Click Properties→Device Manager. , and right-click Computer. 2 Scroll down the list ...

Setup and Quick Reference Guide
Page 25
...System" on page 26) to return your computer: a Right-click My Computer on the desktop. NOTE: The User Account Control window appears. Windows XP Embedded 1 Locate the list of the driver→OK→Next. 8 Click Finish and restart your administrator to the ...operating state that existed before you installed the new driver. otherwise, contact your computer. Manually Reinstalling Drivers Windows Vista 1 Click the Windows Vista Start button , and right-click Computer. 2 Click Properties→Device Manager. otherwise, contact your administrator to continue....
...System" on page 26) to return your computer: a Right-click My Computer on the desktop. NOTE: The User Account Control window appears. Windows XP Embedded 1 Locate the list of the driver→OK→Next. 8 Click Finish and restart your administrator to the ...operating state that existed before you installed the new driver. otherwise, contact your computer. Manually Reinstalling Drivers Windows Vista 1 Click the Windows Vista Start button , and right-click Computer. 2 Click Properties→Device Manager. otherwise, contact your administrator to continue....
Setup and Quick Reference Guide
Page 26
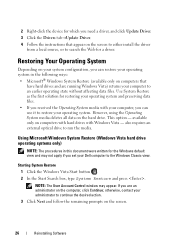
... the screen. 26 Reinstalling Software available only on the computer, click Continue; NOTE: The User Account Control window may not apply if you set your Dell computer to the Windows Classic view. Restoring Your Operating System Depending on the screen to either install the driver from a local source..., or to search the Web for a driver. 2 Right-click the device for which you are running Windows Vista) returns your ...
... the screen. 26 Reinstalling Software available only on the computer, click Continue; NOTE: The User Account Control window may not apply if you set your Dell computer to the Windows Classic view. Restoring Your Operating System Depending on the screen to either install the driver from a local source..., or to search the Web for a driver. 2 Right-click the device for which you are running Windows Vista) returns your ...

Setup and Quick Reference Guide
Page 27
Reinstalling Software 27 Undoing the Last System Restore NOTICE: Before you undo the last system restore, save and close all open files and exit any open programs. Do not alter, open, or delete any files or programs until the system restoration is complete. 1 Click the Windows Vista Start button . 2 In the Start Search box, type System Restore and press . 3 Click Undo my last restoration and click Next.
Reinstalling Software 27 Undoing the Last System Restore NOTICE: Before you undo the last system restore, save and close all open files and exit any open programs. Do not alter, open, or delete any files or programs until the system restoration is complete. 1 Click the Windows Vista Start button . 2 In the Start Search box, type System Restore and press . 3 Click Undo my last restoration and click Next.
Setup and Quick Reference Guide
Page 29
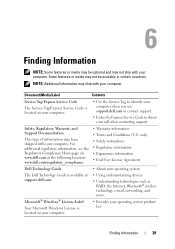
...media may not be optional and may not ship with your computer. Microsoft® Windows® License Label Your Microsoft Windows License is located on www.dell.com at support.dell.com. For additional regulatory information, see the Regulatory Compliance Homepage on your computer. ...Media/Label Contents Service Tag/Express Service Code The Service Tag/Express Service Code is available at the following location: www.dell.com/regulatory_compliance. • Warranty information • Terms and Conditions (U.S. Finding Information 29 Finding Information NOTE: Some features ...
...media may not be optional and may not ship with your computer. Microsoft® Windows® License Label Your Microsoft Windows License is located on www.dell.com at support.dell.com. For additional regulatory information, see the Regulatory Compliance Homepage on your computer. ...Media/Label Contents Service Tag/Express Service Code The Service Tag/Express Service Code is available at the following location: www.dell.com/regulatory_compliance. • Warranty information • Terms and Conditions (U.S. Finding Information 29 Finding Information NOTE: Some features ...
Setup and Quick Reference Guide
Page 41
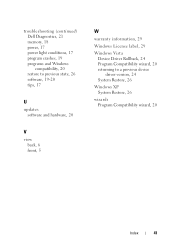
troubleshooting (continued) Dell Diagnostics, 21 memory, 18 power, 17 power light conditions, 17 program crashes, 19 programs and Windows compatibility, 20 restore to previous state, 26 software, 19-20 tips, 17 U updates software and hardware, 20 V view back, 6 front, 5 W warranty information, 29 Windows License label, 29 Windows Vista Device Driver Rollback, 24 Program Compatibility wizard, 20 returning to a previous device driver version, 24 System Restore, 26 Windows XP System Restore, 26 wizards Program Compatibility wizard, 20 Index 41
troubleshooting (continued) Dell Diagnostics, 21 memory, 18 power, 17 power light conditions, 17 program crashes, 19 programs and Windows compatibility, 20 restore to previous state, 26 software, 19-20 tips, 17 U updates software and hardware, 20 V view back, 6 front, 5 W warranty information, 29 Windows License label, 29 Windows Vista Device Driver Rollback, 24 Program Compatibility wizard, 20 returning to a previous device driver version, 24 System Restore, 26 Windows XP System Restore, 26 wizards Program Compatibility wizard, 20 Index 41
Dell™ OptiPlex™ FX160 Re-Imaging Guide
Page 2
Information in trademarks and trade names other countries. Microsoft, Windows, Windows Vista, and the Windows Vista start button are trademarks of Dell Inc.; disclaims any proprietary interest in this text: Dell, the DELL logo, and OptiPlex are either the entities claiming the marks and names or their products. If you purchased a Dell™ n Series computer, any manner whatsoever without...
Information in trademarks and trade names other countries. Microsoft, Windows, Windows Vista, and the Windows Vista start button are trademarks of Dell Inc.; disclaims any proprietary interest in this text: Dell, the DELL logo, and OptiPlex are either the entities claiming the marks and names or their products. If you purchased a Dell™ n Series computer, any manner whatsoever without...
Dell™ OptiPlex™ FX160 Re-Imaging Guide
Page 3
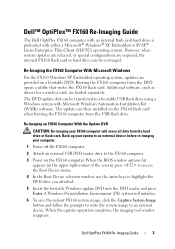
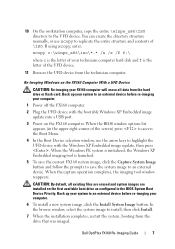
...; XP Embedded or SUSE® Linux Enterprise Thin Client (SLETC) operating system. Re-Imaging the FX160 Computer With Microsoft Windows For the FX160 Windows XP Embedded operating system, updates are loaded separately. Dell OptiPlex FX160 Re-Imaging Guide 3 A Windows Preinstallation Environment (PE) system will erase all data from the hard drive or flash card. Additional software, such as...
...; XP Embedded or SUSE® Linux Enterprise Thin Client (SLETC) operating system. Re-Imaging the FX160 Computer With Microsoft Windows For the FX160 Windows XP Embedded operating system, updates are loaded separately. Dell OptiPlex FX160 Re-Imaging Guide 3 A Windows Preinstallation Environment (PE) system will erase all data from the hard drive or flash card. Additional software, such as...
Dell™ OptiPlex™ FX160 Re-Imaging Guide
Page 4
... session. • A UFD device. Back up your system to an external device before re-imaging your Windows PE image plus any additional applications. 4 Dell OptiPlex FX160 Re-Imaging Guide The size of your Windows PE image and any additional files that you will erase all data from the drive that you have sufficient memory to...
... session. • A UFD device. Back up your system to an external device before re-imaging your Windows PE image plus any additional applications. 4 Dell OptiPlex FX160 Re-Imaging Guide The size of your Windows PE image and any additional files that you will erase all data from the drive that you have sufficient memory to...

Dell™ OptiPlex™ FX160 Re-Imaging Guide
Page 5
... Image". In this example, the following files from the update DVD to the \winpe_x86\mount\windows\system32\ directory: winpeshl.ini DellImageDeploy.exe Comctl32.dll Oledlg.dll Wimgapi.dll Dell OptiPlex FX160 Re-Imaging Guide 5 This information is very large (about this procedure, such as c:\winpe_x86. NOTE: For additional information about 1GB). 2 Click Start, point...
... Image". In this example, the following files from the update DVD to the \winpe_x86\mount\windows\system32\ directory: winpeshl.ini DellImageDeploy.exe Comctl32.dll Oledlg.dll Wimgapi.dll Dell OptiPlex FX160 Re-Imaging Guide 5 This information is very large (about this procedure, such as c:\winpe_x86. NOTE: For additional information about 1GB). 2 Click Start, point...
Dell™ OptiPlex™ FX160 Re-Imaging Guide
Page 6
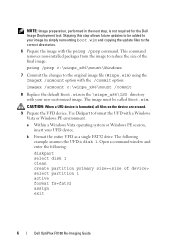
...UFD device. Use Diskpart to the correct directories. 6 Prepare the image with a Windows Vista or Windows PE environment. The following : diskpart select disk 1 clean create partition primary size= select partition 1 active format fs=fat32 assign exit 6 Dell OptiPlex FX160 Re-Imaging Guide The image must be added to be called Boot.wim. b Format...the update files to format the UFD with the peimg /prep command. CAUTION: When a UFD device is not required for the Dell Image Deployment tool. a Within a Windows Vista operating system or Windows PE session, insert your UFD device.
...UFD device. Use Diskpart to the correct directories. 6 Prepare the image with a Windows Vista or Windows PE environment. The following : diskpart select disk 1 clean create partition primary size= select partition 1 active format fs=fat32 assign exit 6 Dell OptiPlex FX160 Re-Imaging Guide The image must be added to be called Boot.wim. b Format...the update files to format the UFD with the peimg /prep command. CAUTION: When a UFD device is not required for the Dell Image Deployment tool. a Within a Windows Vista operating system or Windows PE session, insert your UFD device.
Dell™ OptiPlex™ FX160 Re-Imaging Guide
Page 7
... UFD device. Back up your system to replicate the entire structure and contents of \ISO. Dell OptiPlex FX160 Re-Imaging Guide 7 10 On the workstation computer, copy the entire \winpe_x86\ISO directory to an external device. Re-Imaging Windows on the FX160 computer. Back up your system to an external device before re-imaging your...
... UFD device. Back up your system to replicate the entire structure and contents of \ISO. Dell OptiPlex FX160 Re-Imaging Guide 7 10 On the workstation computer, copy the entire \winpe_x86\ISO directory to an external device. Re-Imaging Windows on the FX160 computer. Back up your system to an external device before re-imaging your...


