Owner's Manual
Page 4
... Keyboard Settings 37 Touch Pad 38 Customizing the Touch Pad 38 5 Using a Battery 39 Battery Performance 39 Checking the Battery Charge 40 Dell™ QuickSet Battery Meter 40 Microsoft® Windows® Power Meter 40 Charge Gauge 40 Low-Battery Warning 41 Conserving Battery Power 41 Power Management Modes 41 Configuring Power Management Settings 43 Charging the...
... Keyboard Settings 37 Touch Pad 38 Customizing the Touch Pad 38 5 Using a Battery 39 Battery Performance 39 Checking the Battery Charge 40 Dell™ QuickSet Battery Meter 40 Microsoft® Windows® Power Meter 40 Charge Gauge 40 Low-Battery Warning 41 Conserving Battery Power 41 Power Management Modes 41 Configuring Power Management Settings 43 Charging the...
Owner's Manual
Page 8
... and Utilities 100 Resolving Software and Hardware Incompatibilities 102 Restoring Your Operating System 102 Using Microsoft Windows XP System Restore 103 Using Dell PC Restore by Symantec 104 Using the Operating System CD 106 11 Adding and Replacing Parts 109 Before You Begin 109 Recommended ... 109 Before Working Inside Your Computer 110 Optical Drive 111 Hard Drive 112 Returning a Hard Drive to Dell 114 Memory 114 Modem 117 Hinge Cover 118 Keyboard 119 Wireless Mini-Card 121 Coin-Cell Battery 124 Display 125 Internal Card With Bluetooth® Wireless Technology 127 12...
... and Utilities 100 Resolving Software and Hardware Incompatibilities 102 Restoring Your Operating System 102 Using Microsoft Windows XP System Restore 103 Using Dell PC Restore by Symantec 104 Using the Operating System CD 106 11 Adding and Replacing Parts 109 Before You Begin 109 Recommended ... 109 Before Working Inside Your Computer 110 Optical Drive 111 Hard Drive 112 Returning a Hard Drive to Dell 114 Memory 114 Modem 117 Hinge Cover 118 Keyboard 119 Wireless Mini-Card 121 Coin-Cell Battery 124 Display 125 Internal Card With Bluetooth® Wireless Technology 127 12...

Owner's Manual
Page 17
... critically low. About Your Computer 17 NOTICE: To avoid loss of data, never turn off ). • Flashing orange: The battery charge is low. • Solid orange: The battery charge is almost fully charged. POWER BUTTON Press the power button to turn on the computer, and blinks when the computer is flashing. ... reads or writes data. See "Power Management Modes" on the computer or to an electrical outlet, the light operates as follows: • Off: The battery is adequately charged (or the computer is turned off the computer while the light is in a power management mode.
... critically low. About Your Computer 17 NOTICE: To avoid loss of data, never turn off ). • Flashing orange: The battery charge is low. • Solid orange: The battery charge is almost fully charged. POWER BUTTON Press the power button to turn on the computer, and blinks when the computer is flashing. ... reads or writes data. See "Power Management Modes" on the computer or to an electrical outlet, the light operates as follows: • Off: The battery is adequately charged (or the computer is turned off the computer while the light is in a power management mode.

Owner's Manual
Page 24
... the computer without connecting the computer to create airflow through the vents, which prevents the computer from the battery bay. D R I V E L O C K I C A L - BATTERY-BAY LATCH RELEASE - Provides information on page 40. O P T I N G S C R E W - See "Checking the Battery Charge" on the battery charge status. H A R D D R I V E - F A N - The computer uses a fan to an electrical outlet. For more information, see "Optical Drive" on...
... the computer without connecting the computer to create airflow through the vents, which prevents the computer from the battery bay. D R I V E L O C K I C A L - BATTERY-BAY LATCH RELEASE - Provides information on page 40. O P T I N G S C R E W - See "Checking the Battery Charge" on the battery charge status. H A R D D R I V E - F A N - The computer uses a fan to an electrical outlet. For more information, see "Optical Drive" on...
Owner's Manual
Page 31
... surge protection. Uninterruptible Power Supplies NOTICE: Loss of power while data is approved by nearby lightning strikes. UPS devices contain a battery that the device is being saved to the hard drive may result in your area, disconnect the telephone line from the electrical outlet. ...The battery charges while AC power is interrupted. A UPS protects against power fluctuations and interruptions. NOTICE: Not all surge protectors offer network adapter...
... surge protection. Uninterruptible Power Supplies NOTICE: Loss of power while data is approved by nearby lightning strikes. UPS devices contain a battery that the device is being saved to the hard drive may result in your area, disconnect the telephone line from the electrical outlet. ...The battery charges while AC power is interrupted. A UPS protects against power fluctuations and interruptions. NOTICE: Not all surge protectors offer network adapter...
Owner's Manual
Page 33
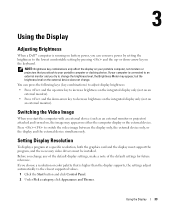
Using the Display Adjusting Brightness When a Dell™ computer is running on either the computer display or the external device. or down -arrow key to decrease brightness on the integrated display only (..., not monitors or projectors that is connected to an external monitor and you try to change the brightness level, the Brightness Meter may appear on battery power, you can press the following keys (key combinations) to increase brightness on the integrated display only (not on an external monitor). • Press and...
Using the Display Adjusting Brightness When a Dell™ computer is running on either the computer display or the external device. or down -arrow key to decrease brightness on the integrated display only (..., not monitors or projectors that is connected to an external monitor and you try to change the brightness level, the Brightness Meter may appear on battery power, you can press the following keys (key combinations) to increase brightness on the integrated display only (not on an external monitor). • Press and...
Owner's Manual
Page 37
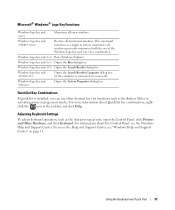
... logo key and key combination. Windows logo key and Restores all windows previously minimized with the use other shortcut keys for functions such as the Battery Meter or activating power management modes. QuickSet Key Combinations If QuickSet is connected to restore (maximize) all minimized windows. Adjusting Keyboard Settings To adjust keyboard...
... logo key and key combination. Windows logo key and Restores all windows previously minimized with the use other shortcut keys for functions such as the Battery Meter or activating power management modes. QuickSet Key Combinations If QuickSet is connected to restore (maximize) all minimized windows. Adjusting Keyboard Settings To adjust keyboard...

Owner's Manual
Page 39
... BIOS settings, operate your Dell™ portable computer with your computer. You can check the battery charge (see the Product Information Guide or separate paper warranty document that you use a battery from Dell. Replace the battery only with the AC adapter until the battery is used and the conditions... under which it is fully charged. Depending on page 43 for information about the Dell warranty for your new computer to an ...
... BIOS settings, operate your Dell™ portable computer with your computer. You can check the battery charge (see the Product Information Guide or separate paper warranty document that you use a battery from Dell. Replace the battery only with the AC adapter until the battery is used and the conditions... under which it is fully charged. Depending on page 43 for information about the Dell warranty for your new computer to an ...
Owner's Manual
Page 40
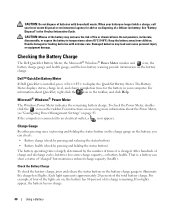
... Meter The Windows Power Meter indicates the remaining battery charge. CAUTION: Do not dispose of fire or chemical burn. After hundreds of a lithium-ion battery. Damaged batteries may increase the risk of batteries with extreme care. Keep the battery away from children. Checking the Battery Charge The Dell QuickSet Battery Meter, the Microsoft® Windows® Power Meter...
... Meter The Windows Power Meter indicates the remaining battery charge. CAUTION: Do not dispose of fire or chemical burn. After hundreds of a lithium-ion battery. Damaged batteries may increase the risk of batteries with extreme care. Keep the battery away from children. Checking the Battery Charge The Dell QuickSet Battery Meter, the Microsoft® Windows® Power Meter...
Owner's Manual
Page 41
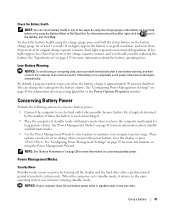
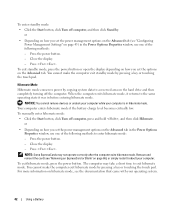
... largely determined by using the charge gauge, press and hold the status button on conserving battery power. These options can change when you when the battery charge is used and recharged. • Place the computer in Dell QuickSet. Power Management Modes Standby Mode Standby mode conserves power by turning off the display and...
... largely determined by using the charge gauge, press and hold the status button on conserving battery power. These options can change when you when the battery charge is used and recharged. • Place the computer in Dell QuickSet. Power Management Modes Standby Mode Standby mode conserves power by turning off the display and...
Owner's Manual
Page 42
...Properties window, use one of the following methods: - NOTICE: You cannot remove devices or undock your computer while your operating system. 42 Using a Battery NOTE: Some ExpressCards may take a short time to enter hibernate mode: - Press . or • Depending on how you set the power ...computer exits hibernate mode. For more information on page 43) in before entering hibernate mode. Your computer enters hibernate mode if the battery charge level becomes critically low. You cannot make the computer exit hibernate mode by pressing a key or touching the touch pad. To...
...Properties window, use one of the following methods: - NOTICE: You cannot remove devices or undock your computer while your operating system. 42 Using a Battery NOTE: Some ExpressCards may take a short time to enter hibernate mode: - Press . or • Depending on how you set the power ...computer exits hibernate mode. For more information on page 43) in before entering hibernate mode. Your computer enters hibernate mode if the battery charge level becomes critically low. You cannot make the computer exit hibernate mode by pressing a key or touching the touch pad. To...
Owner's Manual
Page 43
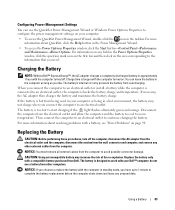
... and remove any other computers. The battery's internal circuitry prevents the battery from Dell. Replacing the Battery CAUTION: Before performing these procedures, turn off . The battery is connected to configure the power management settings on your Dell™ computer; For more information about ... to start charging if the light flashes alternately green and orange. Charging the Battery NOTE: Without Dell™ ExpressCharge™, the AC adapter charges a completely discharged battery in the Power Management Wizard. • To access the Power Options Properties window...
... and remove any other computers. The battery's internal circuitry prevents the battery from Dell. Replacing the Battery CAUTION: Before performing these procedures, turn off . The battery is connected to configure the power management settings on your Dell™ computer; For more information about ... to start charging if the light flashes alternately green and orange. Charging the Battery NOTE: Without Dell™ ExpressCharge™, the AC adapter charges a completely discharged battery in the Power Management Wizard. • To access the Power Options Properties window...
Owner's Manual
Page 44
.... 2 Ensure that the computer is connected to a docking device (docked), undock it . 44 Using a Battery A battery discharges during prolonged storage. After a long storage period, recharge the battery fully (see "Charging the Battery" on the bottom of time. To remove the battery: 1 If the computer is turned off or suspended in a power management mode. 3 Slide and...
.... 2 Ensure that the computer is connected to a docking device (docked), undock it . 44 Using a Battery A battery discharges during prolonged storage. After a long storage period, recharge the battery fully (see "Charging the Battery" on the bottom of time. To remove the battery: 1 If the computer is turned off or suspended in a power management mode. 3 Slide and...
Owner's Manual
Page 88
... persists, try to use. M E M O R Y O D D / E V E N L O G I C F A I L U R E A T A D D R E S S , R E A D V A L U E E X P E C T I N G V A L U E - The computer cannot find a specific track on page 79). Contact Dell. The operating system cannot locate a sector on page 133. 88 Solving Problems Run the Windows error-checking utility to charge the battery. NO TIMER TICK INTERRUPT - Connect your boot device, ensure that you want to open is...
... persists, try to use. M E M O R Y O D D / E V E N L O G I C F A I L U R E A T A D D R E S S , R E A D V A L U E E X P E C T I N G V A L U E - The computer cannot find a specific track on page 79). Contact Dell. The operating system cannot locate a sector on page 133. 88 Solving Problems Run the Windows error-checking utility to charge the battery. NO TIMER TICK INTERRUPT - Connect your boot device, ensure that you want to open is...
Owner's Manual
Page 89
... in this section, follow the safety instructions in the Product Information Guide. O F - See "Contacting Dell" on page 79). Contact Dell or the IEEE 1394 device manufacturer. TIMER CHIP COUNTER 2 FAILED - Replace the battery, or connect the computer to charge the battery. I F Y O U H A V E P R O B L E M S W I C E - U N E X P E C T E D I N T E R R U P T I B L E . IEEE 1394 Device Problems CAUTION: Before you begin any of the procedures in...
... in this section, follow the safety instructions in the Product Information Guide. O F - See "Contacting Dell" on page 79). Contact Dell or the IEEE 1394 device manufacturer. TIMER CHIP COUNTER 2 FAILED - Replace the battery, or connect the computer to charge the battery. I F Y O U H A V E P R O B L E M S W I C E - U N E X P E C T E D I N T E R R U P T I B L E . IEEE 1394 Device Problems CAUTION: Before you begin any of the procedures in...

Owner's Manual
Page 94
... the lower-right corner of the connection. If the power light is blinking, the computer is not a Dell-branded card, see "Windows Help and Support Center" on page 41. C H E C K N E T W O R K C O N N E C T I O N S T A T U S I N D E L L M O B I L E B R O A D B A N D C A R D U T I L I L E B R O A D B A N D E X P R E S S C A R D - NOTE: Battery operating time (the time the battery can hold a charge) decreases over the icon in the main window: • No card detected - RESTART...
... the lower-right corner of the connection. If the power light is blinking, the computer is not a Dell-branded card, see "Windows Help and Support Center" on page 41. C H E C K N E T W O R K C O N N E C T I O N S T A T U S I N D E L L M O B I L E B R O A D B A N D C A R D U T I L I L E B R O A D B A N D E X P R E S S C A R D - NOTE: Battery operating time (the time the battery can hold a charge) decreases over the icon in the main window: • No card detected - RESTART...

Owner's Manual
Page 95
... INTERFERENCE - ENSURE THAT THE PRINTER IS TURNED ON CHECK THE PRINTER CABLE CONNECTIONS - • See the printer documentation for your computer battery. TEST THE ELECTRICAL OUTLET - Solving Problems 95 See "Contacting Dell" on . C O N N E C T T H E C O M P U T E R D I R E C T L Y T O A N E L E C T R I E S - you may choose to use the optional 90-W AC adapter for optimum system performance. Ensure that the computer turns...
... INTERFERENCE - ENSURE THAT THE PRINTER IS TURNED ON CHECK THE PRINTER CABLE CONNECTIONS - • See the printer documentation for your computer battery. TEST THE ELECTRICAL OUTLET - Solving Problems 95 See "Contacting Dell" on . C O N N E C T T H E C O M P U T E R D I R E C T L Y T O A N E L E C T R I E S - you may choose to use the optional 90-W AC adapter for optimum system performance. Ensure that the computer turns...
Owner's Manual
Page 98
... in this section, follow the safety instructions in the Windows Help and Support Center. CHECK THE BATTERY - CHECK THE AC ADAPTER - Bypass power protection devices, power strips, and the extension cable ... I R E C T L Y T O A N E L E C T R I V E R - ADJUST THE POWER PROPERTIES - See "Reinstalling Drivers and Utilities" on page 13. If you are using a battery to an electrical outlet using a program that requires a higher resolution than your computer, the battery charge may be depleted. If the AC adapter has a light, ensure that the electrical outlet is recommended that...
... in this section, follow the safety instructions in the Windows Help and Support Center. CHECK THE BATTERY - CHECK THE AC ADAPTER - Bypass power protection devices, power strips, and the extension cable ... I R E C T L Y T O A N E L E C T R I V E R - ADJUST THE POWER PROPERTIES - See "Reinstalling Drivers and Utilities" on page 13. If you are using a battery to an electrical outlet using a program that requires a higher resolution than your computer, the battery charge may be depleted. If the AC adapter has a light, ensure that the electrical outlet is recommended that...
Owner's Manual
Page 110
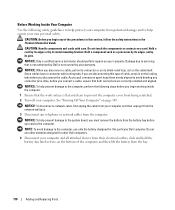
... jack. 3 Disconnect any telephone or network cables from the computer. As you service the computer. Do not use only the battery designed for other Dell computers. 4 Disconnect your computer and all attached devices from their electrical outlets, slide and hold the...NOTICE: To help prevent damage to avoid bending any of the procedures in this particular Dell computer. CAUTION: Handle components and cards with locking tabs; NOTE: To avoid damage to the computer, use other batteries designed for this section, follow the safety instructions in on your warranty. NOTICE: To ...
... jack. 3 Disconnect any telephone or network cables from the computer. As you service the computer. Do not use only the battery designed for other Dell computers. 4 Disconnect your computer and all attached devices from their electrical outlets, slide and hold the...NOTICE: To help prevent damage to avoid bending any of the procedures in this particular Dell computer. CAUTION: Handle components and cards with locking tabs; NOTE: To avoid damage to the computer, use other batteries designed for this section, follow the safety instructions in on your warranty. NOTICE: To ...

Owner's Manual
Page 111
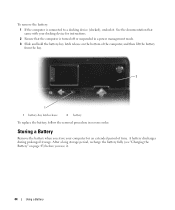
1 2 1 battery-bay latch release 2 battery 5 Remove the optical drive, if installed, from the bay. 4 Slide the drive out of the bay. Optical Drive CAUTION: Before you begin any of the ...
1 2 1 battery-bay latch release 2 battery 5 Remove the optical drive, if installed, from the bay. 4 Slide the drive out of the bay. Optical Drive CAUTION: Before you begin any of the ...


